
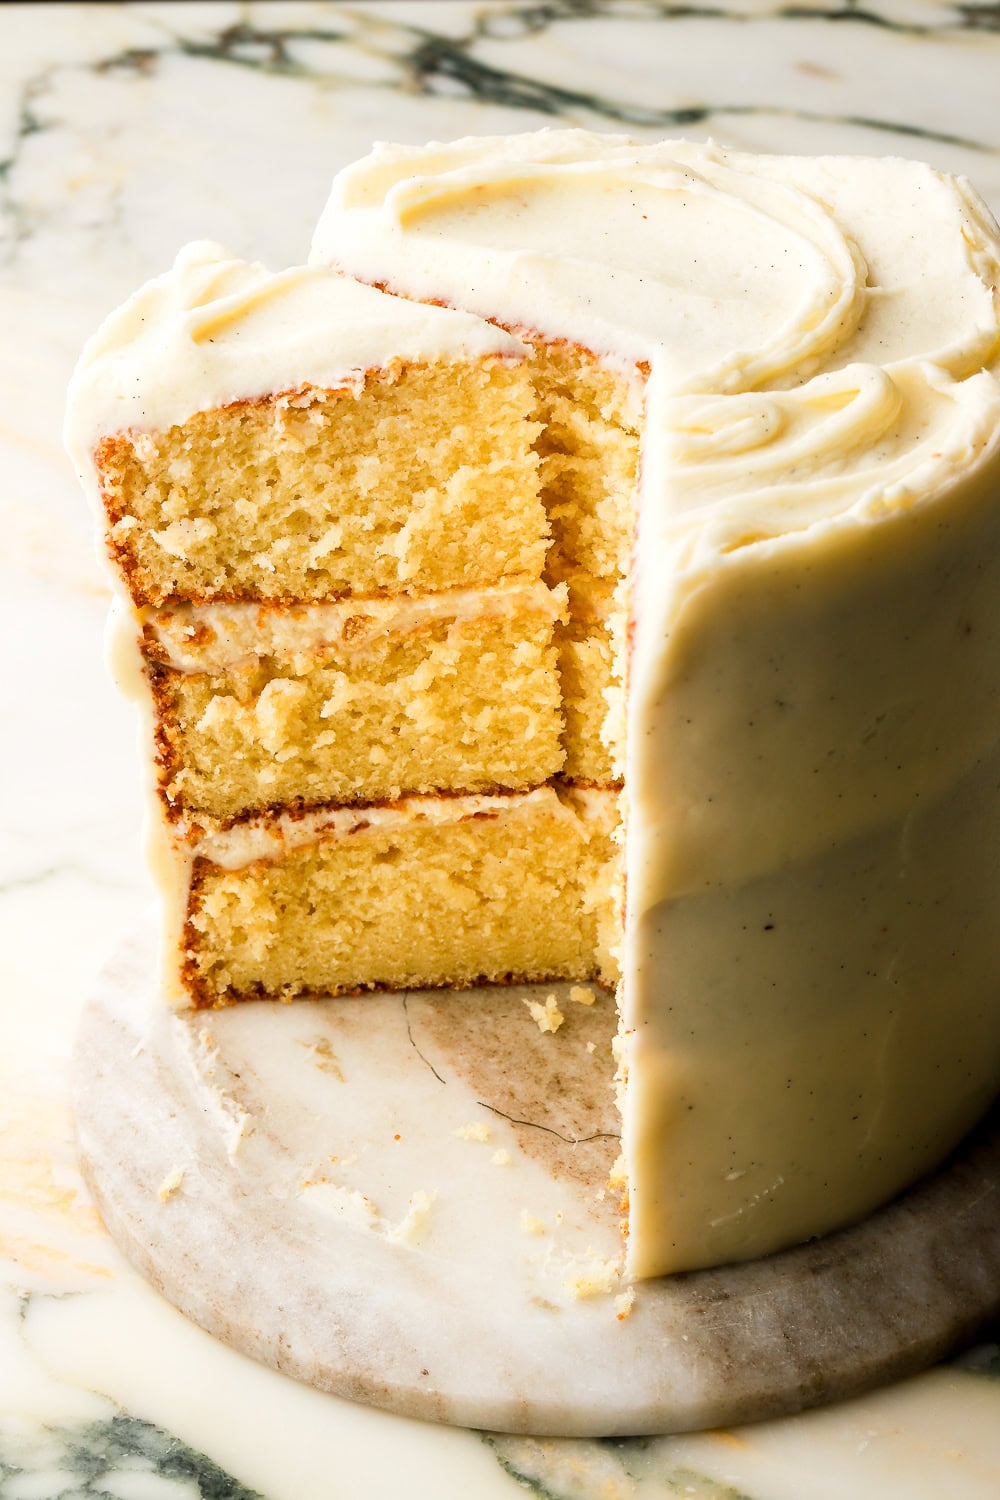
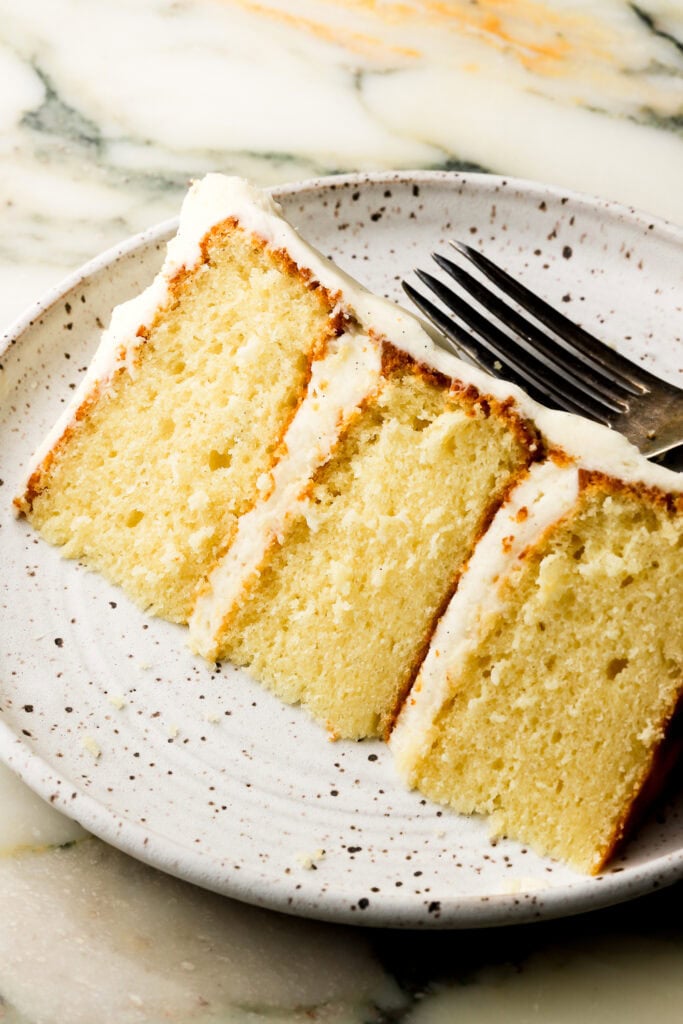
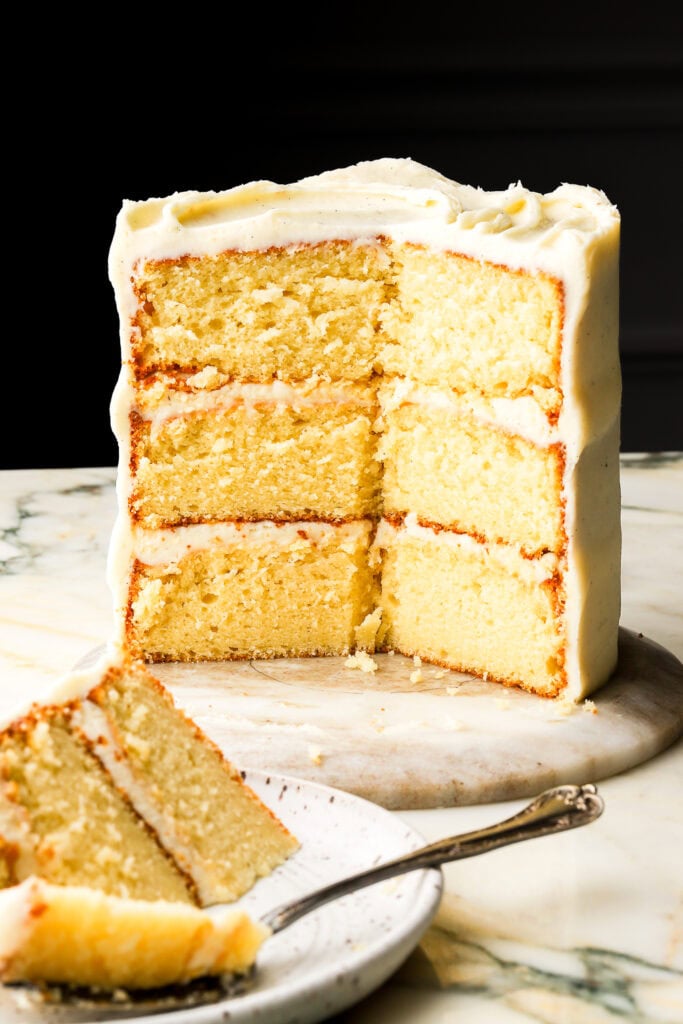
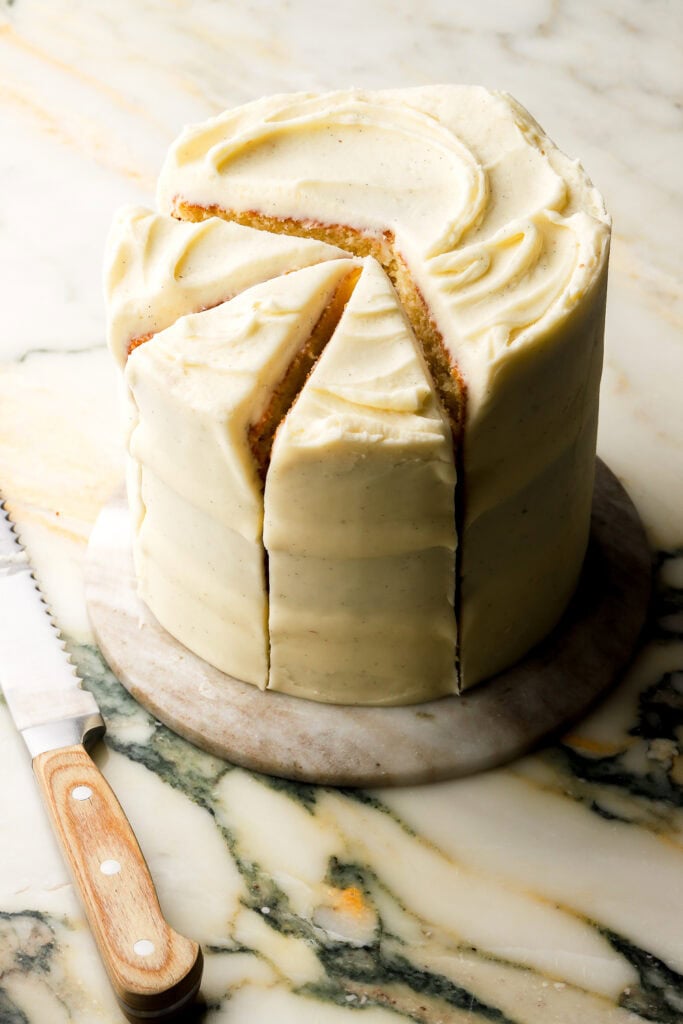
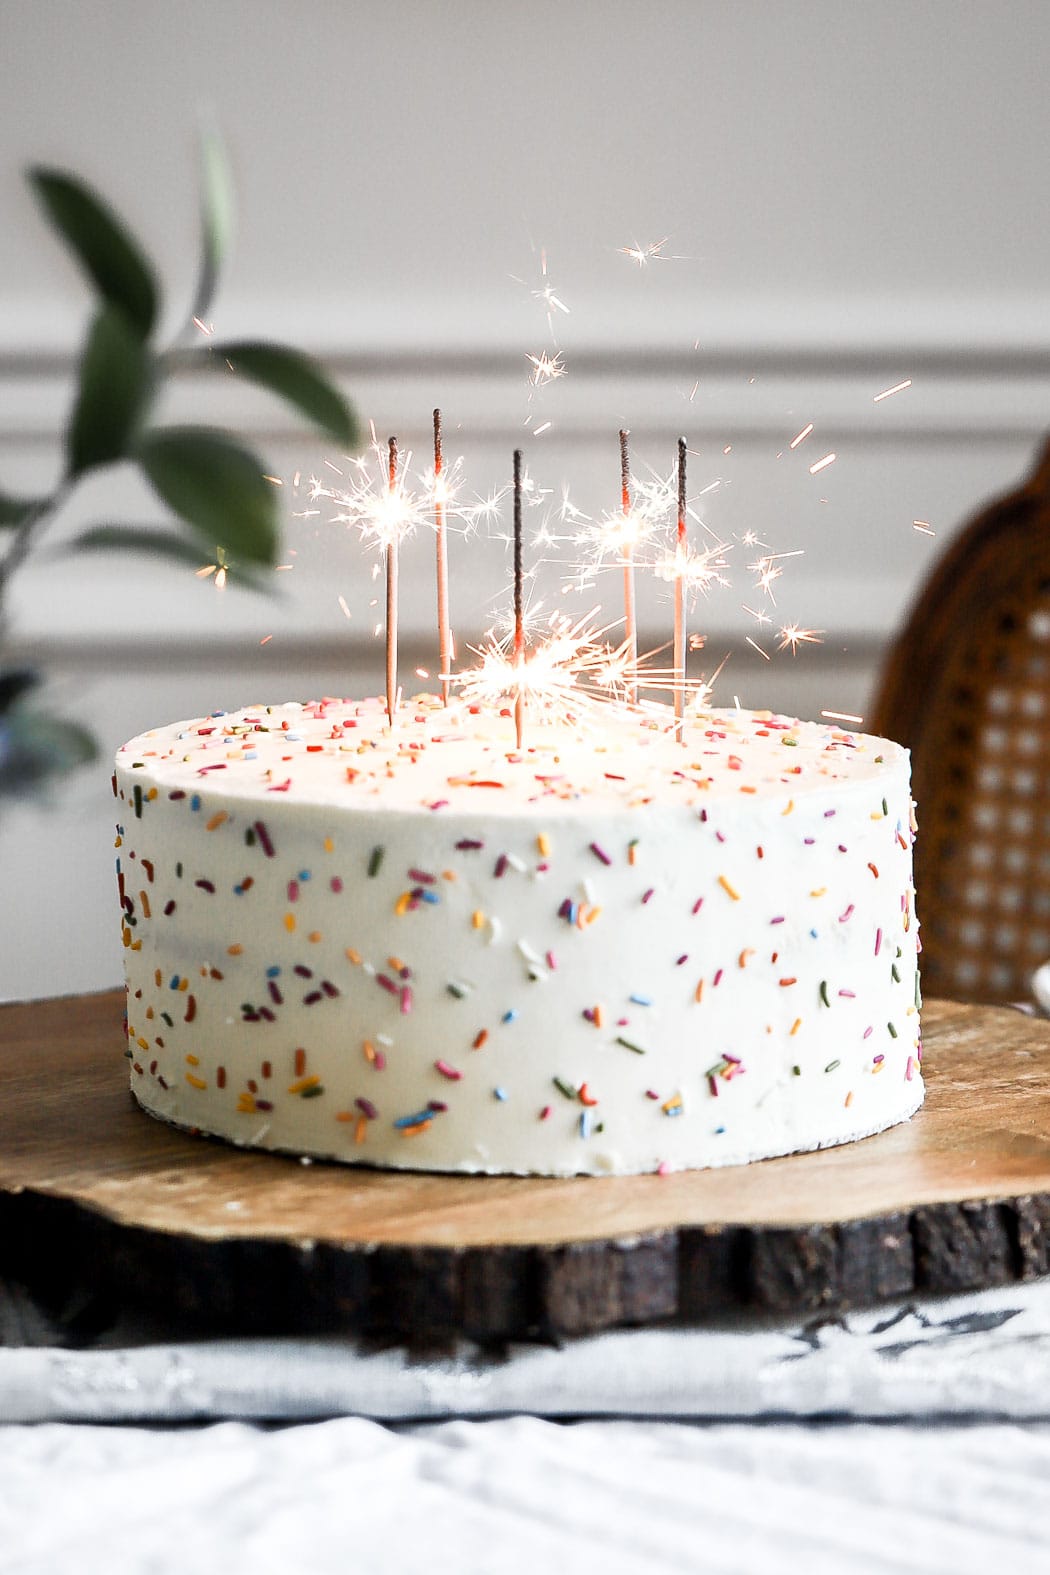
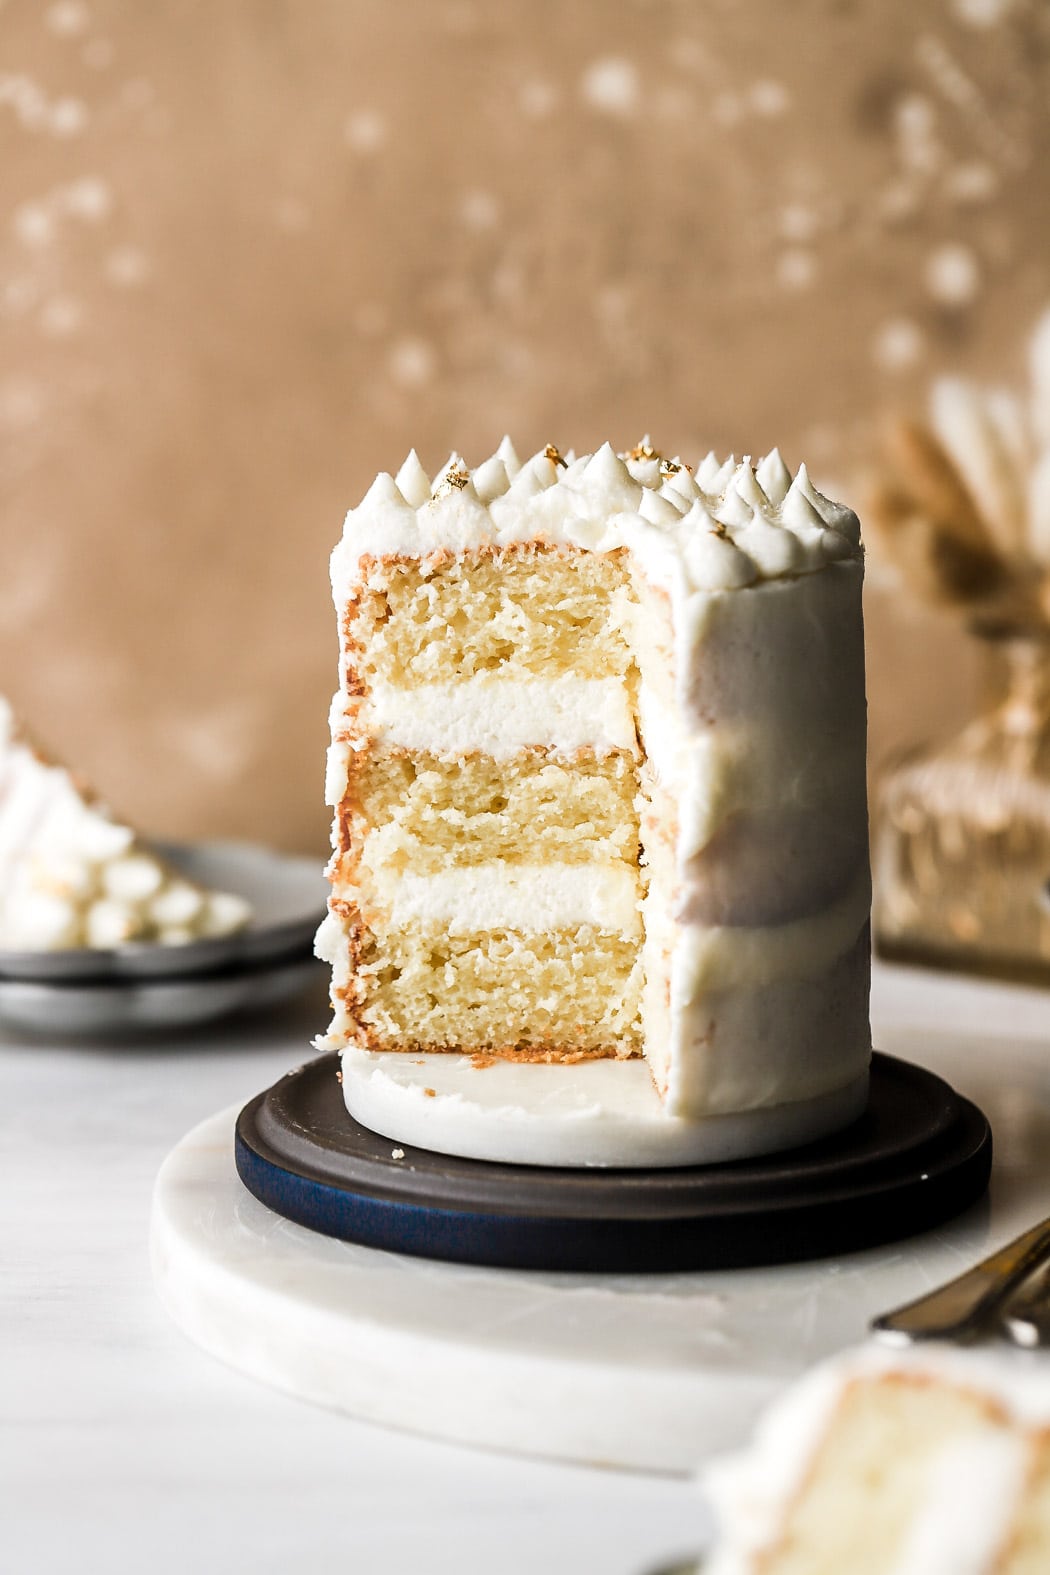
Vanilla 6 Inch Cake Recipe
After extensively testing cake recipes, this is my absolute favorite vanilla cake recipe. It’s super fluffy but not too spongy, perfectly balanced vanilla and buttery flavor and simple to make!
I use it as the base to SO MANY of my cake recipes because it can easily be adapted into any flavor, paired with any frosting and adjusted to different pan sizes.
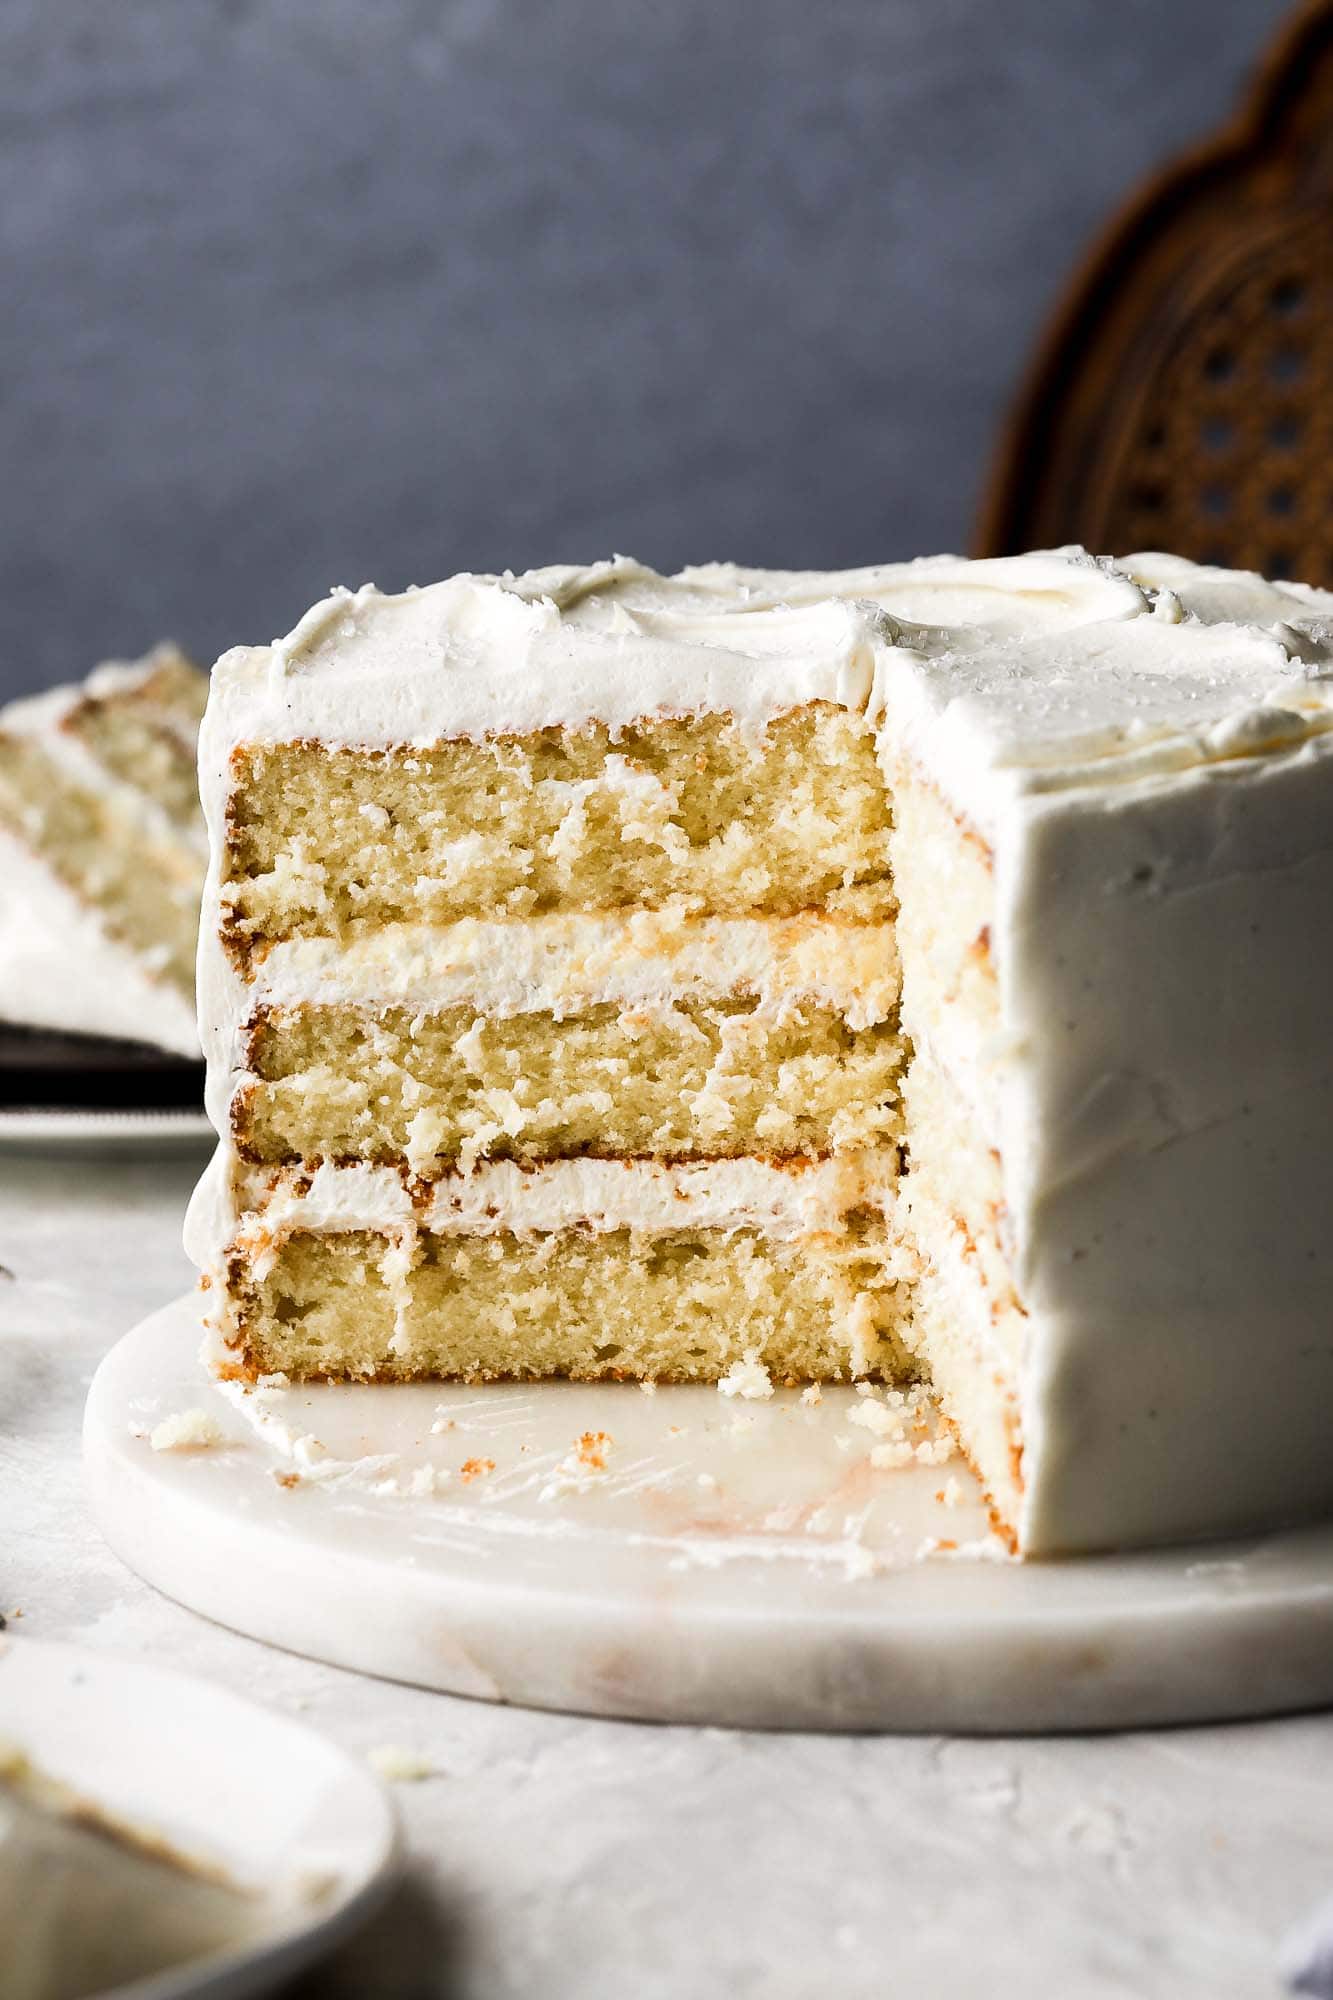
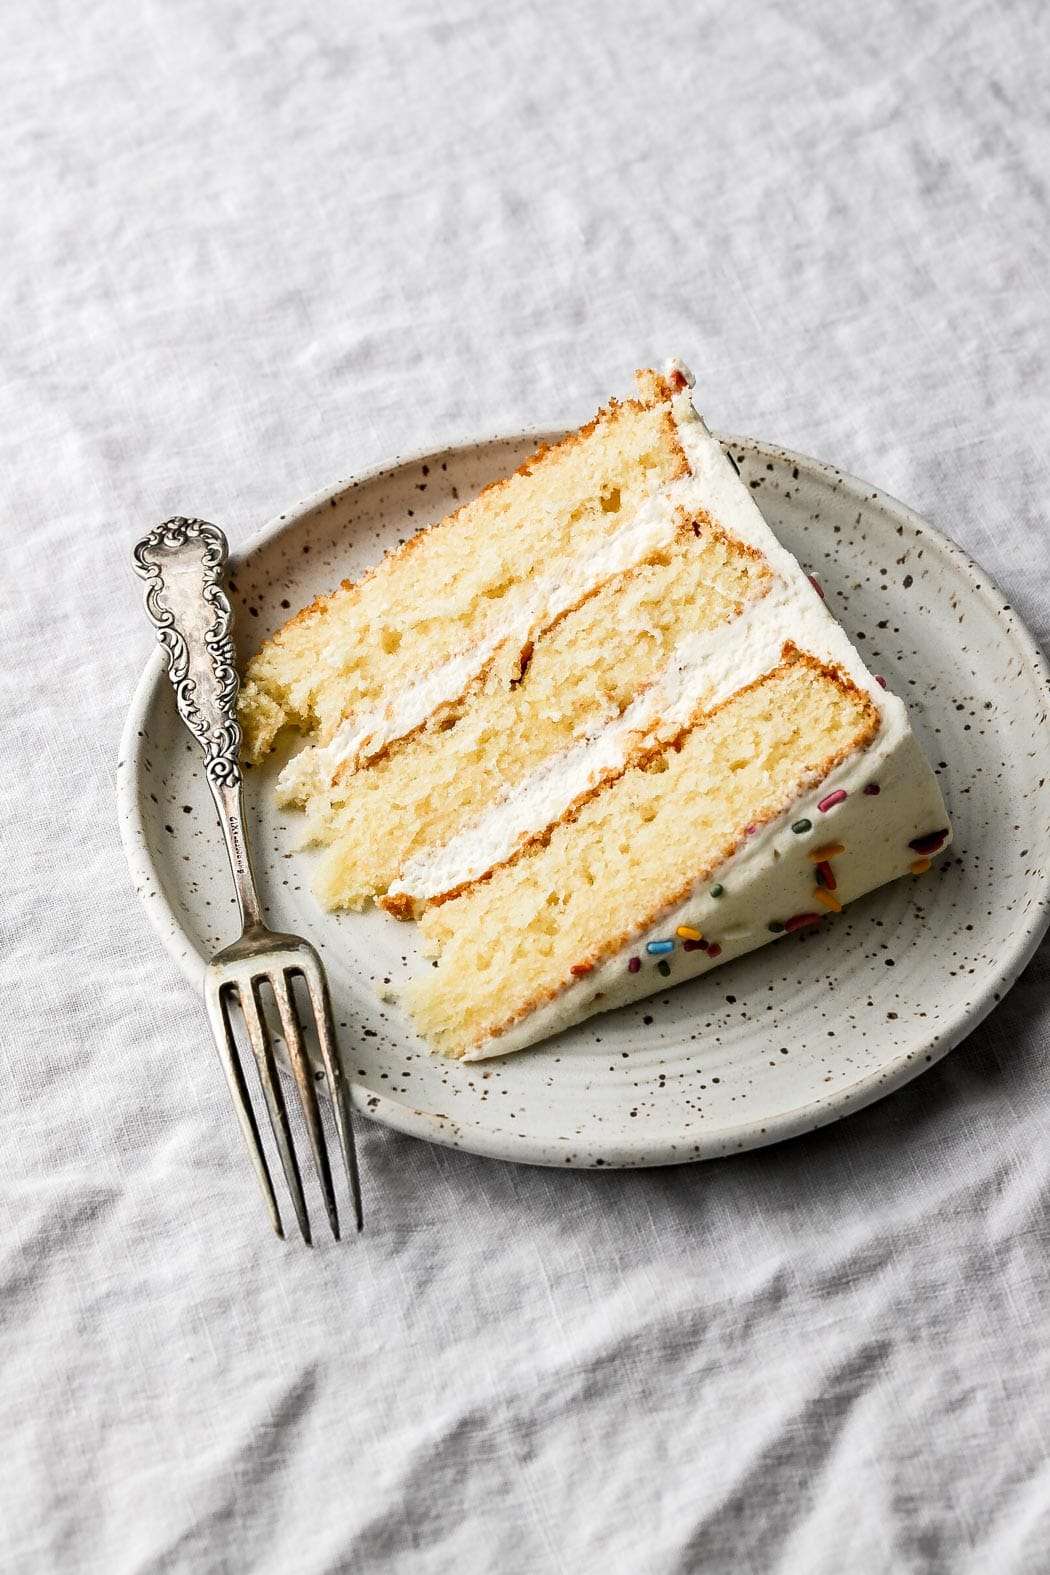
*If you saw a different image of this photo, it’s the same cake recipe made with a rhubarb frosting.
What makes this the perfect 6 inch cake recipe?
I wanted the perfect 6 inch cake that I could use on it’s own as vanilla or as a base for other recipes. Now, we know that perfect is different to everyone so let me describe my version of perfect.
- Texture: I don’t like when there are large air tunnels throughout in my cake or when the crumb is too crumbly or too bread-y. I wanted a perfect combination of moisture, density, and fluffiness.
- For instance, if your cake has too much moisture, it can be kinda gummy and super dense and heavy. We obviously don’t want that. If the cake is super light and airy, it can be a little too spongy or not sturdy enough to stack three layers.
- Flavor: I don’t want my cake to taste too buttery or too sweet – it has to taste like a combination of butter, sugar, flour, milk and vanilla in harmony!
- Simplicity: No one wants to make the BEST cake out there if the ingredient list is inaccessible or the instructions are obnoxious. Some will still say this one is way too much work but remember, you’re making a cake from scratch… not a box mix. That said, it is super versatile, I’ll list substitutions below!
- Adaptability: I wanted my perfect 6 inch cake to be easily adapted to other flavors. I’ve tried many different version of this cake with different flavors and it’s very versatile.
I would not recommend adding anything that will vastly alter the wet to dry ratio but you can certainly do things like substitute ¼-½ cup of flour for graham crackers or cocoa powder, etc.
Ingredients & Substitutions:
*full recipe is in the recipe card at the bottom!
- Flour: This recipe was developed specifically to use all-purpose flour since that’s what most people have at home but cake flour also works well!
- Fat: I use butter and oil in almost all my cake recipes because I like the flavor from the butter and I like the texture produced by the combination of both fats. I find that oil alone is sometimes too spongy and not quite as pleasant in a plain cake. Whereas using all butter usually results in a cake that’s a bit more stiff.
- Whole Eggs: you simply can’t argue against the flavor and richness that egg yolks bring to the table. I replace the 3 eggs with 5 egg whites when I specifically want my cake to be white (less yellow) but this cake was developed for optimal flavor and texture so I recommend whole eggs if you don’t mind the yellow color.
- Sugar: I mean do we need to talk about this one? YES WE DO. Sugar is not only there for sweetness. It caramelizes to provide color and flavor, creates tenderness and locks in moisture so PLEASE don’t cut out any sugar. If you want to reduce sweetness, use a European based buttercream like Swiss or French instead of American.
- Liquid: I was a firm believer in buttermilk before I did all this testing. Now I am a firm believer in sour cream with milk. The difference in texture and flavor was mind blowing from the very first test. If you really don’t have access to sour cream you can substitute it for 3/4 cup of plain yogurt or Greek yogurt.
I’ve tested this recipe with gluten-free 1:1 flour blends, including King Arthur and Bob’s Red Mill, and it works beautifully. I’ve also made it with dairy-free butter, milk, and sour cream or yogurt with great results.
TIP: I HIGHLY recommend using a digital scale, as dry ingredients are almost always over measured.
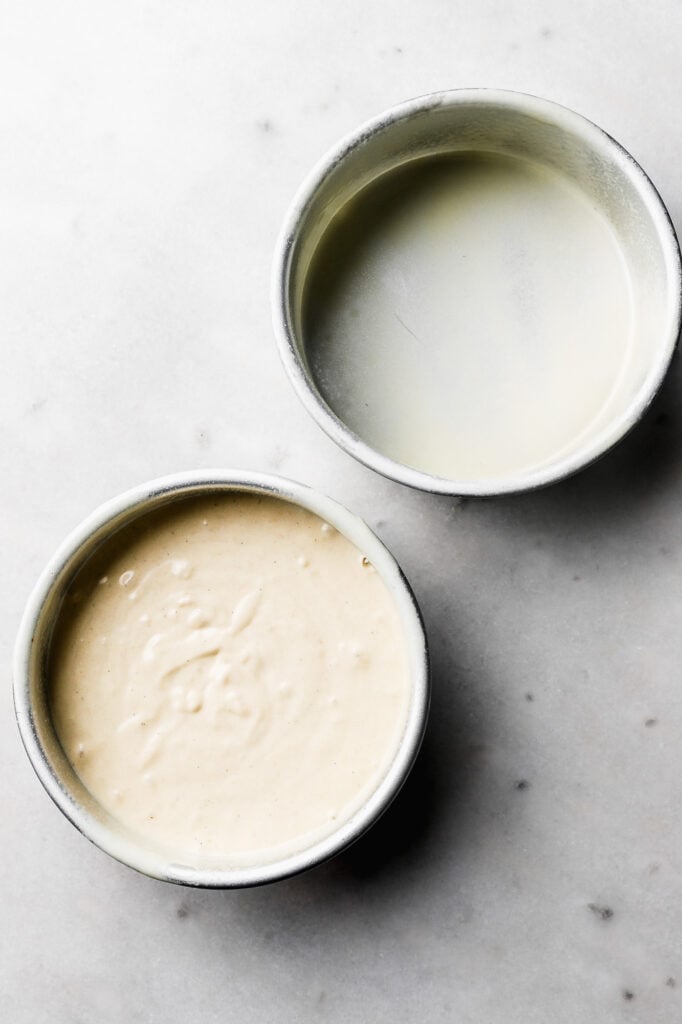
Step-By-Step Photos
My cake is pretty straight forward but there are a couple of important steps not to skip:
- Ingredients at a cool room temperature will emulsify properly and hold on to more air, creating a fluffier cake texture.
- Adding the eggs one at a time and giving them each time to emulsify properly will incorporate more air and also result in a fluffier cake texture.
Vanilla Cake
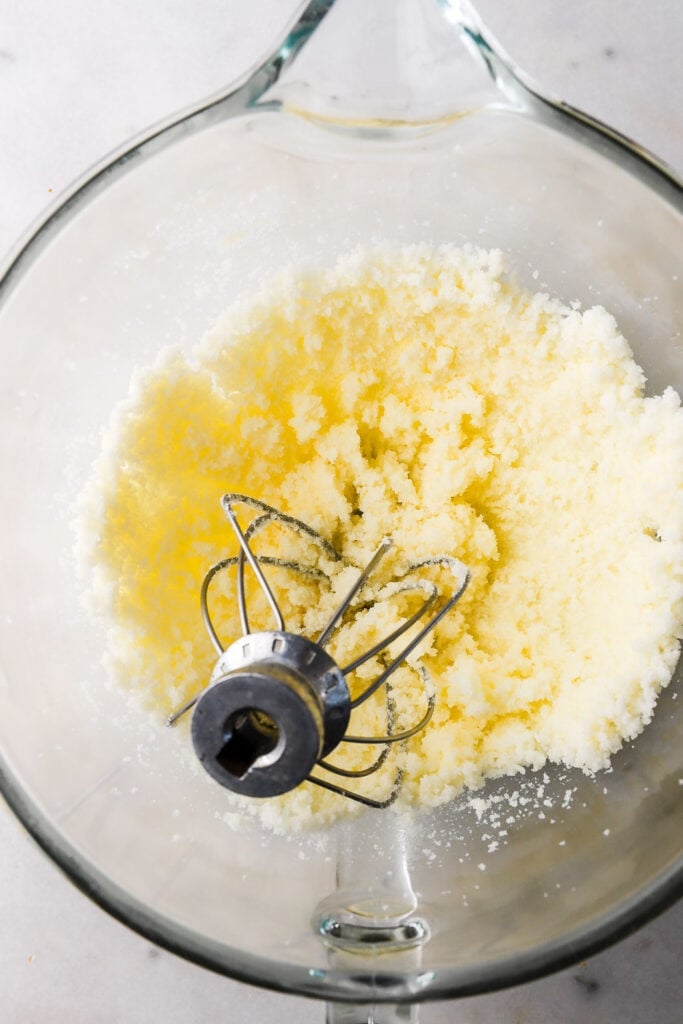
- Beat together the butter and sugar for 1-2 minutes with the whisk attachment.
- Add the oil and continue beating for another 1-2 minutes.
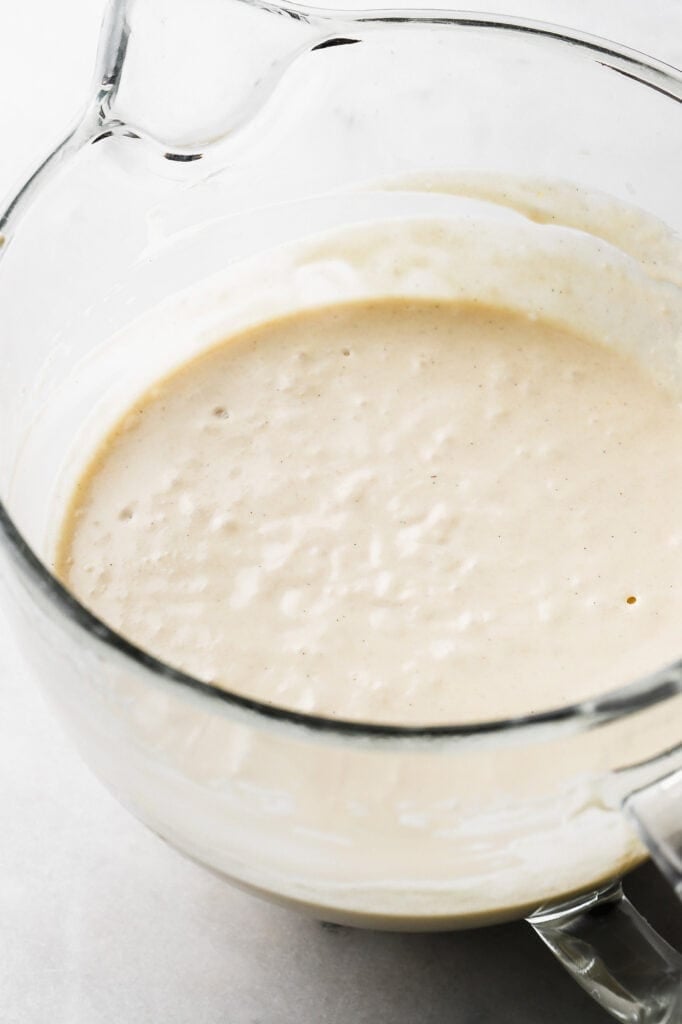
- Add the eggs, one at a time, beating for at least 30-60 seconds between each addition, until each one is combined. Add the sour cream and vanilla and mix just until they’re incorporated.
- Add in half of the dry ingredients, followed by the milk and then the other half of the dry ingredients. Mix just until the last streak of flour is combined.
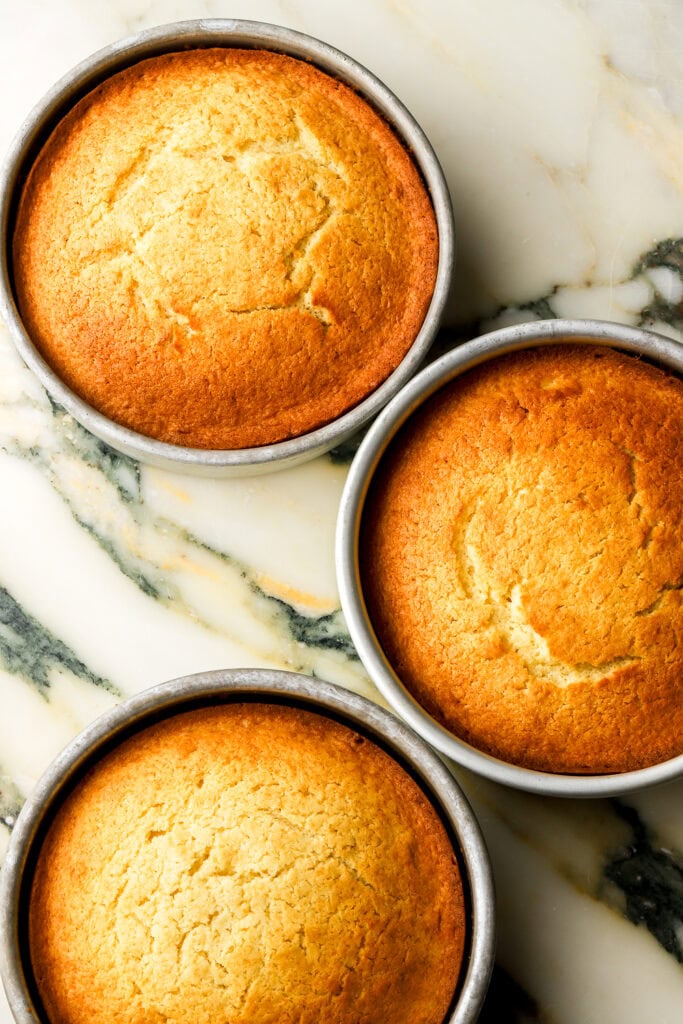
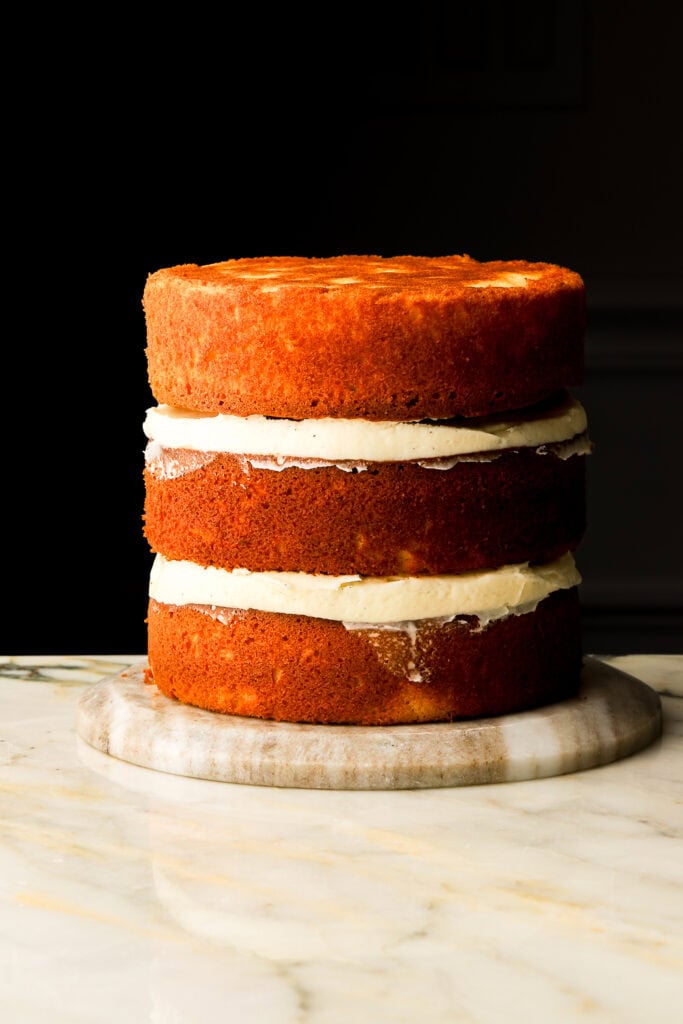
- Distribute the batter evenly between three round 6 inch cake pans, about 14 ounces of batter in each one.
- Bake for 30-35 minutes, until the cake is golden brown, the edges released from the pan and/or the cake springs back when you press on it gently. Flip over onto a cooling rack or a tea towel and cool completely before frosting.
Pro Tip: lighter colored baking pans will reduce the amount of browning on the outside whilst darker pans will brown more.
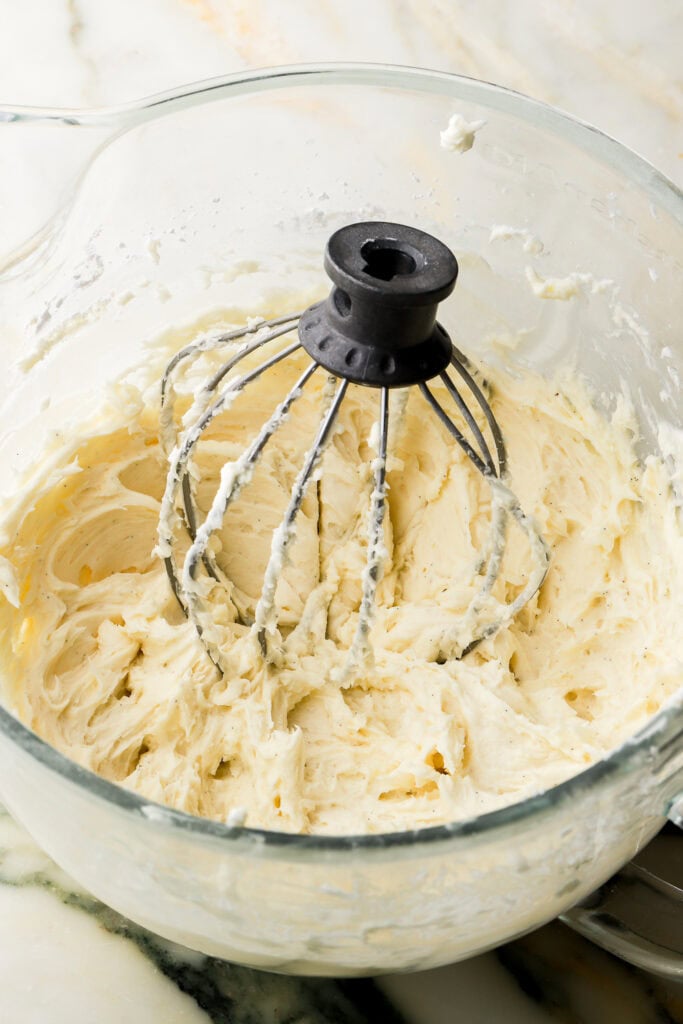
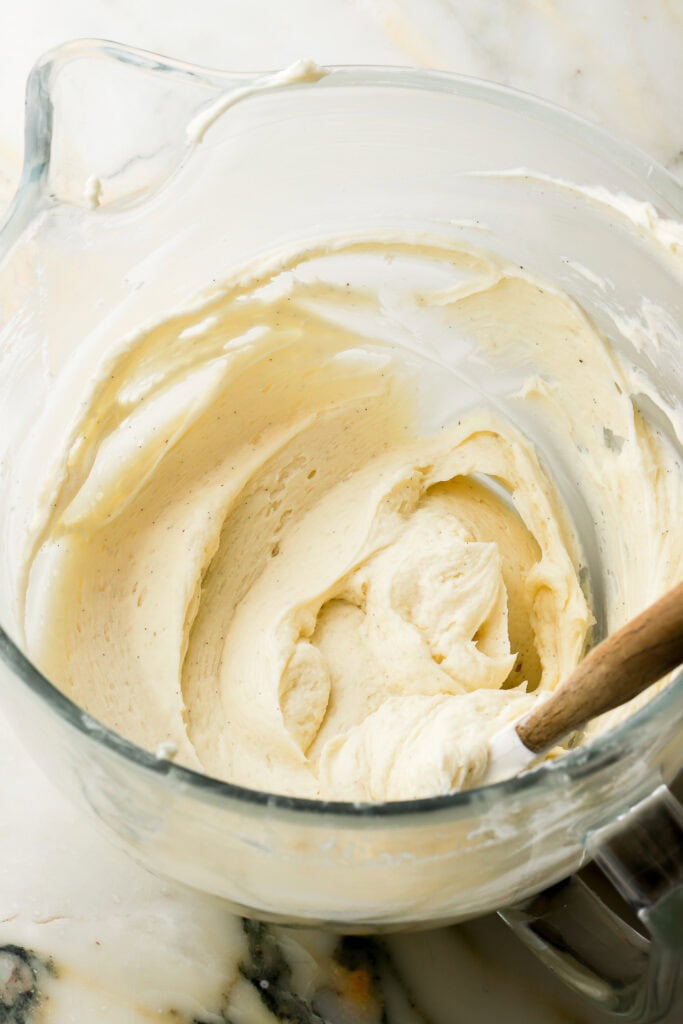
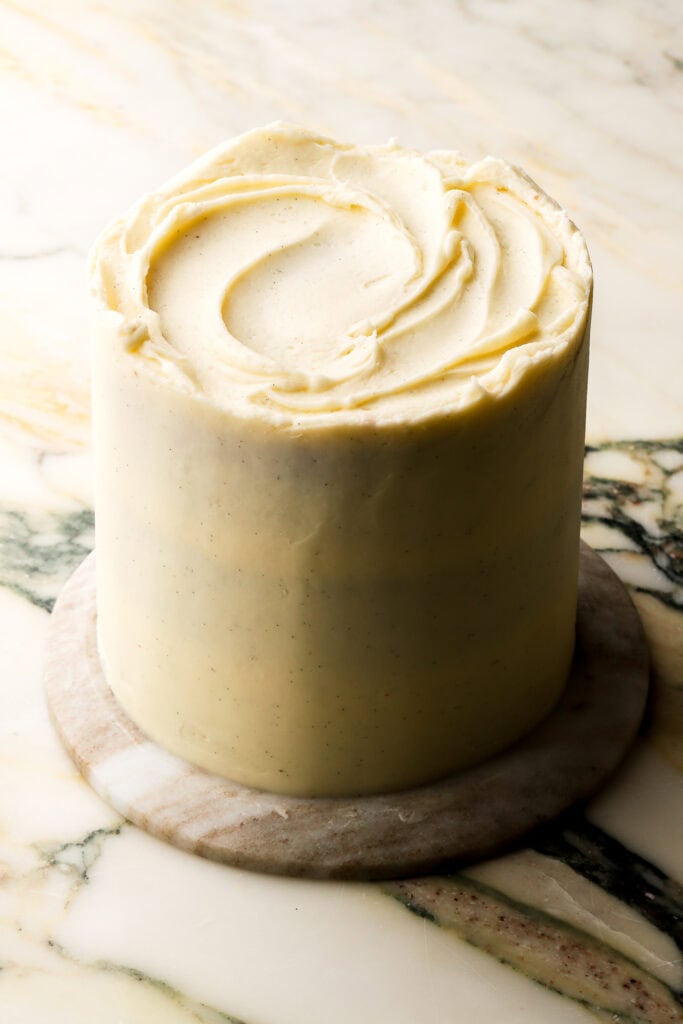
Vanilla Buttercream
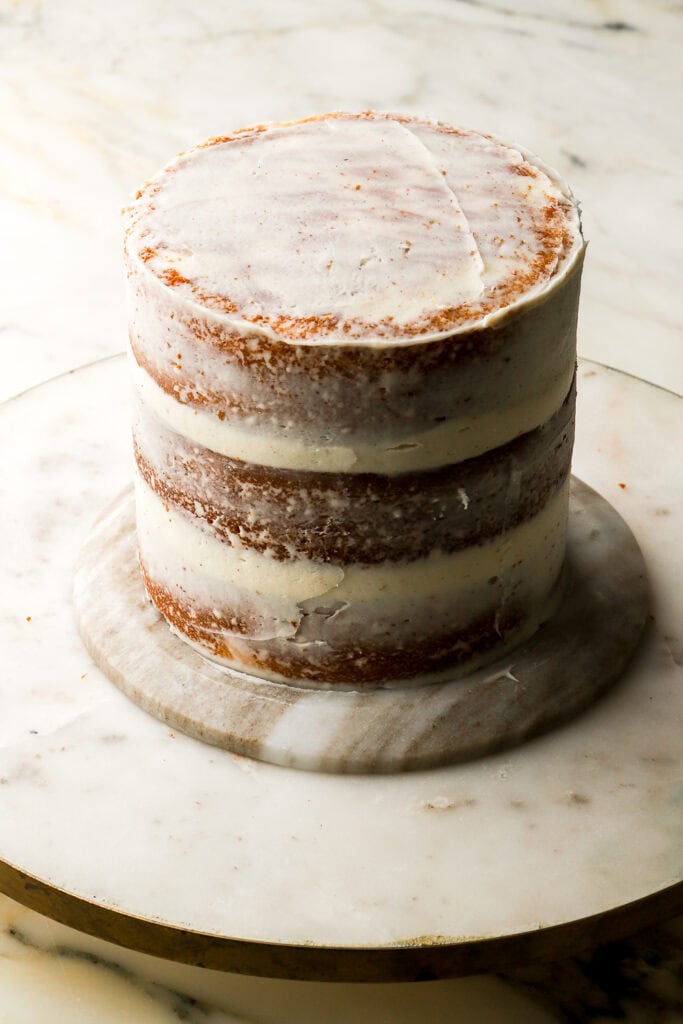
I used American buttercream for simplicity here but this cake pairs well with any buttercream. The amount of frosting you get in the recipe is JUST enough to frost it how I did in the pictures. If you want to decorate the cake more, I recommend doing 1.5x or 2x the frosting recipe.
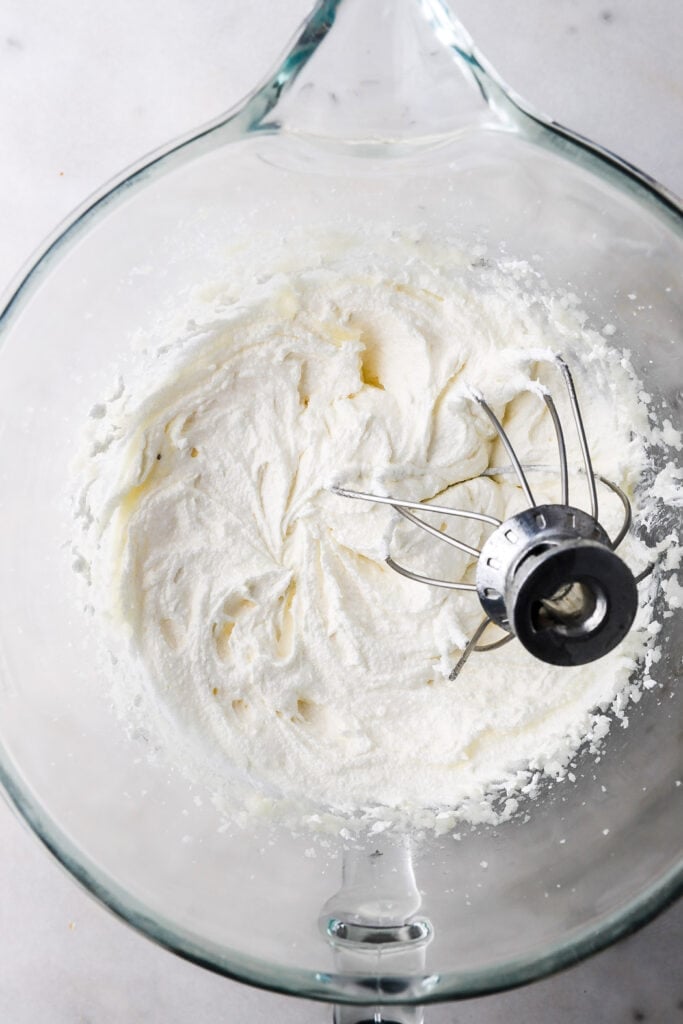
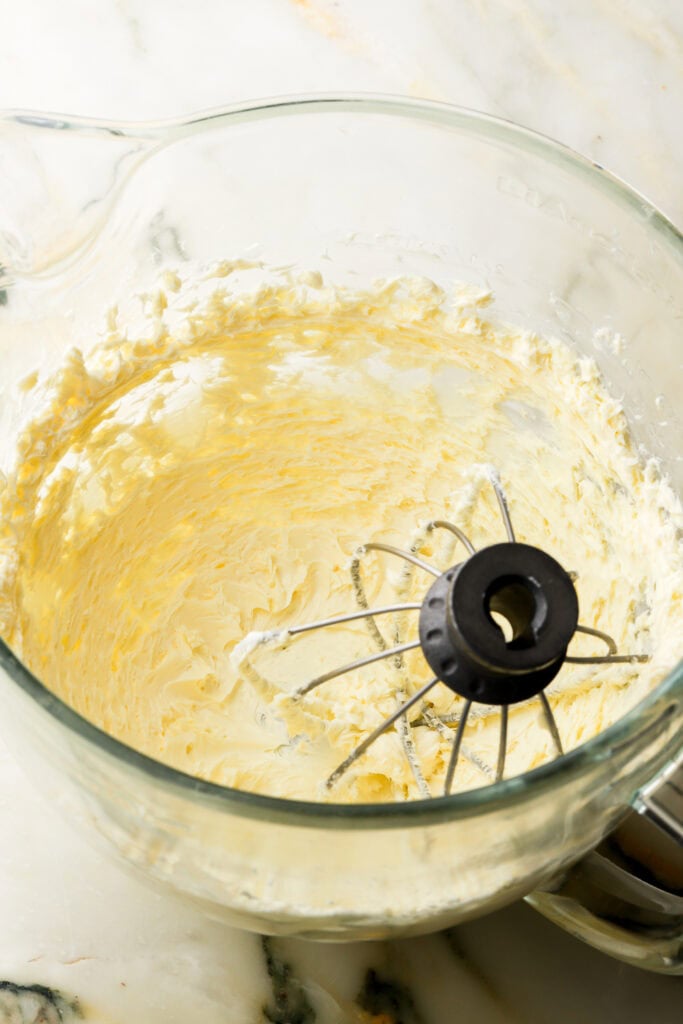
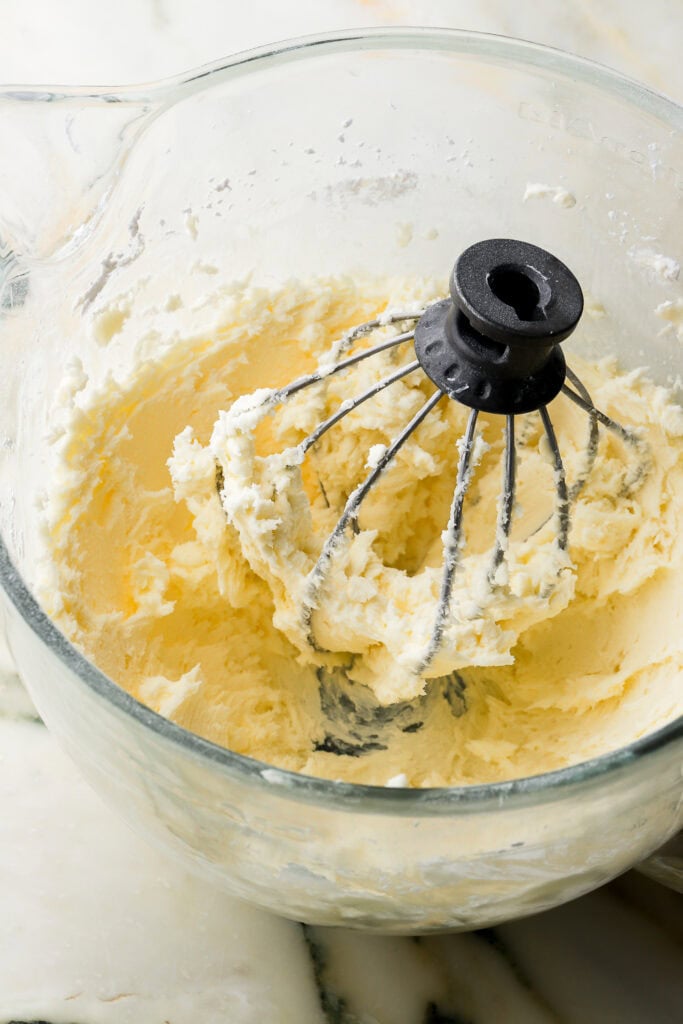
- Beat the butter until it lightens in color and get’s fluffy.
- Add the powdered sugar and salt beat for about 5 minutes until it’s completely smooth.
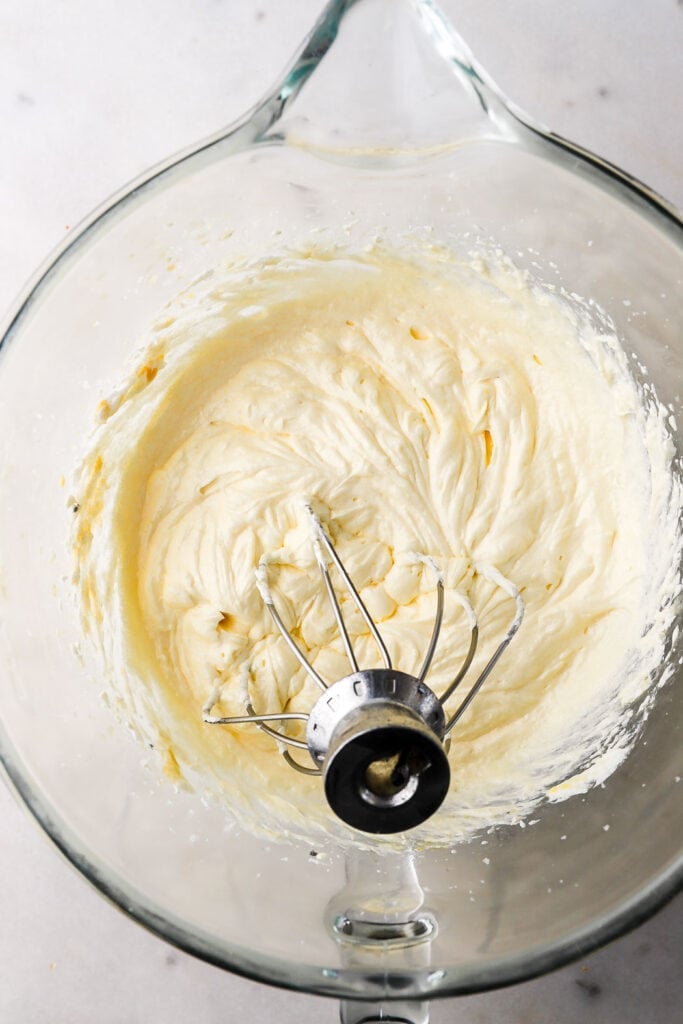
- Add the vanilla and stream in the heavy whipping cream, beating until the frosting is light and fluffy.
Pro Tip: Start with a whisk attachment on low speed to avoid the cloud of sugar, then switch to a paddle attachment if you want to beat the air out and make it smooth.
This cake in other sizes
I scaled this 6 inch cake into other commonly used sizes.
- 4 Inch Cake
- 10 Inch Cake
- 8 Inch Cake
- This exact recipe can be baked as 9×13″ for 45 minutes or in a large sheet pan to cut out Mini Cakes.
- I also use it as the base for my Birthday Sheet Cake in a half sheet pan.

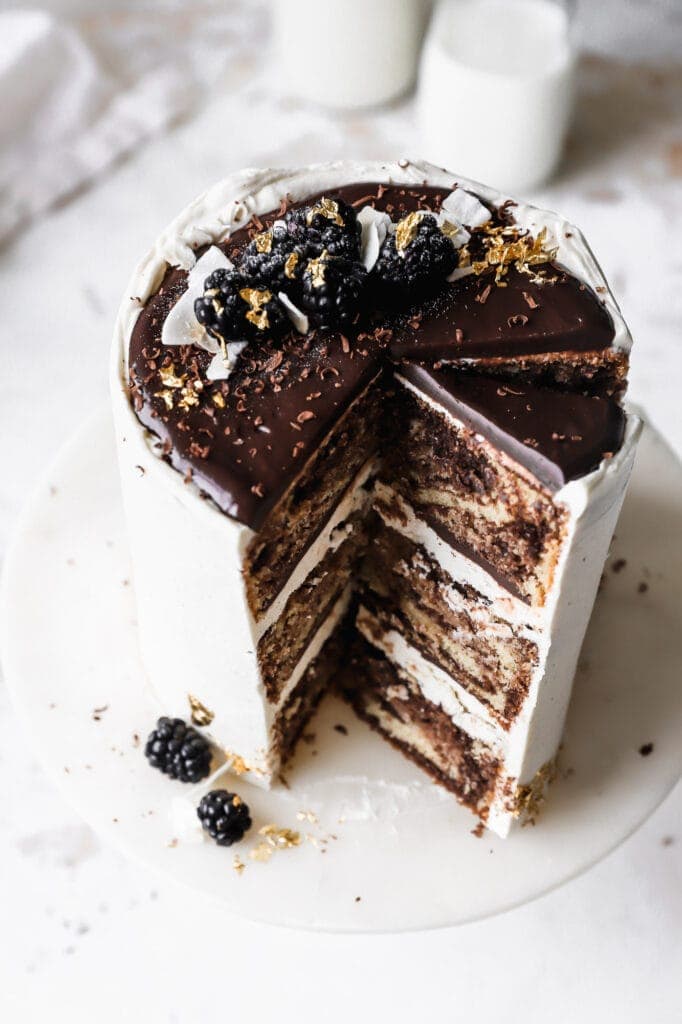
Recipes that I’ve adapted this cake into:
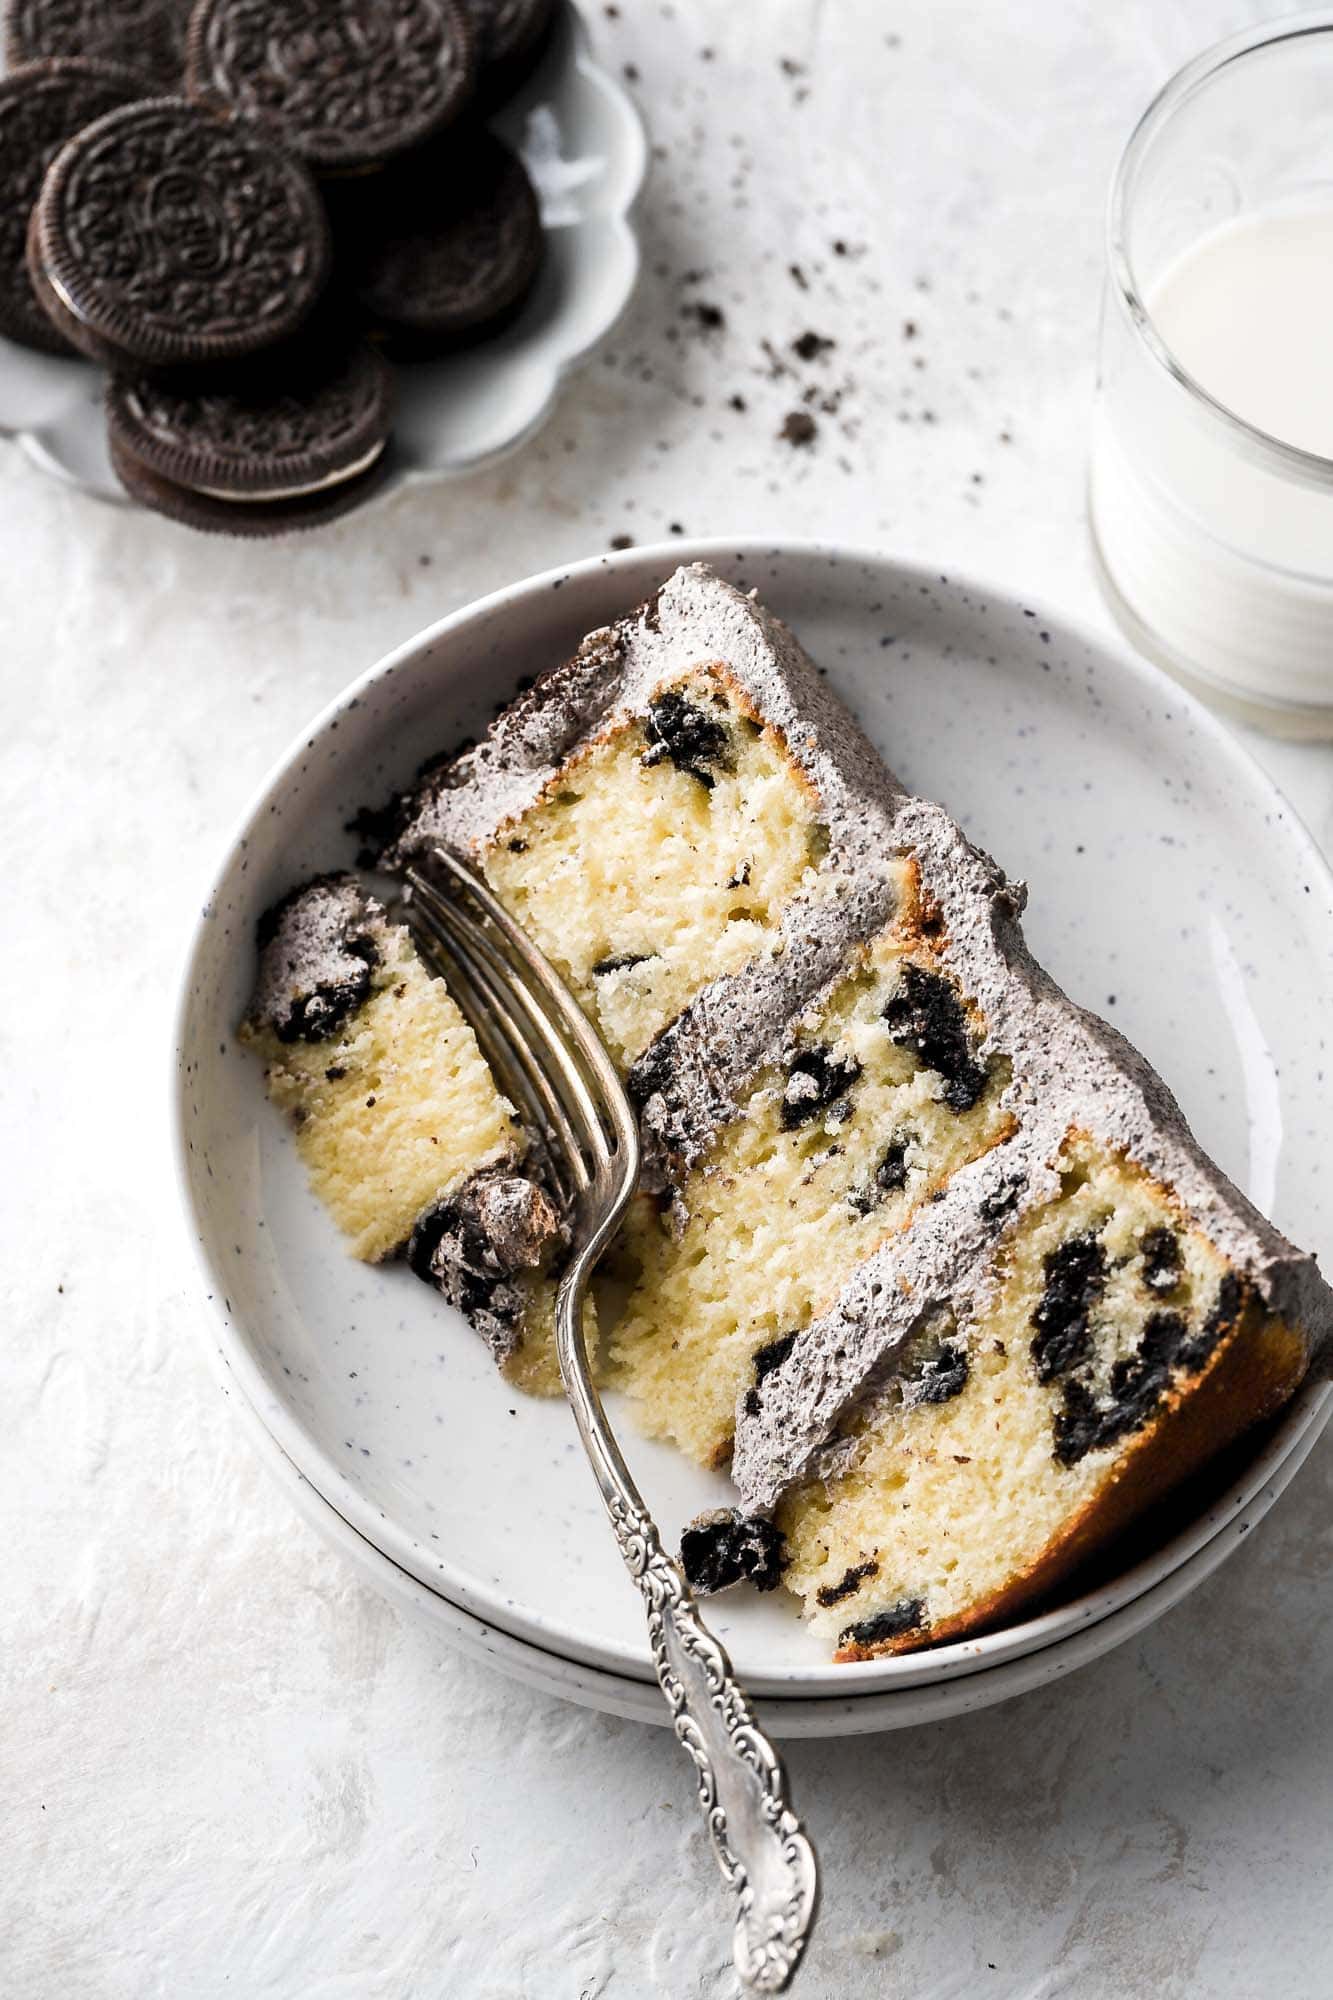
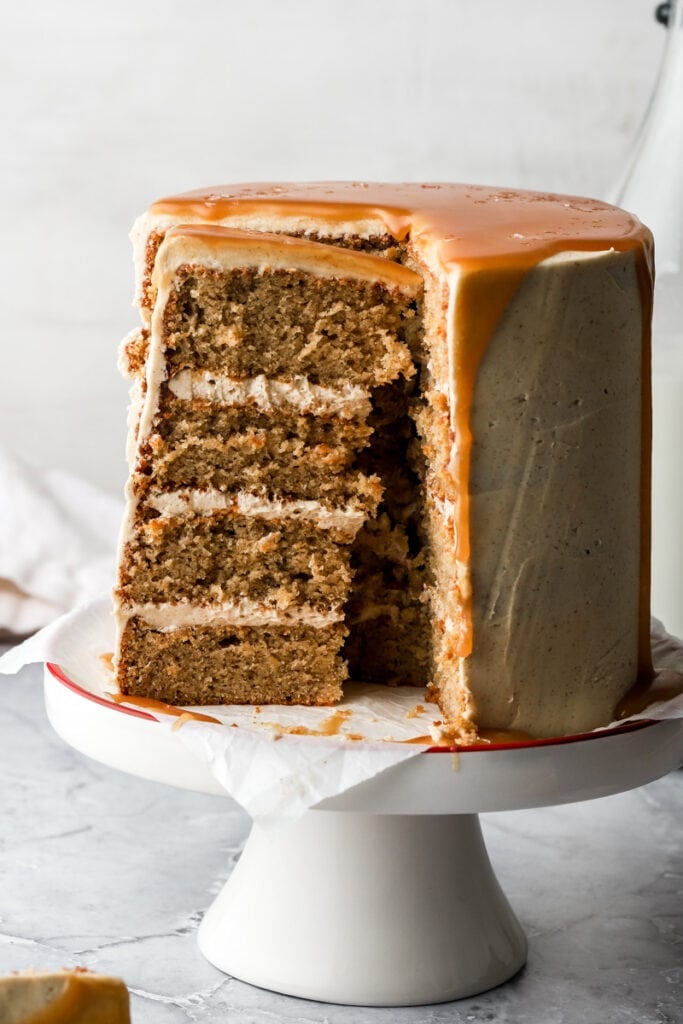
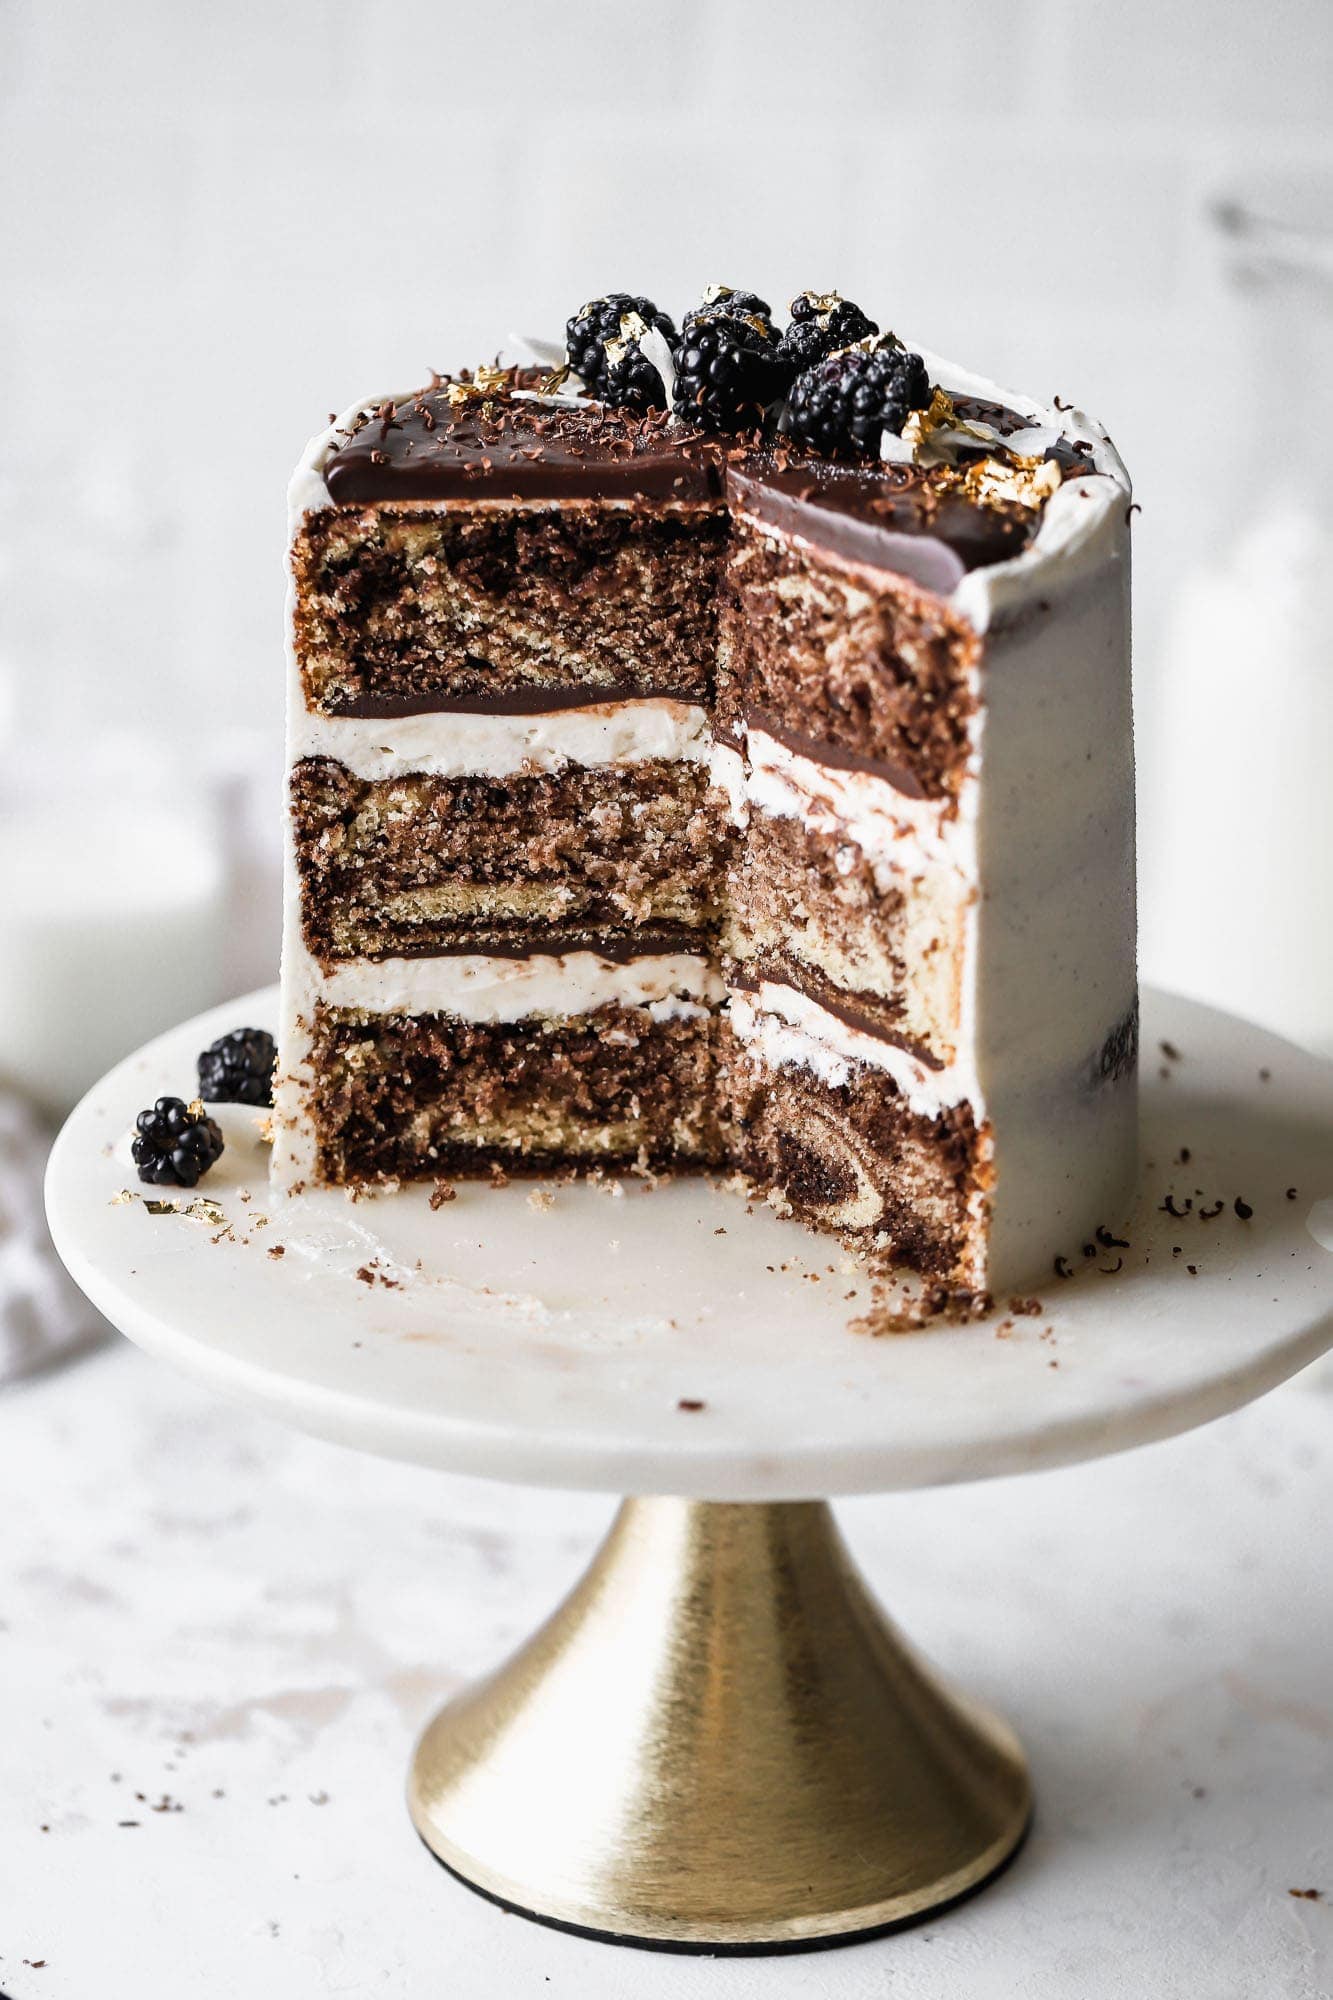
There’re so many recipes on my website that were adapted from this cake including a full chocolate version but a few of my favorites are my Marble Cake, Oreo Cake, and Maple Spice Cake.
Serving & Storing Cake
This cake is best served at room temperature within 1-2 days. It can sit on the counter for a couple of days but if it’s sliced, make sure to keep it covered. I recommend freezing the leftover in an airtight container to keep it as fresh as possible and thaw at room temperature before eating.
I’m very aware that this will not be everyone else’s favorite base cake recipe so I always welcome constructive criticism.
I’d be happy to answer any questions down below. If you make this cake, please leave me a 5-star rating or a review as well!
As always, happy baking and have a blessed day!
Love, B

I love this recipe so much! But I have a silly question. Can I use this recipe in three 6-inch heart shaped pans? Or do they need to be round?
Thank you so much! No silly at all, if it’s roughly the same size, you absolutely can. If your heart shaped pans are larger, maybe just do two layers.
Can the sugar content be reduced? Making it for a first birthday! Thanks 🙂
Hi Becca, it can but the cake will be a little more dense and obviously less sweet 🙂
How can I add the strawberry reduction you use for your strawberry cupcakes? I’ve made the strawberry cupcake recipe and it was great, but needing to now make in a 6in smash cake.
Hi Sidney, I would just swap out the milk for the strawberry reduction. I haven’t tried it on this cake but that’s what I did when I turned my vanilla cupcakes to strawberry cupcakes so I don’t see why it wouldn’t work!
Hello:
Quick question: how can I convert this recipe with AP flour? Two of my grandchildren have allergies and at the moment I am restricted to King Arthur AP flour. Thank you! Love all your recipes!!
Hi Pam, thank you so much, I’m so glad you like them! However, I don’t quite understand your question, I use AP flour in the recipe so any brand works fine 🙂
Hello again:
So sorry, I think I forgot to include my question above. lol.. It’s been a busy day. I made your 6 inch vanilla cake and everyone loved it!! I also wanted to make cupcakes with this recipe. In your post, you recommend your Cupcake recipe which has Cake flour as a main ingredient. I am unable to use Cake flour because 2 of my grandchildren have allergies. I cannot find a brand of Cake flour that is safe. Every brand that I purchase must be made in a peanut, tree nut and sesame free facility so I am restricted. Thank you for any suggestions. I appreciate it!
Ahh I see, yes you can use AP flour for the cupcakes too, they are just slightly less tender. You could also sub in 1-2 tbsp of the flour for cornstarch to help with that
Hello:
I made this cake for my grandson’s birthday. Quick question: Did you had fruit to the frosting? It looks like it is incorporated in the frosting picture. Thanks
Hi Pam, this post initially just had the cake part and then I decided to add in some shots of the inside texture but that cake had raspberry rhubarb jam in the frosting lol, I have a separate post for it but the cake is the same! I will have to photograph and plain version to update the photos!
What type of oil did you use?
canola but any neutral oil works
Extremely moist and light, made in a 9×9 pan, minus 1/2 C batter,baked slightly longer. Turned out perfect for a quick bday request.
Hi there, I was just wondering if I need to adjust the recipe or cook times/temp if doing two 8 inch cakes instead of three 6 inch pans? Thank you!
I am making a small wedding cake for a friend. I made two 10” instead of three and two 6” instead of three. They came out absolutely perfect! They smell delicious and if the batter is any hint of what they will taste like, then….amazing! Thank you for the recipe, very easy too!
I plan to make this recipe for my sons first birthday next Saturday. Do you know approximately how many standard size cupcakes this recipe makes? Thanks!
23! But I recommend making a cupcake recipe instead 🙂
https://baranbakery.com/vanilla-cupcakes-with-vanilla-buttercream/
Hi,
Recipe looks amazing and I want to try.
Please what could I substitute instead of sour cream?
Thanks 🙂
Yogurt
Hello, I tried the 6 inch cake recipe and it was absolutely delicious. I’m making it for my son’s 1st bday smash cake but I also want to make a larger 9x13in cake for the rest of the guests . Do you think a batch of this same recipe would cook properly in a 9×13 rectangular cake pan?
Yes one batch of this will make a 9×13” cake. Bake for approximately 40 minutes!
Hi I have just come across your recipe and can’t wait to try it. Does it need to be kept in the fridge because of the sour cream?
Hi, I’m keen to try this recipe. Is the sponge stable enough to be used for a 2 tier cake?
Yes
I want to make a smash cake for my daughter’s first birthday. She is allergic to eggs. I have found I can substitute 1 tsp baking soda + 1 tbsp vinegar for the first egg, and 1/4 cup plain yogurt for every egg after the first in almost any cake recipe. I see that this cake has sour cream and baking powder. Is there any reason why my method for replacing eggs wouldn’t work with these ingredients? Should I still put the sour cream since I’m already using yogurt, or maybe I could use sour cream instead of the yogurt? I didn’t know if the yogurt would be good with the sour cream. I understand that by altering the recipe this way it won’t taste exactly the same. I just want to make sure it will still cook okay if you have any idea. Thank you!
Hi Ashley, I haven’t really worked with egg replacements but if that worked in the past I don’t see why it wouldn’t work now. I use sour cream and yogurt pretty interchangeably so I think using just one or the other, or both would be perfectly fine.