
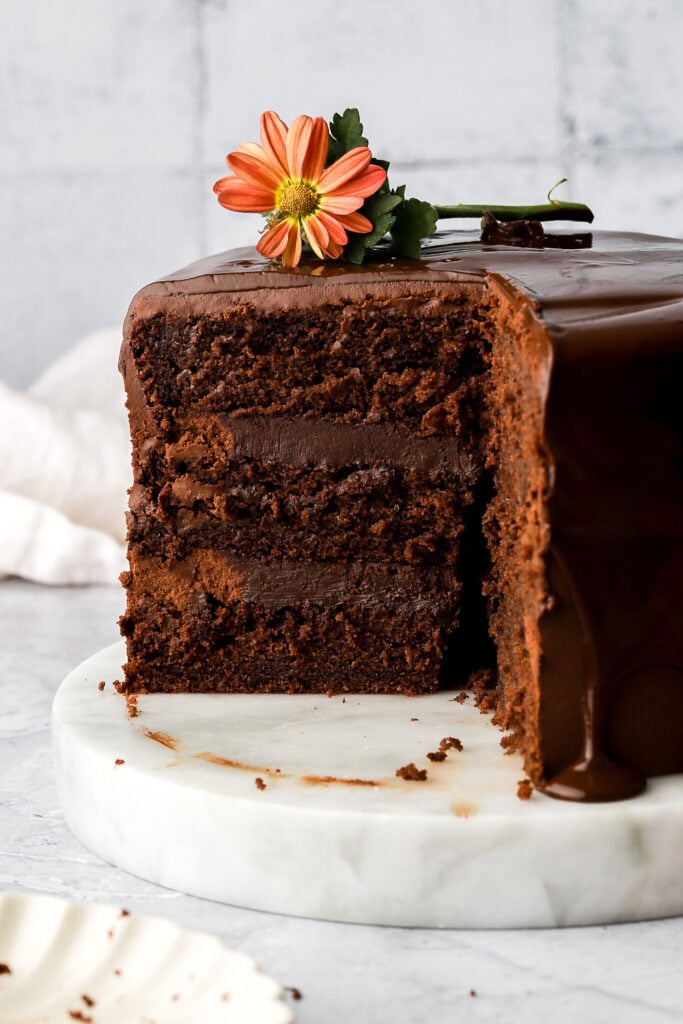
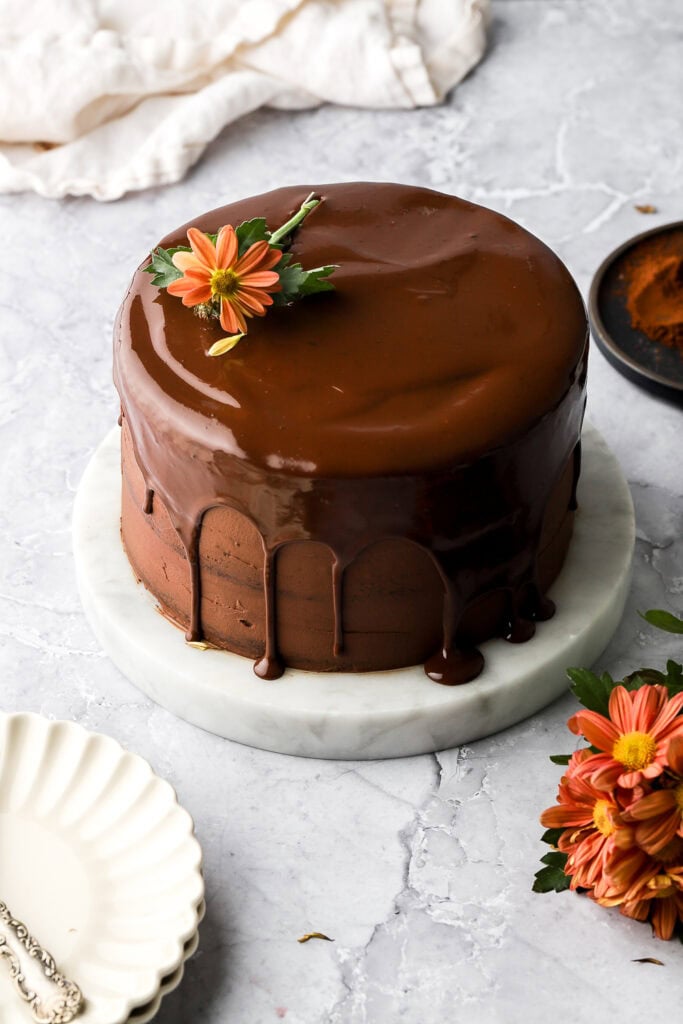
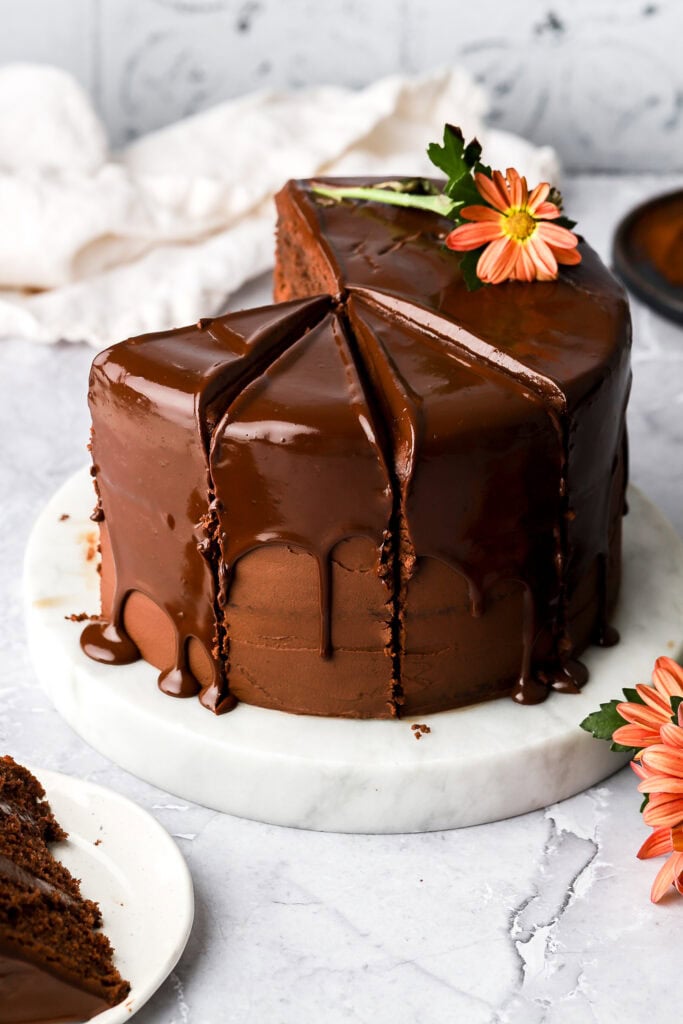
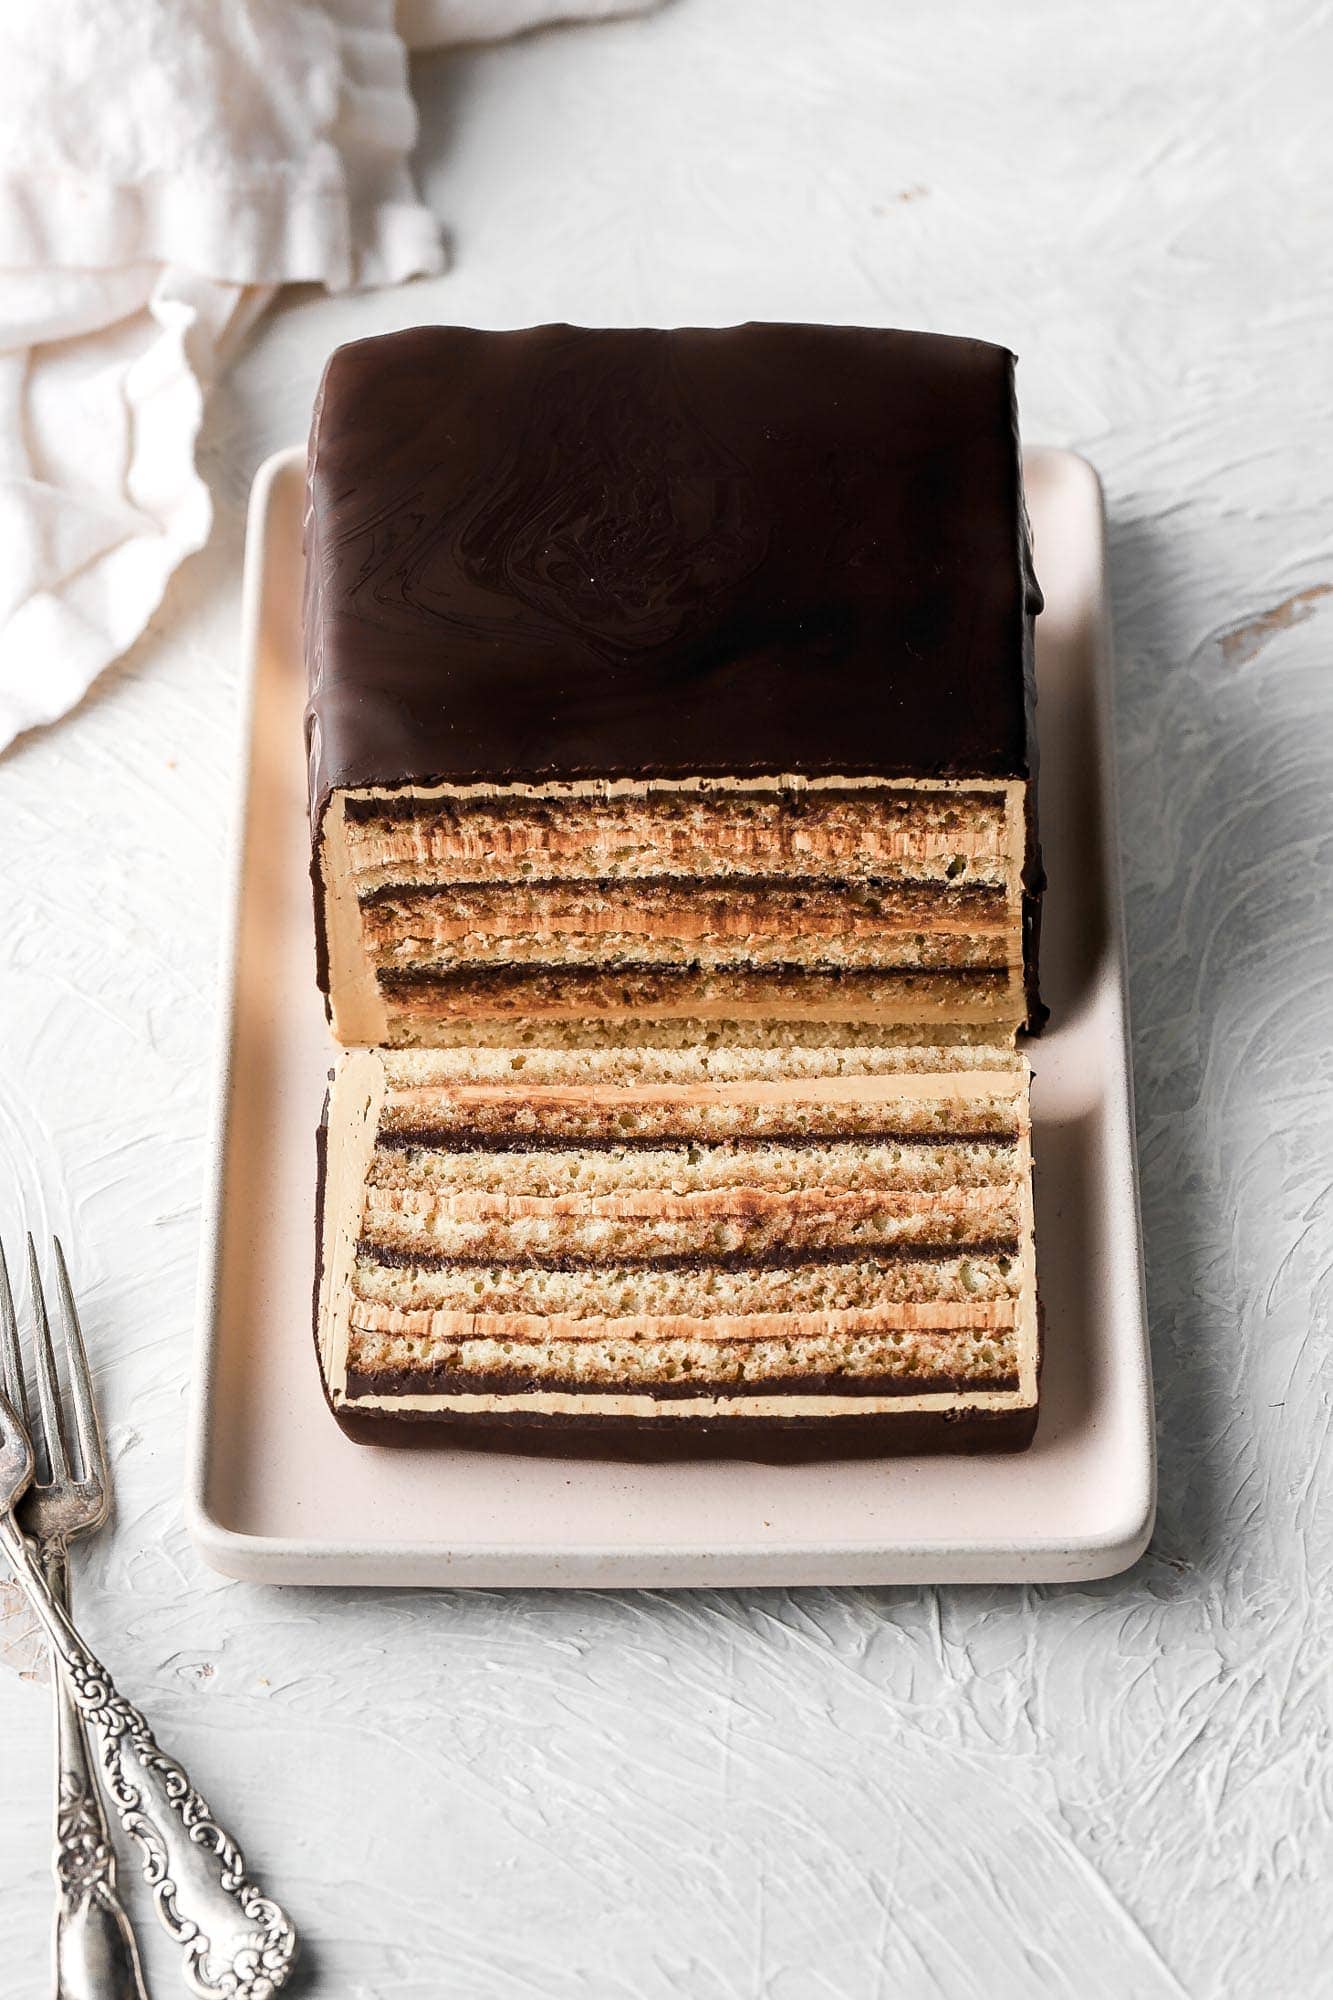
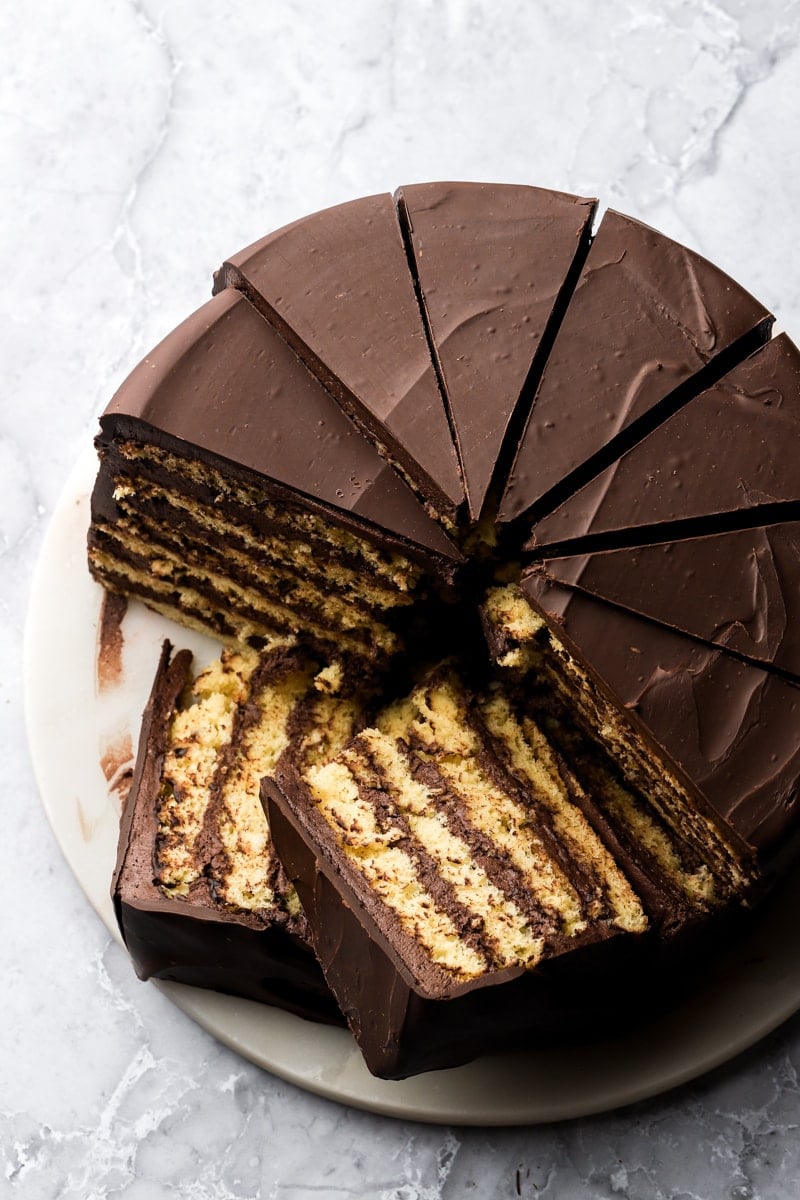
Chocolate Ganache Cake
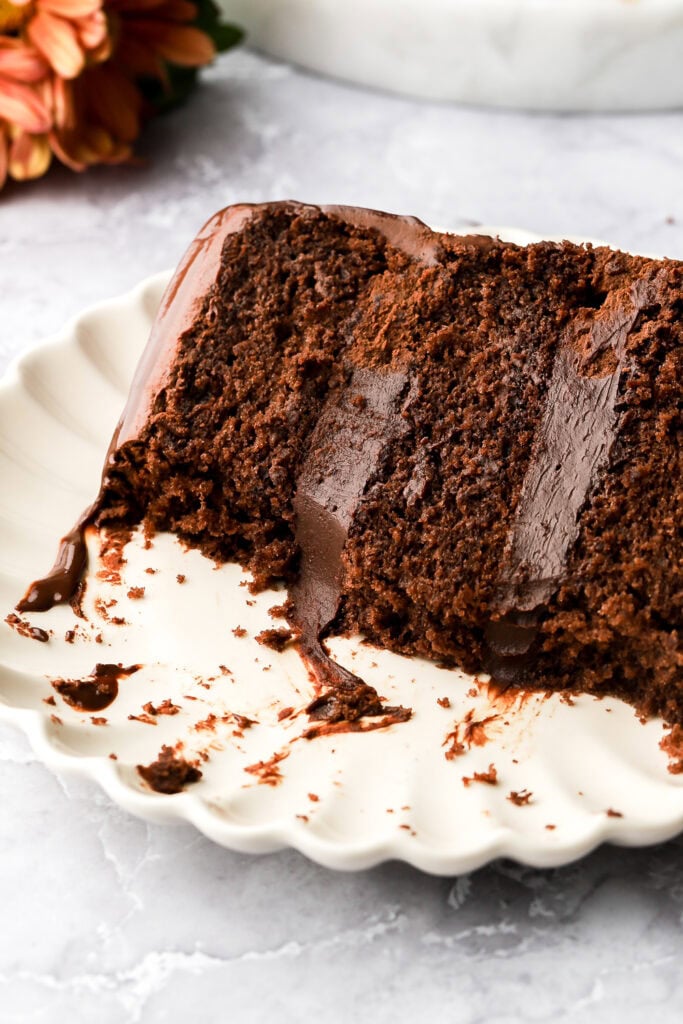
This chocolate ganache cake is dark, rich, and unapologetically chocolatey.
If you’ve never had chocolate ganache before, it’s incredibly rich and sets into a soft, fudgy texture once it cools. Because it’s more thicker and richer than traditional frosting, I prefer pairing it with a cake that’s sturdy enough to support it.
The chocolate cake layers here are slightly more structured than most chocolate cakes but still very moist, which makes them perfect for layering with ganache.
I used a 1:1 chocolate ganache for the filling, frosting, and drip, which keeps it nice and simple.
I have a few similar cake styles but with a few flavor twists so if you want to add a little something, try my chocolate caramel cake, chocolate raspberry cake, chocolate blueberry cake, and ferrero rocher cake.
Chocolate Notes
- Cocoa Powder: I use dutch process cocoa powder for a darker color and richer flavor. Natural cocoa powder also works but the color and flavor will be slightly less intense.
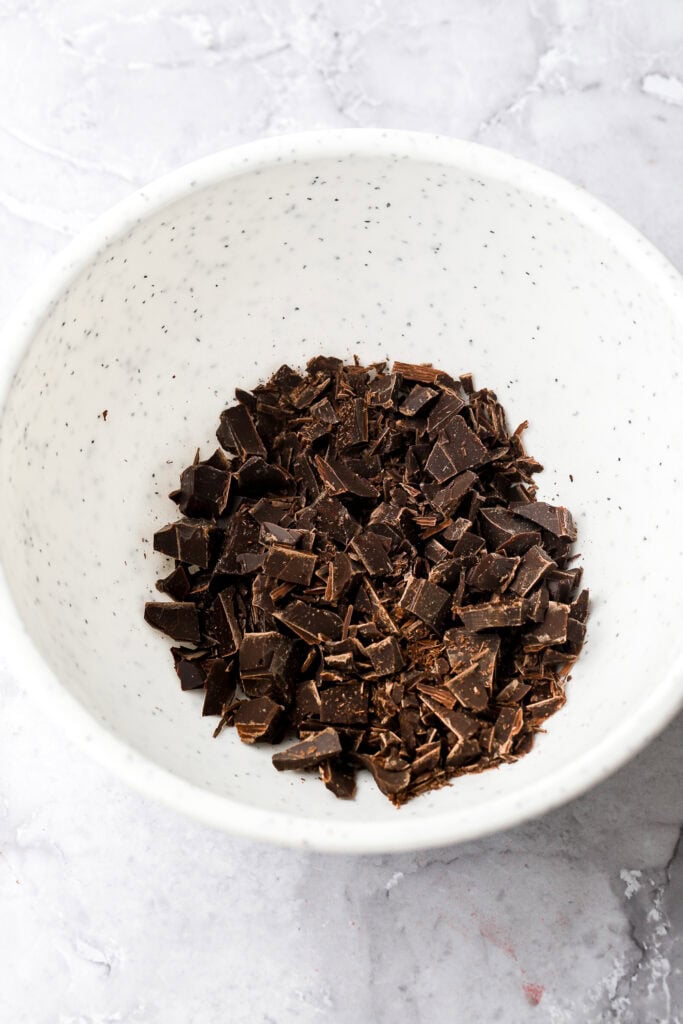
- Chocolate: I recommend dark chocolate for all the components in this recipe. My favorite chocolate is the Dark Pound Chocolate from Trader Joes, but any dark chocolate baking bar will work here. If you’re not familiar with chocolate ganache or if you make any swaps, please refer to my full guide on ganache.
Step-by-Step Instructions
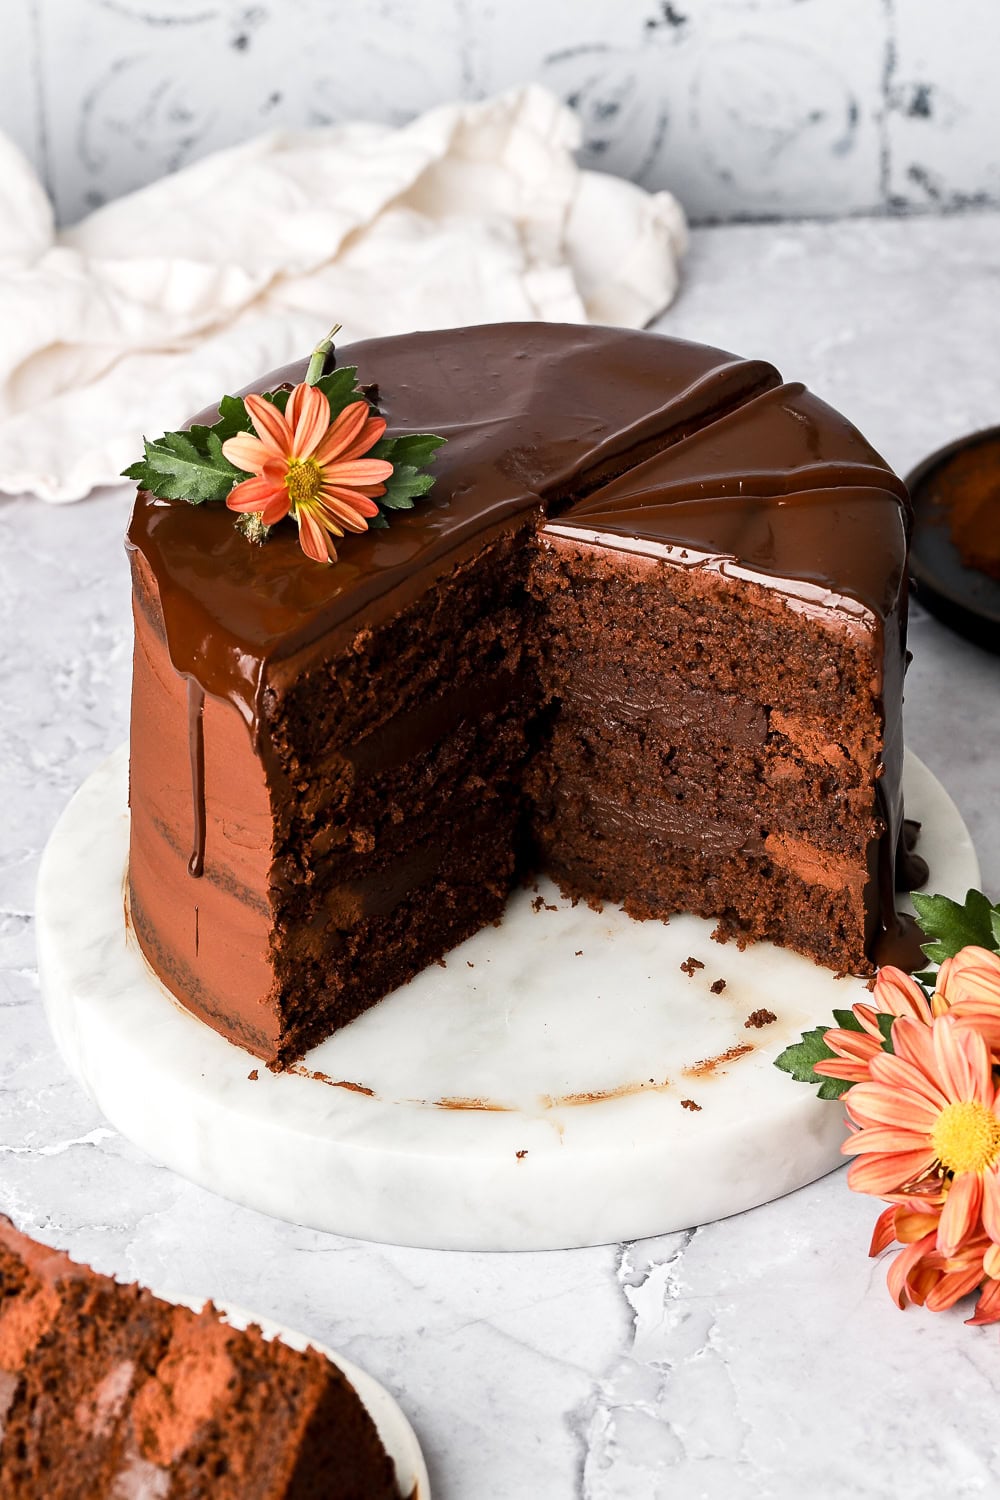
This cake looks much more complicated than it actually is. There are three cake layers, and the filling, frosting, and drip all start from the same 1:1 chocolate ganache.
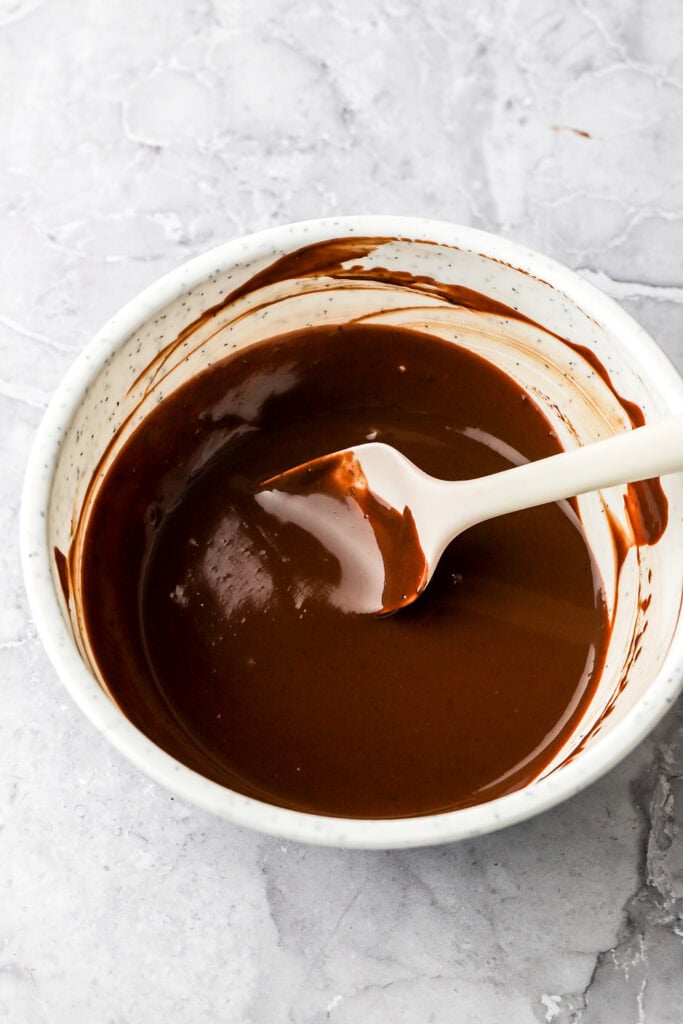
Chocolate ganache is simple to make (just chocolate + cream), but the texture changes depending on temperature. You’ll use the ganache at three stages: cooled and thick for the filling, whipped once cooled for the frosting, and slightly warm/thinner for the drip.
A digital scale is one of the best ways to get consistent results—especially for flour, cocoa powder, and keeping your ganache ratio accurate.
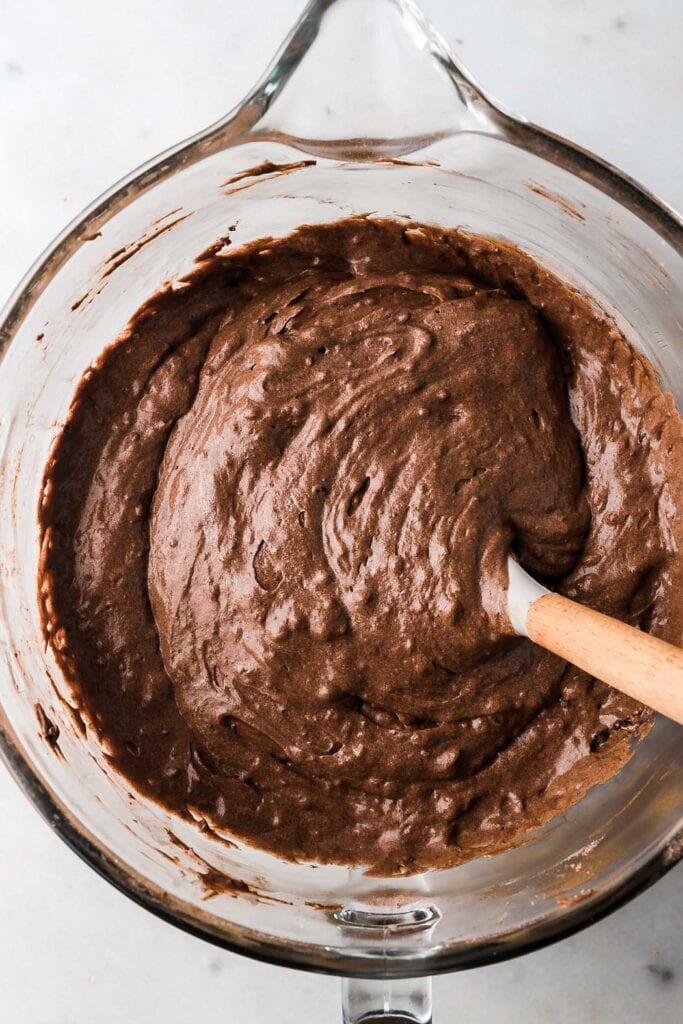
Chocolate Cake Layers
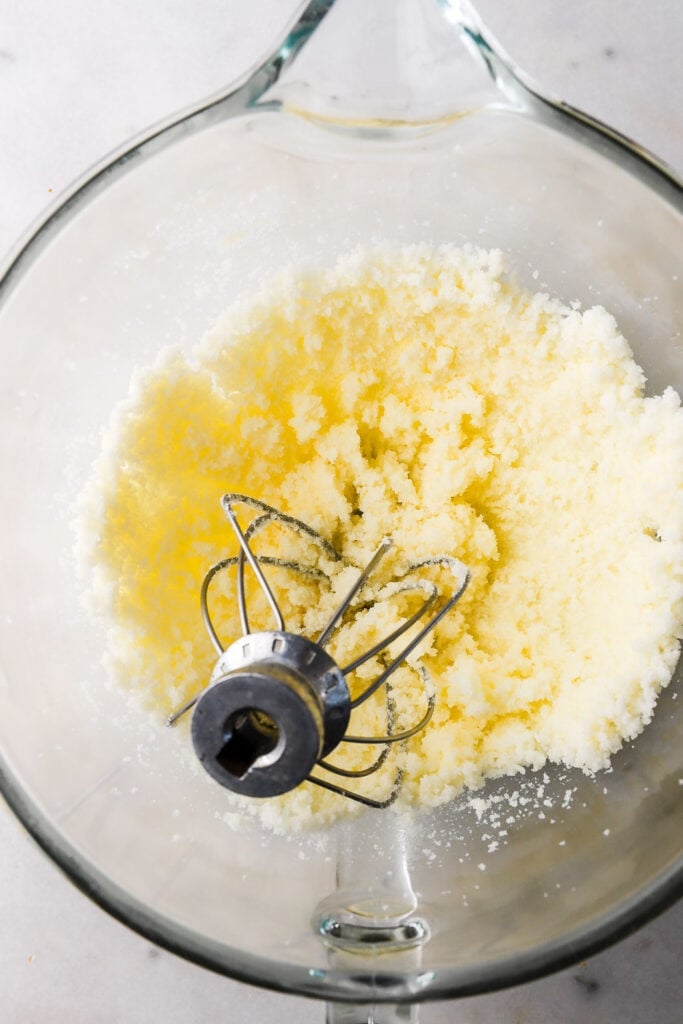
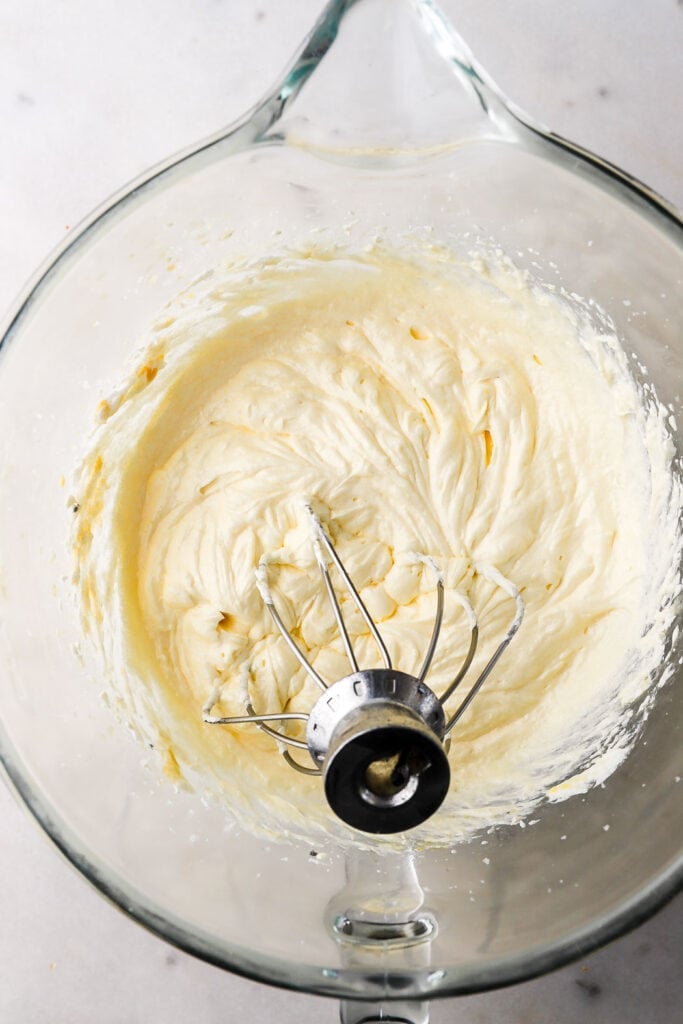
- Make the cake first. Start by creaming the butter with the sugar for 1-2 minutes. Then add the oil and beat at full speed until it’s pale and fluffy.
- Add the eggs one at a time. Make sure each egg is fully incorporated before adding the next egg. Then add the vanilla and sour cream, mixing just until they’re combined.
- Add half of the dry ingredients, followed by the milk and the other half of the dry ingredients. Make sure to scrape the bottom and sides of the bowl well so it’s evenly mixed.
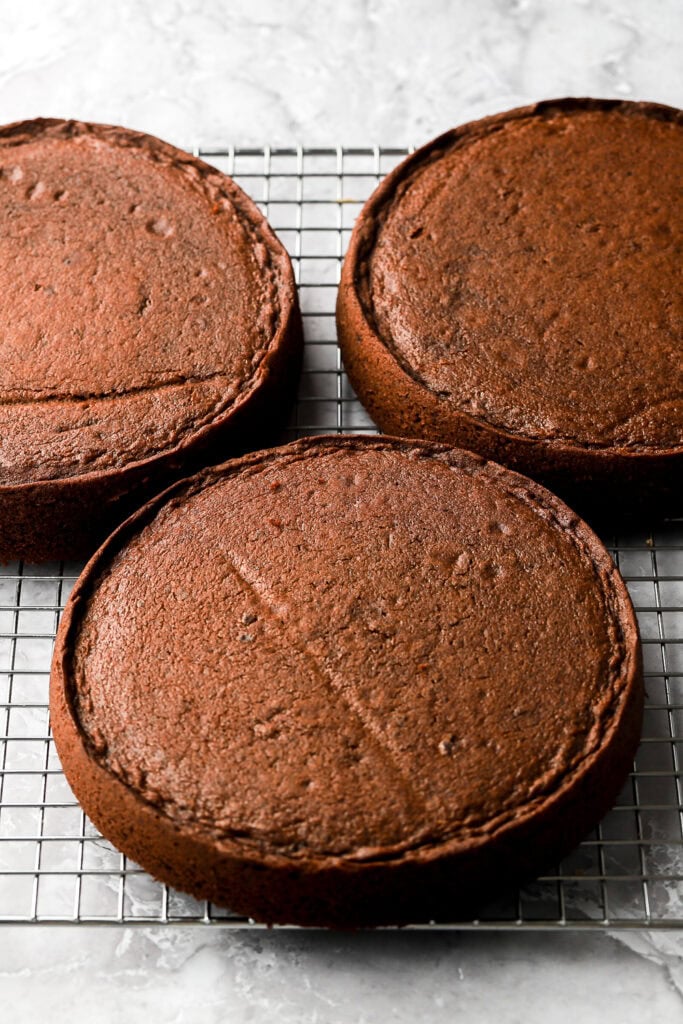
- Distribute the batter evenly. You should get about 500 grams in three 8 inch cake pans.
- Bake for about 30-35 minutes. When the cake is done baking, it will release itself from the edge of the pan and spring back when you press on the center. Let the cakes rest for just a few minutes, then flip them over onto a cooling rack or a tea towel.
- Allow them to cool completely to room temperature.
Oven temperatures vary a lot, so I recommend using an oven thermometer—cakes can be sensitive to temperature swings.

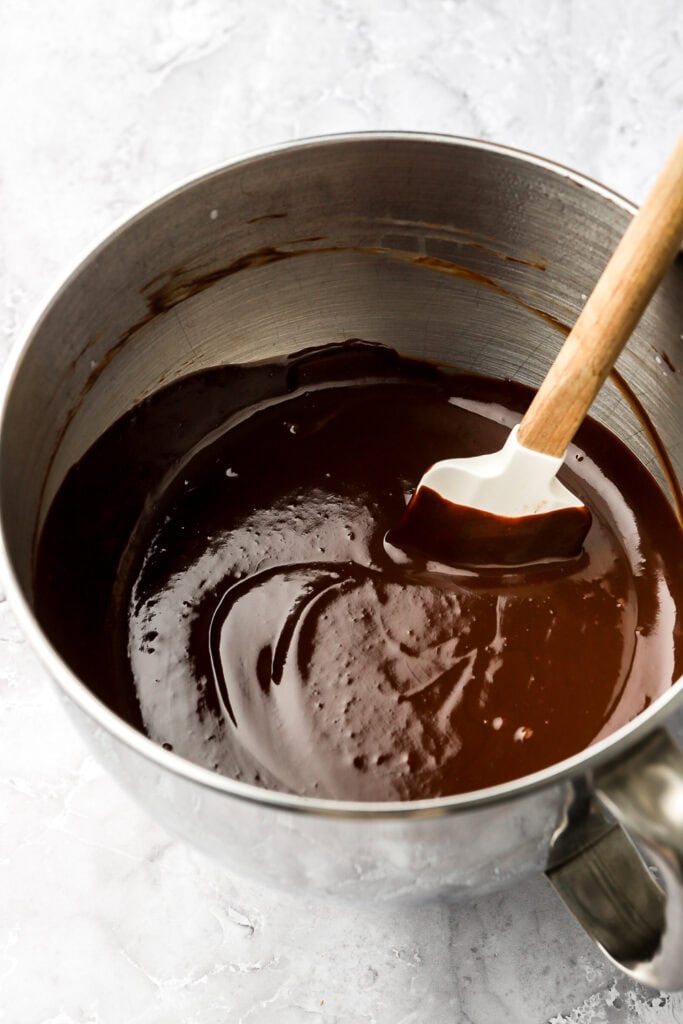
Chocolate Ganache
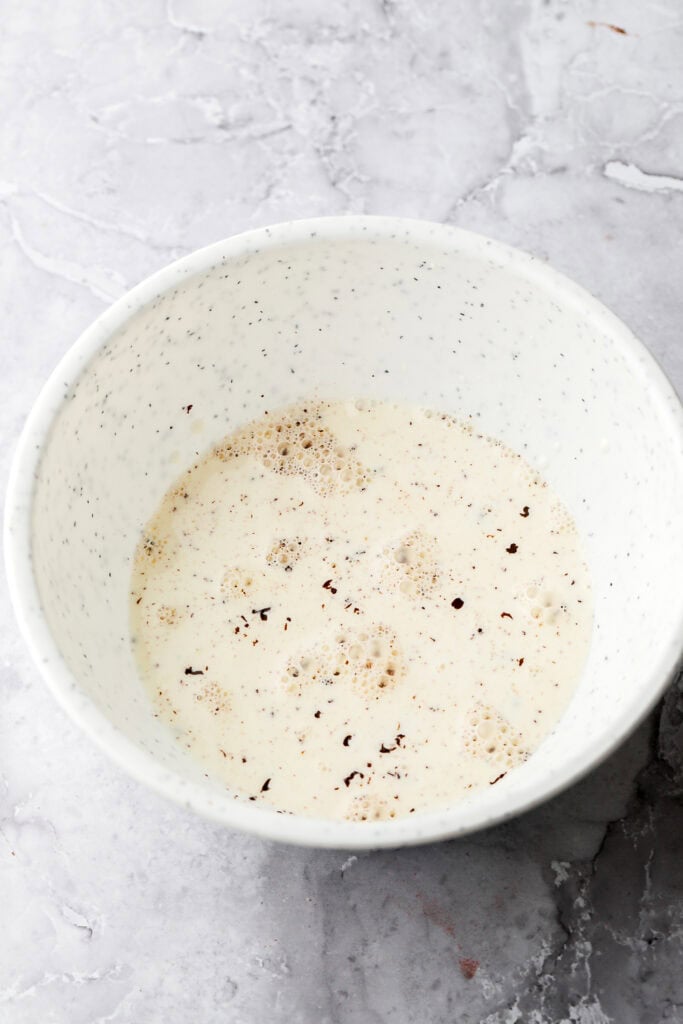
- Heat the cream in a saucepan on the stovetop, or a microwave, just until it’s steaming and begins to simmer around the edge of the pot (NOT boiling- if it gets too hot, let it cool for a minute before pouring over the chocolate).
- Pour the cream over the chopped chocolate in a bowl, cover it and let it rest for 1-2 minutes.
- Gently stir the cream into the chocolate from the center outwards until it’s completely smooth.
- Set aside to cool completely. Room temperature is best but it takes longer. If you refrigerate it to speed things up, stir it every 15–20 minutes so it cools evenly and doesn’t firm up around the edges.
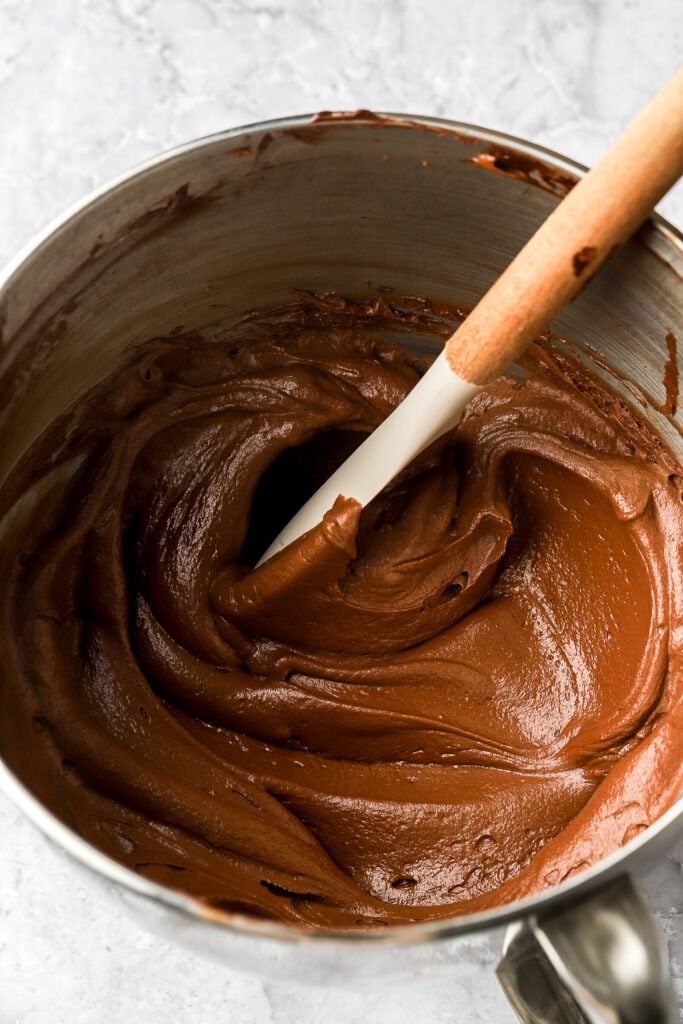
- Once the chocolate has cooled, split it in half (doesn’t have to be perfect), reserving plain chocolate ganache for the filling.
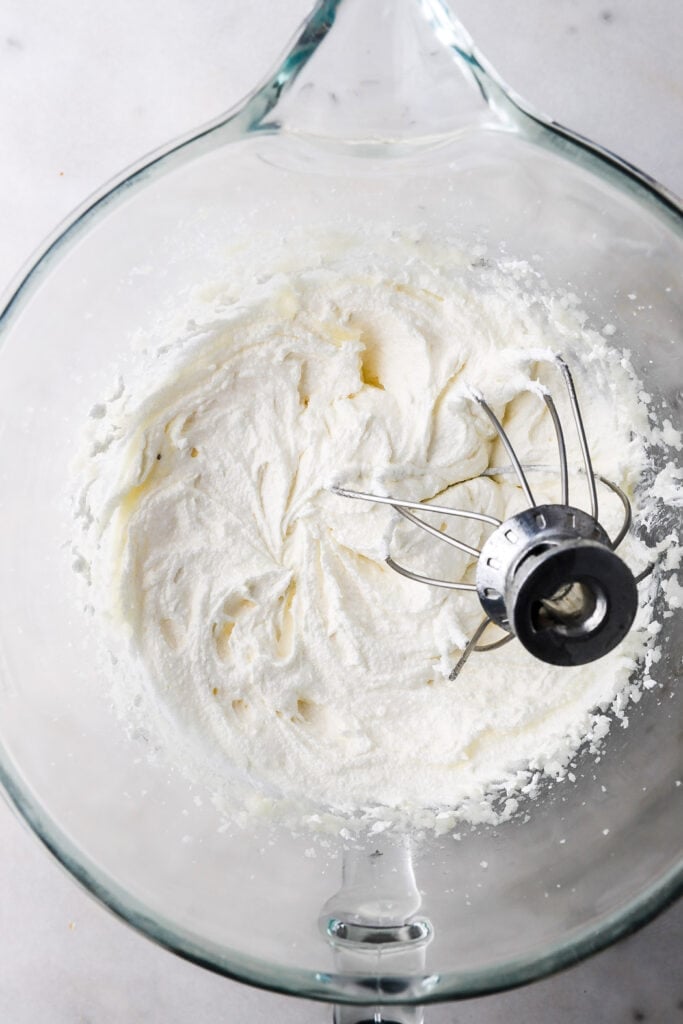
- Use a mixer to beat the other half of the chocolate ganache at full speed, until it lightens in color and resembles more of a frosting texture.
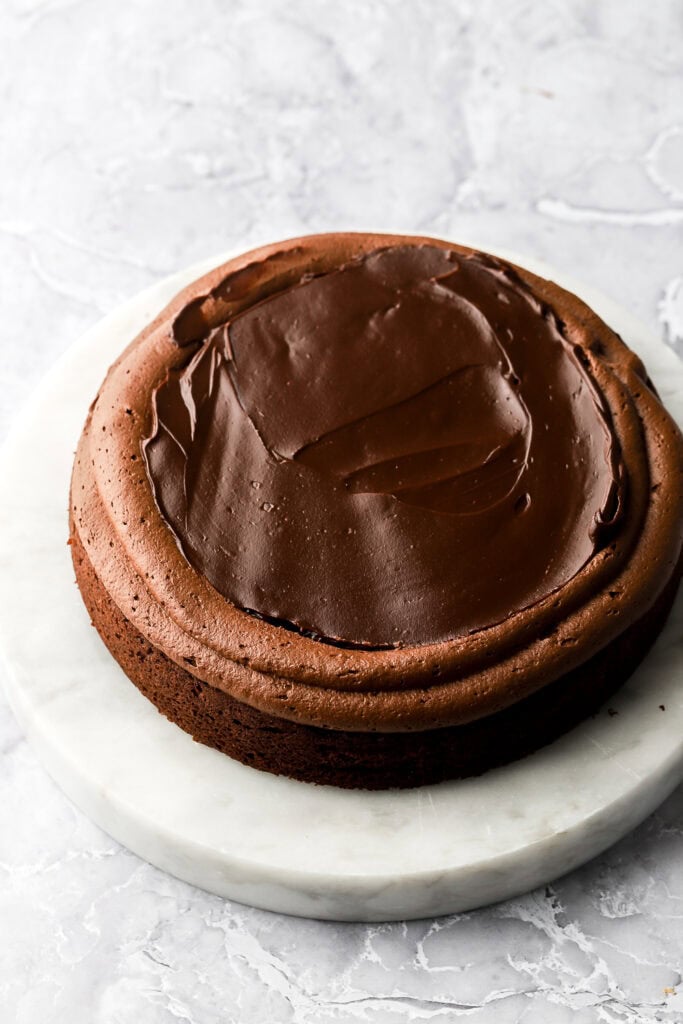
Assemble
- Use the whipped chocolate ganache to pipe a border around the edge of the cake.
- Then fill in the center with the plain un-whipped chocolate ganache.
- Repeat with the second layer and then place the third layer on top.
- Frost the cake with the rest of the whipped chocolate ganache and refrigerate the cake.
- For the chocolate drip, repeat the steps for the chocolate ganache (but with a smaller amount of ingredients).
- Let it cool for about 15-30 minutes, until it’s no longer warm and has thickened just slightly but is still fluid enough to drip.
- Spread it on top of the chilled cake, allowing it to run off the edge a little.
Tip: If at any point the ganache feels loose or the cake feels wobbly, refrigerate the cake (and ganache) for 10–15 minutes between layers.
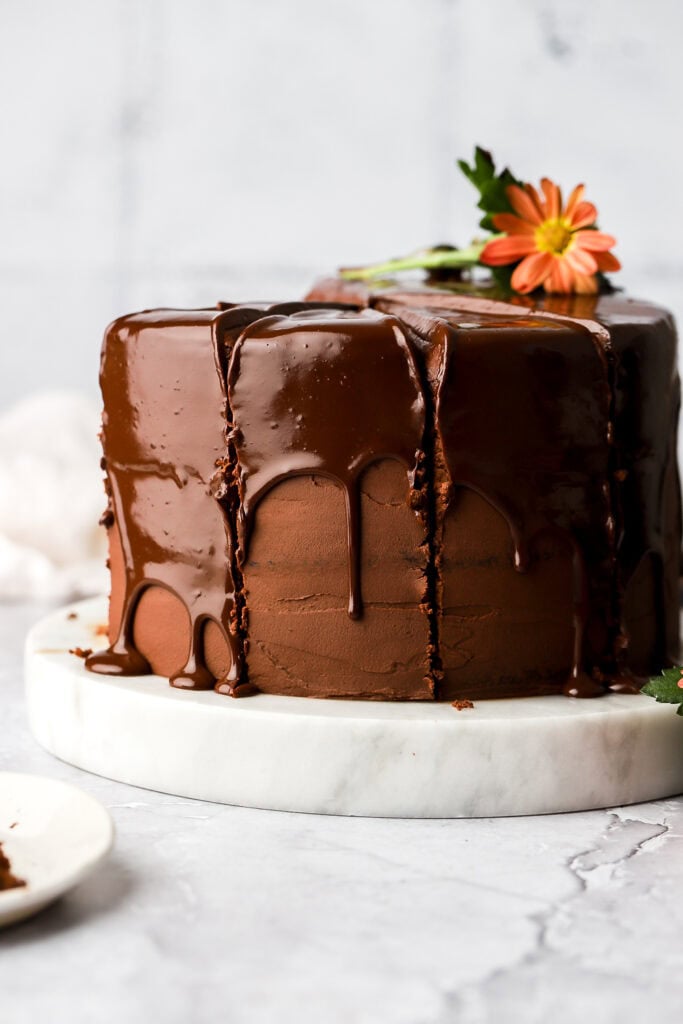
How to get a perfect chocolate drip
Chocolate drips are simple to make. Just follow the same process as making chocolate ganache with a few differences in how it’s used:
- You want the ganache to be fluid but not hot.
- Chill the cake so that you get nice clean drips – the chocolate ganache will set quicker as it’s dripping off the edge of a cold cake.
- Work quickly so it doesn’t set TOO quickly before it’s done dripping off the edge.
- For a waterfall drip, pour the chocolate on top of the cake and use an offset spatula or a spoon to spread it out to the edges, allowing it to fall off of the cake organically.
- For a more uniform drip, allow the chocolate to cool slightly more so it’s a little thicker and not quite as fluid. Then place it in a piping bag with a small tip and pipe the drips along the edge of the cake. Then spread the rest on top, being careful not to ruin the drips on the side of the cake.
How to make the cake ahead of time
To make the cake ahead of time you can make the cakes up to a couple weeks in advance. When you remove them from the oven, let them cool for about half an hour and then wrap them individually in plastic wrap. Then place them in a freezer bag, squeezing out all the excess air.
Bring back to room temperature before frosting. If you frost them while they’re frozen, the whipped ganache will set way too quickly from the cold cake and make it difficult to spread.
To make the ganache ahead of time just follow the instructions until it’s done, place it in an airtight container and refrigerate for a few days. Bring back to room temperature before assembling the cake.
Ganache can be sensitive to temperature sometimes so I prefer to use it fresh as I don’t like to refrigerate it. To save time, make it the night before and allow it to cool overnight at room temperature. Then assemble the cake in the morning.
How to store finished cake
I usually just cover it with a cake dome or place it in an airtight container and store it at room temperature for 1-2 days.
To refrigerate – store covered (or store slices in an airtight container) for up to a week, though I prefer freezing for the freshest texture.
To freeze the whole cake, refrigerate it until it’s firm. Then wrap it in plastic wrap so it’s completely covered. Then wrap it in aluminum foil and freeze.
To freeze slices, place the slices in an airtight container and freeze. Bring it back to room temperature by thawing for a few hours before serving.
Thanks so much for reading—if you have questions, leave a comment below. And if you make this cake, I’d be so grateful for a 5-star rating or review.
Have a blessed day and happy baking!
Love, B

This recipe looks amazing! I’m going to make it for my sister’s wedding next week. I can see you can double up the recipe, do you think it will stack ok? Also I am planning on using Cadbury darkmilk for the ganache as it’s her fave! I’ve looked at your ganache advice and seen dark chocolate 1:1, milk chocolate 2:1. Dark milk is somewhere in the middle so do you think 1.5:1 will be ok? Thanks in advance 😊
Hi Kath, I haven’t used that chocolate before but I yes would go in the middle lol but make sure to test it before hand on a sample batch before the wedding! 🙂
This cake is a firm favourite, the unbeatable bake! I first made this cake this time last year for my partners best friends birthday and he loved it! Ever since it’s become the cake for all of his friends birthdays, I made two for my baby shower celebrating my baby girl in March! As well as ours and my son’s 2nd birthday in August just gone. The only cake my son will eat 😂 honestly it’s the best, I occasionally struggle with assembling as we have found we like to add some milk chocolate to the ganache which makes it a little runnier but we persevere every time and get it done with a extra chocolate, it’s my favourite cake to make AND EAT. Thank you for being like a long lost family friend or the great grandma of recipes I never had, myself, my little family and our friends lives are all the more fun for you being in it! Ps, I’m making two this week for the group, they’re animals 😂