
Tuxedo Cake Recipe
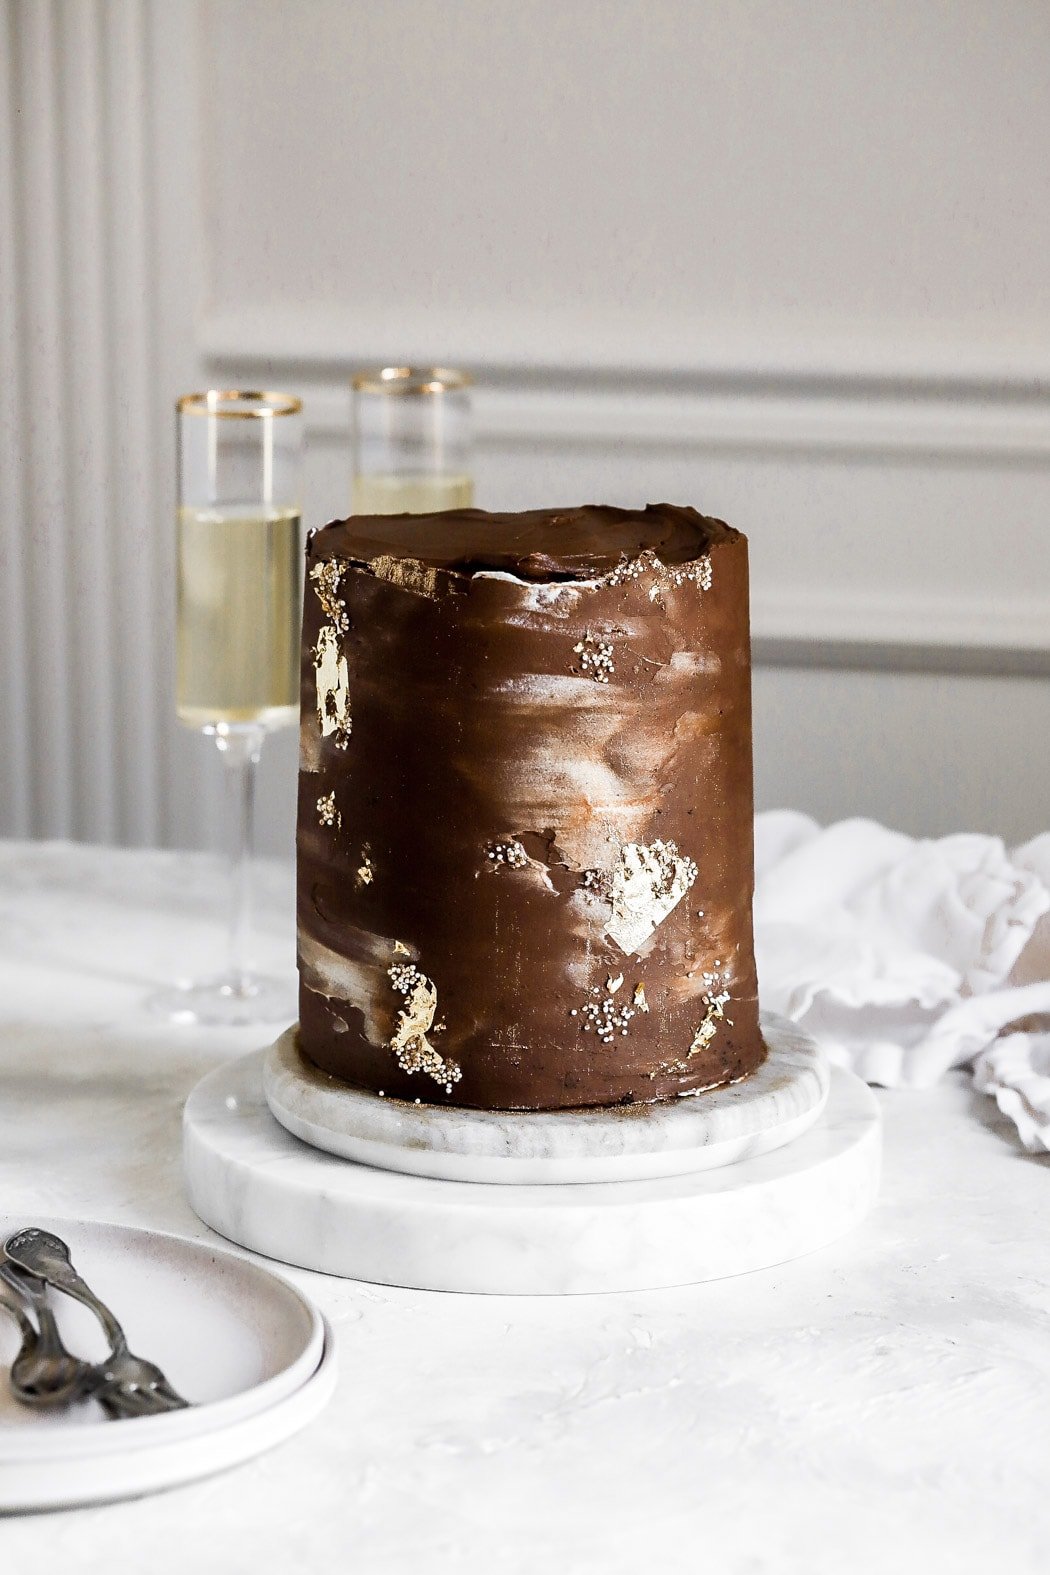
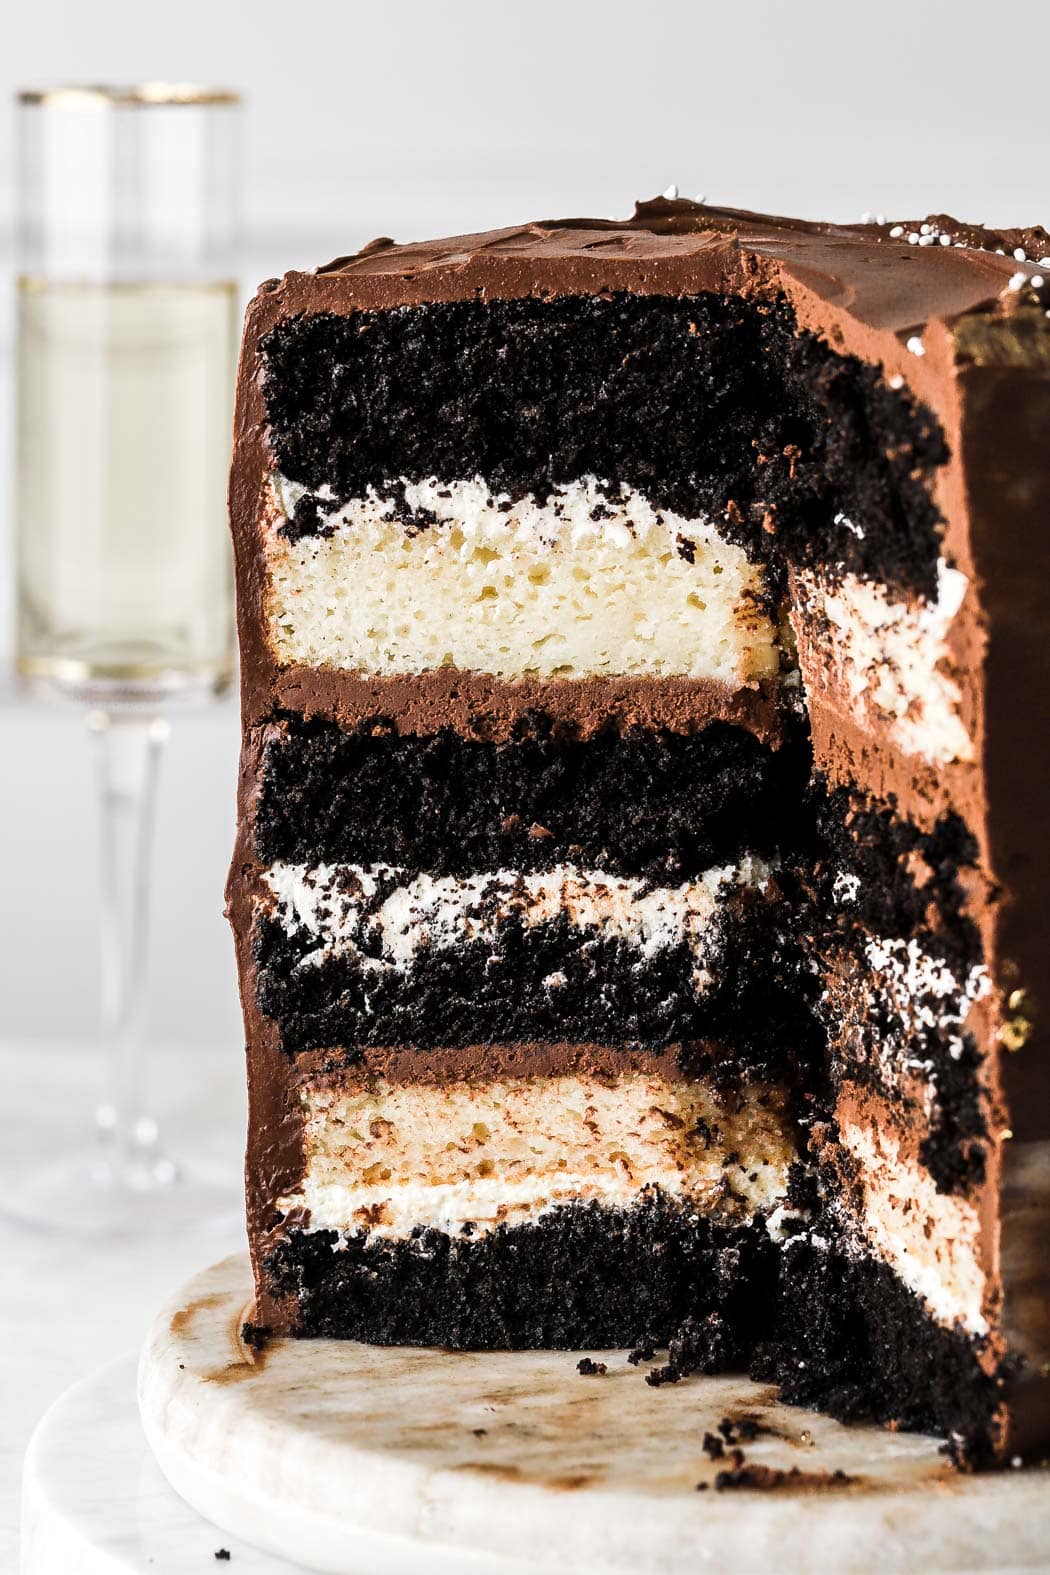
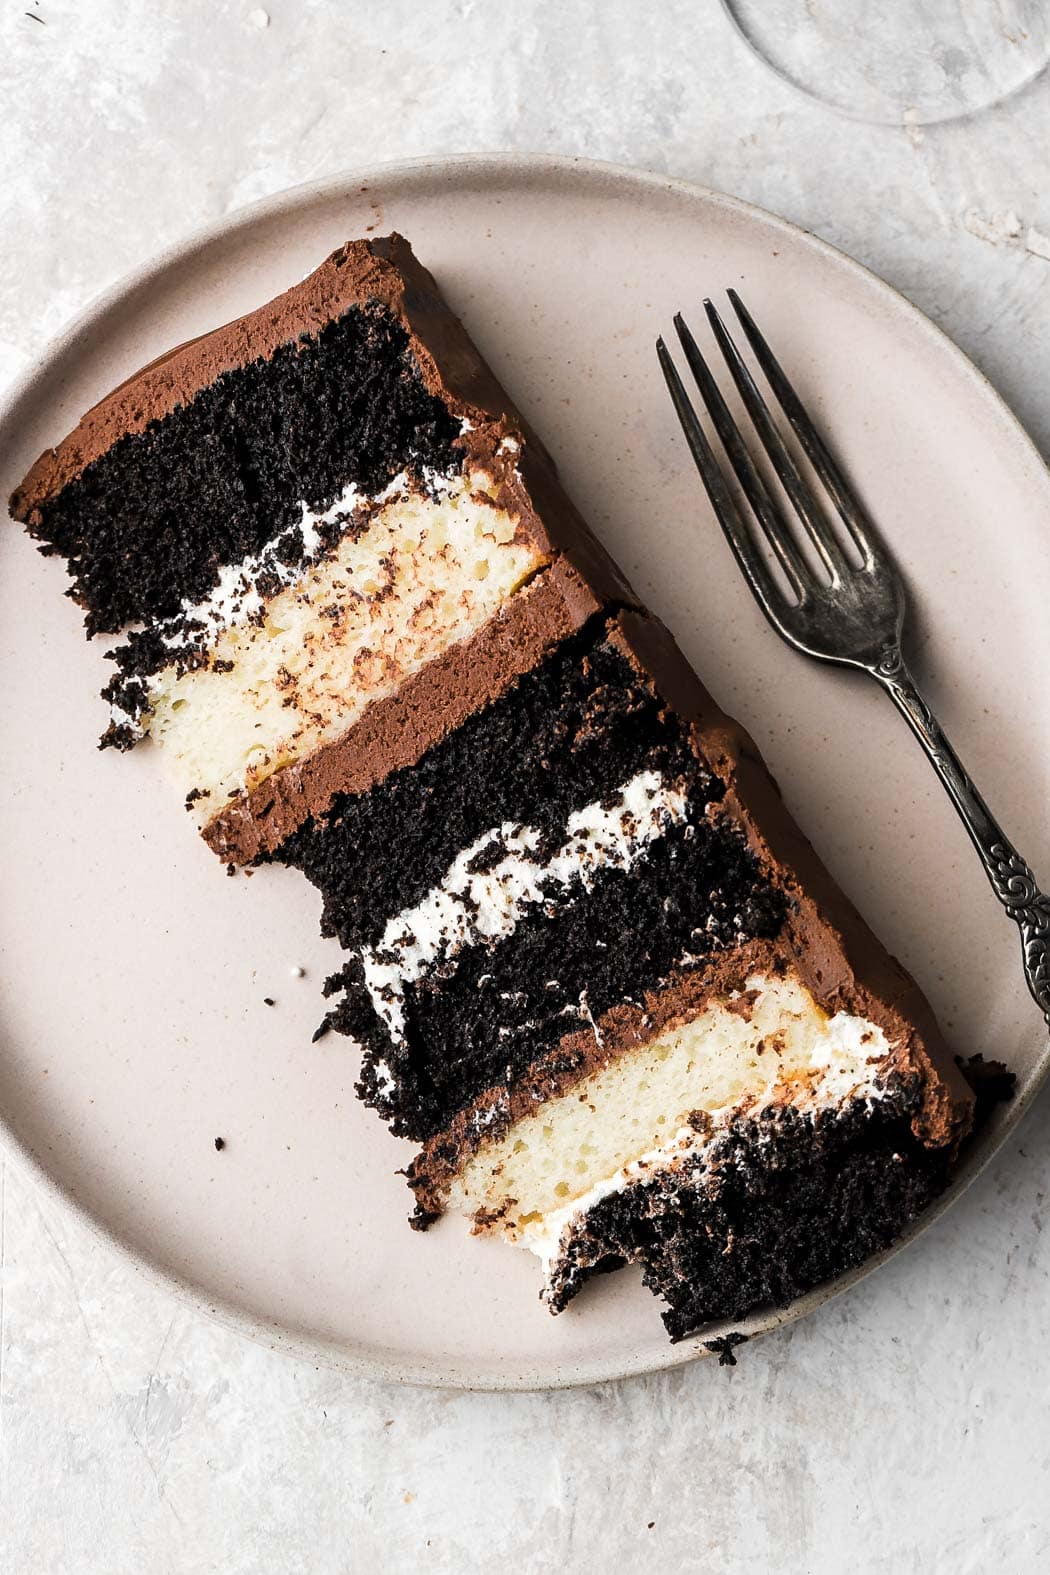
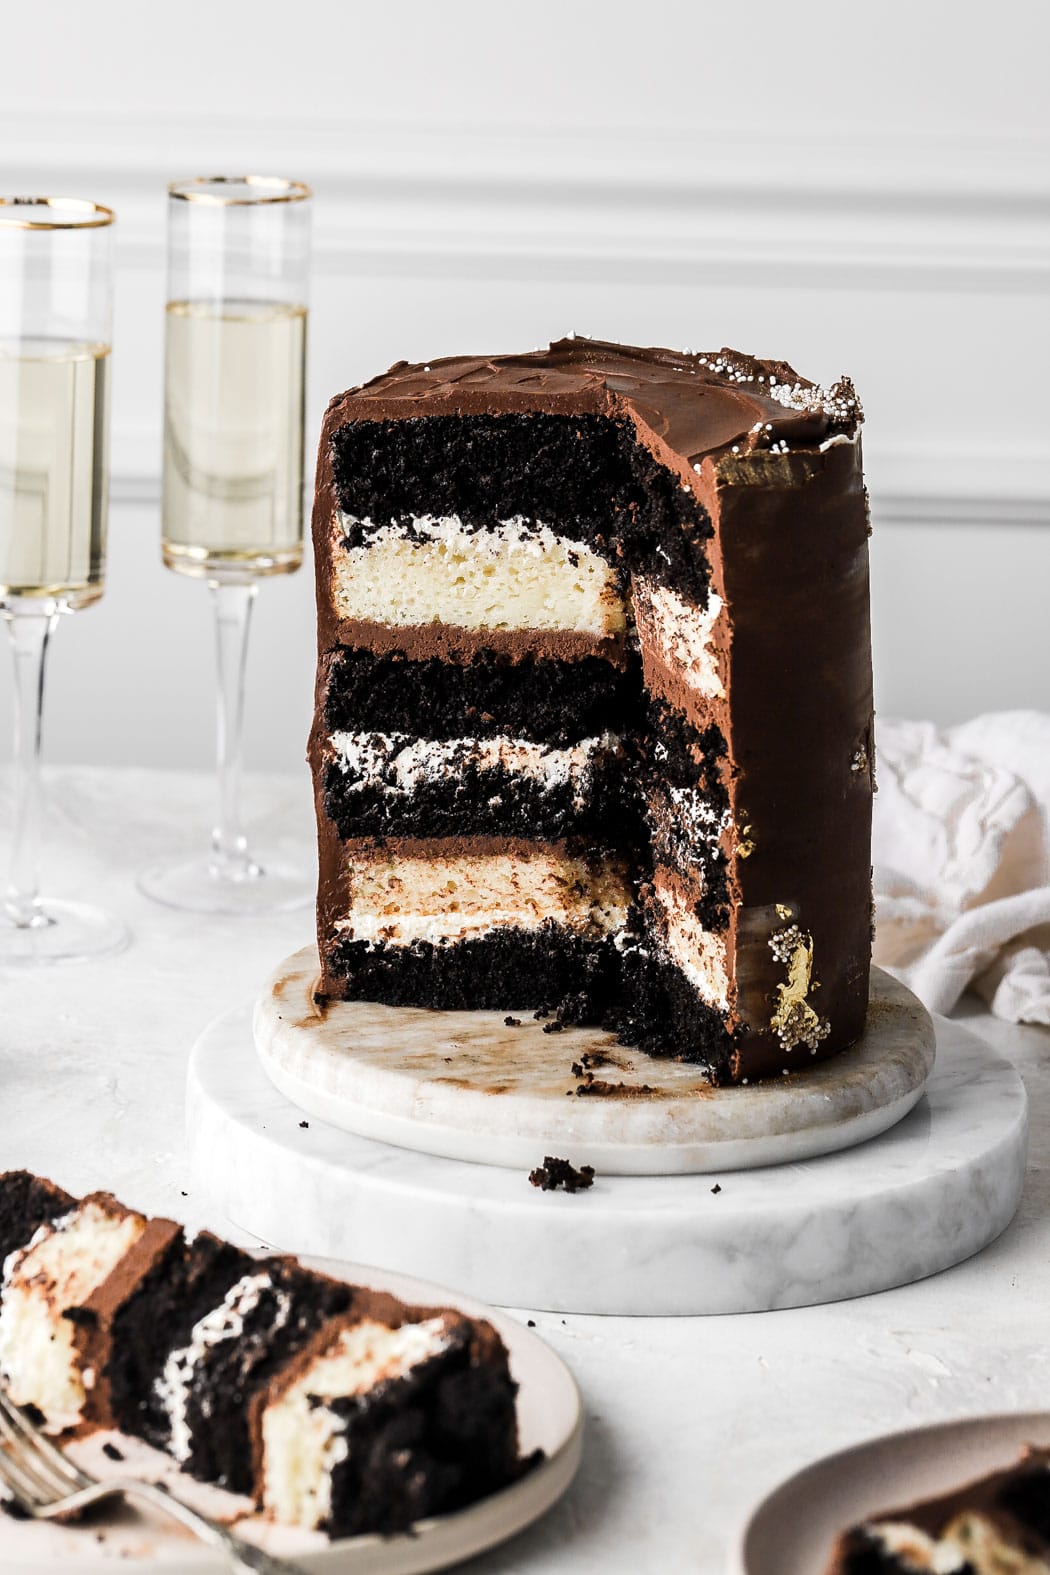
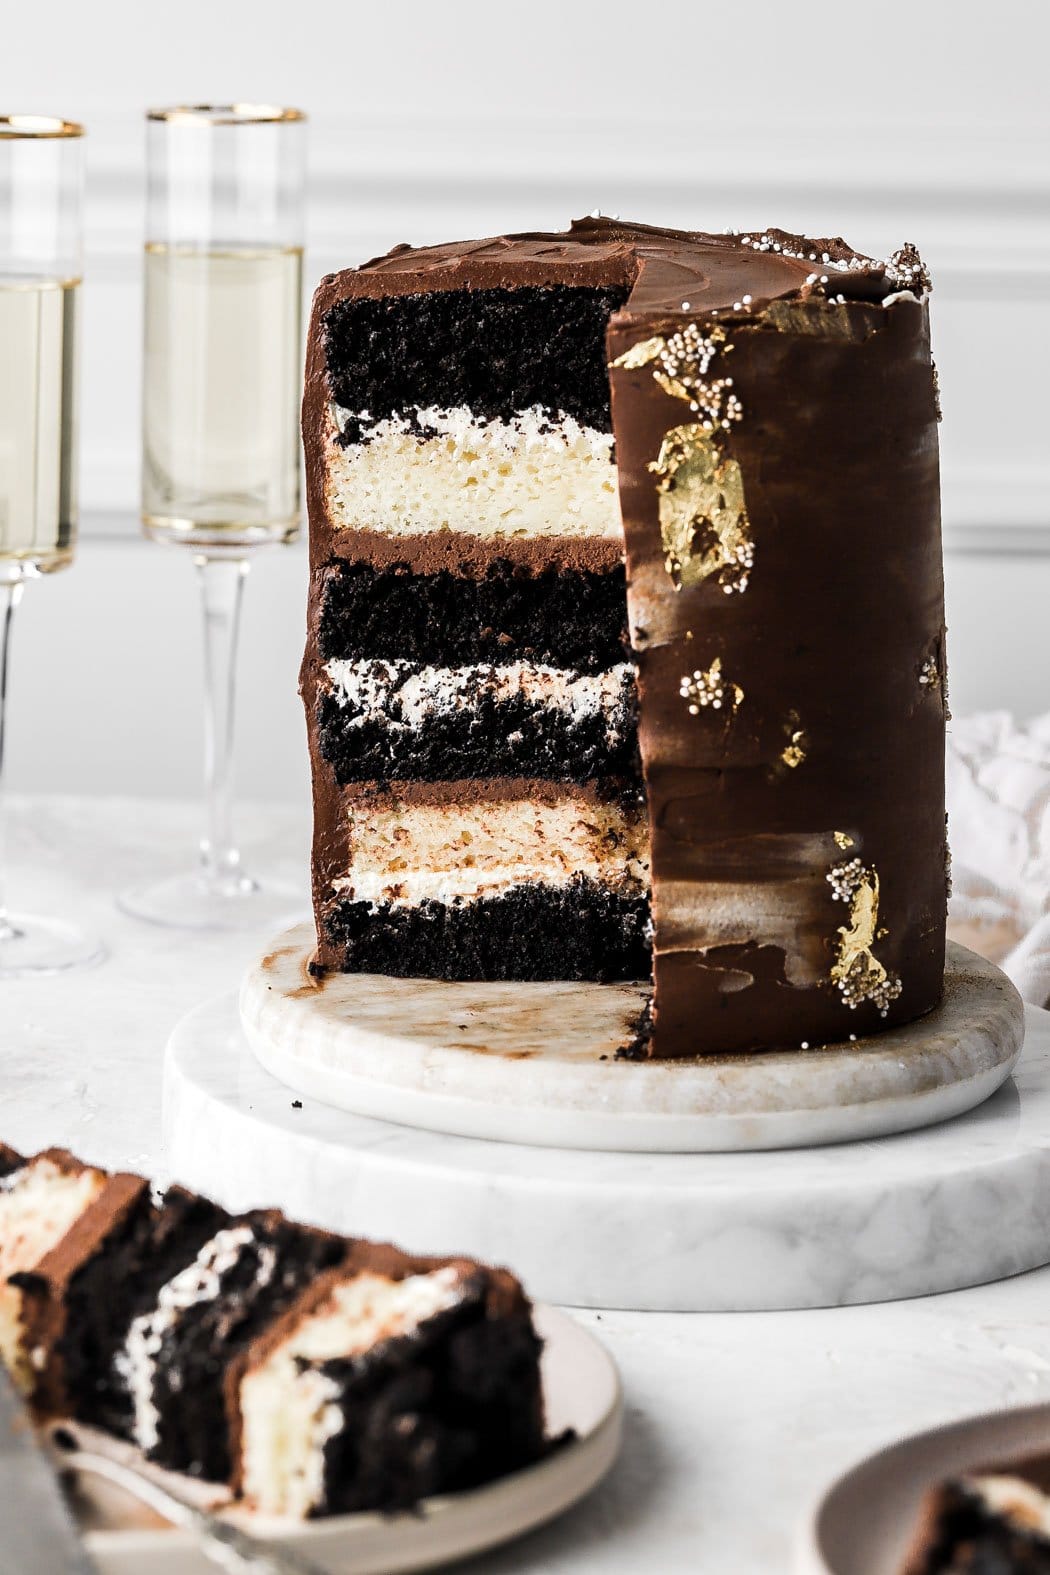
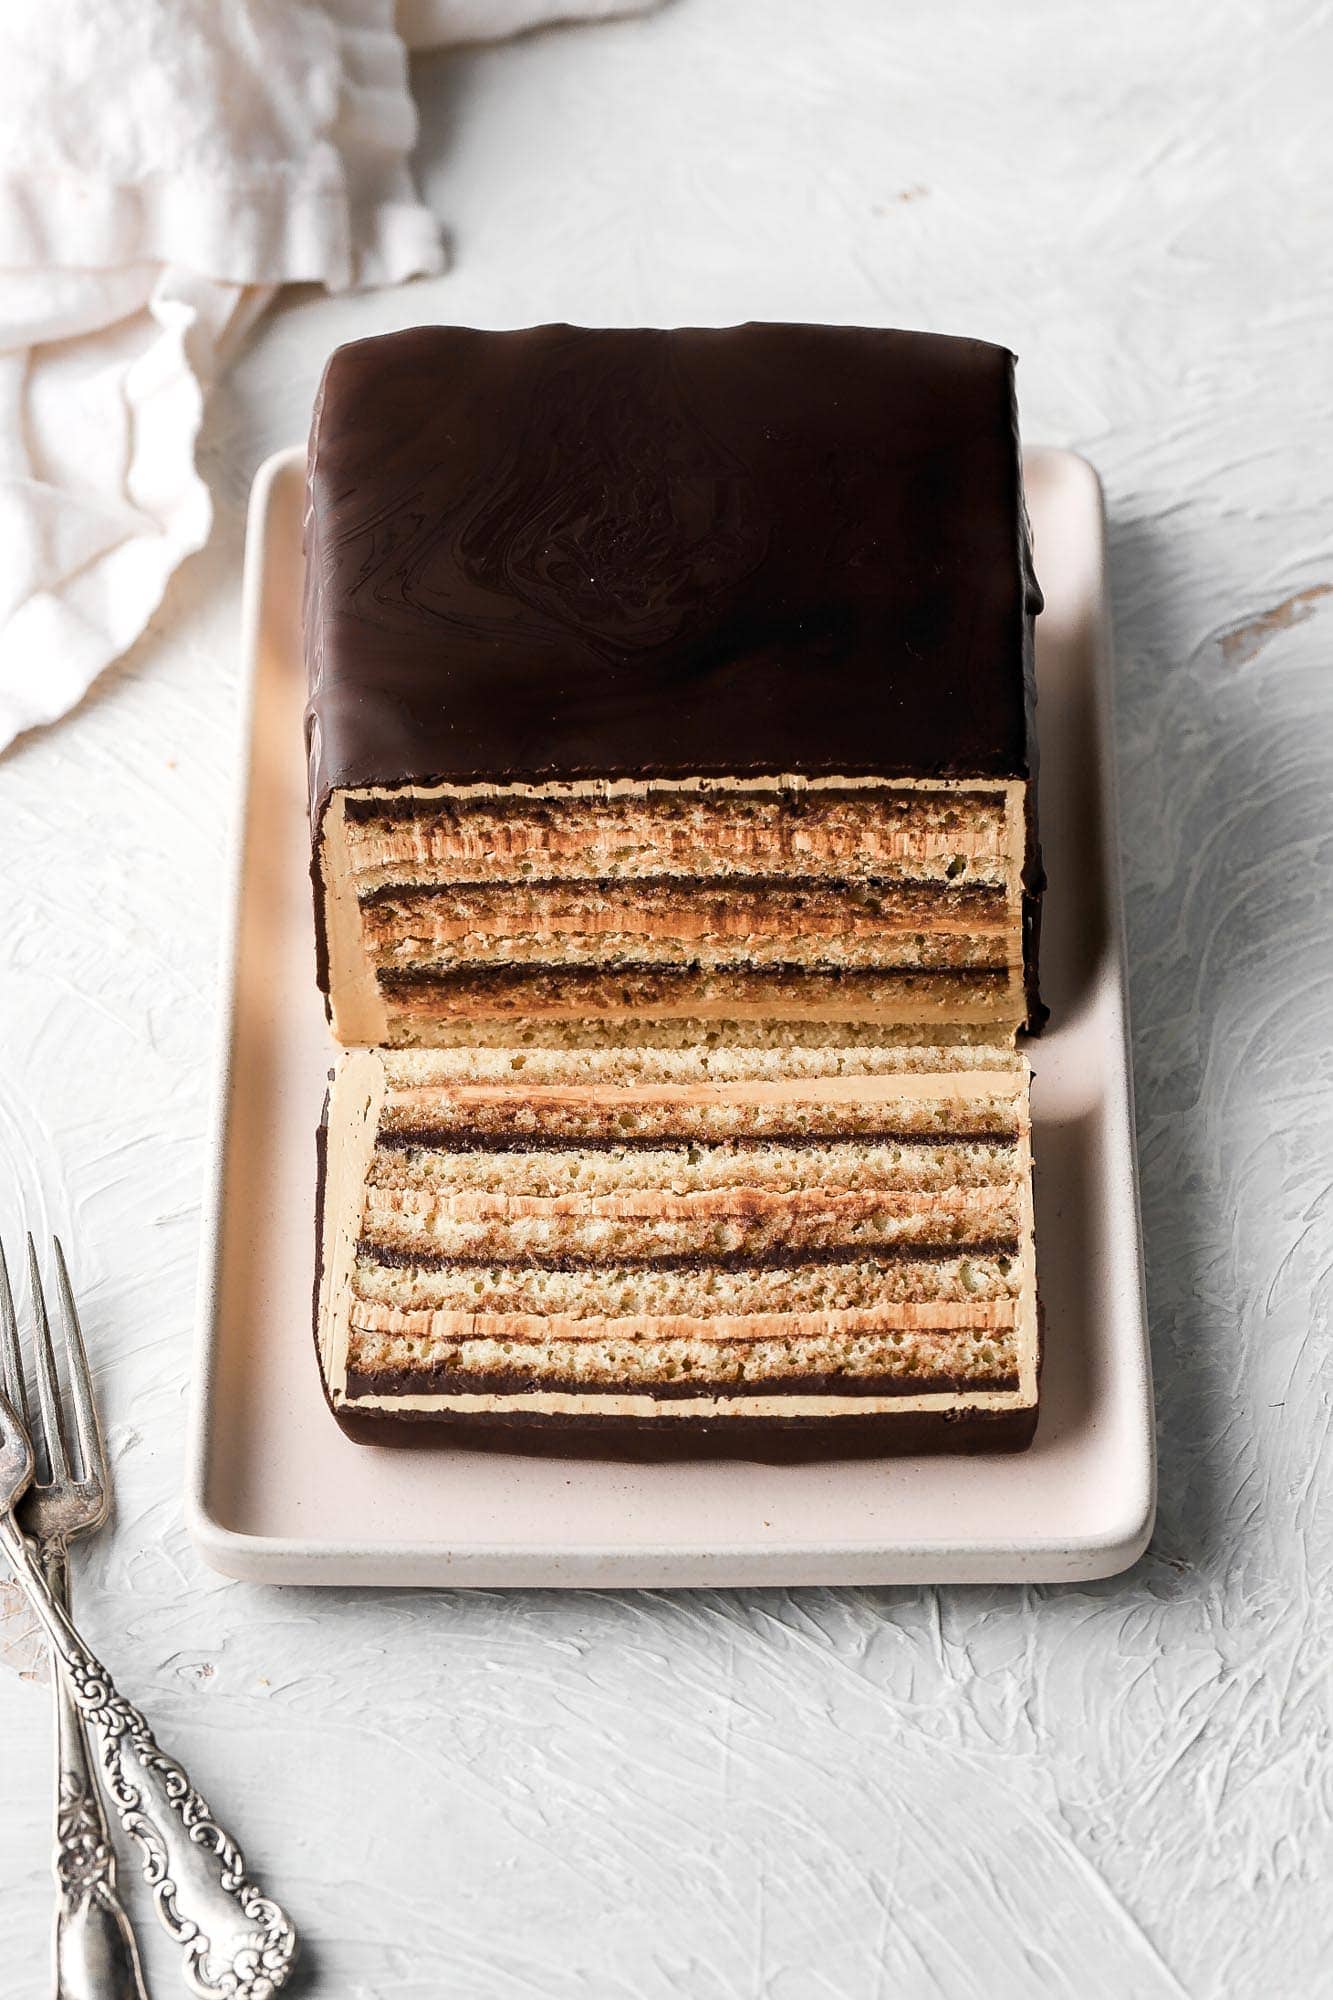
Truly one of the best cakes I’ve ever made. This tuxedo cake has four layers of moist chocolate cake, two layers of fluffy white cake and alternating whipped dark and white chocolate ganache between every layer. She’s a real beauty.
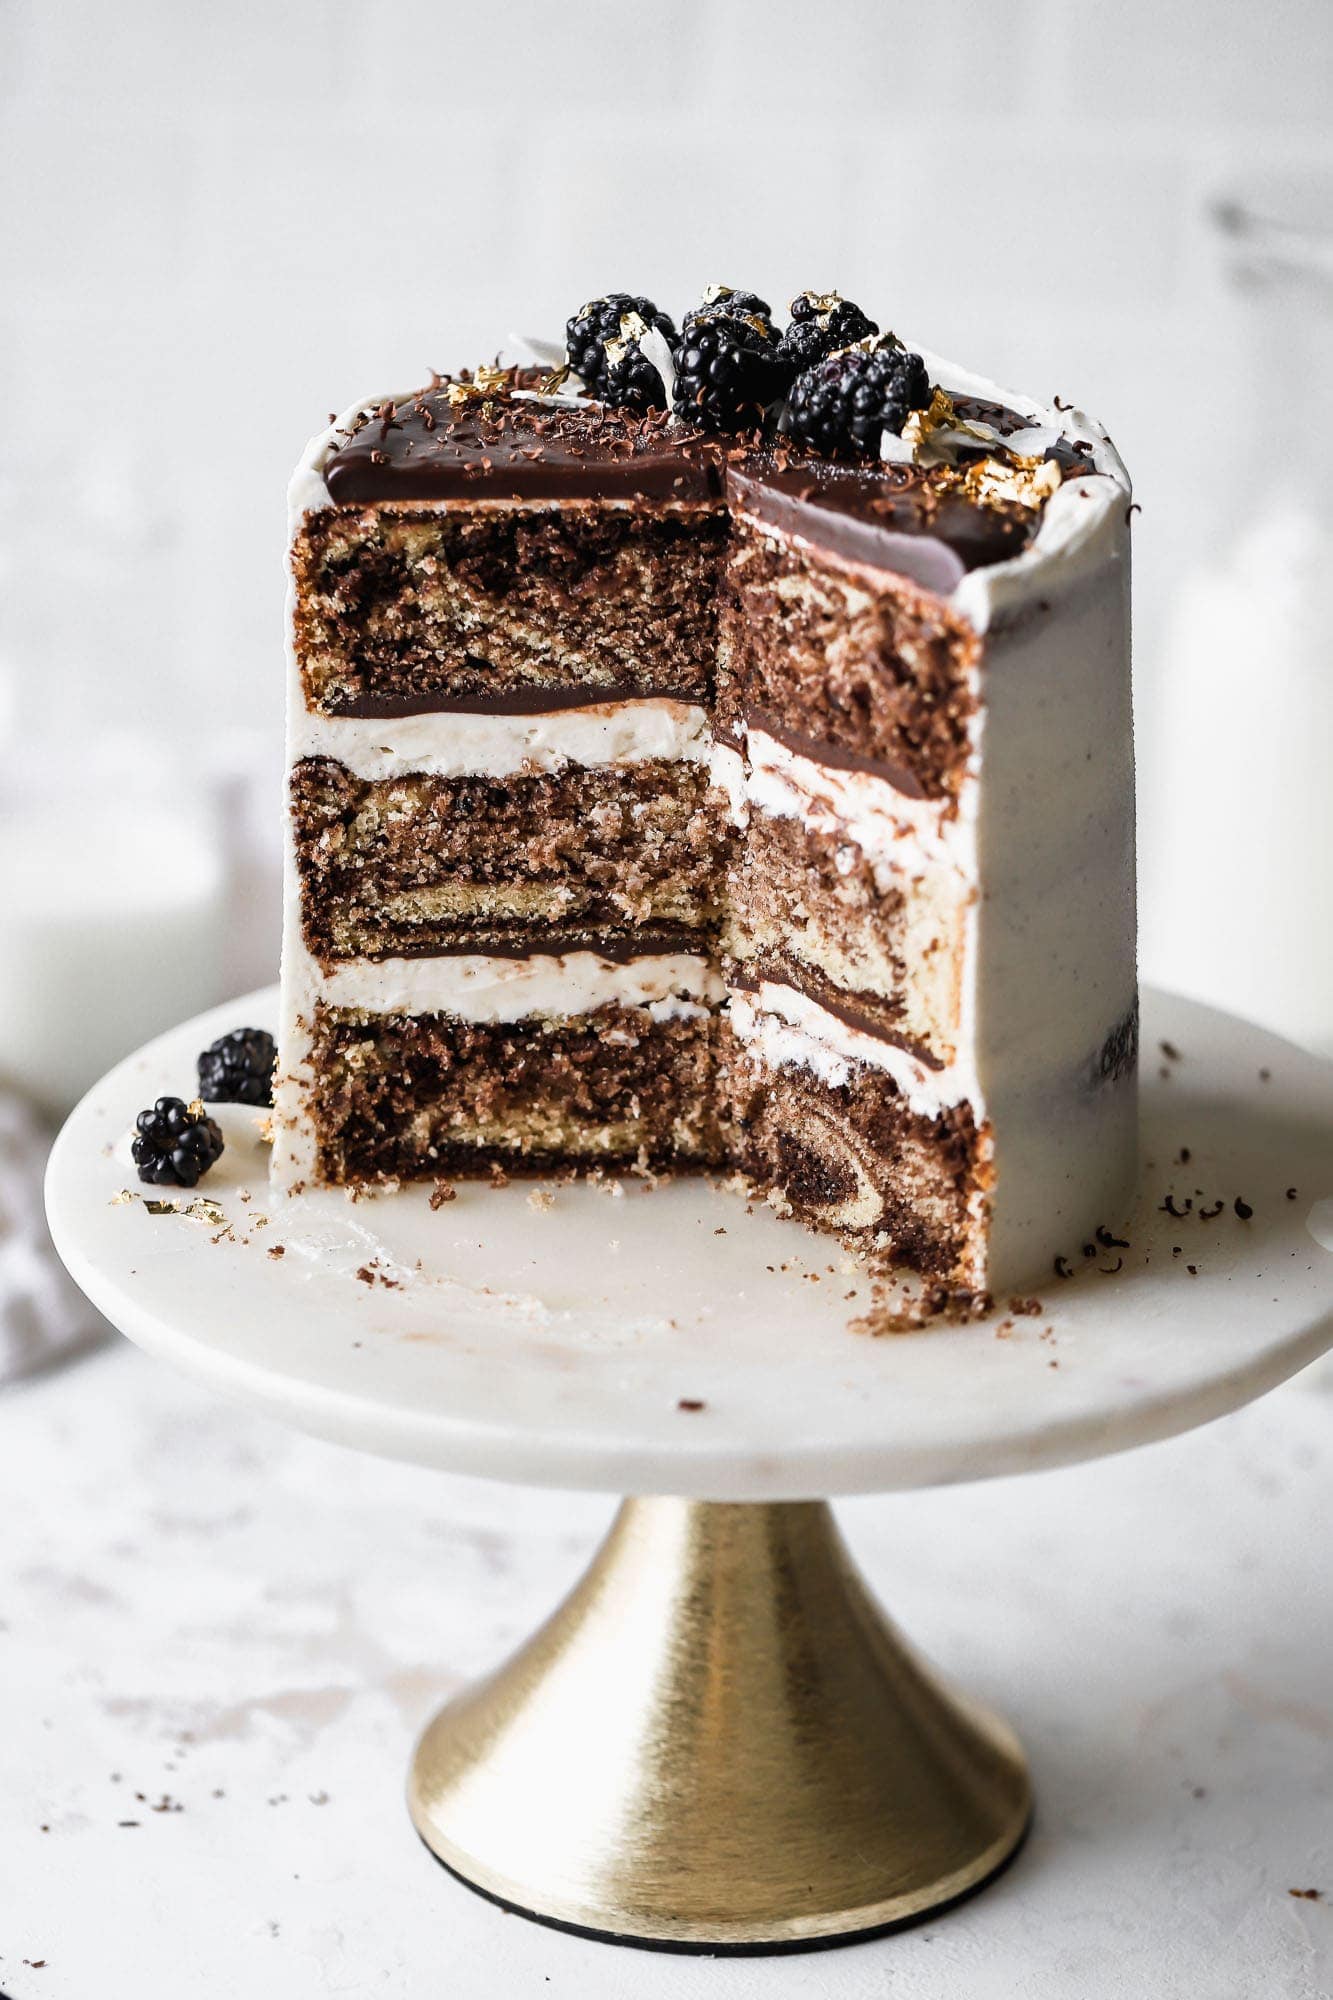
This cake has been on my to do list for a long time! My first inspiration came from the incredible costco tuxedo cake. This is not a copycat, but a copycat version of that is also on my to do list. The second source of inspiration is the blondery cake.
I came across that beauty when planning out Zara’s birthday cake part and I knew I had to make something with a ton of layers like that. What an absolutely stunning cake!
What is a tuxedo cake
So when I did my research on tuxedo cakes, there was no one right answer on what exactly a tuxedo cake is and where it originated. The consensus is that it’s basically a cake that’s black and white.
To keep it a true black and white, most people incorporate some form of dark chocolate and some form of white chocolate in the recipe. It should also visually be black and white.
A lot of recipes include a dark or a white chocolate mousse but that wouldn’t hold up very well with all the layers in this cake.
How to make this tuxedo cake
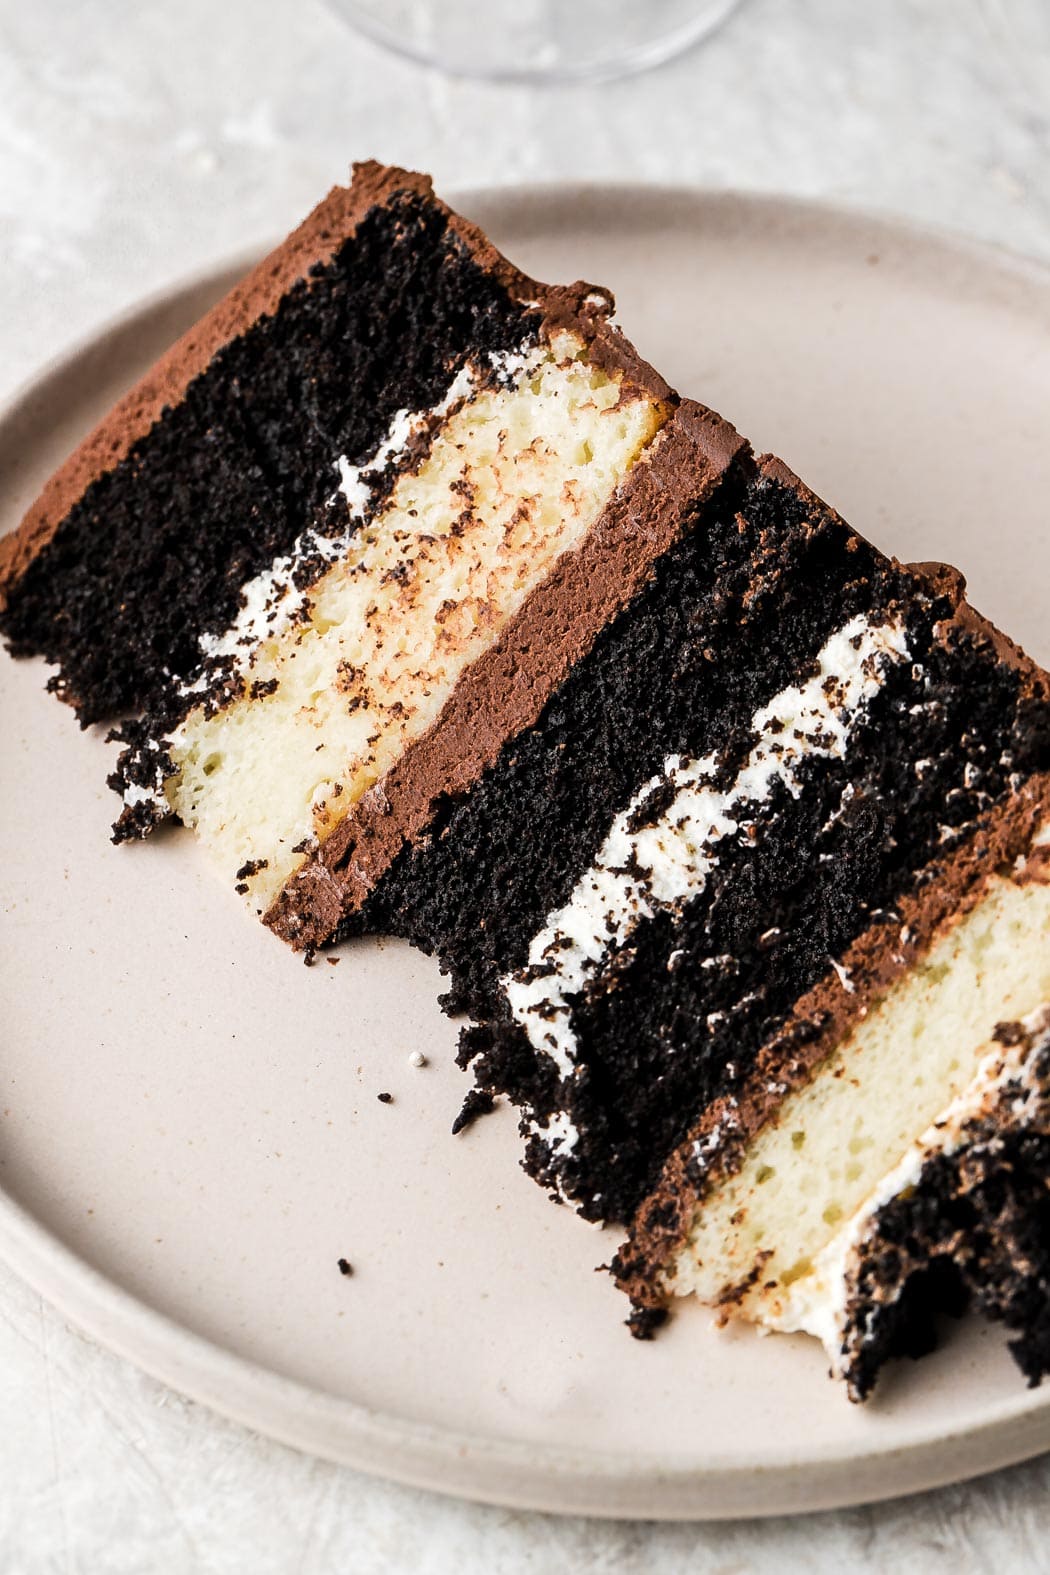
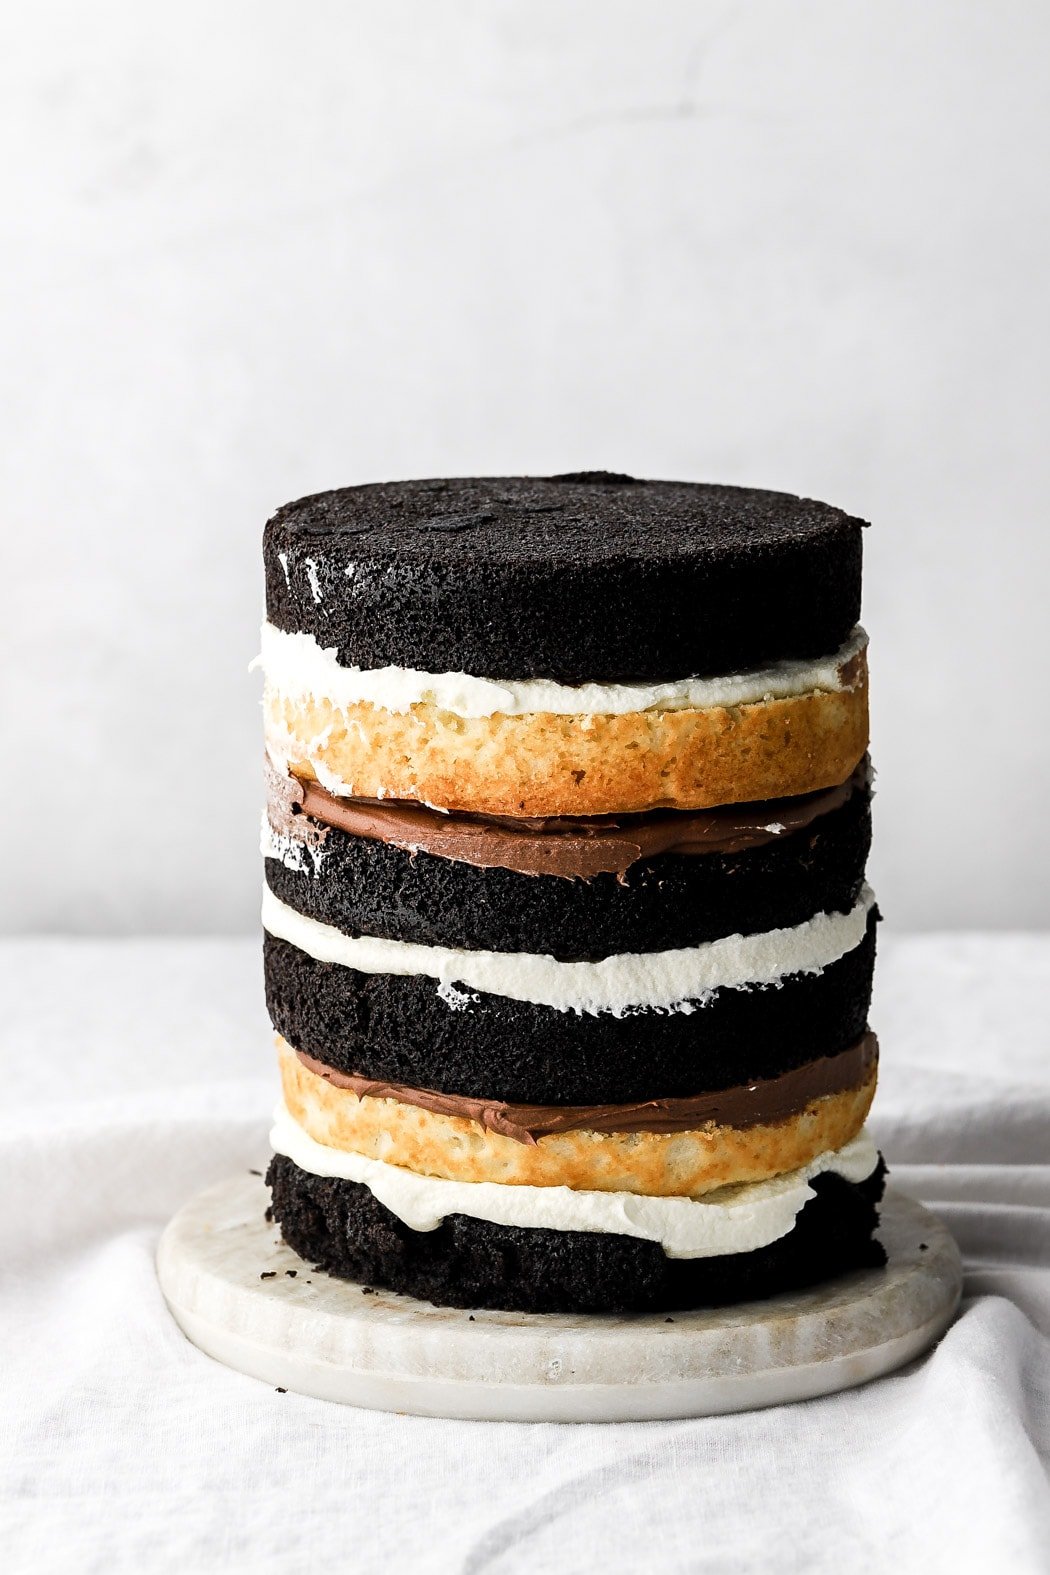
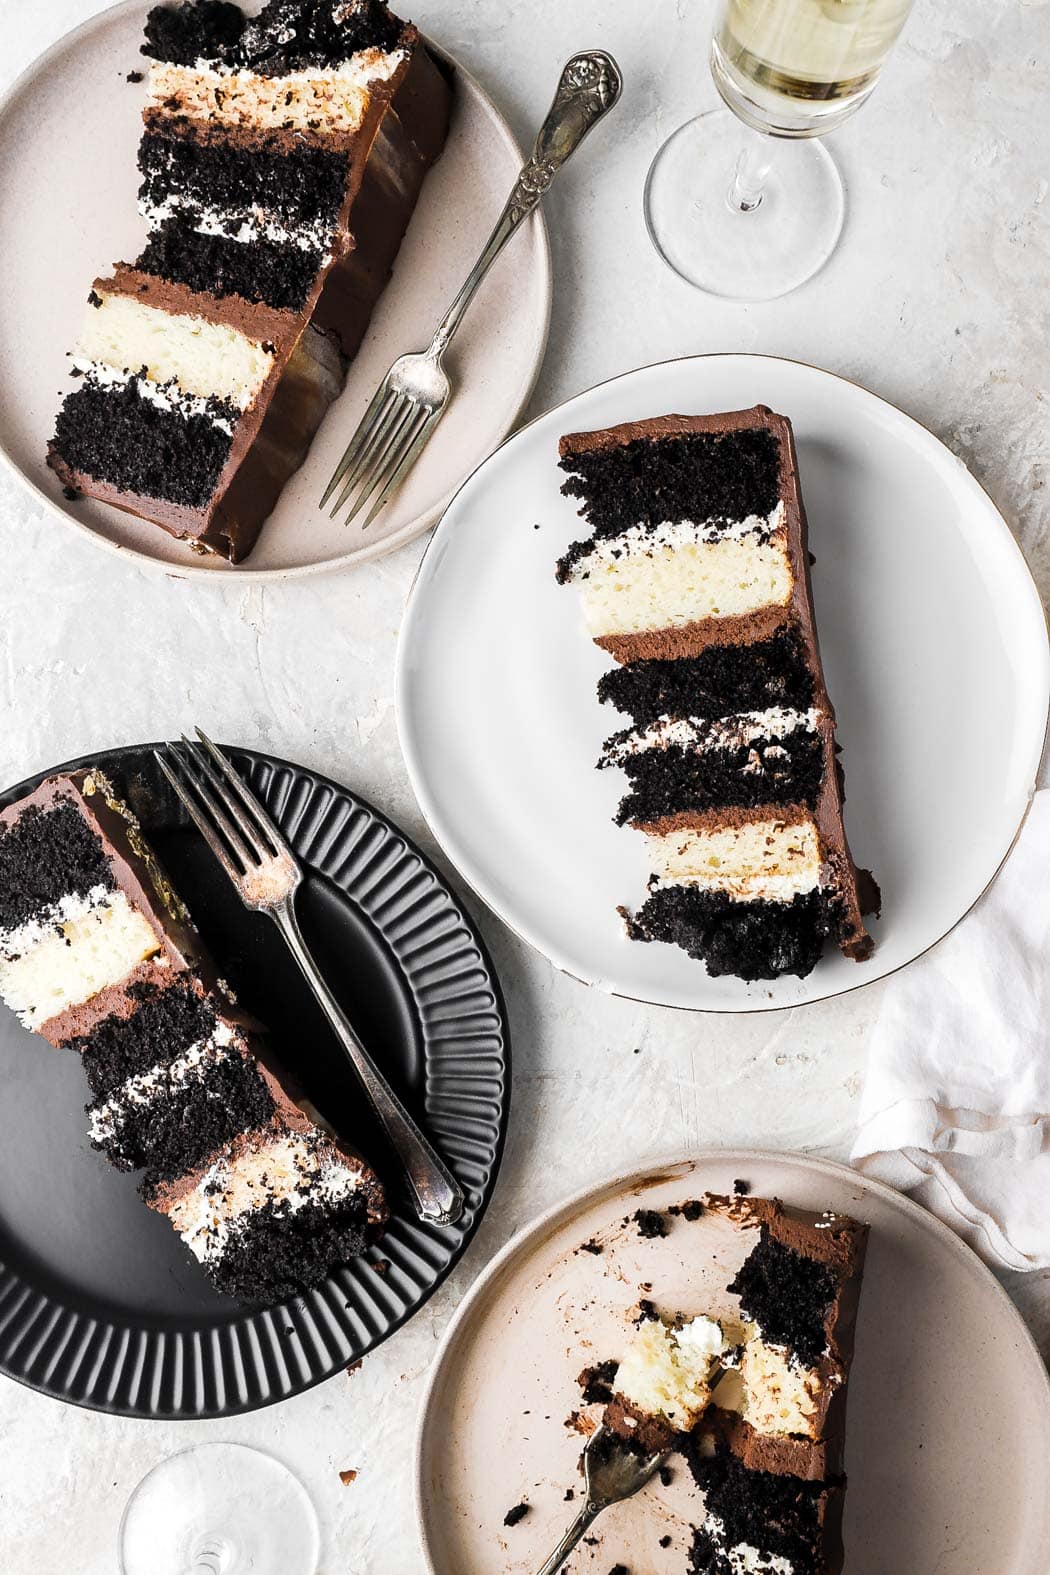
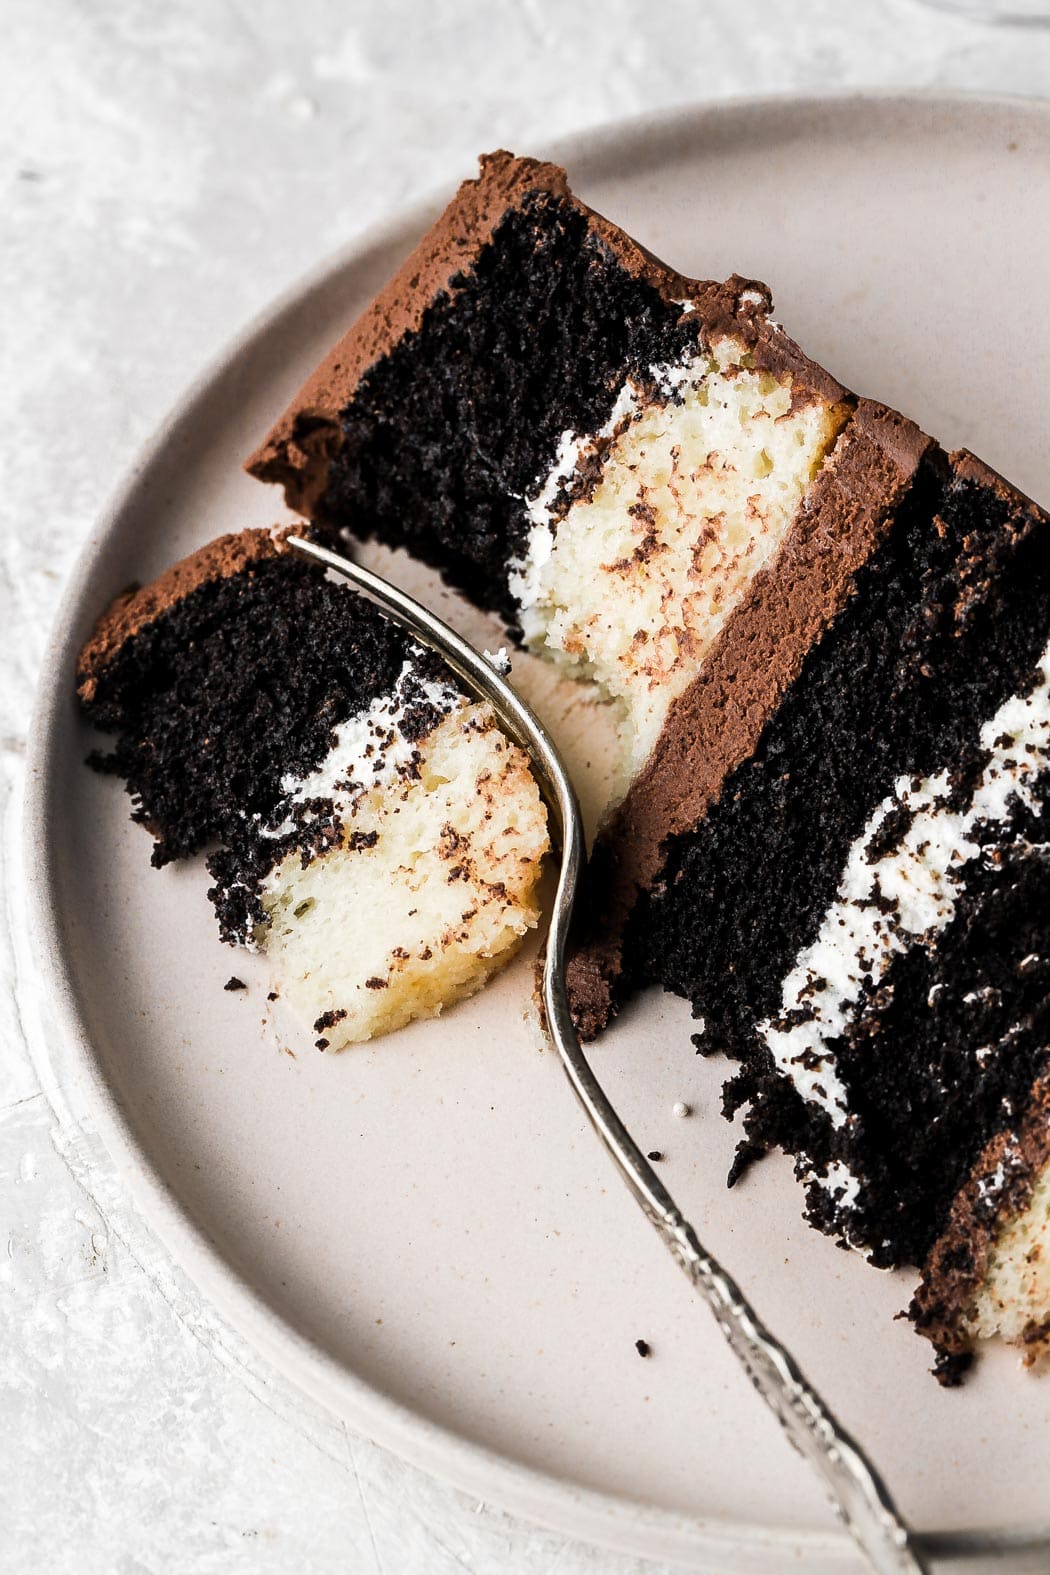
So my tuxedo cake consists of four dark chocolate cake layers, two vanilla white cake layers and alternating layers of whipped dark and white chocolate ganache.
The cake layers
I wanted this to be a dark and rich chocolate cake so I went with my chocolate cake from my cookbook Frosted and subbed half the dutch process cocoa powder for black cocoa powder.
I also wanted the vanilla cake to be the same texture but also more white in color. So I used my 4 inch vanilla recipe but I subbed the butter for oil so it has the same texture as the chocolate cake. Then I subbed the whole egg for two egg whites and the milk for heavy cream.
Ingredients:
- Flour: I use all-purpose flour in both cakes. 1:1 substitute for cake flour works as well.
- I also HIGHLY recommend using a digital scale, as flour is the most over-measured ingredient.
- Sugar: I used granulated sugar in both cakes. I don’t recommend using a different sugar or reducing the amount.
- Oil: any kind of neutral oil works. I used oil instead of butter so the cakes can be more spongy and have a similar texture/consistency.
- Sour Cream: unsweetened plain or greek yogurt also works.
- Heavy Cream: I use heavy cream in vanilla cakes when I replace the whole egg with egg whites. This makes up for the loss of fat from removing the egg yolks and provides extra flavor and tenderness. Milk also works though.
- Coffee: I used coffee in the chocolate cake to give it a dark color and more intense flavor.
- Vanilla: use a clear vanilla extract to keep the white cake as white as possible
- Cocoa Powder: I used half dutch process, because I like that flavor, and half black cocoa powder, to give it a darker color. Any kind of cocoa powder works, you’ll just likely get a lighter color.

How to make whipped chocolate ganache
Ganache is one of the easiest frostings to make! The most important part is just getting the ratio of chocolate to heavy cream right. Dark chocolate is going to need a lot more cream than white chocolate to get them to the same consistency. I have more on that in my full Chocolate Ganache Ratio post.
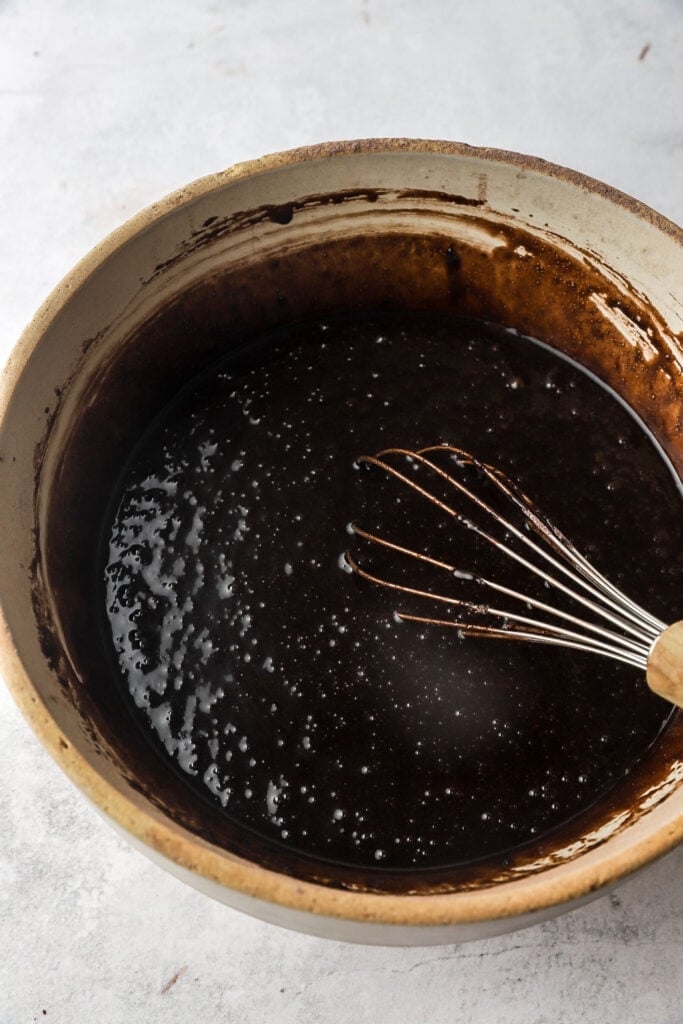
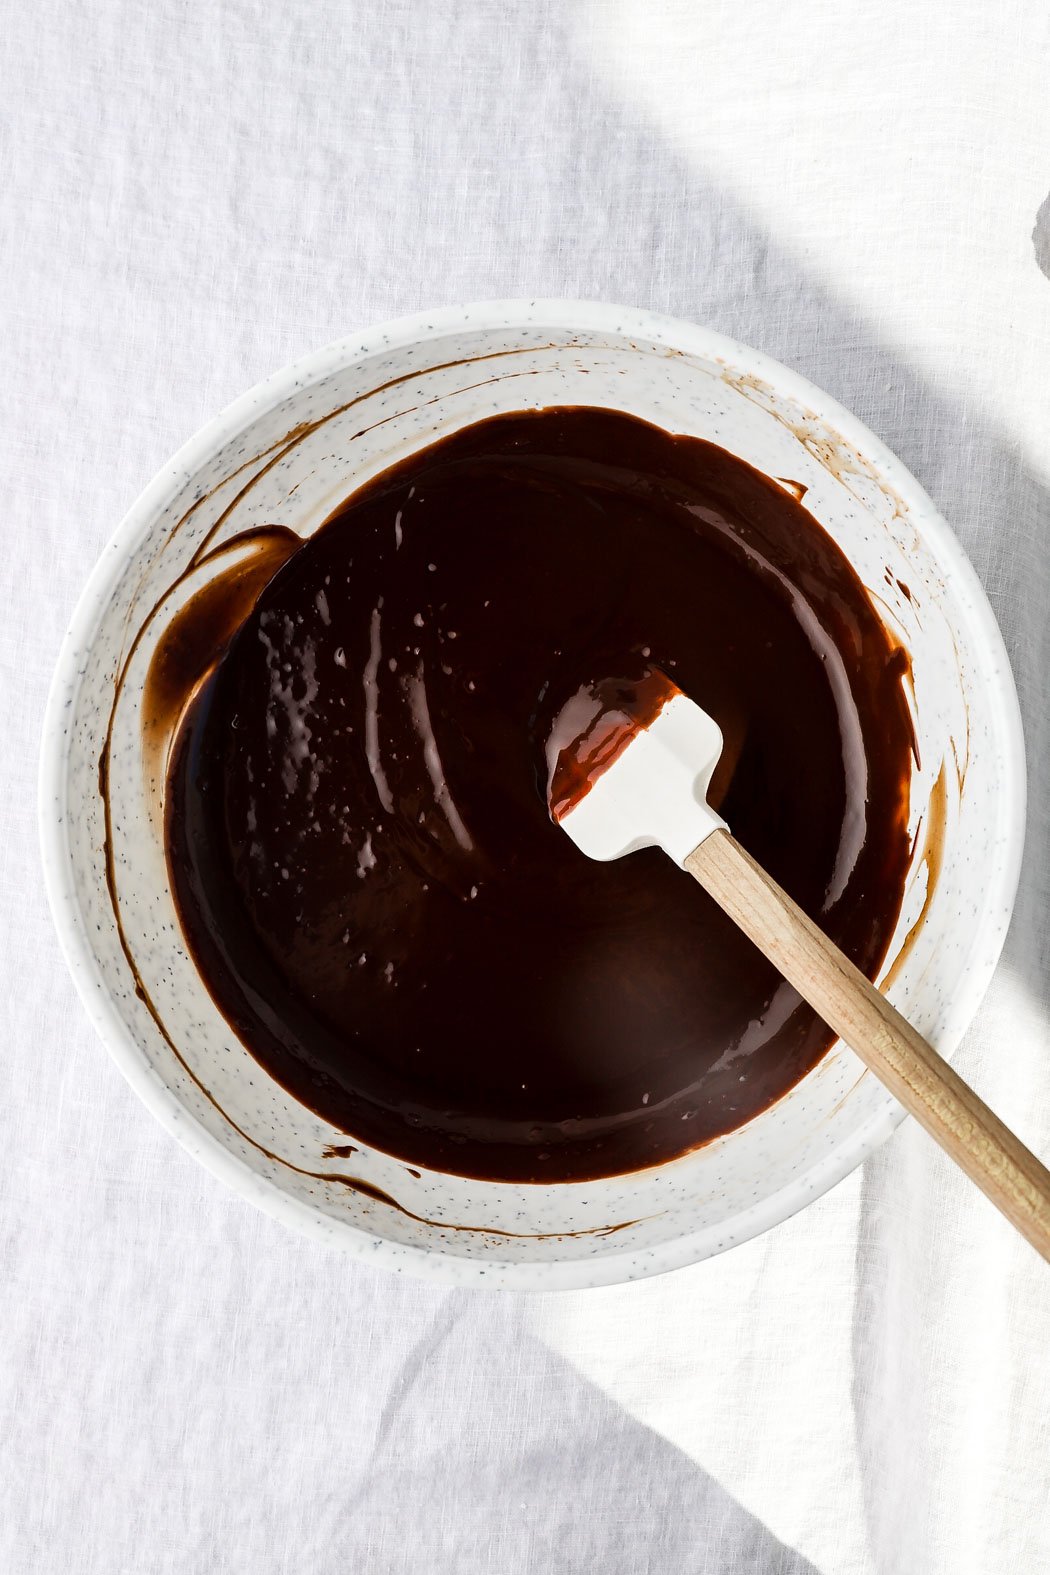
First you’ll heat the cream on the stove, then pour it on top of the white chocolate and cover. Do the same with the dark chocolate. Let them rest for up to five minutes, then stir gently until all the chocolate is melted and smooth.
Now you’re going to let them cool completely to room temperature. If it’s warm in the house, you may want to even refrigerate them for 5-10 minutes intervals, mixing between each interval.
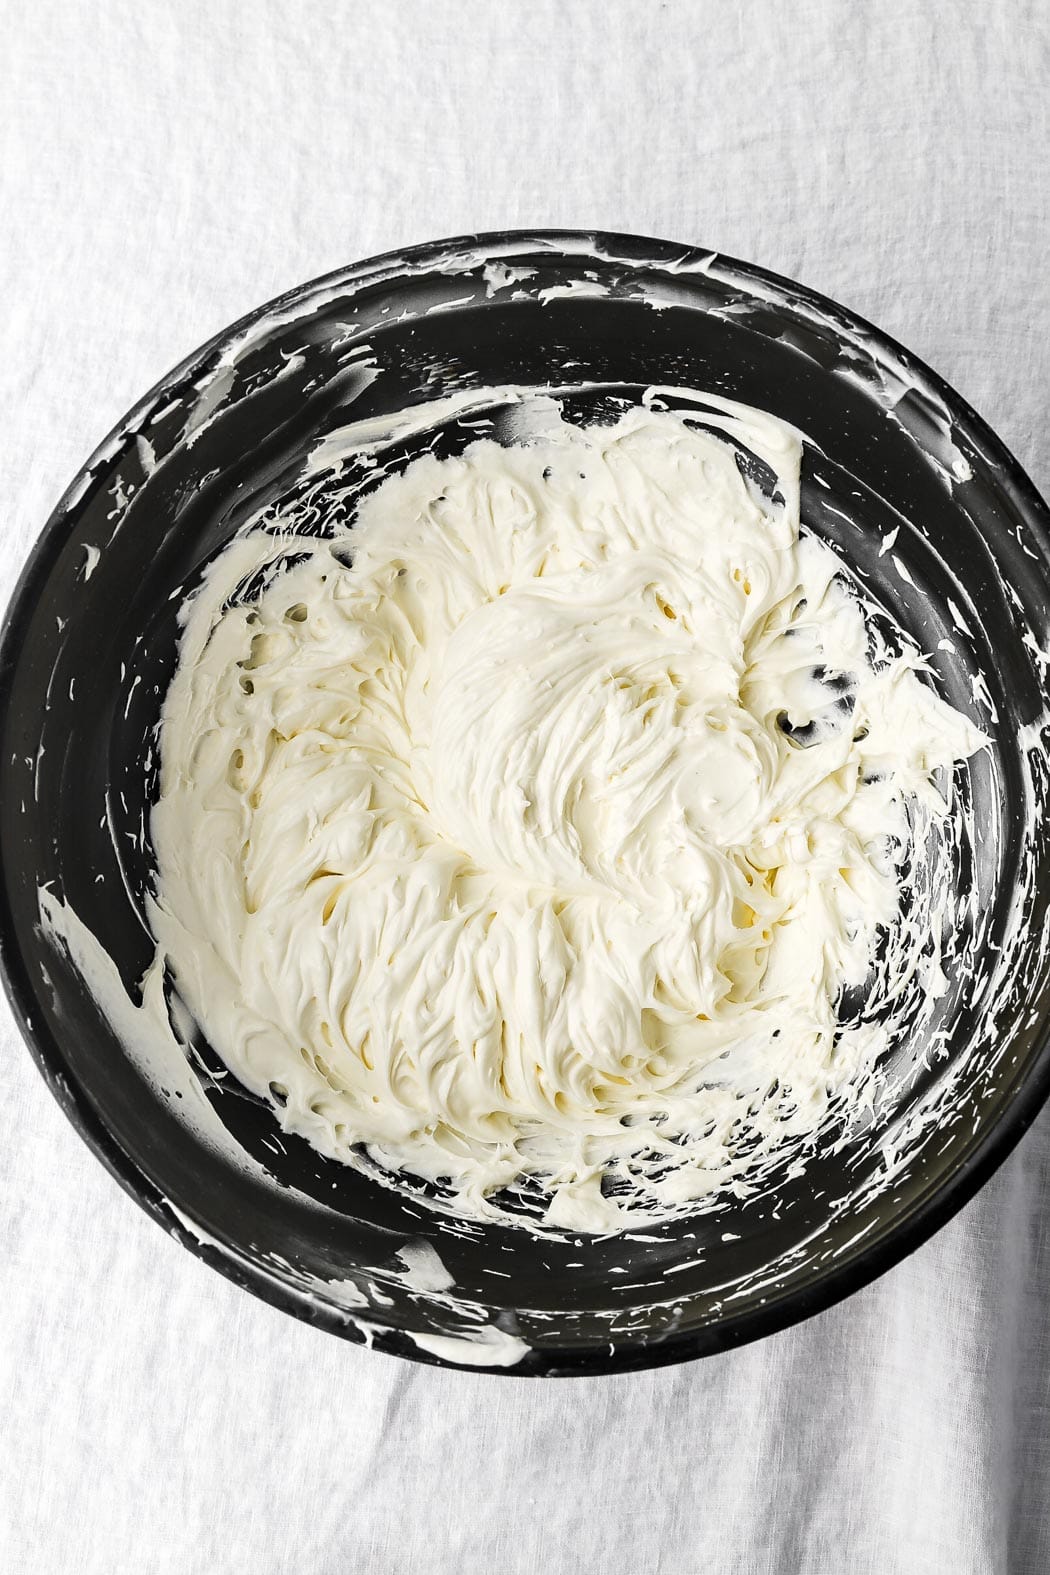
The white chocolate filling will be kind of yellowish but after whipping it, it will look much more white than before.
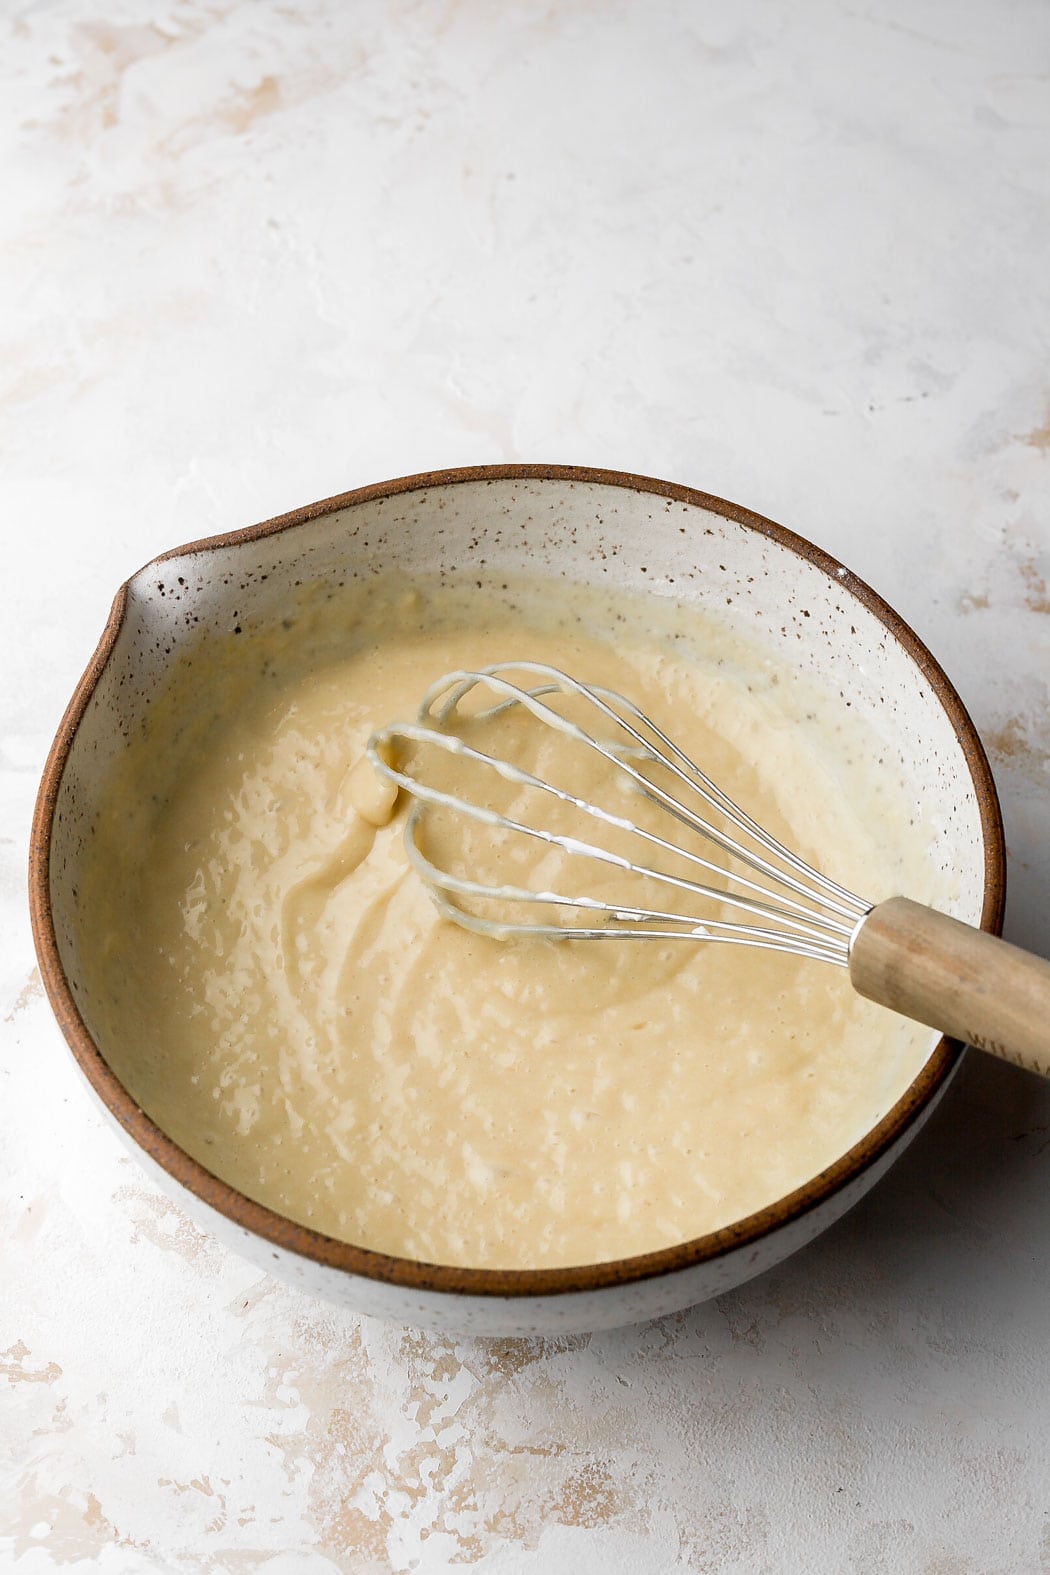
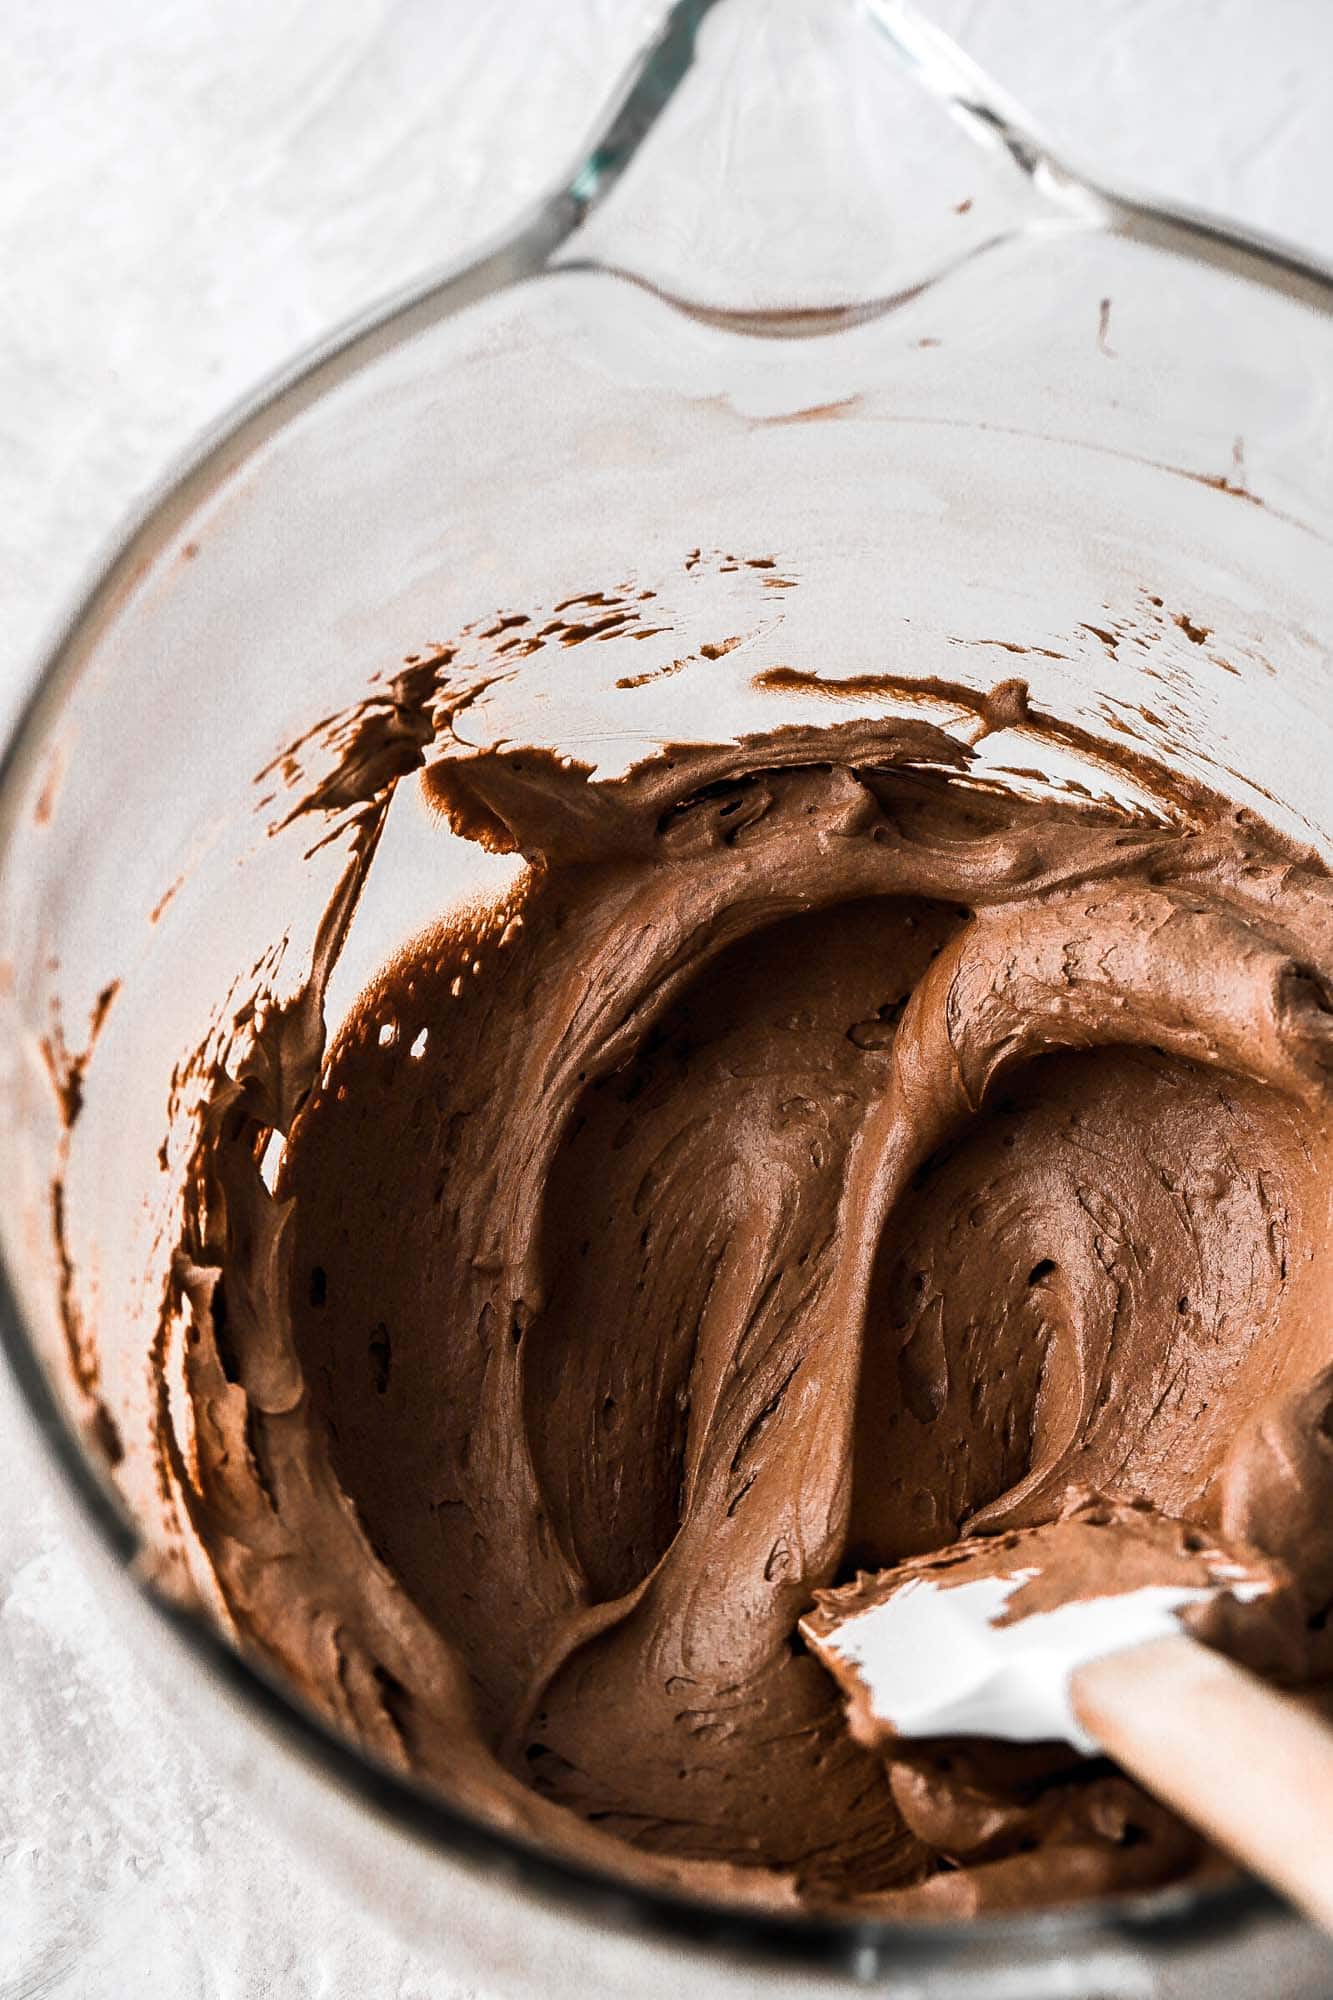
Once they’ve cooled completely, use an electric hand mixer to beat them (in separate bowls) until they’re pale and fluffy.
The chocolate one will be a lighter chocolate color after whipping as well.
How to assemble the tuxedo cake
I wanted to make the layers of cake into a pattern instead of just alternating. Since I have double the amount of chocolate cake as I do white cake, I made the pattern symmetrical so I did:
- Chocolate Cake
- White Cake
- Chocolate Cake
- Chocolate Cake
- White Cake
- Chocolate Cake
It would look weird to have two chocolate cake layers next to each other but when you alternate the ganaches like that too, the white goes between the chocolate cake layers and it then looks so scrumptious!
So we have:
- Chocolate Cake
- White Chocolate Ganache
- White Cake
- Dark Chocolate Ganache
- Chocolate Cake
- White Chocolate Ganache
- Chocolate Cake
- Dark Chocolate Ganache
- White Cake
- White Chocolate Ganache
- Chocolate Cake
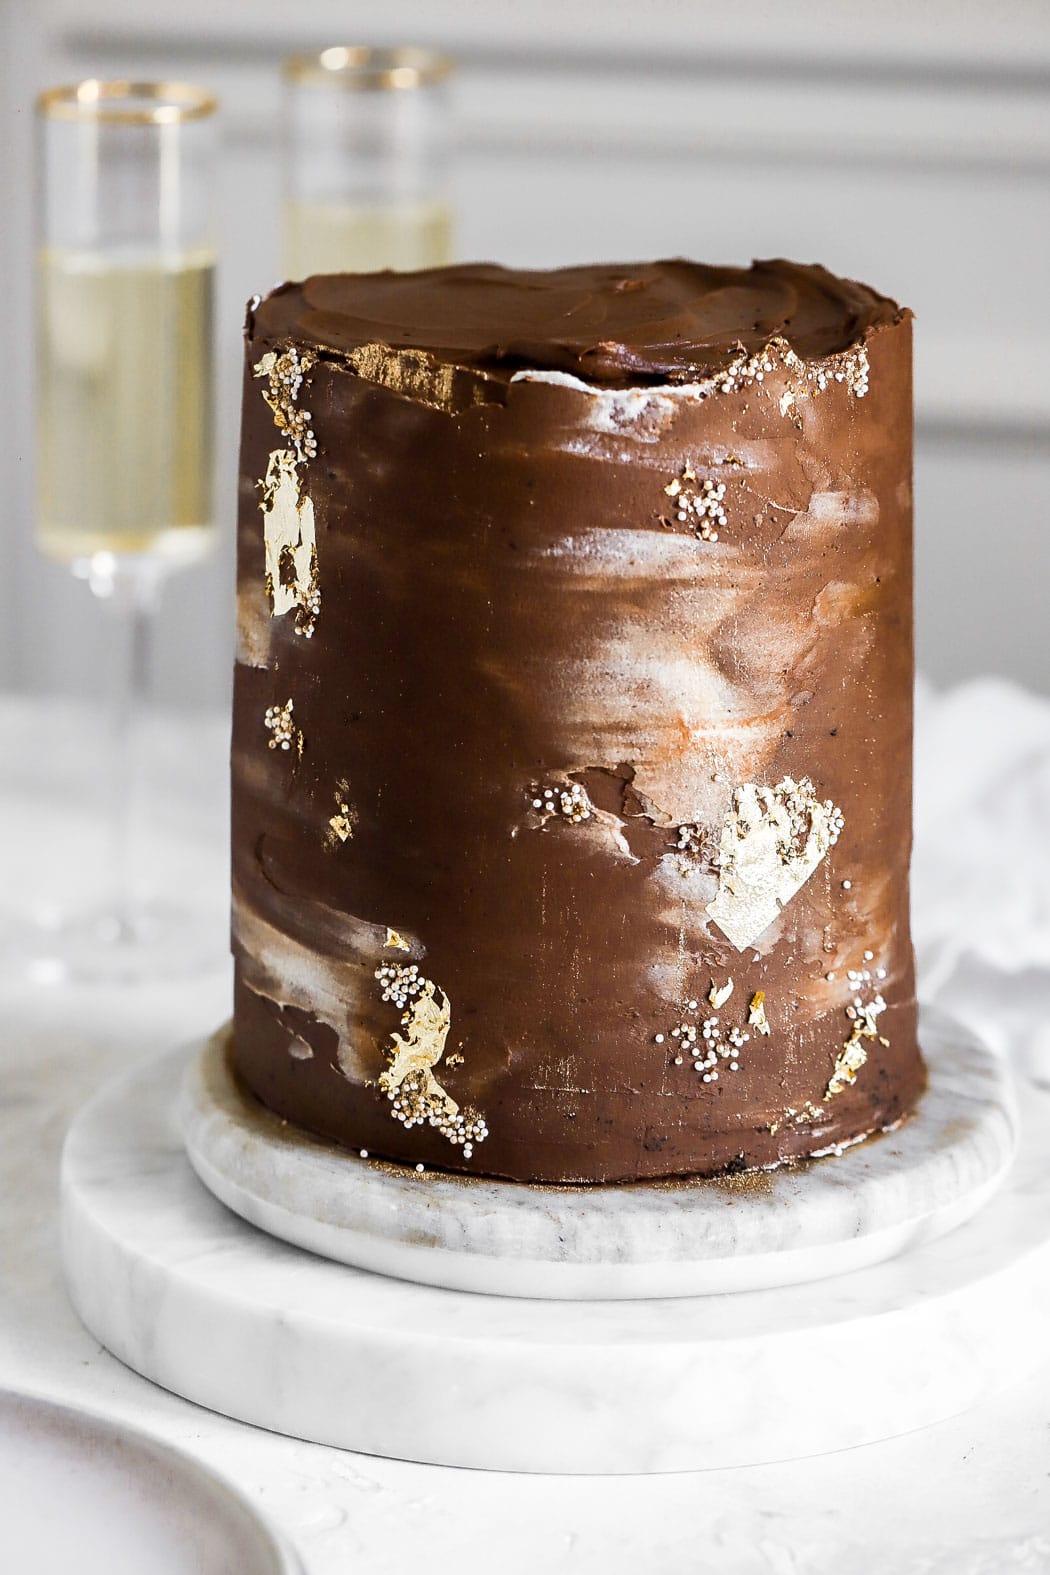
Decorating the tuxedo cake
I frosted the whole cake with the dark chocolate ganache and then did a little marble effect with swirled chocolate and white chocolate ganache on top. I also added some gold foil, tiny pearl sprinkles and Gold Dust.
You will have some leftover white chocolate ganache if you frost it like I did. The recipe makes enough to do a full crumb coat and generous frost on the outside but I got lazy…
You can crumb coat it with the white chocolate ganache and then frost with the dark chocolate ganache, vise versa, marble it, or just mix the two together and get a pale chocolate ganache frosting.
This is a pretty tall cake and soft cake layers so I find it easier to assemble if I freeze my cake layers ahead of time.
To freeze the cake layers, I let them cool almost to room temperature. Then wrap them in plastic wrap and place them in a freezer bag.
Remove them when you’re ready to frost! If they need to be trimmed, remove them a little sooner, let them thaw for 15 minutes and trim before frosting.
Frequently Asked Questions
Can I just use regular frosting instead of the ganache?
Yes! You can make a vanilla frosting using my American buttercream, Swiss meringue buttercream, French buttercream or any frosting recipe from my cookbook Frosted.
I would make a full batch of frosting for each flavor, just melt 1 cup of dark chocolate and 1 cup of white chocolate and add that to each frosting.
Can I reverse the pattern of the cake?
Yes! You can double the white cake layers and halve the chocolate and reverse the order to get more white layers.
Can I make this in a different size?
This one is questionable. I doubled the entire recipe to make this into an 8 inch cake for Zara’s birthday. It was massive. If you double the entire cake, I would bake it in a 9 inch pan so they layers are not quite as tall.
You could also double the white cake layer so you can bake two 8 inch layers and use the chocolate cake recipe to make two 8 inch cake layers as well. Then you’ll be left with 4 layers total.
You can still do a pattern like
- White Cake
- Dark Chocolate Ganache
- Chocolate Cake
- White Chocolate Ganache
- Chocolate Cake
- Dark Chocolate Ganache
- White Cake
Or you can alternate and do:
- Chocolate Cake
- White Chocolate Ganache
- White Cake
- Dark Chocolate Ganache
- Chocolate Cake
- White Chocolate Ganache
- White Cake
Can I make this ahead of time?
You can make cake layers a few weeks ahead of time and freeze them (read assembling section). The chocolate ganache is a little difficult to make ahead. It needs to be refrigerated so it will harden and then you’ll have to bring it back to room temperature to whip it.
Chocolate is also a bit finicky on its temperature so you’ll risk it splitting. I recommend making the ganache the night before or the morning of assembling the cake and preparing to assemble the cake at least a day in advance or serving.
How to store tuxedo cake
Once assembled, if the tuxedo cake feels sturdy it can stay at room temperature for one night, then refrigerate it. Make sure to cover it with a cake dome or plastic wrap if it’s been sliced into. Store slices in an airtight container.
Cakes stay more fresh when they’re frozen. Place cake slices in an airtight container and then place the container in a freezer bag. Freeze for up to a couple of months. Bring back to room temperature before serving.
Thanks so much for reading today’s post, if you have any questions just comment down below in the comment section (I can’t reply in the rating section).
If you make this tuxedo cake I would love to see it, so make sure to tag me @baranbakery on instagram and order my cookbook, Frosted.
As always, have a blessed day and happy baking!
Love, B


I have made this cake three times and everyone loves it. It’s the best chocolate cake I have ever had.
The vanilla cake has been my go-to for the last year, I’ve made it about five times now and its perfect every time…except this last time. The amount of flour was somehow changed, it reads as 1/4 cup (for the 1x measurements) but should actually read 3/4 cup. It still made a lovely custard, but certainly not a cake.
omg Sarah, I’m soooo sorry about that! When I had my website updated, I had to go through and update every recipe card and it must have been a typo! Thank you so much for letting me know and I’m so sorry that happened!
I wasn’t wasted…in fact, my neighbors have requested that I make it again, they thought it made a great custard/pudding.
Just finished the first step of baking this (the cakes) and even though I accidentally messed up the measurement on my scale, the chocolate cake came out delicious with a bit more of a fudge-y taste. The vanilla cake will now be my go-to cake. My kids said it might be better than any chocolate cake they’ve ever had. I can’t wait to finish the entire cake!
This cake looks and sounds amazing. Can you tell me if the cakes are light and fluffy or are the a dense cake? Thank you
Hi Carol, I feel like they are kind of in between. Not light like a sponge cake but not super dense either.
I’ve read over all of the comments and no one mentioned that they had to make the white cake twice. You were so complete in the directions for the chocolate layers, that they should have 12 oz of batter per cake, which was very helpful, but when I made the batter for the white cake, following the directions, I weighed them and it was only 14 oz in total, so I just baked that all as one cake and made more batter for a second one. How am I the only one who had this problem???
Hi Sharon, thank you for your feedback. I only baked one layer of white cake and sliced it in half to get two the layers. The chocolate cake is a little more liquidy so it weighs more in general but the white cake should’ve baked a good size layer that could be sliced in half to make it the same size as the chocolate ones, as you can see in the photos. Sorry for the confusion, I can tweak the recipe wording a bit to make it more clear.
This Tuxedo Cake from Baran Bakery is a stunning masterpiece that combines rich chocolate and fluffy white cake layers with alternating whipped dark and white chocolate ganache. Its elegant black-and-white design makes it perfect for special occasions. The detailed instructions and helpful tips, like freezing cake layers for easier assembly, ensure a successful bake. Whether you’re a seasoned baker or a beginner, this recipe is a delightful challenge that will impress both in taste and appearance. Happy baking!
Hello! I made the ganache and my chocolate ganache whipped amazingly and was yummy but my white chocolate ganache separated! Any recommendations and reason why that happened?
Hi! I’m so sorry, were you able to fix it?
White chocolate can be reallllyyy finicky sometimes. What was the temperature and consistency like when you started whipping? The consistency depends on the temperature and can be affected by different brands as well. I use Nestle or Ghirardelli white chocolate chips.
When you cooled the white chocolate before whipping, did you pop it in the fridge for a few minutes? I mentioned in the notes that sometimes I refrigerate my ganache for a few minutes before whipping.
Most things generally separate from aggravation, temperature and how wet they are LOL so if anything to be safe, you could try removing 1-2 Tbsp of the heavy cream, makes sure it’s at a cool room temperature when you start whipping, and whip gently on a medium speed and don’t over-whip. I hope that helps!
Hi, I’m trying to make this cake for my mom‘s birthday. How would I adjust this recipe for baking at a 7,600 ft. altitude? Thanks! 🙂
Hi Kaitlin I’, sorry, I don’t have any experience with hi altitude baking.
This looks delicious! Is there a particular brand of black cocoa that you recommend?
My favorite is from King Arthur but I’ve also used random ones off Amazon and they worked well too!
If I double the white cake, do I need to increase the ganache?
Hi April, i had some white and dark ganache leftover so it should be enough 🙂
Hi B, I am the eLisa who asked about the cake for 25 people.
In your recipe, you use 6 in cake pans.?
when you said that you made the cake for 25 people did you use 8 in cake pans?
I love the way you have the 6 layers, but I am understanding it will be difficult to cut. What about transporting it? I have to take it an hour away to the party so do you think an 8 in 6 layer cake s way too tall?
If I make it 4 layers maybe that will be ok, but I love the look of yours with the 4 chocolate and 4 white. I am so confused! Thank you for getting back to me.
Hi yes, when I made for 25 people, I doubled the whole recipe and baked them in 8 inch cake pans. I was just saying that I had too much cake for 25 people 🙂
The cake will transport fine if you refrigerate it overnight and is firm when you transport. I would just let it soften a little at the event before serving.
Good afternoon Bernice, I love your Instagram page as well. I have a question I’m going to make the tuxedo cake for get-together on February 24th. I am having 25 people. So obviously this will not be enough. Can you advise me on what size pan I should be using, and how much better I need to make to make the cake suitable for 25 people? I appreciate your help thank you so much
Hi Lisa, it really depends what size slices you want to serve. I also served this to about 25 people and I just doubled the whole recipe and baked them in 8 inch pans instead. Mine was still super tall though and difficult to slice so if you double the recipe, I recommend baking them in 9 inch pans so it’s slightly easier to assemble and serve. 🙂
That said, I had a lot left over because it’s a hefty cake and most people only wanted half a slice. Another options is to follow this chocolate cake recipe and bake two chocolate layers in 8 or 9 inch pans and double the white cake to bake two white layers in 8 or 9 inch pans so you’ll have a more normal sized 8 or 9 inch cake that should be enough for 25 people but not too excessive. If you do this second option, the layers will look different as you’ll have 2 white and 2 black instead of 4 black. Also keep the ganache recipes the same, you shouldn’t need anymore for this.
If you’re really loving all these layers and want it exactly like this but larger, I recommend doing 1.5x the recipe and baking in 8 inch pans :).
I hope that helps!
Hi !
Just wanted to check on why the chocolate layer has 1Tbsp of baking powder and the white layer has 1 Tsp of baking powder?
Hi Debby, the chocolate cake is a larger quantity, there are four layers instead of two layers.
Oh ok thx a lot ☺
If I want to use the white chocolate on the outside should I double the whole recipe or just double the cream?
Double the white chocolate and the cream, but take out just 2-3 TBSP of cream because it’s a bit soft for frosting the outside 🙂
Hello Bernice (:
I am attempting to make this cake for my birthday. I will be making this cake in 9×2 cake pans because that is what I have at the moment. Hoping it works out. How long would you recommend I bake them for? Do I still bake them at 325F if I am using the 9×2 pans?
Thank you so much,
Berenice
Hi! I would still bake them at the same temperature. I’m not entirely sure on baking time but just keep an eye on it and when the center no longer looks wet, press on it gently. When it’s done it will slowly spring back. if it stays indented, bake another couple of minutes.
This cake was fabulous! Recipe was easy to follow and had delicious results! Everyone at our party loved it! Made just as recipe directed and it fed over a dozen people ?
Hi Mary, thanks so much for sharing! I’m so glad you all loved the cake ??
Lovely combination
I was suspicious that whipping would take my light yellow coloured white chocolate ganache to white but it did! Great texture pairings with using the black cocoa. My only thing is that the vanilla cake portion wasn’t as moist as I would have liked it and was a little dense. What am I doing wrong?
Hi Lisa, I was suspicious that it would brighten that much too hahah but I’m not sure why your vanilla cake turned out dense. Did you weigh the ingredients or measure by volume?
If I want to make this cake as (4) 6-inch layers (2 chocolate and 2 white) would I half the recipe?
Hi Lori, you could just halve the chocolate cake part 🙂
and depending on how much you want to decorate the cake, if you leave it more simple, you can do half of the ganaches too. I had some leftover for this cake since I didn’t decorate as much but if you’re making the cake even smaller, you’ll have lot left over.