
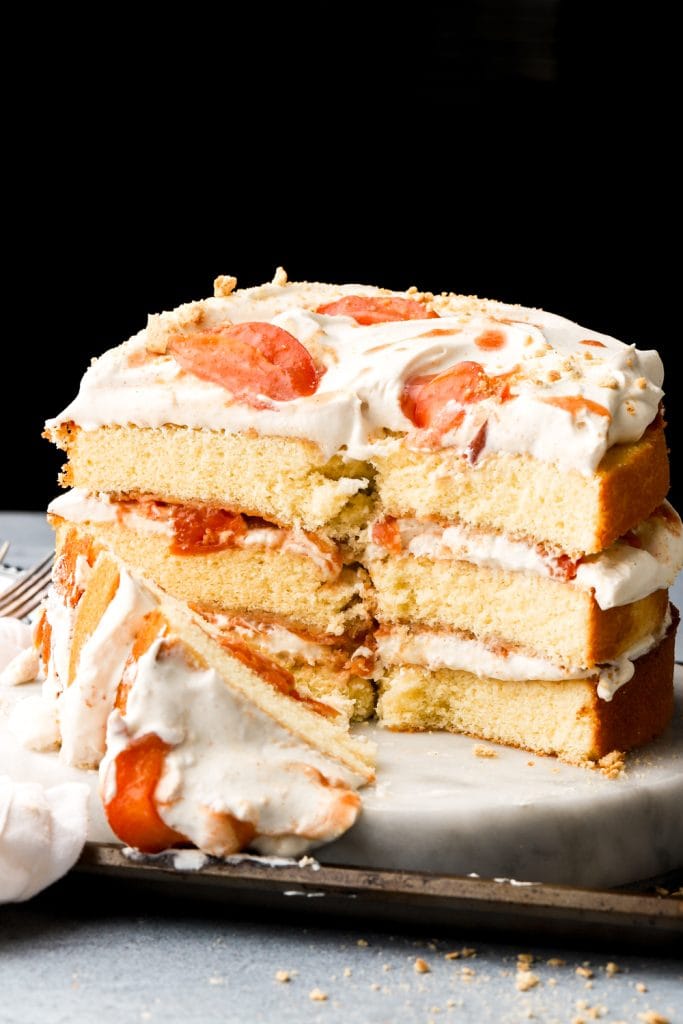
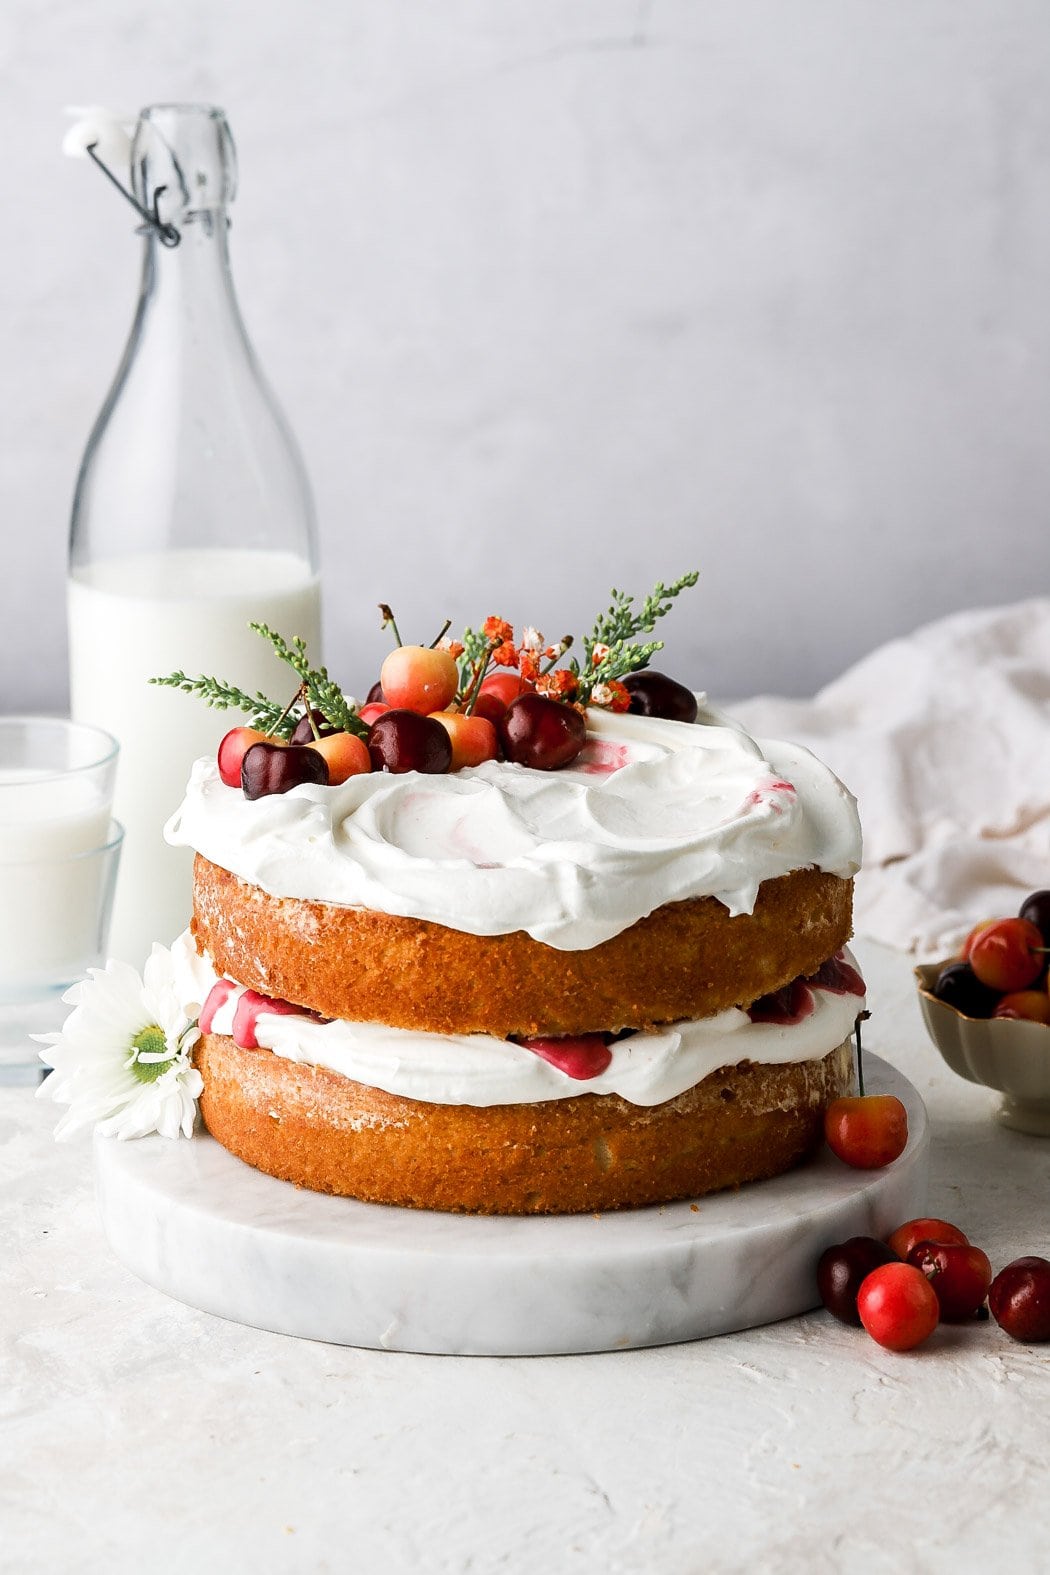
Peaches and Cream Cake
This peaches and cream cake is one of those simple-but-special summer cakes that feels just a little more elevated than the name lets on.
The fluffy vanilla cake, nutty brown butter, and sweet whipped cream pair perfectly with caramelized peaches for a cake that tastes delicate, rich, and fresh all at once.
And if you love baking with peaches, I also have a Peach Cobbler, Peach Cobbler Cupcakes, and Peach Cobbler Pound Cake.
How to Make a Peaches & Cream Cake
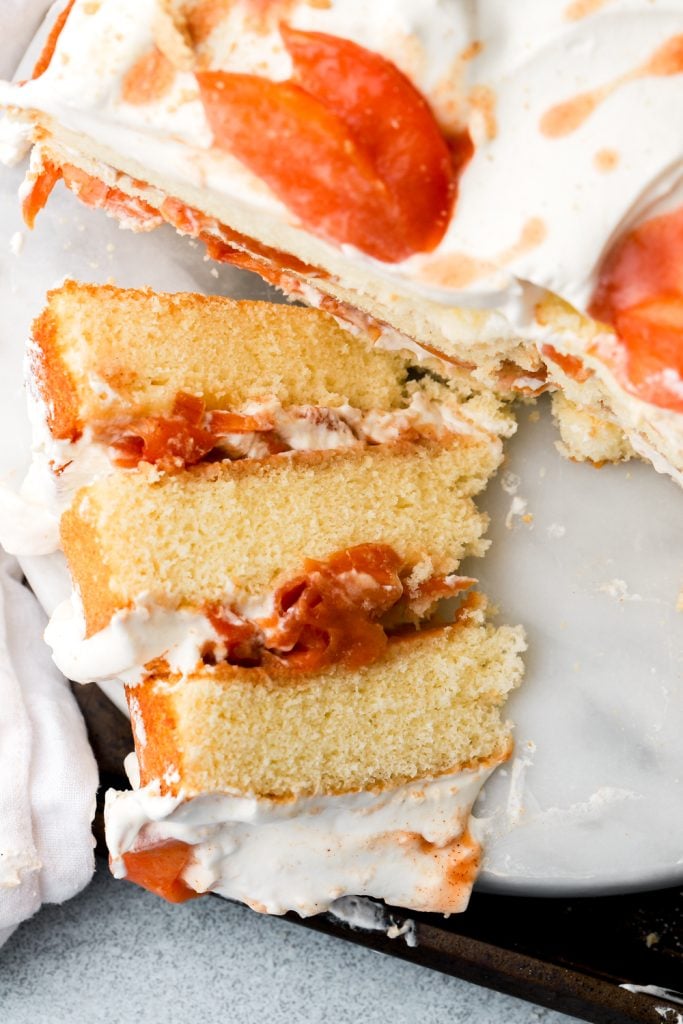
There’s 3 main parts to this cake – a base cake, the cream & of course, our flavorful peaches.
- Vanilla Cake – I used my hot milk sponge cake recipe because the texture is fluffy enough to be served chilled but not too soft that it doesn’t hold up all the layers.
- Chantilly Cream – this is a sweetened whipped cream – the extra sugar makes the cream more stable so I don’t recommend reducing it. I also flavored this with the toasted solids from brown butter and used brown sugar instead of white.
- Peaches – fresh banana slices and vanilla wafers. I highly recommend the brand name ‘Nilla Wafers because some other brands just taste like cardboard. Make sure to slice the bananas fresh before using and rub a little lemon juice on them to prevent them from browning (you won’t taste the lemon).
My highest recommendation is to always use a digital scale to weigh your ingredients in grams. This ensures that you get a fluffy cake and that the pastry cream is stiff enough to stay on the cake.
Step-by-Step Instructions
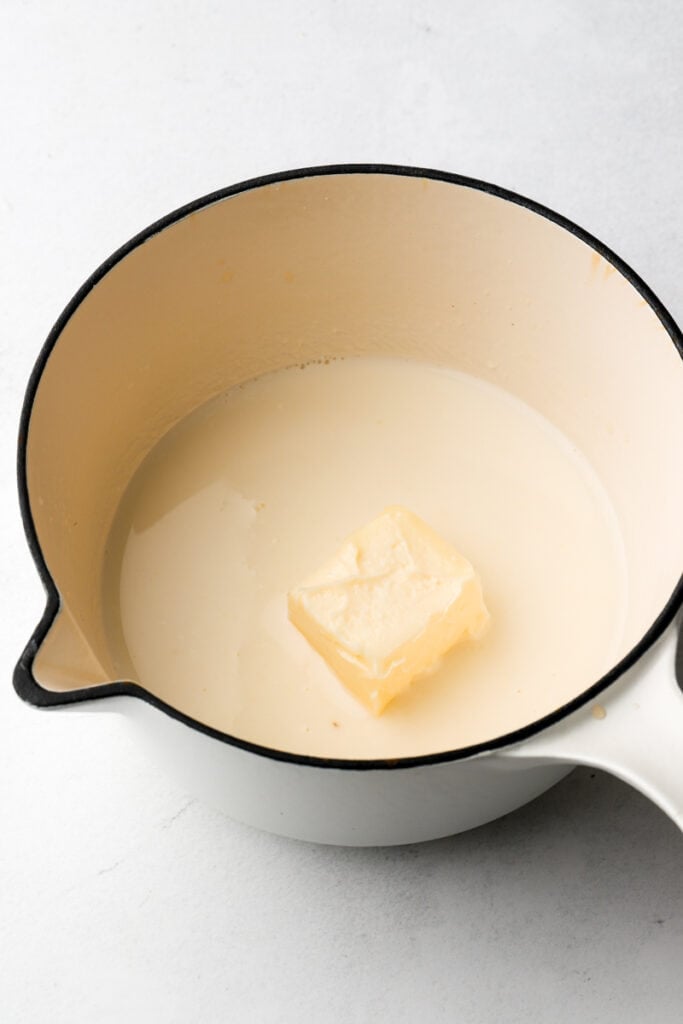
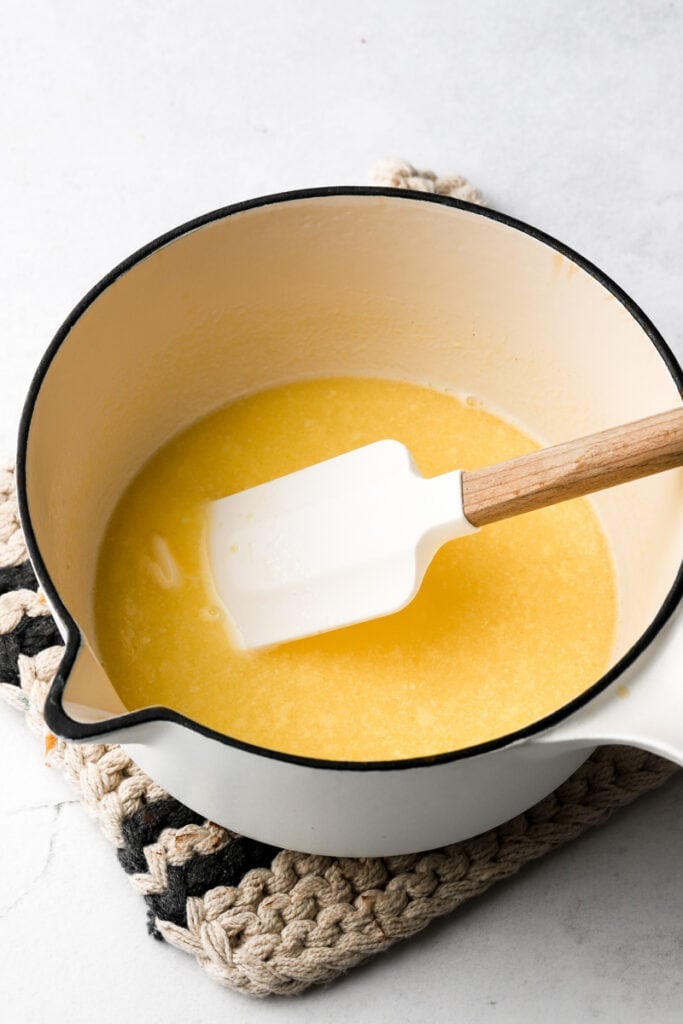
- Start making the cake by heating the milk and butter until it’s hot but not simmering. Set aside.
- Whisk the flour, baking powder and sea salt in a medium bowl. Set aside.
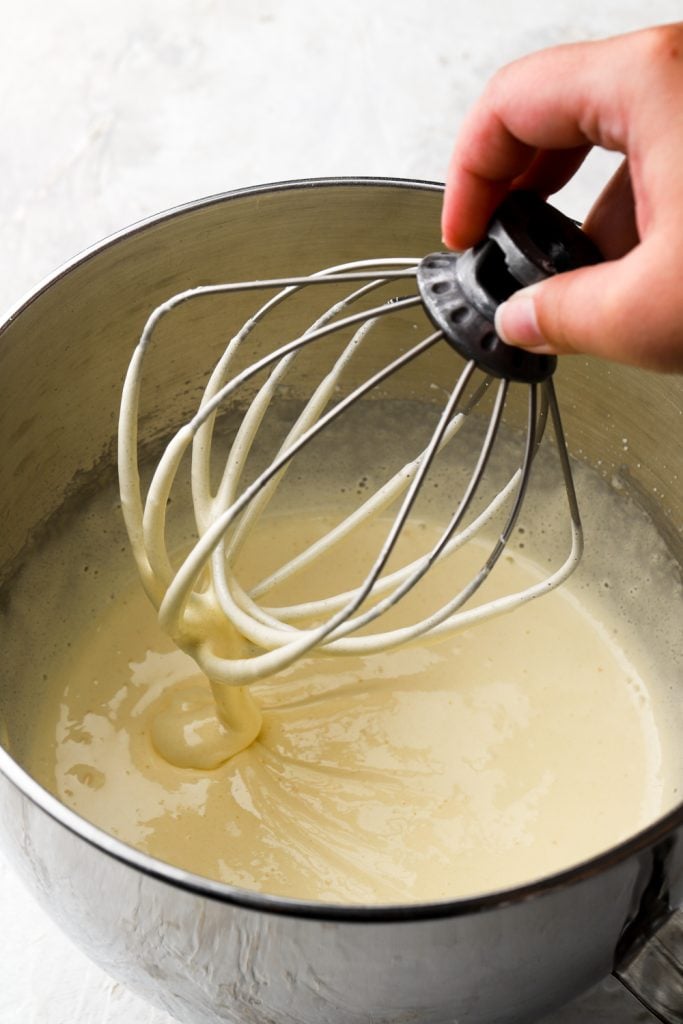
- Beat eggs with a stand mixer until they begin to froth, then stream in the sugar then the vanilla extract. Beat until the mixture is pale, thicker and ribbons.
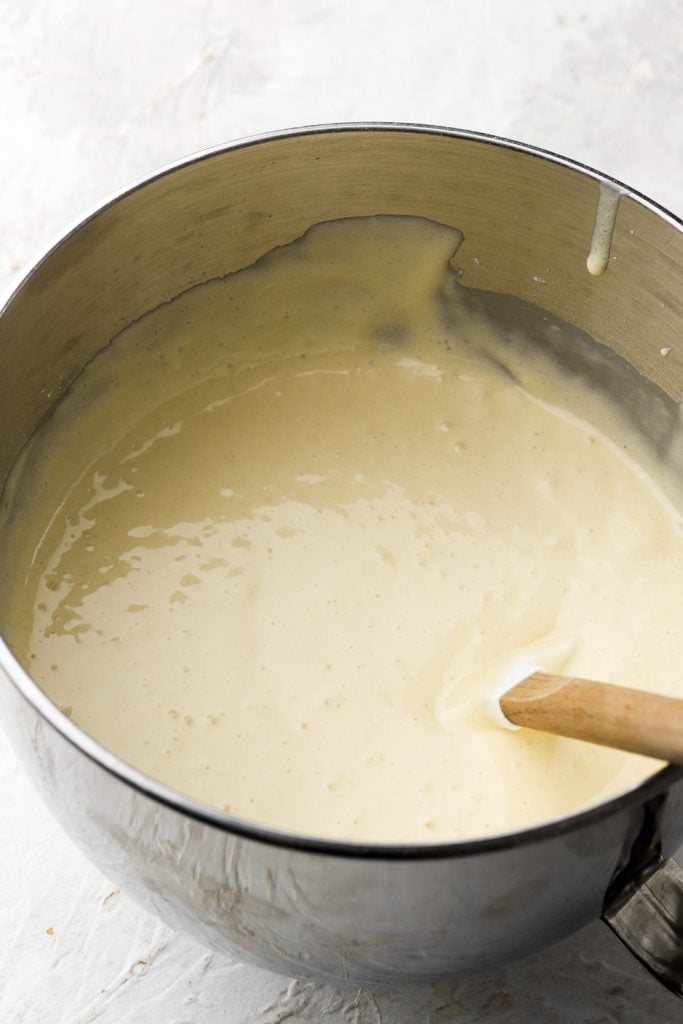
- Sift the dry ingredients over the egg mixture. Now turn the mixer up to low speed while streaming in the warm milk and butter.
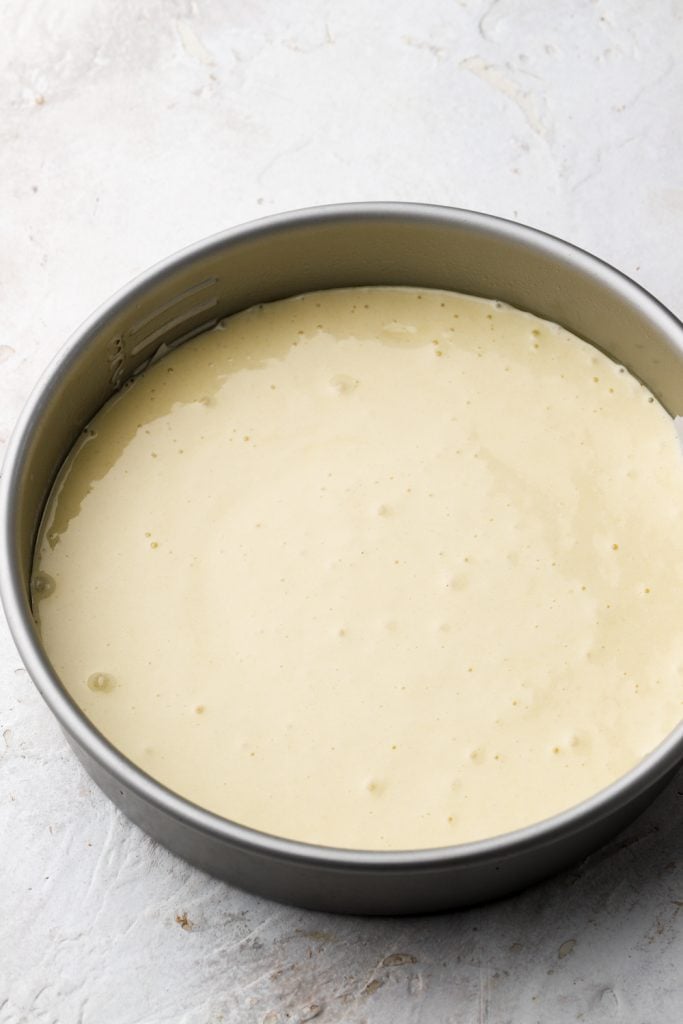
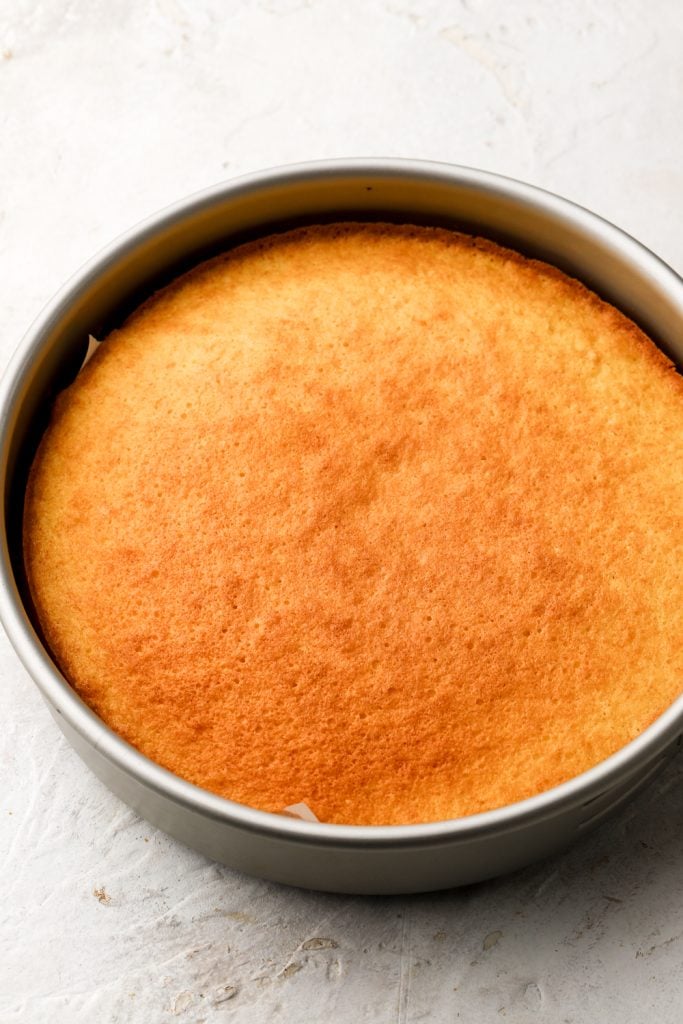
- Pour out the batter into the prepared pans and bake for 20-25 minutes, then set aside to cool.
Tip: I like to weigh my batter – for perfect, even layers it’s about 15-16 ounces of batter per layer.
Caramelized Peaches
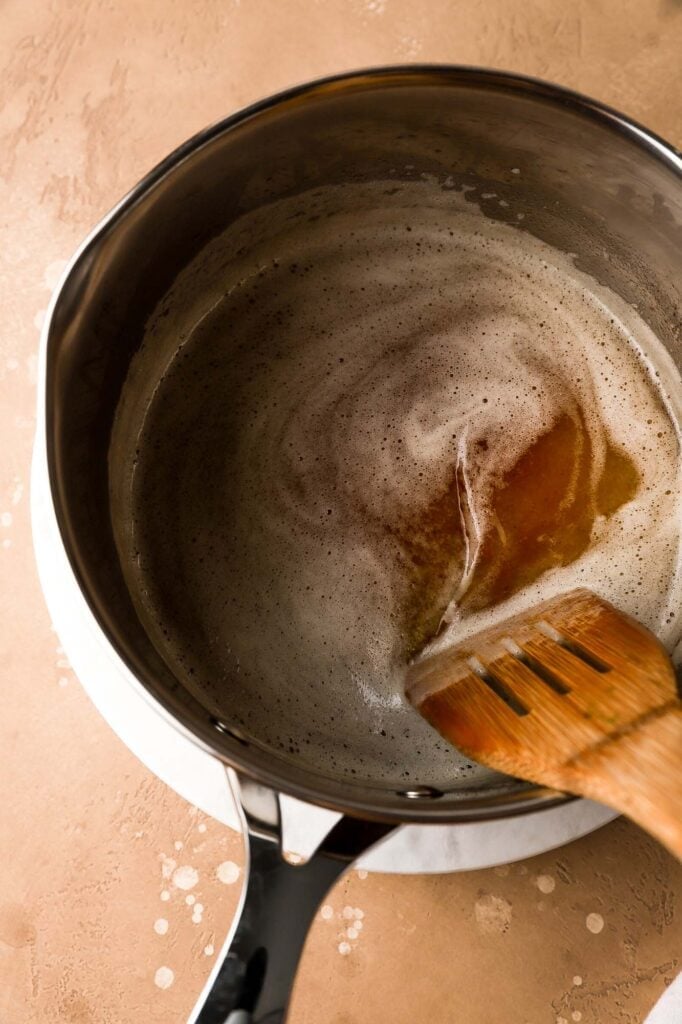
- Brown the butter, by gently heating butter until it’s fully melted. Then once it’s bubbly and foamy, stir continuously until the milk solids are browned. Remove the pan from the heat and then remove 1-2 tablespoons of the butter, trying to get most of the bits out. Reserve those bits for the whipped cream.
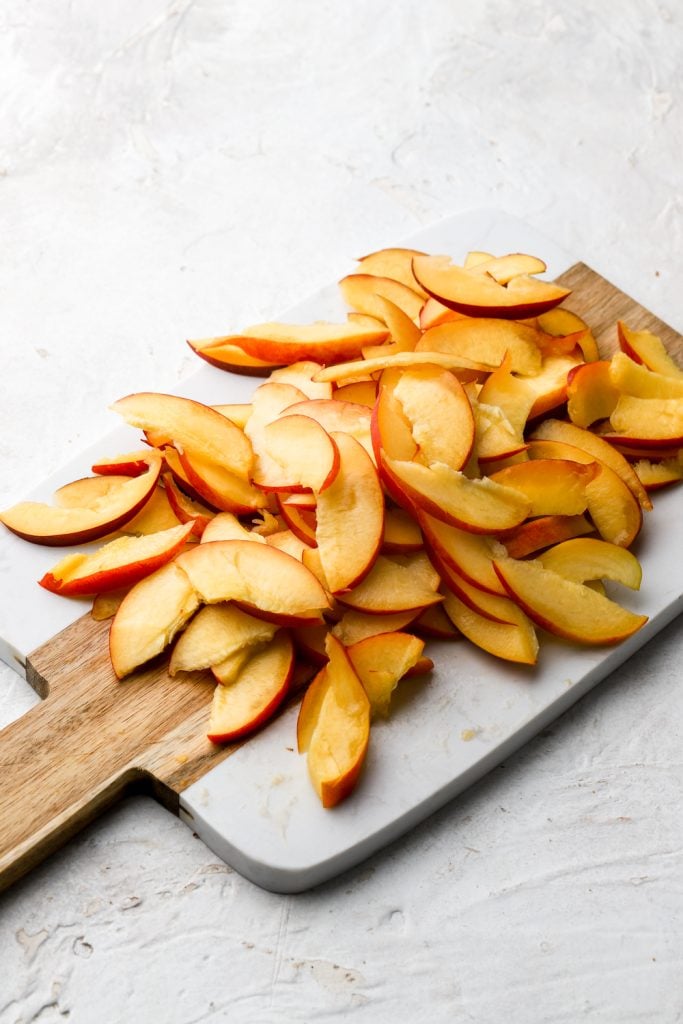
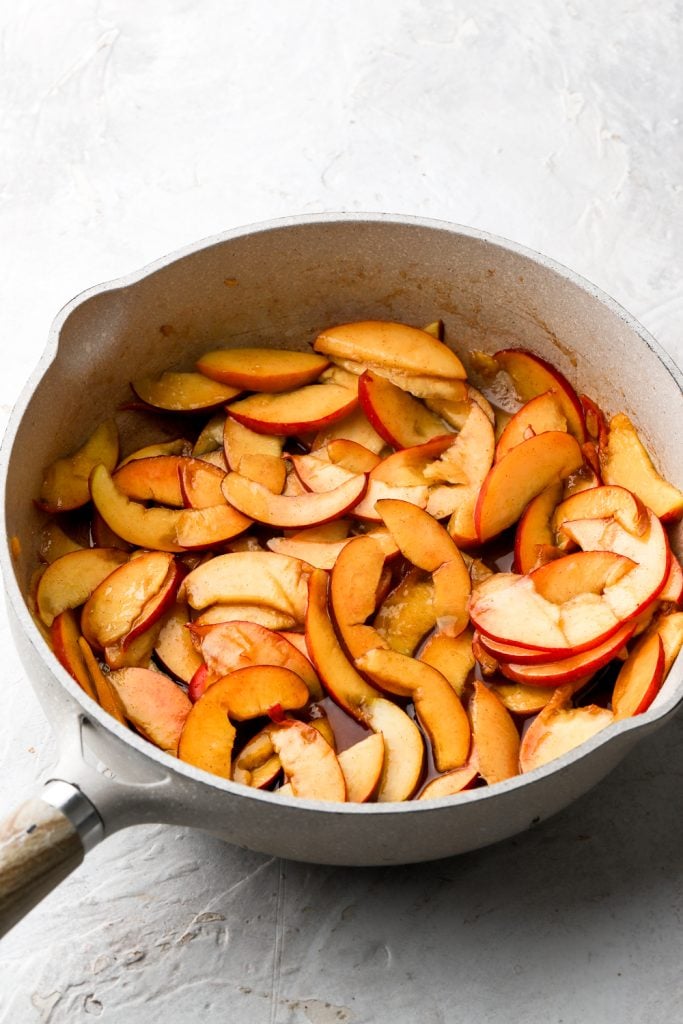
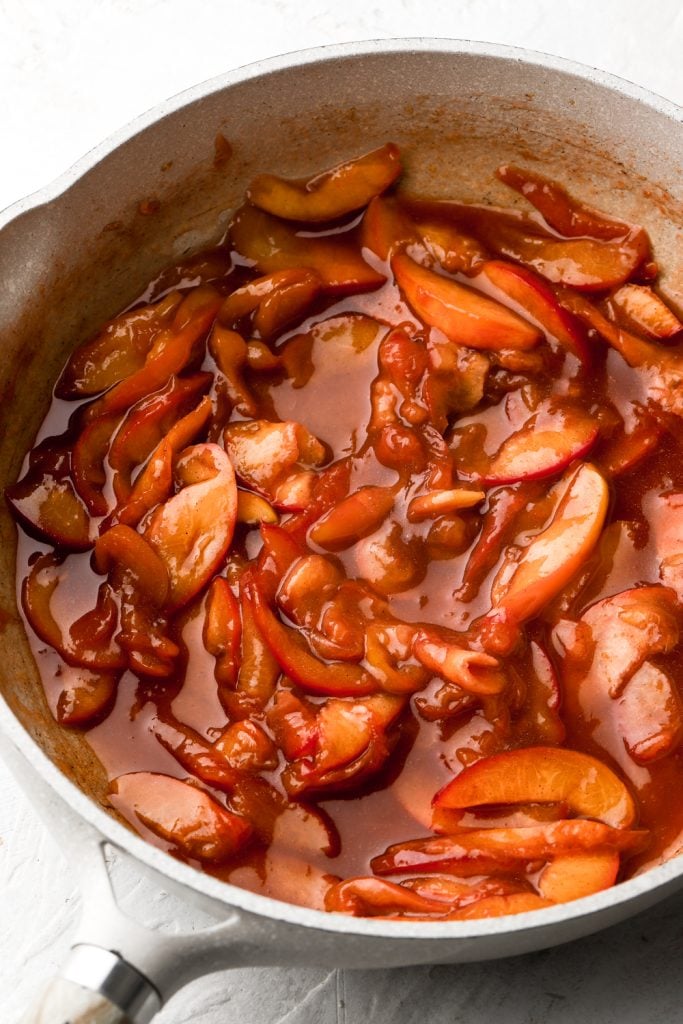
- Return the pan to the stove, add the sugar, cinnamon and peaches. Cook until the peaches are tender but not mushy, 10-15 minutes on medium-low heat. Remove and allow to cool completely. Can refrigerate as well.
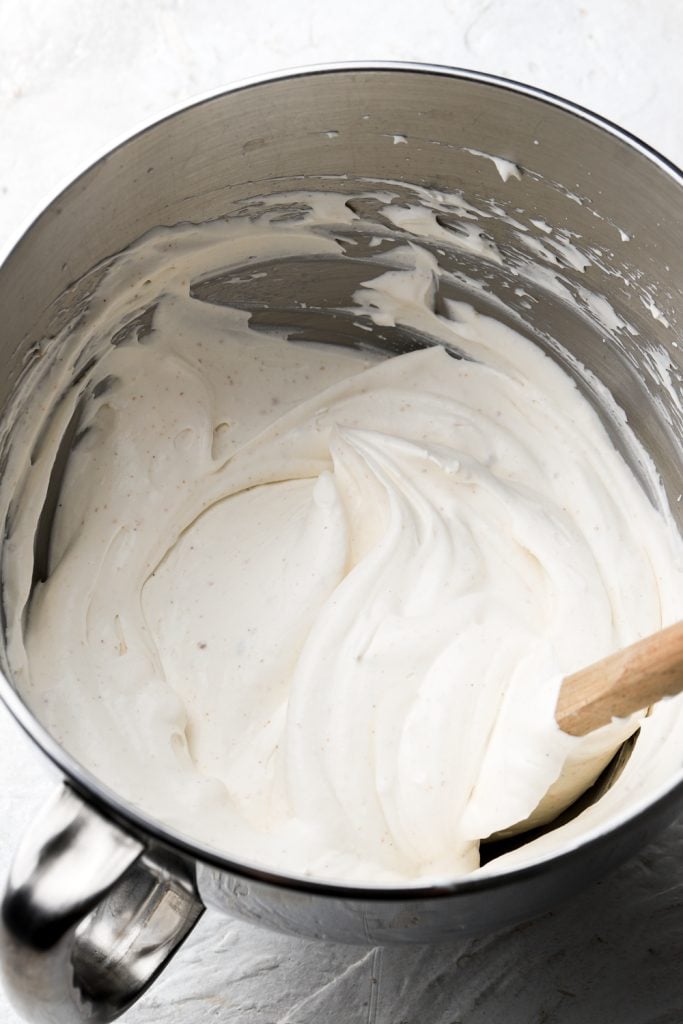
Chantilly Cream
- Add the brown sugar, salt and reserved brown butter bits into the bowl of the stand mixer
- Pour the heavy whipping cream and vanilla and whip until it holds stiff peaks.
Tip: If you over-whip slightly, add a touch more cream and mix just until it’s combined.
Assemble
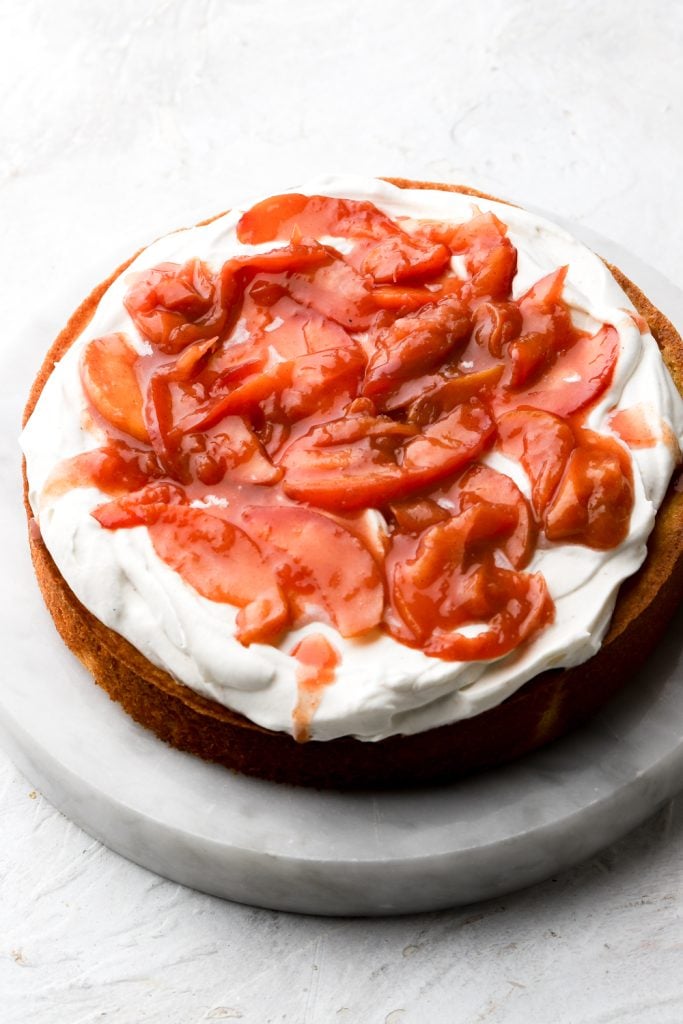
- Place the first layer of cake onto a flat surface and top with a generous layer of whipped cream, then layer on some of the peaches.
- Freeze the cake for 15-30 minutes before stacking the next layer – it can be a little unstable and difficult to assemble a cake with whipped cream so I recommend freezing the cake for a little before stacking on a new layer so that the whipped cream doesn’t all squish out.
- I also like to leave a little room on the edge of the cake because when you do place the next layer of cake on top, it will press the whipped cream down, causing it to spread out a little.
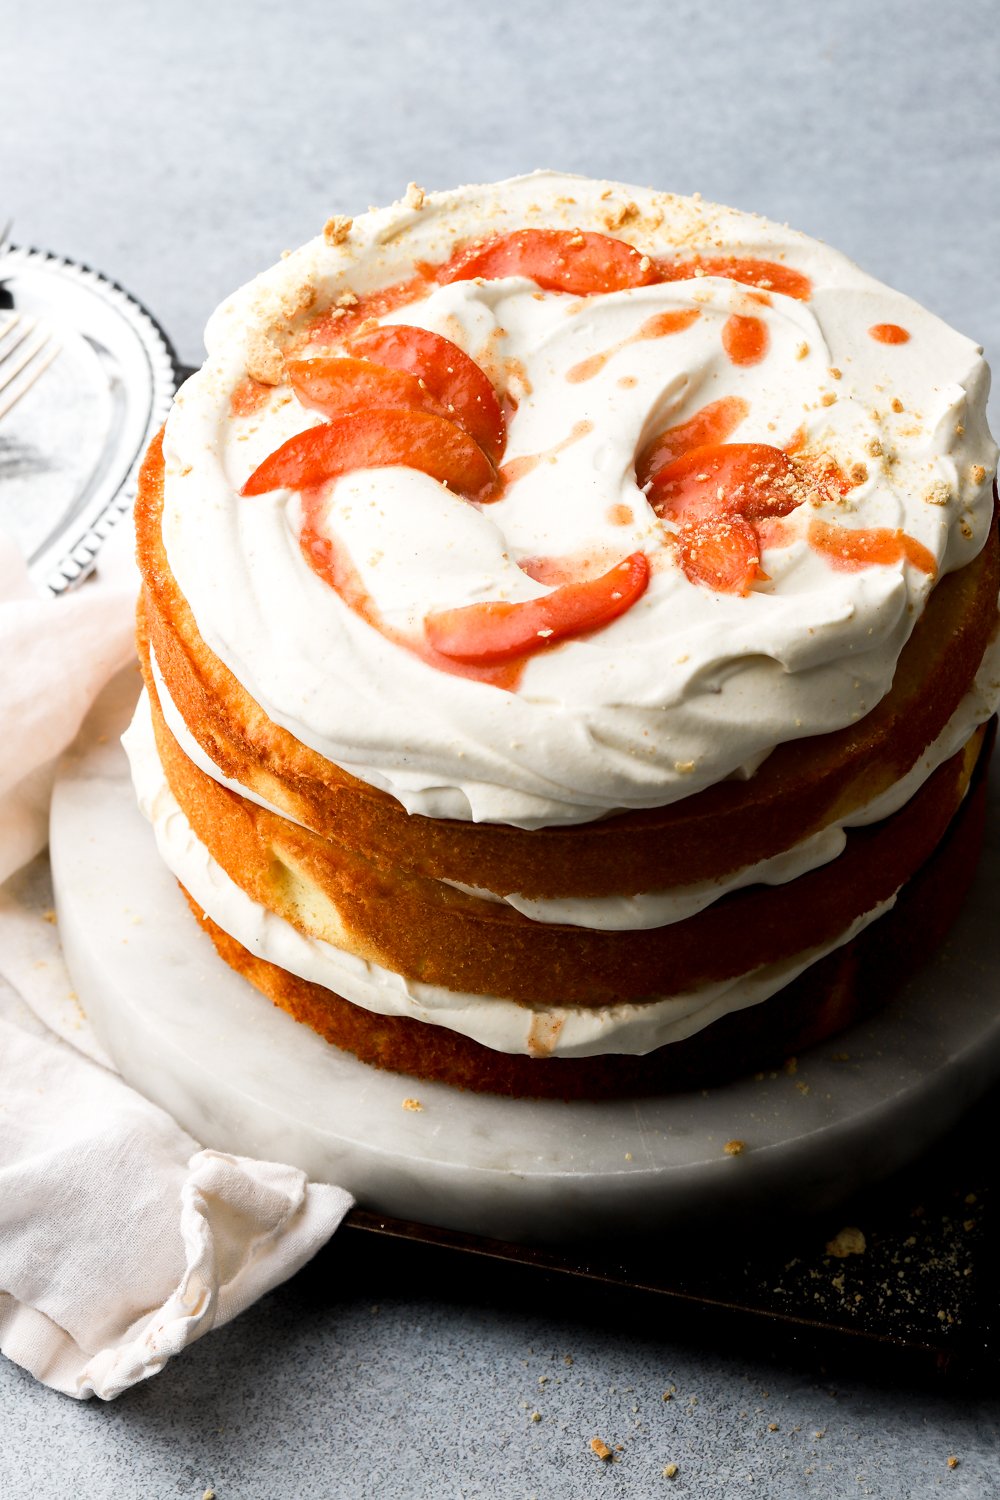
- Place the second layer of cake on top and repeat the above steps. Repeat again with the last layer. Swirl the rest of the whipped cream on the top layer and top with more peaches. Refrigerate the cake for at least a few hours to set and slice easier.

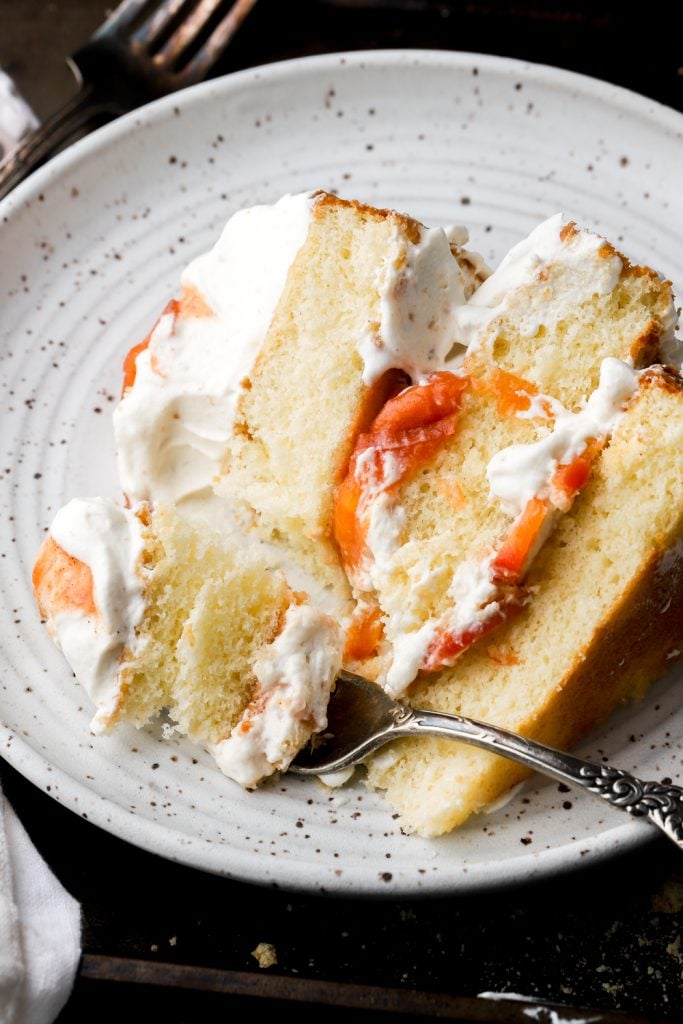
Serving and Storing the Cake
This cake is best served slightly chilled.
Cover the cake with foil, a cake dome or a cake carrier and refrigerate for up to a week.
If it’s any longer, feel free to freeze the cake. Slice it and place the slices in an airtight container and freeze for up to a couple of months.

Thanks so much for reading today’s post, if you have any questions just comment down below.
If you make this peaches and cream cake, I’d love it if you left a 5-star rating or a review for me.
As always, have a blessed day and happy baking!
Love, B


I made this over the weekend and I am so impressed. One of the best internet cake recipes I’ve ever made! I will be using the vanilla sponge as my go-to vanilla cake from now on. The whipped cream is amazing. One thing to note: the recipe states you should get three 15oz 8in cakes from the batter, but I only have two 8in pans so I ended up with two 15oz cakes and one 9oz cake after I washed the cake pan to make the 3rd. Next time I will just do 13oz batter in each pan so they are all the same size.
This was DELICIOUS. The only change I made was whipping a block of cream cheese then adding the heavy cream into my whipped topping. I did this to add stability to topping and I loved the added tang. It was a perfect marriage of cheesecake and peach cobbler flavors in a pretty cake form!
So wonderful! Super light and not too sweet. Simple showstopper… my favorite kind of recipe. The only deviation I made was I used 1 tsp Almond extract and 1 tap vanilla in the cake batter instead or 2 tsps vanilla.
Thank you so much for the review Marci, I’m so glad you liked it! I’ll def have to try it with the almond next time ?
This cake is *phenomenal*. I made it for a birthday and was told it was perfect and the best cake they’ve ever had. The recipe was easy to follow and went flawlessly. Thank you for sharing!
Hi! Thanks so much for the review and I’m so glad you liked it!! 🙂
Loved how you have so many different ways of making sponges and everyday I love one more than the other! The mix of flavors is amazing! Iwould recommend to not peel the peaches because i regret not having the beautiful color Bernice got on her peaches !
I did had one problem i could not troubleshoot but I think it was my scale, tried for the first time to do the tare option to zero the weight and my cakes came out in different sizes, i wan’t too happy about it but made it work!! Love it! Please keep posting them! Love your baking style!
Hi Laura, thank you so much for the feedback! I’m so glad you enjoy my recipes <3 and yes I def recommend always weighing the batter because it makes it so much easier to get the same amount in each one.
I would love to try your recipes! Can you tell me what your altitude is? I usually have to make some adjustments for where we live in Utah.
Thank you in advance,
Dana
Hi Dana, I’m near Detroit, Michigan at 656′
Hope the recipes work out for you!
Thank you for the information. I will give it a try.
Take care,
Dana