Flaky All-Butter Pie Crust (Classic Pâte Brisée)
This style of dough is known in French pastry as pâte brisée, a flaky, unsweetened crust used for both sweet and savory pies.
It’s also known as 3:2:1 pastry because it typically has 3 parts flour, 2 parts butter and 1 part liquid.
If you look at some of my previous recipes, you’ll see that I used a similar recipe but a slightly smaller amount. That might work for a more petite pie, it just wasn’t a generous enough amount to make any sort of design or make it versatile for different size pie dishes.
There’s a few steps I like to take with my pie crusts to ensure success so keep reading for all my secrets (that aren’t really secrets)!
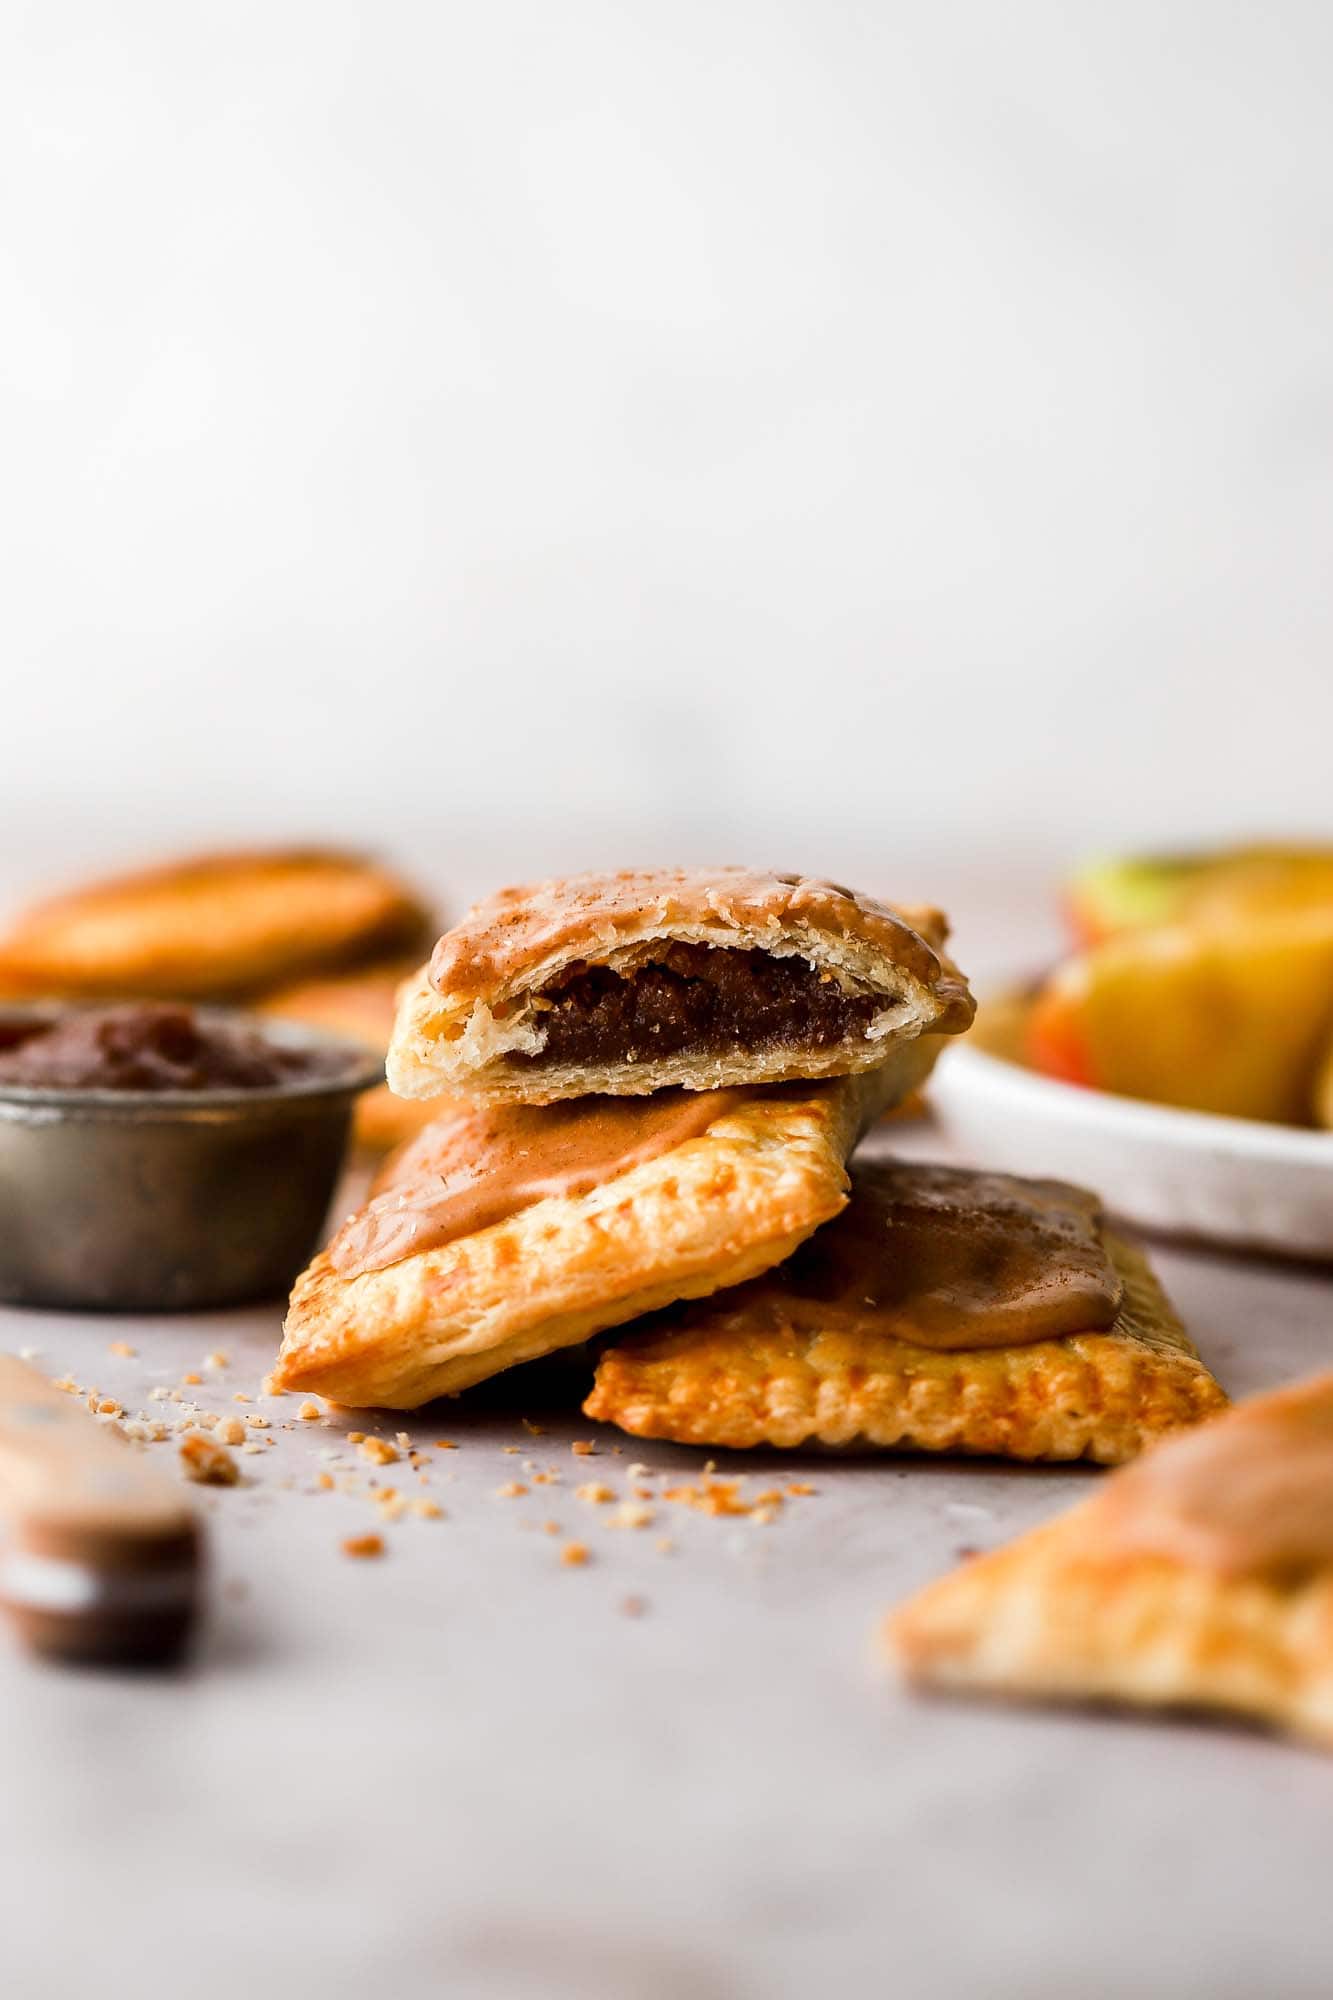
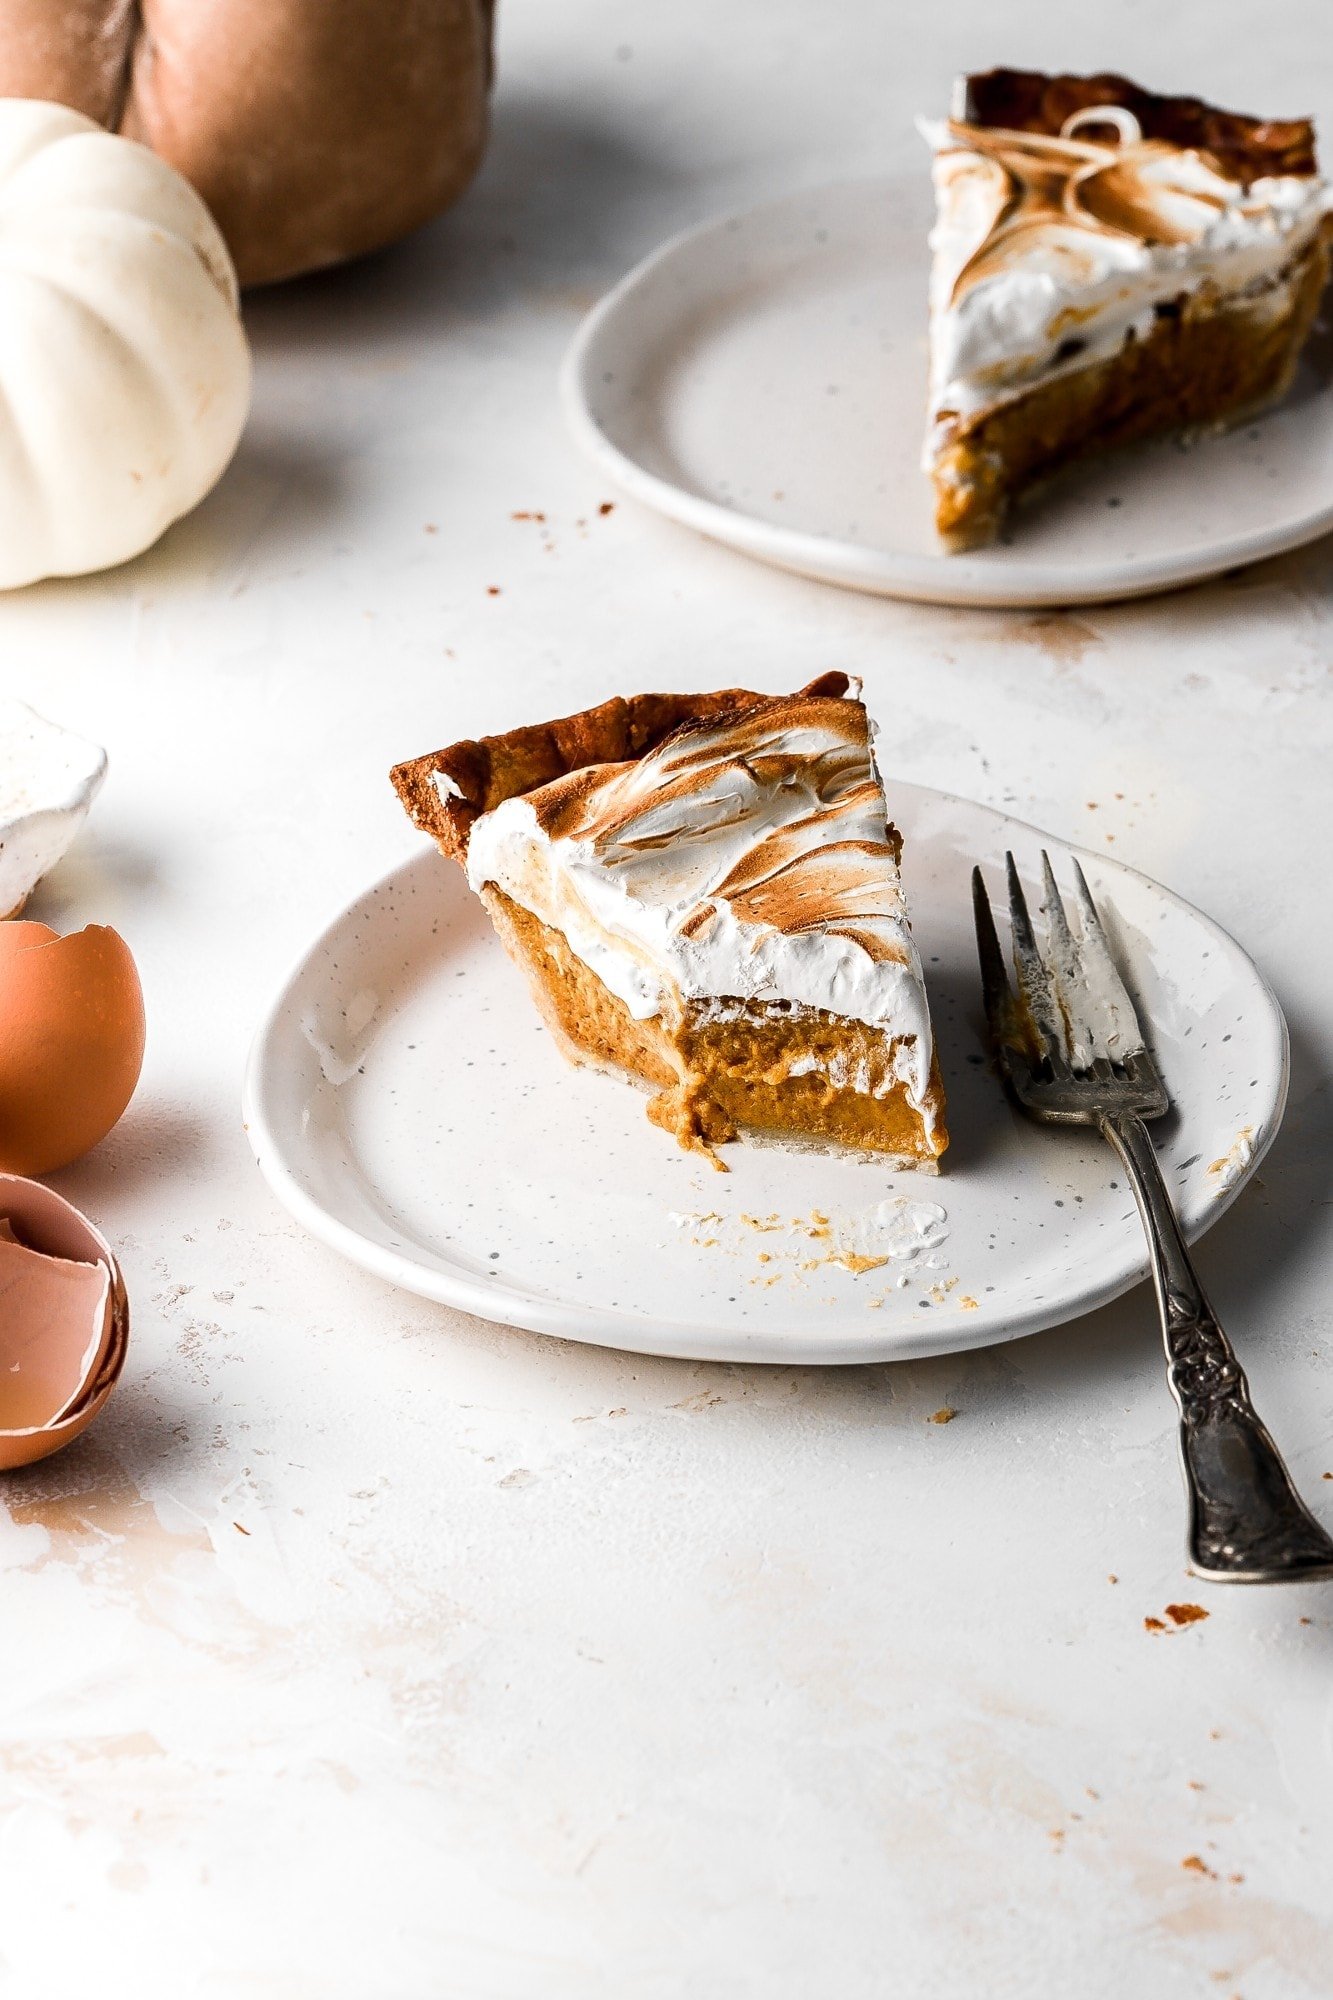
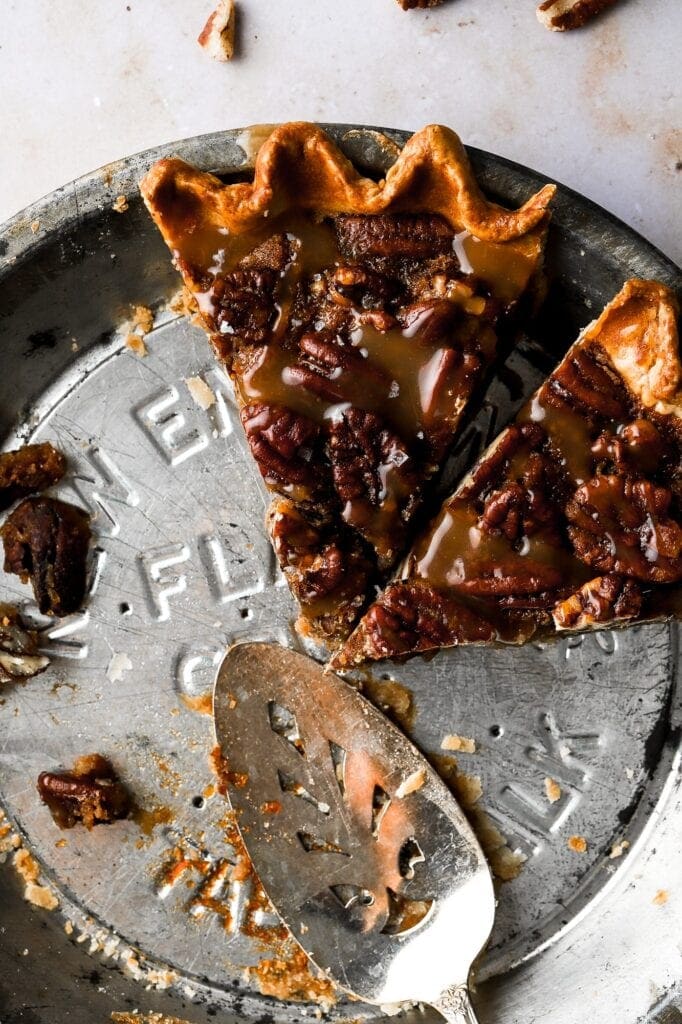
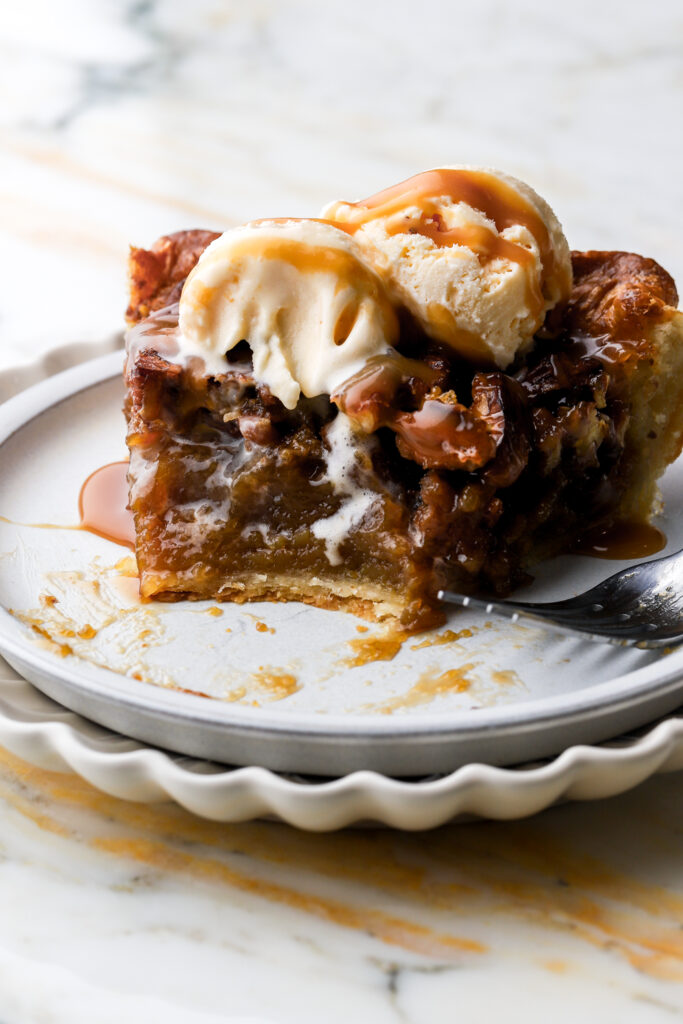
This pie crust can be used to make any of my pie recipes and any leftover scraps can be used to make pie crust cookies. Some of my favorites are dutch apple pie, caramel pecan pie, cherry pie and of course, the classic French Silk Pie!
What is Traditional Pie Crust?
Traditional American pie crust is very similar to the French Pâte Brisée, also known as shortcrust pastry. It’s also a 3:2:1 ratio dough but the main difference being that Pâte Brisée butter gets incorporated a little more into the flour whereas American pie dough leaves the butter in tiny chunks, creating a flakier result.
Pie crust is pretty simple, if the rules are followed. It’s made with 3 main ingredients – flour, butter and water but those can be swapped for some fun flavors like using brown butter, swapping a portion of the flour for toasted pecan flour, or a portion of the water for liquor, etc.
It can be blind baked, par-baked or baked with a filling. The main thing to keep in mind is that before baking, you want everything to be cold at all stages. Start with cold ingredients, refrigerate often and make sure it’s refrigerated solid before going in the oven.
How to make Pie Crust
This pie crust recipe is super simple to make and has never failed me! & I’m not a fancy pie kind of girl. If you’ve been here a while, you’ll know that cakes are more my thing. So I’m telling you this pie crust turns out for me every time and I have tested it many different ways (literally like 5x in the past week alone lol).
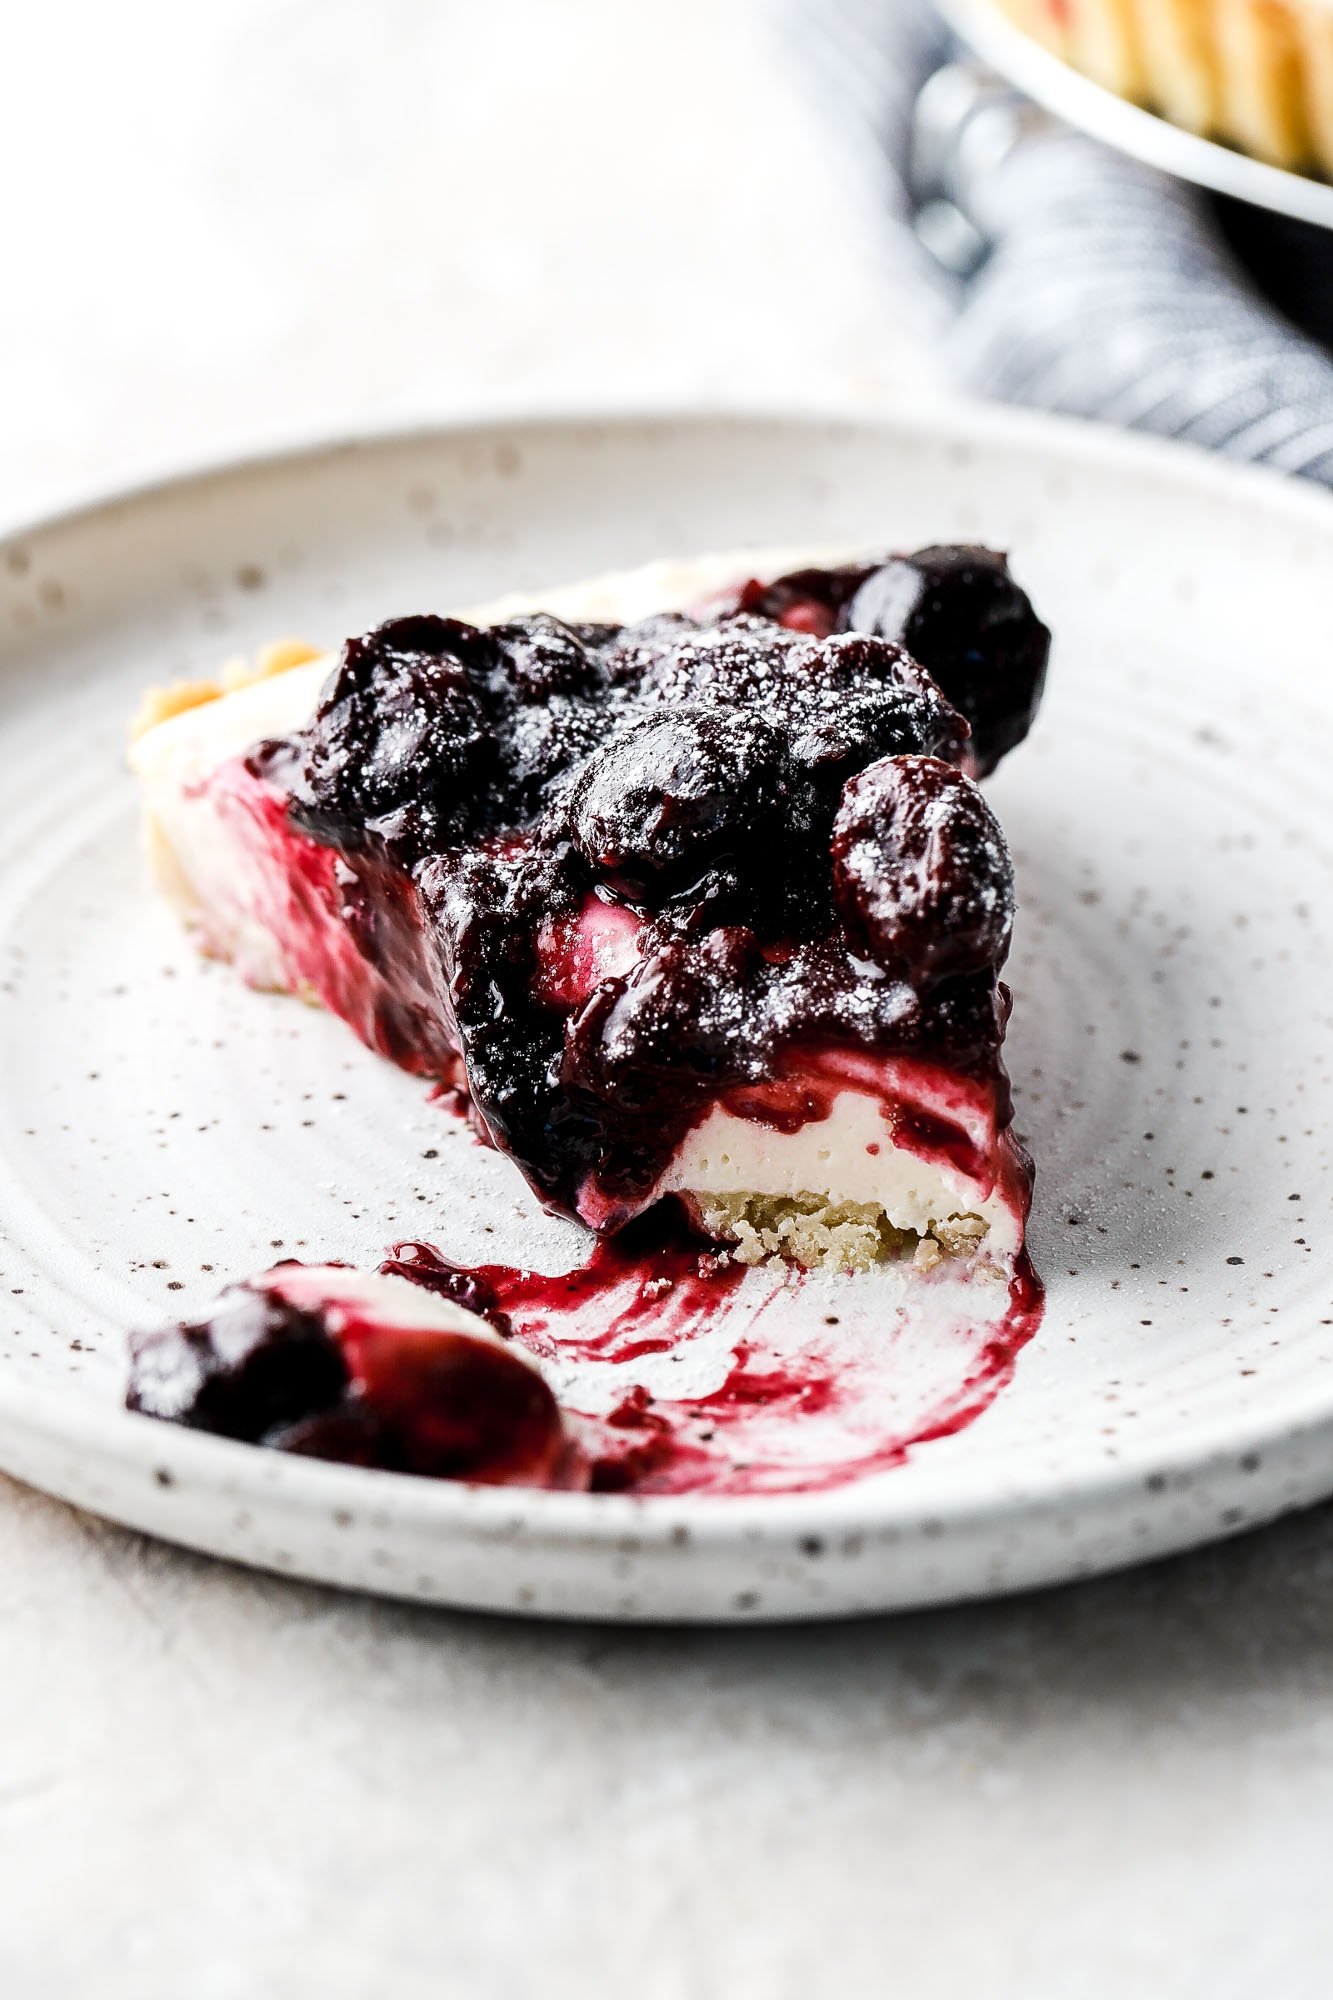
I used the smaller variation in my strawberry blueberry pie, apple butter pop tarts and cherry pop tarts and basically every other pie recipe that uses a pie dough. All I did was slightly increase the amount here to be more generous when making complete pies with a top and bottom crust and some designs.
The recipe can also easily be halved to make just a bottom crust, if needed.
Ingredients & Substitutions:
- Flour: I just use all purpose flour. There is such a thing as pastry flour and I know some people like cake flour for pie crusts too but all-purpose works perfectly fine here. I also HIGHLY recommend using a digital scale, as flour is almost always over measured.
- Butter: I love using salted butter in pastry but unsalted works fine too, I would just add an extra pinch of salt.
- You can do all butter, all brown butter or half and half. Just make sure to give the brown butter time to chill back until it’s hard again. I have not yet tried this recipe with shortening or lard but I don’t see why they wouldn’t work here.
- Water: you’ll want ice cold water. I measure my water first, pop it in the freeze while I get the rest of my ingredients ready and then bring it out when I need it (make sure it doesn’t actually freeze though lol).
- Alcohol: Never have I ever had a flakier crust than when I added 1-2 Tbsp of alcohol. Because alcohol inhibits the development of gluten, it allows you to add a little more liquid without risking a tougher pastry. My best results were with whiskey, but any type of spirit will work fine and won’t impart any flavor unless you use more.
- This is totally optional and not necessary but I always recommended the alcohol for the best results.
Step-by-step Photos
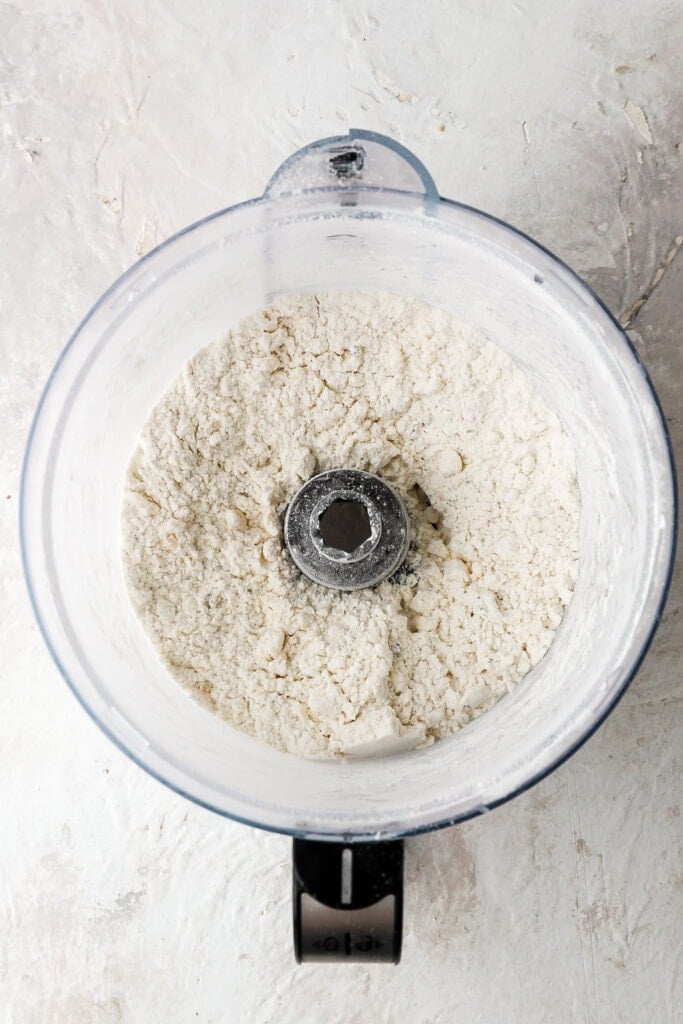
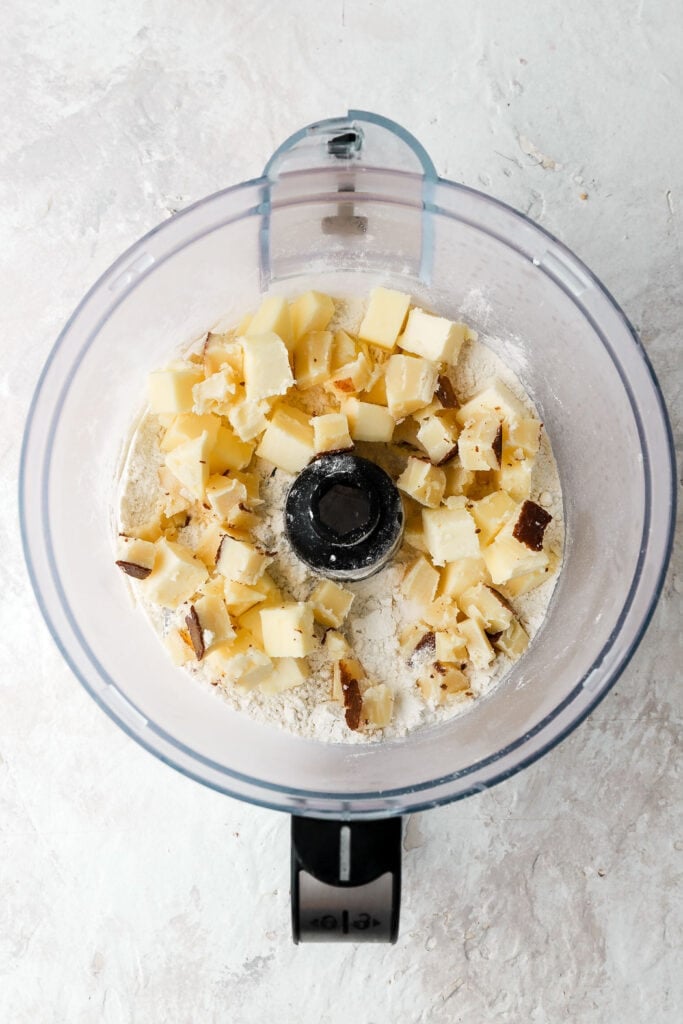
- Cube cold butter and then place it back in the fridge, measure out flour and place it in the fridge or freezer, measure out water and place it in the freezer for 15 minutes.
- Place flour in a food processor and place the cubed butter on top. Pulse for a few seconds until the butter and flour look like small crumbles.
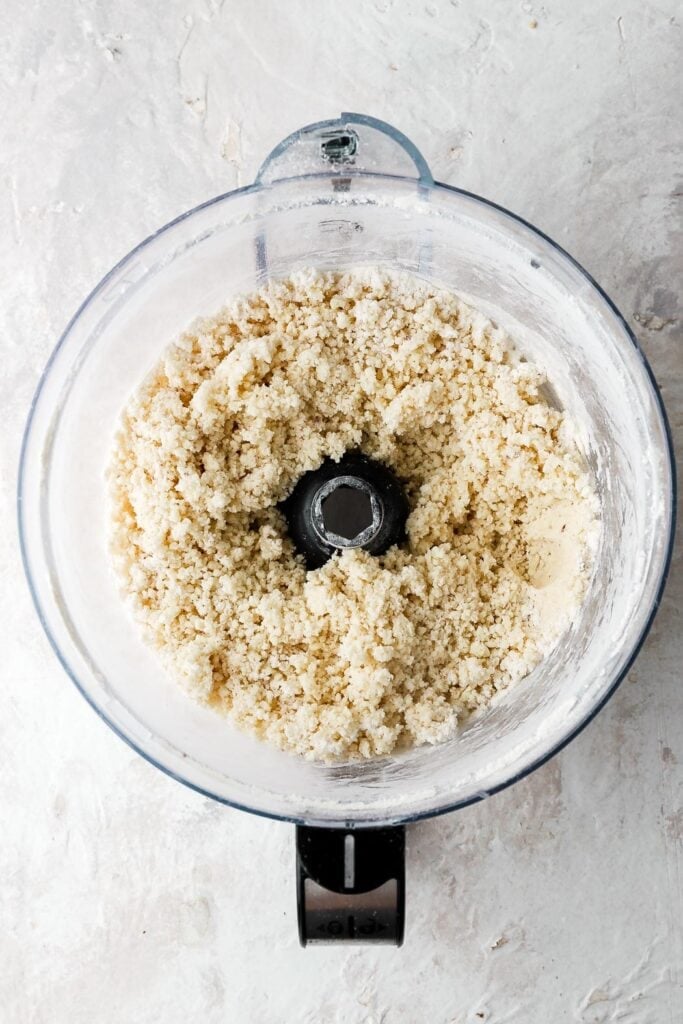
- Drizzle in half the water and alcohol and pulse, then drizzle in a little more at a time just until the dough starts to look more wet. The dough will still be crumbly but when you press on it, it should stick together.
- Dump the mixture onto the countertop and use your hands to press it all together and fold it over itself a couple of times so it all sticks together nicely. You should see bits of butter in the dough and it should be fully hydrated (so no dry.flour spots) but not too sticky to handle.
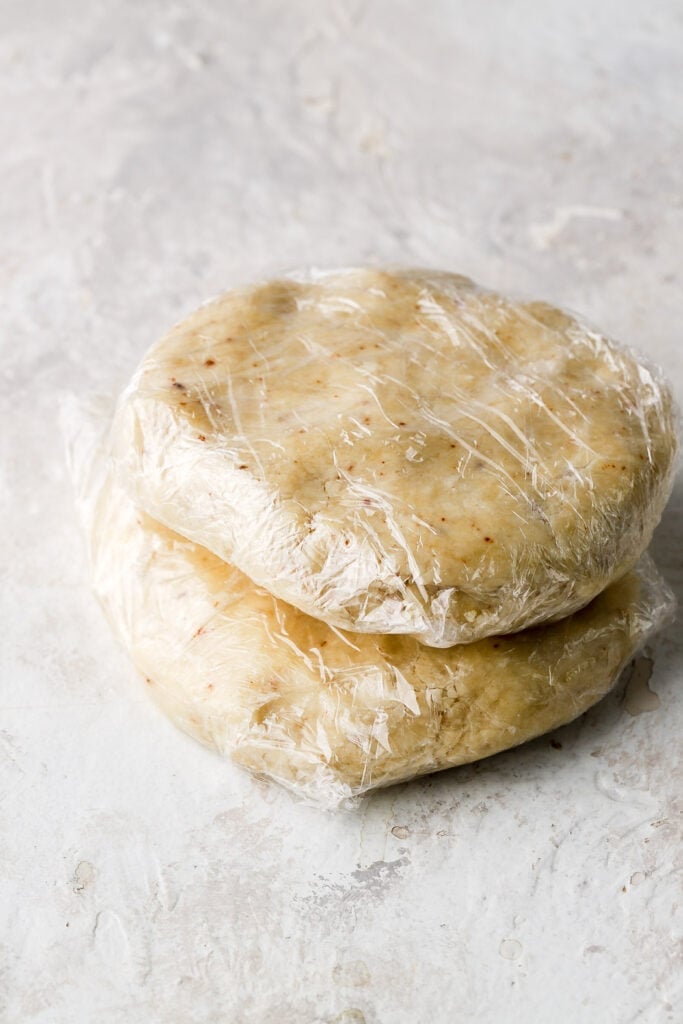
- Separate the dough in half and form two flat(ish) discs. Wrap them in plastic wrap and place them in the fridge for 1-2 hours, up to 3 days or freeze for a couple of months and use as desired.
Pro Tips:
- Temperature matters: to create a flaky crust, you want the butter to be cold so it doesn’t melt into the dough. To keep the dough as cold as possible I like to put my flour and sugar in the food processor bowl and then freeze the whole bowl while I cube my butter.
- Add the butter to the bowl and freeze for 5-10 more minutes.
- Measure out cold water and then place that in the freezer for a few minutes as well.
- Temperature matters again: Refrigerate the pie dough for 1-2 hours after you’ve made it. This will allow the gluten to relax a little and keep the dough cold so you can easily roll it out. Once it feels a little more firm, about an hour or so, you can roll it out. I roll out half at a time (so the bottom crust first and then the top crust) so the other half doesn’t get too warm.
- If you’re making designs with the top crust and it starts to feel sticky/soft, just refrigerate it again for a few minutes.
- Temperature matters one more time: You want the pie crust to hold its shape while it’s baking. If you bake room temperature pie dough, the butter will melt right out and the crust will shrivel up.
- What you want to do is, once the pie is all done, pop it in the fridge or the freezer for about half an hour before baking. You want the crust to be firm and cold before baking so that it holds its shape in the oven.
- Temperature matters one last time: Depending on what you’re filling your pie with, the temperature of the oven matters. You always want to bake your pie crust at 350F (177C) or higher, if the oven is not hot enough, the butter will just leak out and the crust will shrivel up.
- I blind bake/par-bake my crust at 425F (218C) and it sets beautifully without any shriveling.
How to roll out pie dough
When I refrigerate my pie dough for 1-2 hours, it is firm but it’s still malleable and able to be rolled out. If your pie dough feels rock solid, let it rest on the counter for a few minutes until it’s able to be rolled out without cracking.
The dough should not be super sticky so just lightly flour the countertop and the top of the dough. Place the rolling pin in the center of the pie disc and roll out almost to the edge of the pie but don’t go past the edge. Then turn the dough 90 degrees and repeat until it’s about ⅛ inch thick and large enough to fully cover your pie dish.
You can either roll the dough around the rolling pin and unroll it over the pie dish or I like to gently fold the dough in half and then fold it in half again and then unfold it over the pie dish (watch video above).
How to bake pie crust
This all butter pie crust recipe can be baked in several different ways. You can blind bake it completely, par-bake it or bake it with the filling.
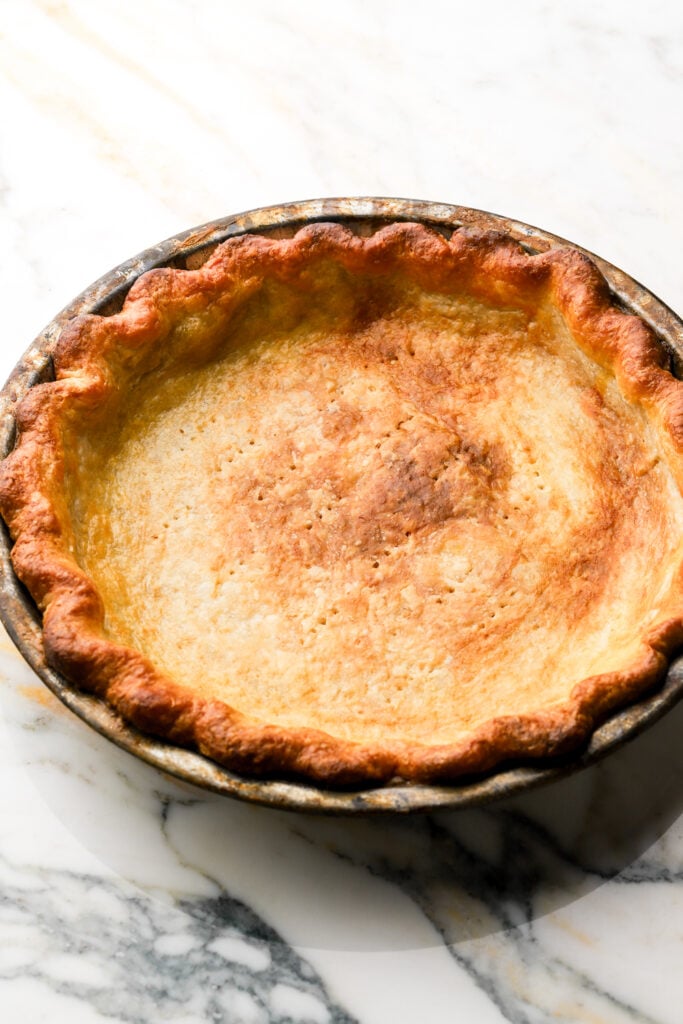
How to blind bake pie crust
Blind baking means to completely bake the crust before adding a filling and it doesn’t get baked anymore after the filling is added. This method of baking pie crust is good for precooked fillings or no-bake fillings such as custards made on the stove top, like my Apple Cream Pie, or no-bake cheesecakes, lemon meringue pies, key lime pies, etc.
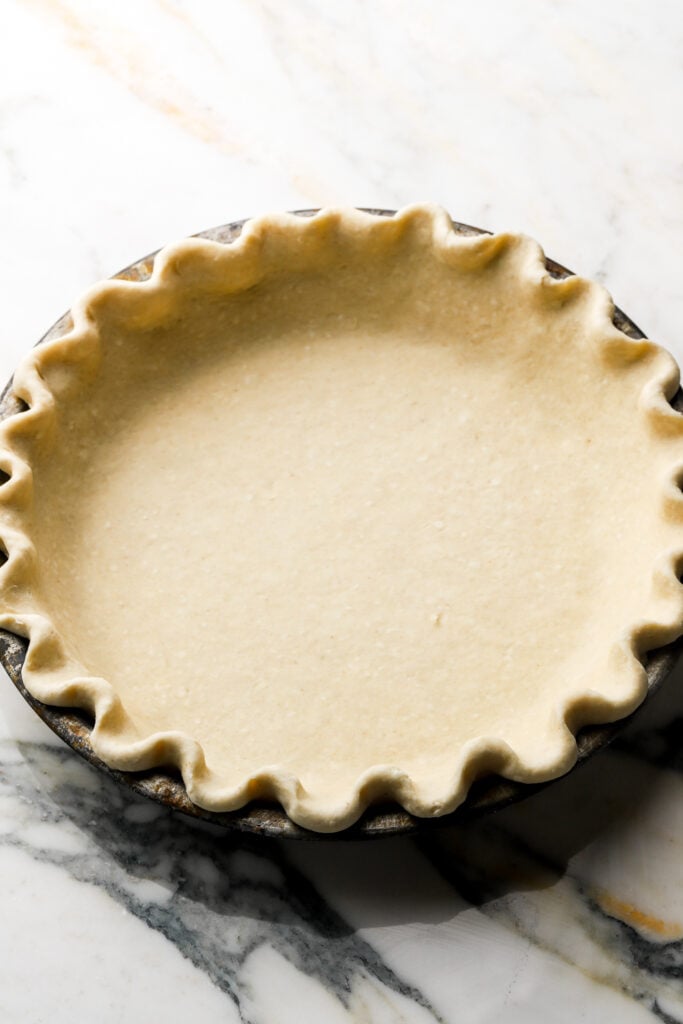
- Roll out your dough onto a well floured surface. Fold or roll the dough up and place it over the pie dish. Press it down on the bottom and adjust the sides as needed. Do whatever design you desire along the edge of the crust and then refrigerate or freeze for at least 30 minutes, until the pie feels firm.
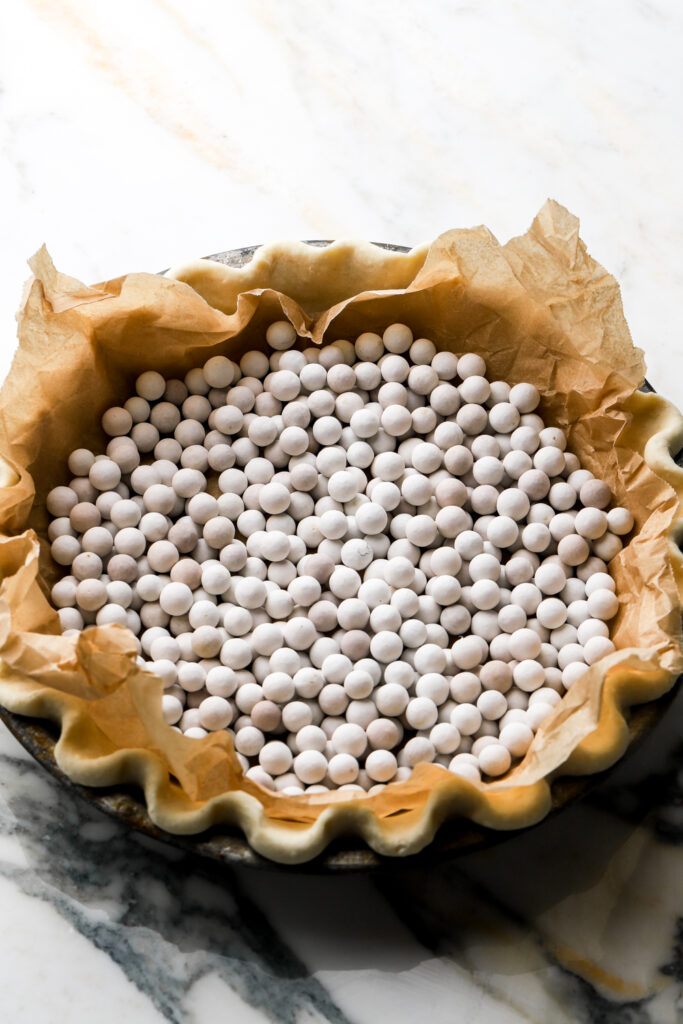
- During this time preheat the oven 425F (212C) – can do less too if desired but don’t go below 350 (177C). Once the dough is cold and firm, place a sheet of parchment paper (I like to crumple mine so that it fits better) on top of the dough and fill it with pie weights. If you don’t have pie weights, use uncooked rice, dried beans or even flour. Place the pie dish on top of a cookie sheet (just in case there’s any butter spillage – I use a metal pan) and bake for 20 minutes (a little longer if oven temp is reduced a little), until it starts to get some color.
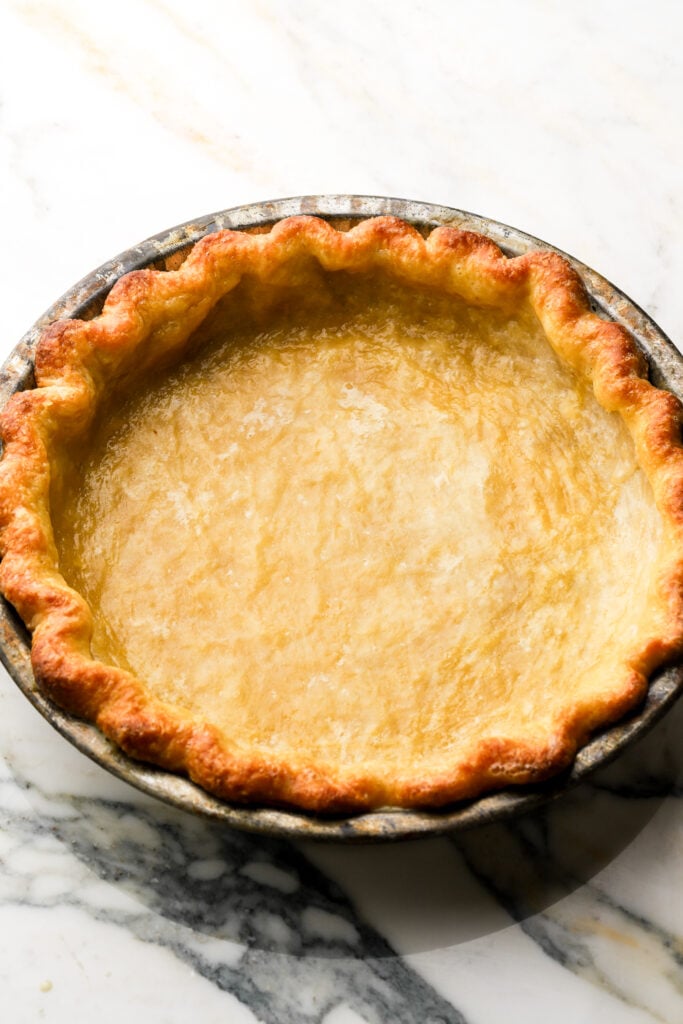
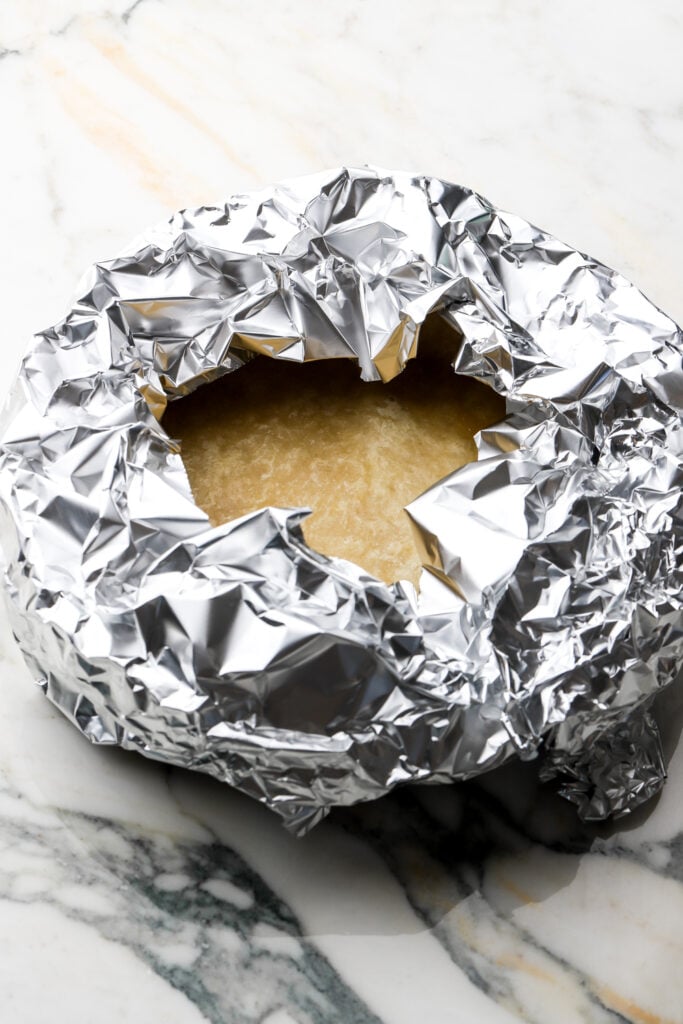
- Remove the pie crust from the oven and carefully remove the parchment paper with the weights from the pie crust. Egg wash the pie crust now (if desired) and then return it to the oven for another 10-15 minutes, until the pie crust has browned as desired. If the edges are getting dark, wrap a piece of foil just around the edges so they don’t burn. Remove and allow to cool completely before filling. Don’t fill a hot crust, you’ll get a soggy bottom.
How to par-bake pie crust
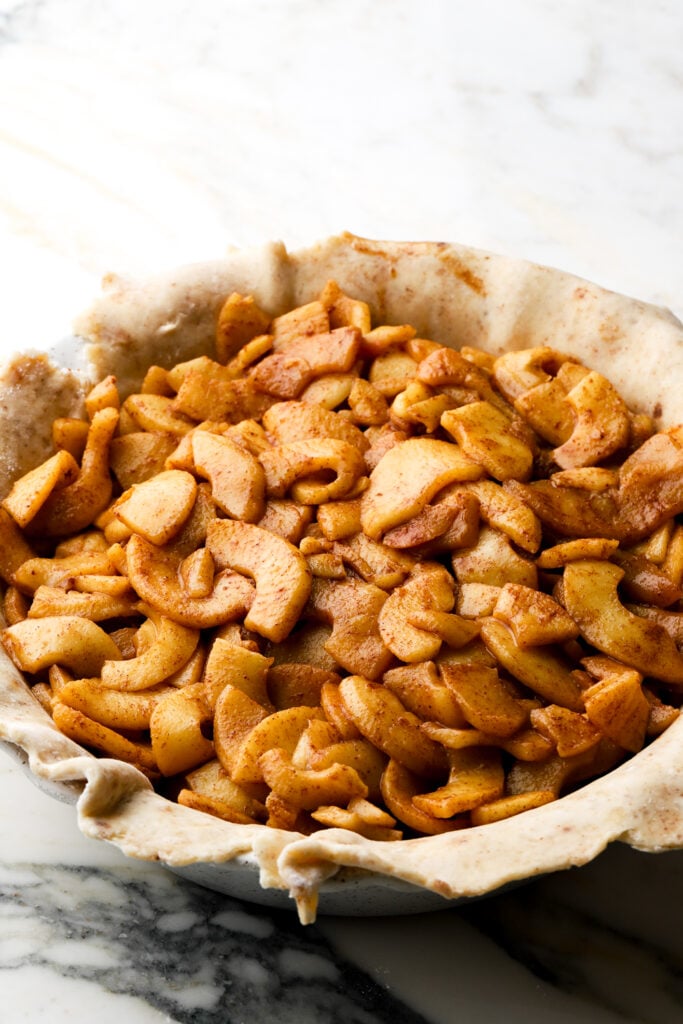
Par-baking means to partially bake the dough, about 80% and then remove it from the oven and finish baking it at a later time. There are different ways/reasons to do this for bread or pastry but for pies it’s usually to make sure the crust is fully baked so it doesn’t result in a soggy pie crust. I like to do this for pies like pecan pie, dutch apple pie (I didn’t do it in that recipe but it would be a good idea lol), pumpkin pie and apple butter pie. This would basically be good for any pie that has a baked filling but no top crust.
To par-bake a pie crust, you’ll follow step 1 and 2 from above and then when you remove it from the oven, you’ll let it cool back to room temperature, egg wash it, then fill it with your filling and return it to the oven as directed by the filling recipe.
If the edges of the crust are browning too much, you can tent the edges with foil as well.
How to bake a pie with the filling
This is the simplest way to bake a pie crust but also the riskiest lol. I don’t prefer to put filling on raw pie, but I do it with pies that have a top and bottom crust, like a Classic Apple Pie.
It is possible to par-bake those pies too but it’s more difficult to get the two crusts to stick together if you par-bake the bottom.
You would just follow step 1 from above and once the crust is firm, egg wash it and fill it with the pie filling. If desired, place the top crust on top or do whatever kind of designs you want. Then egg wash the top as well, along with some coarse sugar, if desired.
You’ll almost always need to bake a full pie like this for AT LEAST an hour. I recommend a lower temperature for this, like 350F (177C) and you’ll most likely need to cover it with foil at some point so the top doesn’t burn.
TIP: I don’t ever use convection for baking pies because the last thing to finish baking is the bottom so you definitely want the heat coming straight from the bottom of the oven and not circulating to the top.
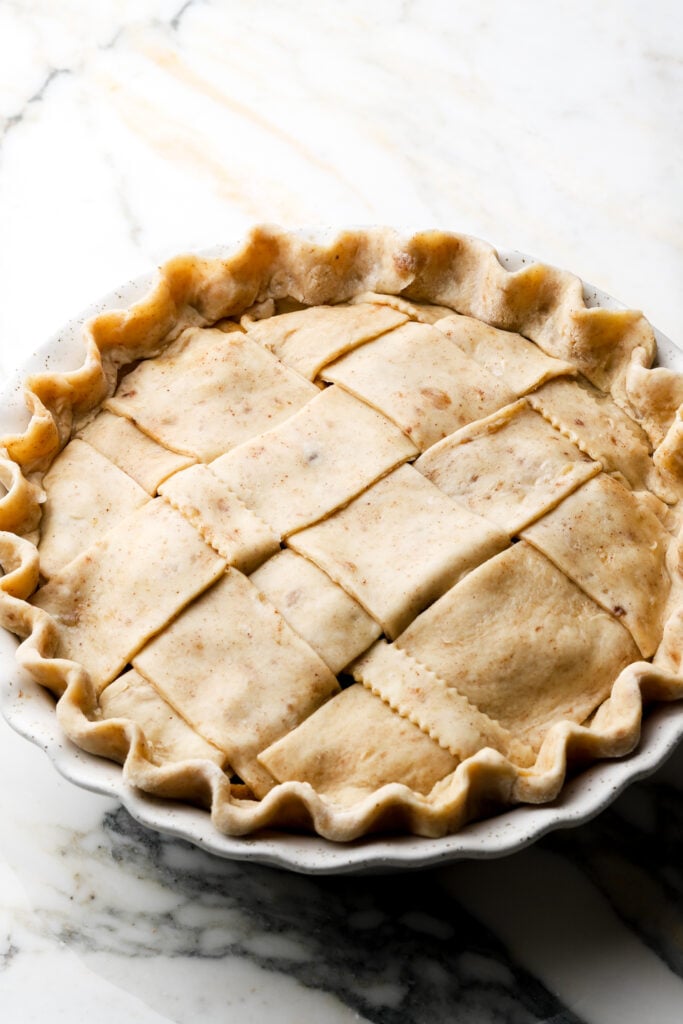

How to assemble pie with a top crust
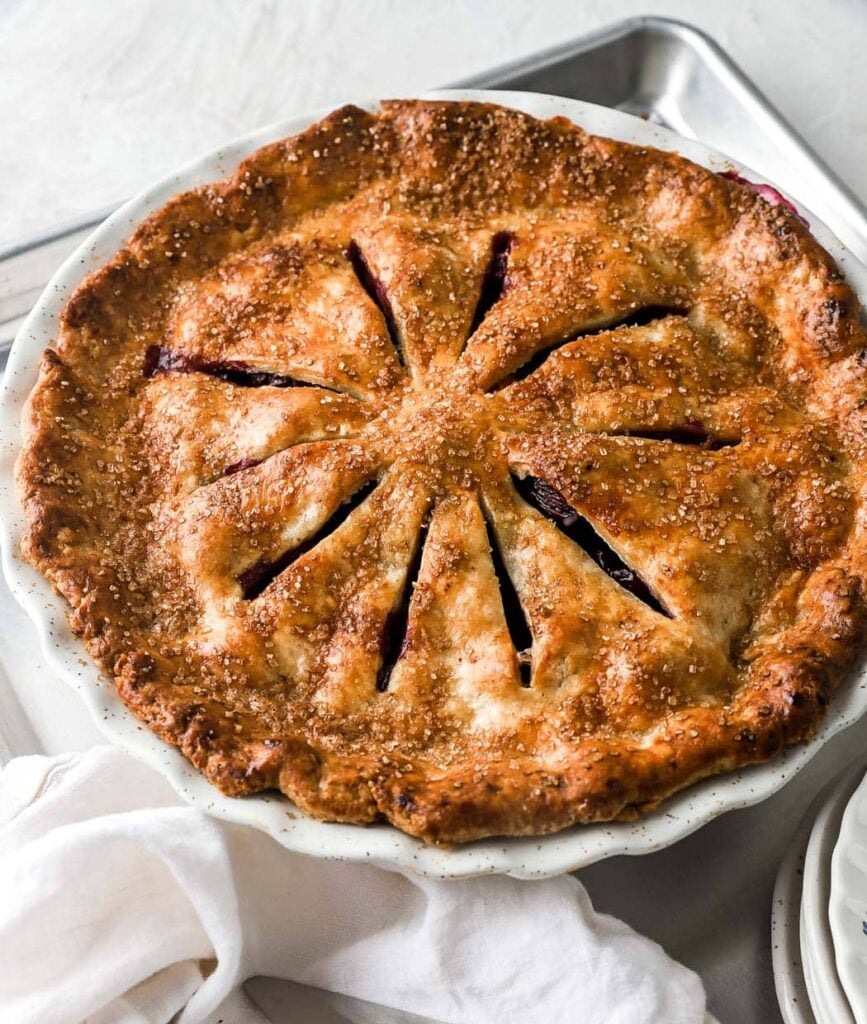
When I want my pie to have a bottom and top crust, I just roll out my top dough into a slightly smaller circle than the bottom. Then place the top crust on top of the filling and fold the edge of the top crust underneath the bottom crust and crimp the edge with your fingers by pressing down every other finger width apart. Slice a few slits in the top for air vents.
You can also do different designs like rolling out the top crust and cutting out different shapes and placing those on top of the pie or cutting your top crust into strips and making a lattice.
You’ll always want to make sure to crimp the edges together so they stick and egg wash them so they look nice and shiny. You can also sprinkle some coarse sugar, if desired.
Remember, cold dough is much easier to work with so refrigerate often and refrigerate or freeze before baking!
What type of pan is best for pies
I prefer to bake pies in a metal pan. Metal pans conduct heat the quickest and most efficiently. Your crust will most likely have the best bake using a metal pan.
That said, I don’t always bake my pies in metal pans because my metal pan is quite shallow and I don’t have a deep dish metal pan so I use my ceramic ones for things like deep dish apple pie and it works fine with a few insurances.
I always make sure to bake on conventional (no fan) and not convection and I like to place it on the bottom rack so that the bottom pie crust gets direct heat. I also always place my pie dish on a metal baking sheet to catch any drippings.
I haven’t tried it but some people recommend using a baking stone underneath the pie dish to bring more heat to the bottom of the pie… I guess my metal pan might be doing some of that anyway lol.
And if I’m baking a more hefty, wet pie like traditional apple pie, I usually sprinkle some sort of starch, like flour or cornstarch on top of the bottom pie crust to help absorb more of the filling juices.


Frequently Asked Questions
It just needs a little more hydration, add another 1-2 Tbsp of water at a time until it forms a dough.
Your pie crust can crack when you go to roll it out if it’s not fully hydrated (see above) or if it’s too cold when you’re rolling it out. Just leave it out at room temperature for a few minutes before rolling.
The pie dough can leak butter if it wasn’t fully chilled or if the chunks of butter are too large in the crust. When you blend the flour with the butter, you want pea size chunks or smaller.
The pie will shrivel up and shrink when it’s baking if it wasn’t fully chilled before baking. You want the pie crust to be cold so the butter is firm when it goes into the oven.
The dough was overworked. You want to handle it as minimally as possible, once it comes together, let it be, refrigerate it and when you roll it out, use it. Don’t re-roll it out.
Thanks so much for reading today’s post, if you have any questions just comment down below.
If you use this pie crust for your pies, I would love it if you left me a review!
As always, have a blessed day and happy baking!
Love, B