

Brioche Donuts
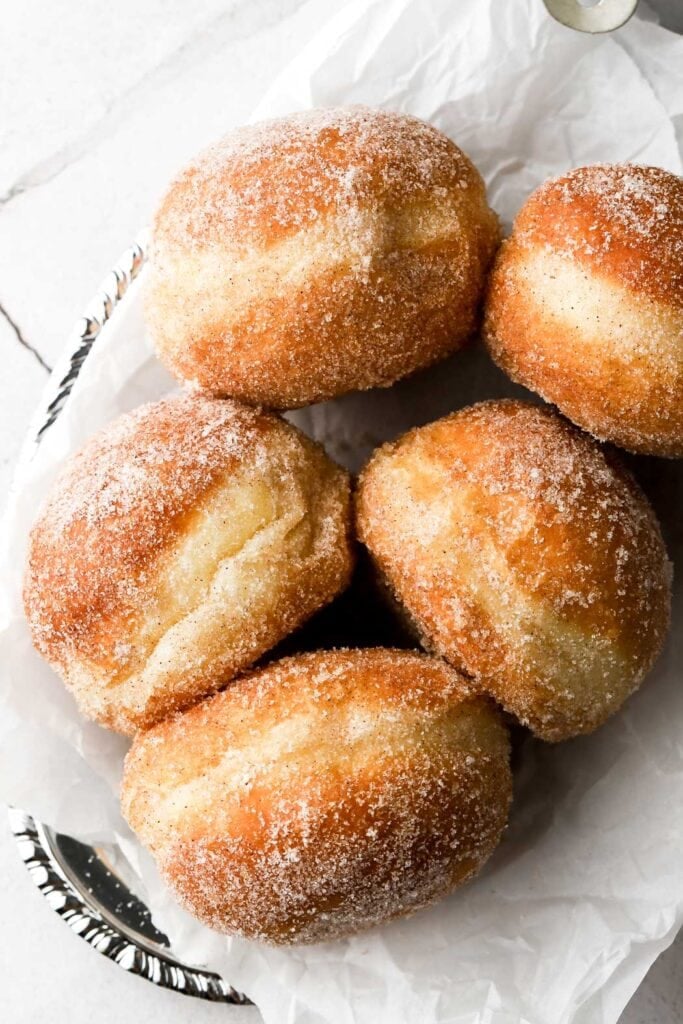
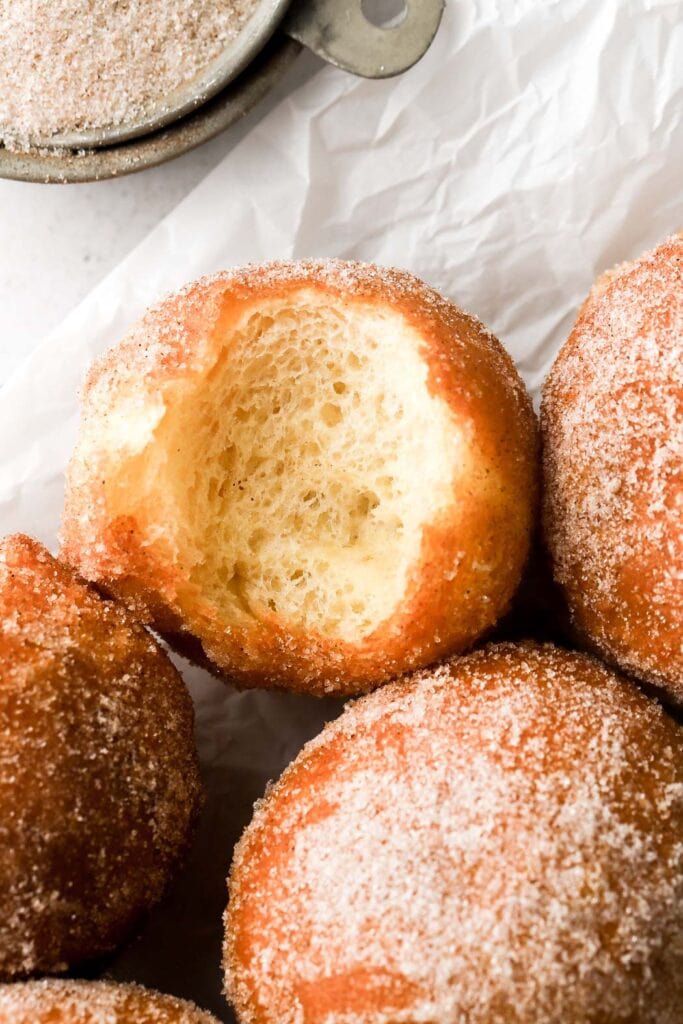
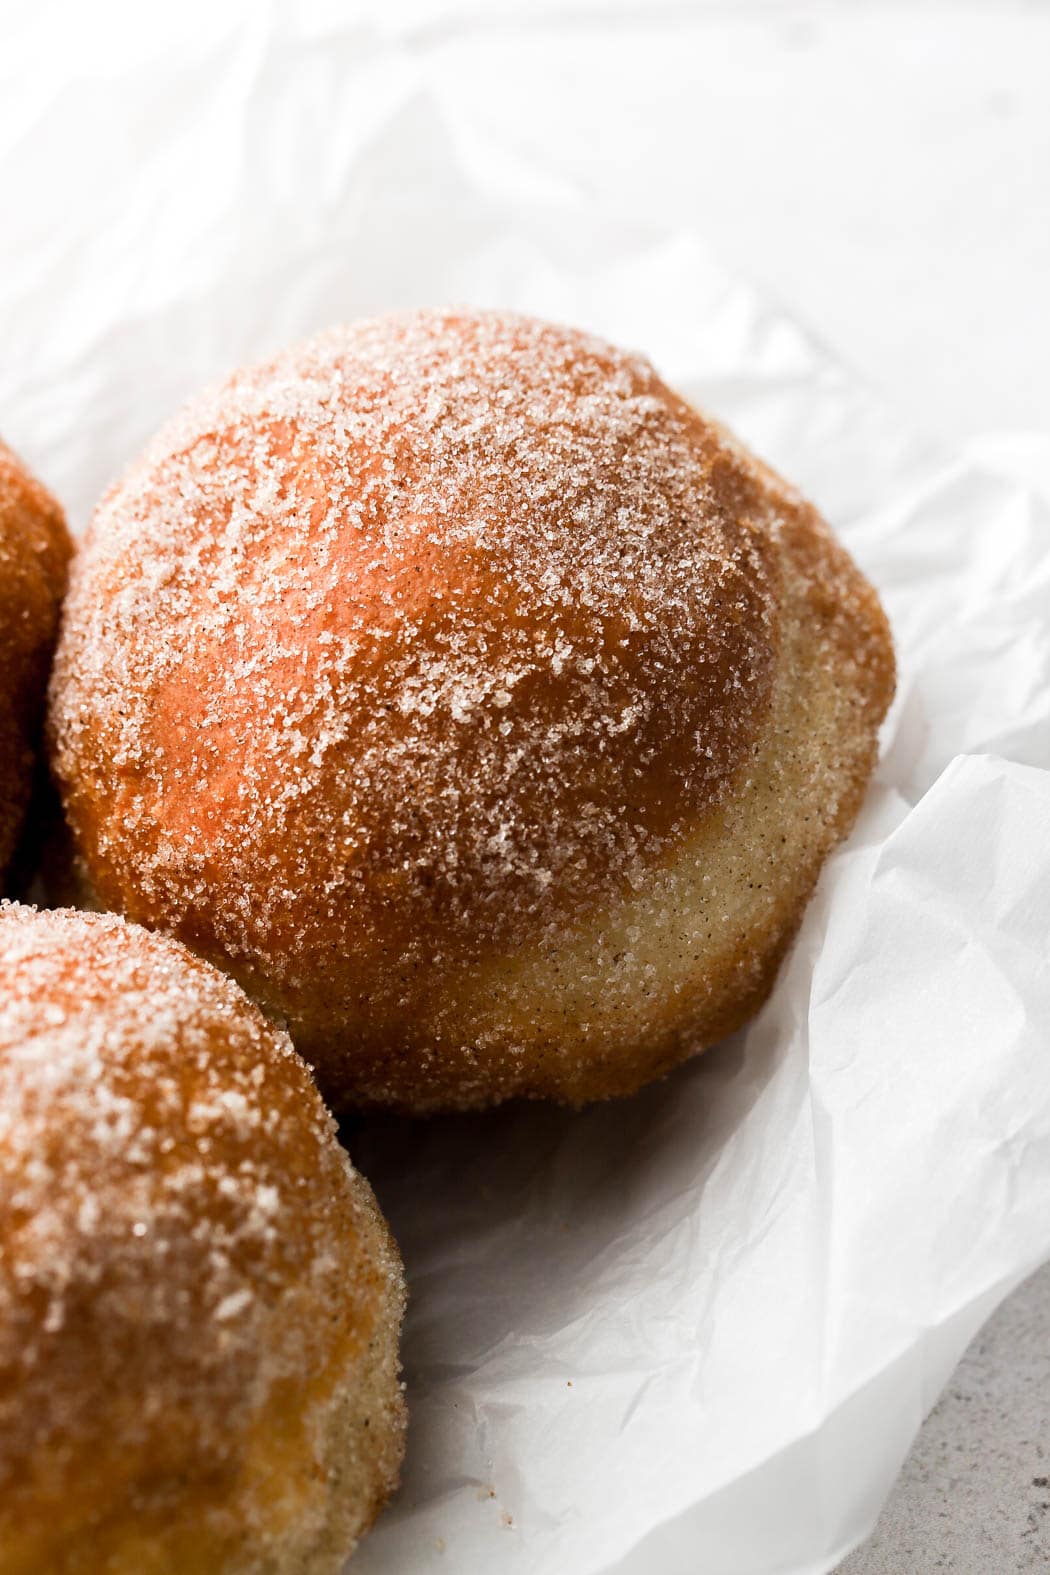
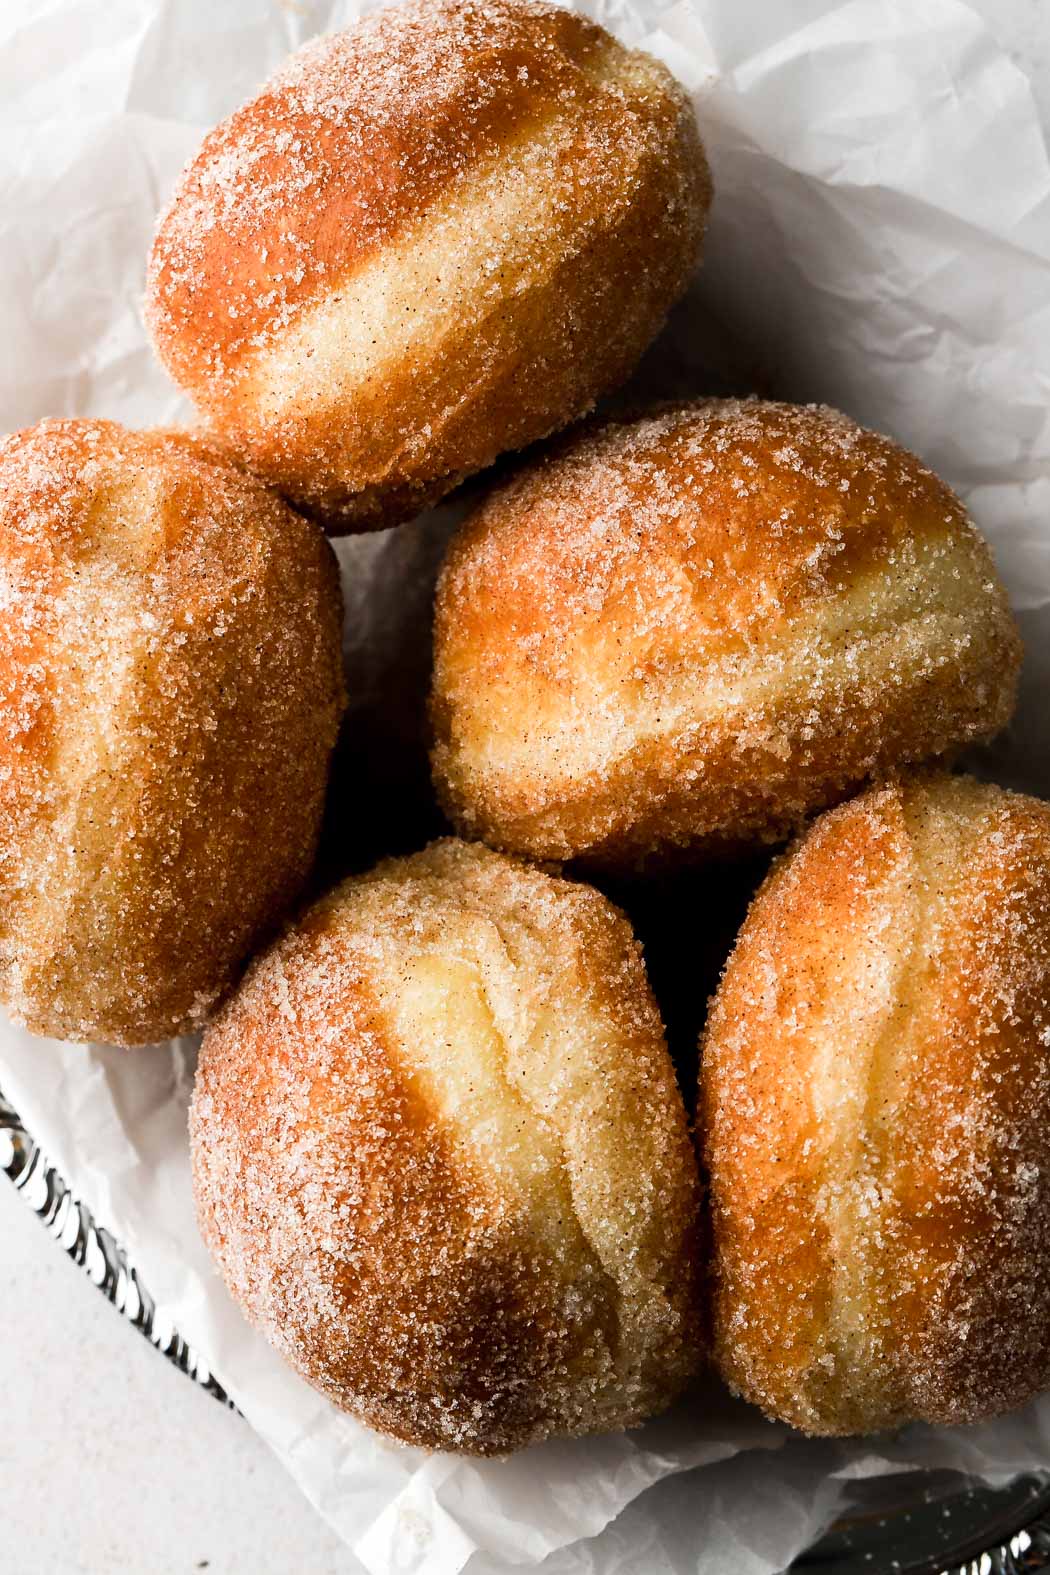
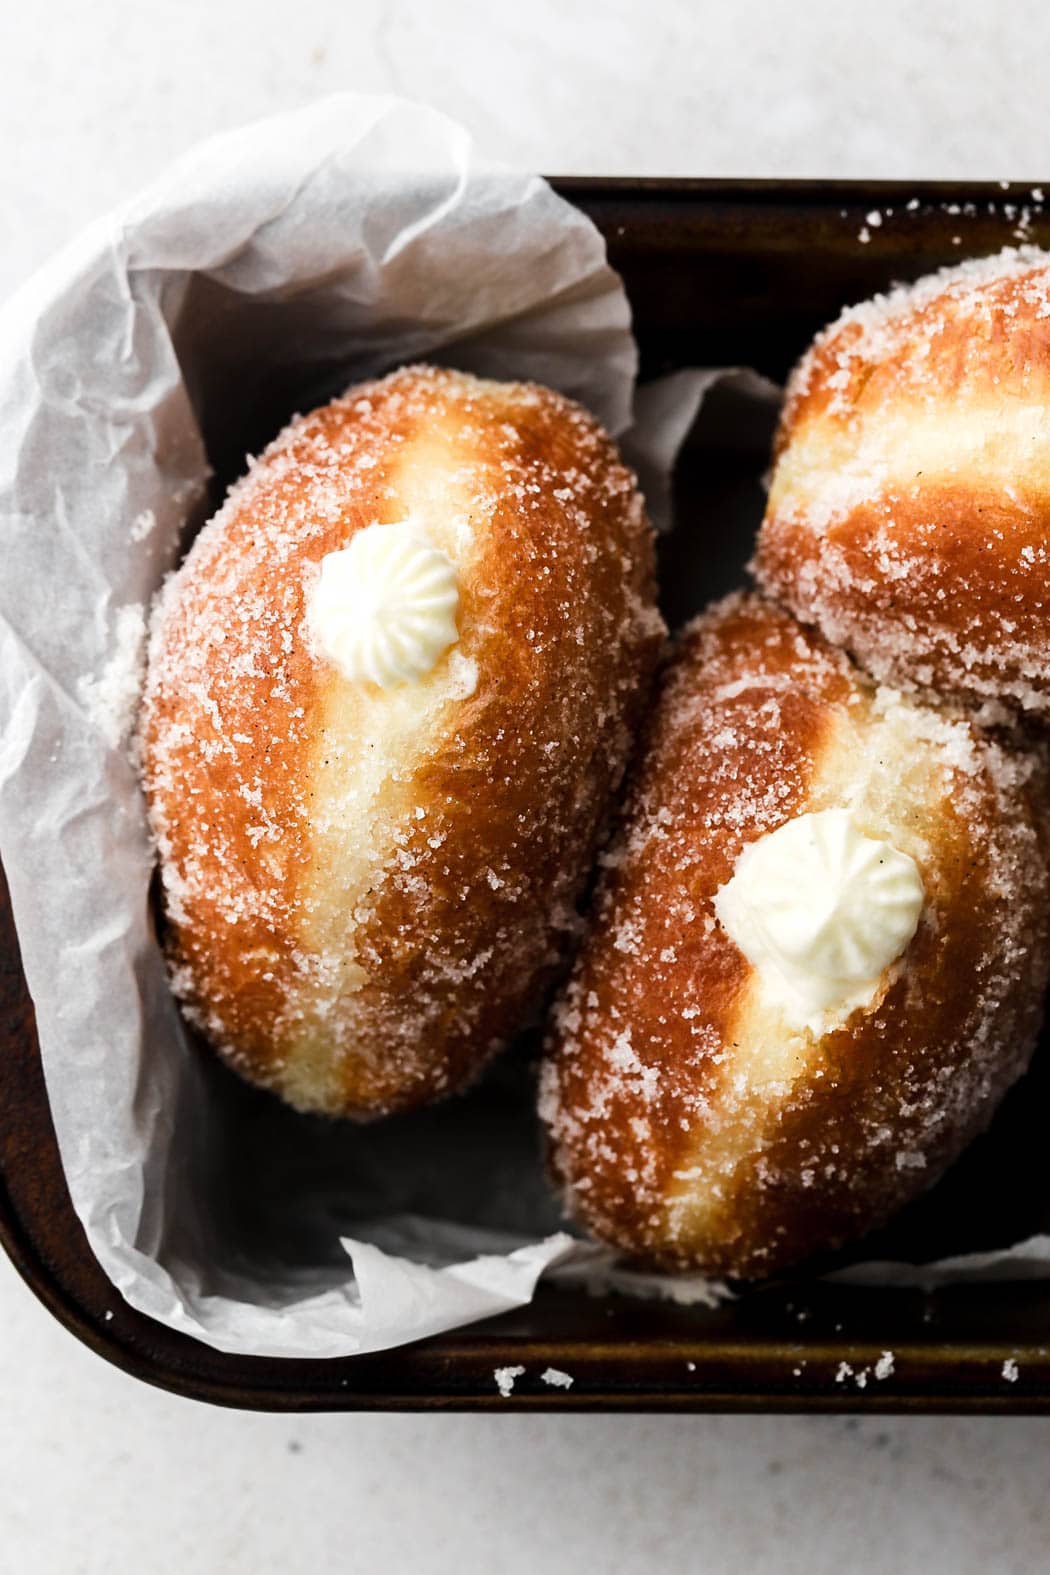
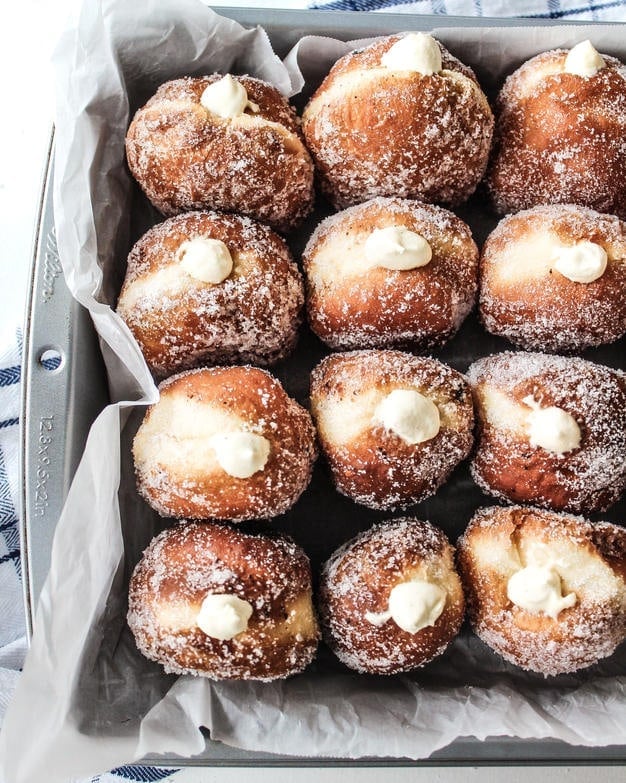
Brioche donuts are the ultimate form of donut. They’re made with a super fluffy and pillowy brioche dough and fried to golden perfection with that characteristic white line through the center. They can be filled with Bavarian cream, pastry cream, jam, chocolate ganache, diplomat cream or any other soft and creamy filling.
What is brioche dough?
There is lean dough, like ciabatta, bagels and sourdough, which is generally made of just flour, water, yeast and salt. These doughs usually don’t contain much fat in them unlike enriched dough.
Enriched dough generally refers to a dough that’s rich in butter, eggs, milk, and/or sugar, etc. which makes the dough higher in fat, slightly sweeter and more tender. The most popular types of enriched dough are brioche and challah.
Brioche dough usually contains some eggs, milk and/or butter. The ratios are usually specific to the recipe but the main difference between brioche and challah is that traditional challah doesn’t contain dairy, it has a lot more egg yolks and uses olive oil.
The added fat and sugar tenderizes the dough, making it super soft and fluffy. Think fluffy french toast or a soft cream stuffed donut.
Making dough can be intimidating and it sounds a lot more complicated than it actually is. There is a lot of science behind baking and especially dough with yeast, it’s actually very interesting but I’ll spare you the nerdy stuff. I’ll just give you a few things to keep in mind.
Ingredients for brioche donuts
- Flour: the added fats will weigh down the dough, making the gluten weaker. That can be balanced with a flour that has a higher protein content, such as bread flour.
- This recipe is made specifically using all-purpose flour to make it more accommodating for those who don’t have access to bread flour.
- Water: I’ve tested this recipe with both milk and water and found that water provides a more pillowy texture for brioche donuts.
- Eggs & egg yolks: My brioche has a little more eggs than traditional and the extra egg yolks added provide extra tenderness, making the donuts super pillowy soft.
- Yeast: this recipe works with both active dry yeast and instant yeast. I follow the same process for most of the dough except for active dry yeast, you’ll want to activate the yeast (see below) and for instant yeast, you can just add it in with the flour.
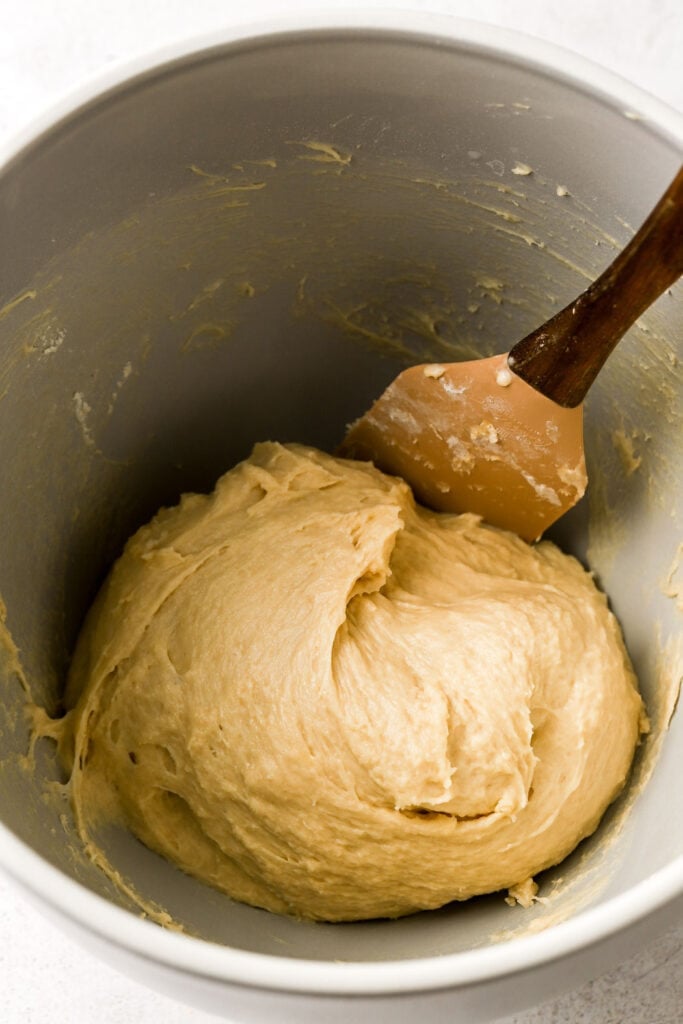
- Mixing: Depending on the type of yeast, the beginning additions can vary a little but the mixing process is simple. I add the eggs into the flour and sugar, then the butter and water. Mix
- Proofing: Dough proofs best at room temperature or slightly warmer. The colder the room, the slower the rise will be. I like to keep it somewhere between about 75-100°F (24-38°C).
What kind of yeast to use for brioche dough
I wanted to do a whole separate section on this to explain how to use both active dry yeast and instant yeast in this recipe. I’ve made this recipe many many times with both types and both of them turn out amazing.
The recipe is written using instant yeast because it’s easier and quicker but if you want to substitute it for active dry yeast, just follow these instructions.
Unlike instant yeast, active dry yeast needs to be activated. To do this, combine the yeast with HALF of the sugar and the warm water in a large cup, mix it and let it rest for 10 minutes. The mixture should develop a thick layer of foam on top.
If the water and yeast mixture doesn’t foam after at least 10-15 minutes, then the water is either too hot and kills the yeast or the yeast has expired. To be safe, make sure the water is lower than 120 °F (50 °C).
After the mixture has foamed, combine it with the rest of the ingredients and proceed to kneading.
If using instant yeast, I just add it into the bowl with the flour, sugar and salt. Then proceed to adding the eggs, butter and water.
Kneading the dough
You’ll want to knead the dough for about 10-15 minutes. There’s a few markers I use to know when the dough is done kneading.
- The dough should form a ball around the hook attachment on the stand mixer and not stick to the sides of the bowl anymore. It may still stick to the bottom of the bowl a little.
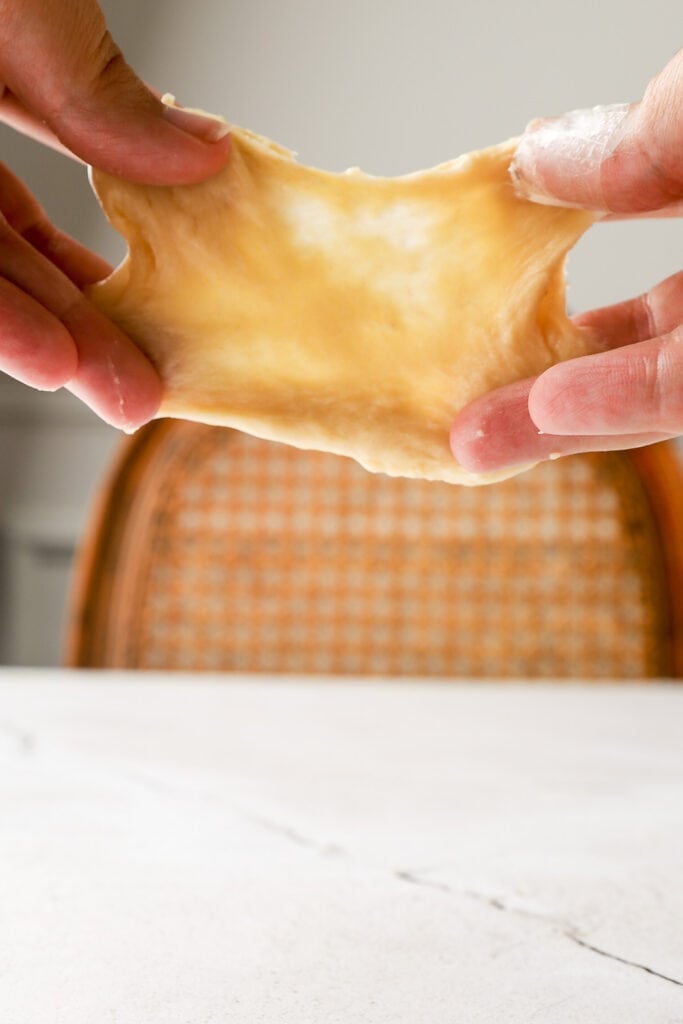
- The dough should also pass the windowpane test. The windowpane test is when you stretch a piece of the dough between your fingers until it’s thin enough to see light through before the dough tears.
If your dough is not passing any of these but is fairly close, that’s ok, just move on after kneading for 5-10 minutes.
If your dough is still really sticky and you can’t even touch it without it sticking to everything, add 2 more tablespoons of flour at a time, until your dough is able to be handled.
What temperature to proof dough at?
You want to make sure your dough is proofing at a comfortable temperature. Generally, room temperature is fine but if it’s slightly warmer, you’ll get a much quicker rise.
Yeast dies at around 120F (50C) so make sure the temperature is lower than that. I recommend anywhere between 75F (24C) to 100F (38C).
The dough can also be proofed in the refrigerator. This is called a retarding proof because it really slows down the process. The Benefit of this is that you can just pop the dough in the fridge overnight and the dough will develop a stronger flavor if it proofs for longer.
You can refrigerate the dough overnight for the first proof or the second proof, just bring it back to room temperature before proceeding with the recipe.
Shaping donuts
Some recipes call for rolling the dough out similar to cinnamon rolls and then cutting out rounds. This way you can also a hole from the center and make donuts with holes and donut holes.
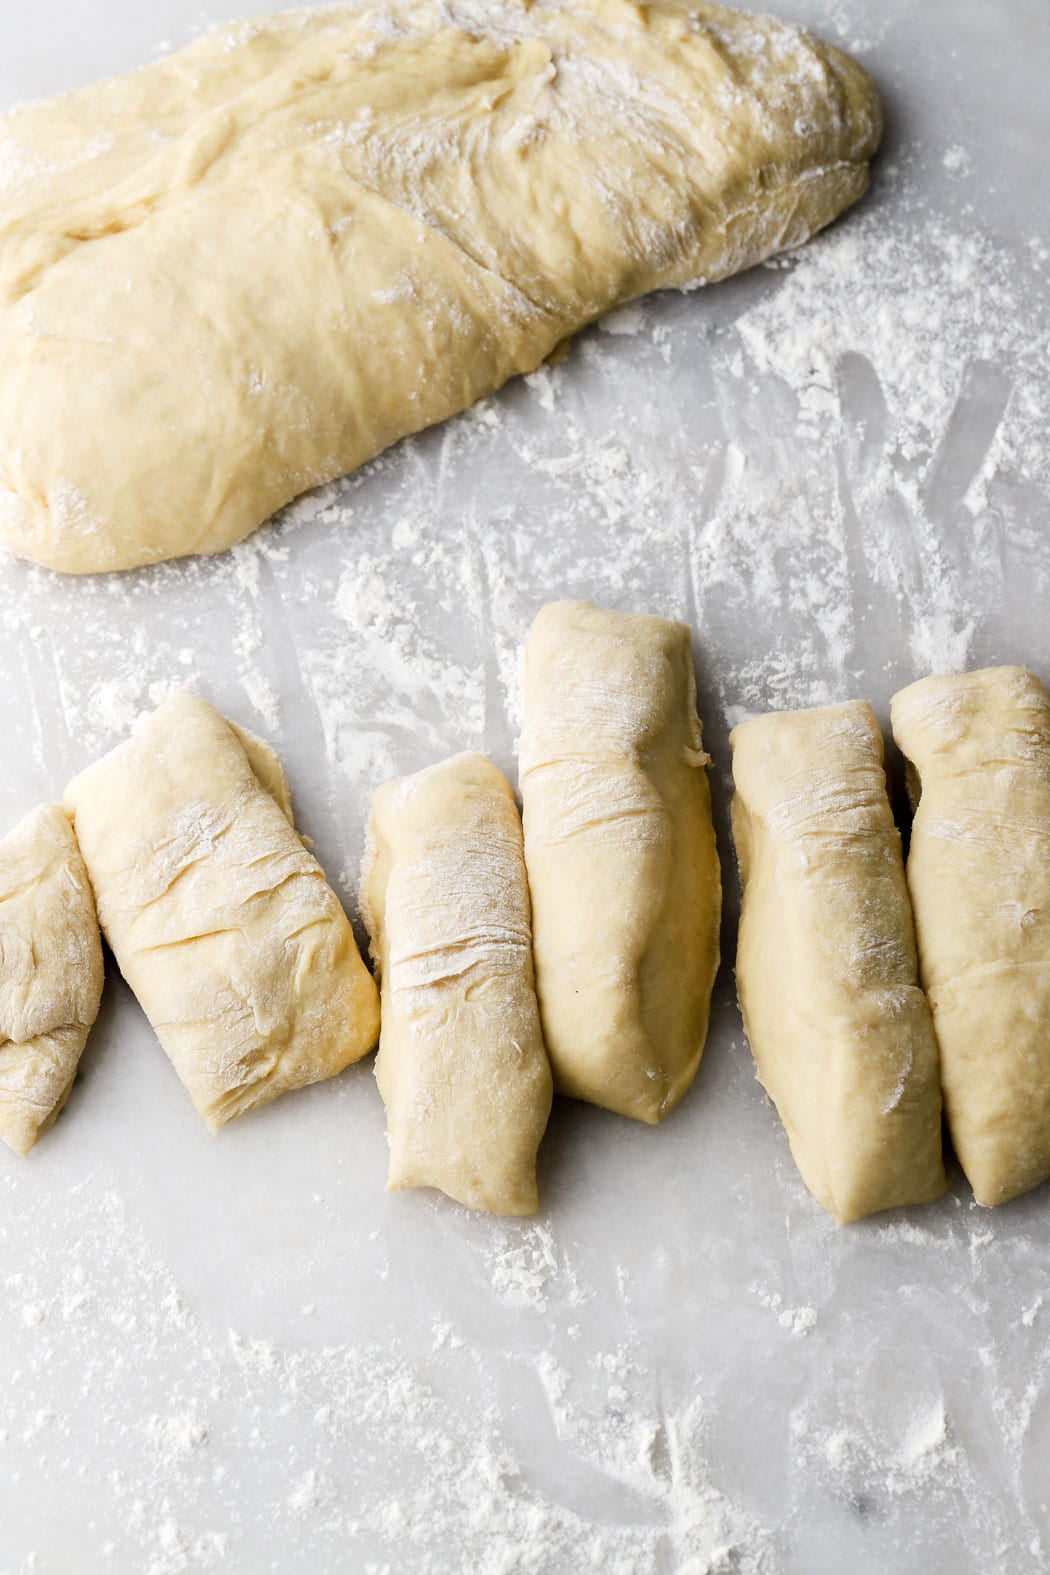
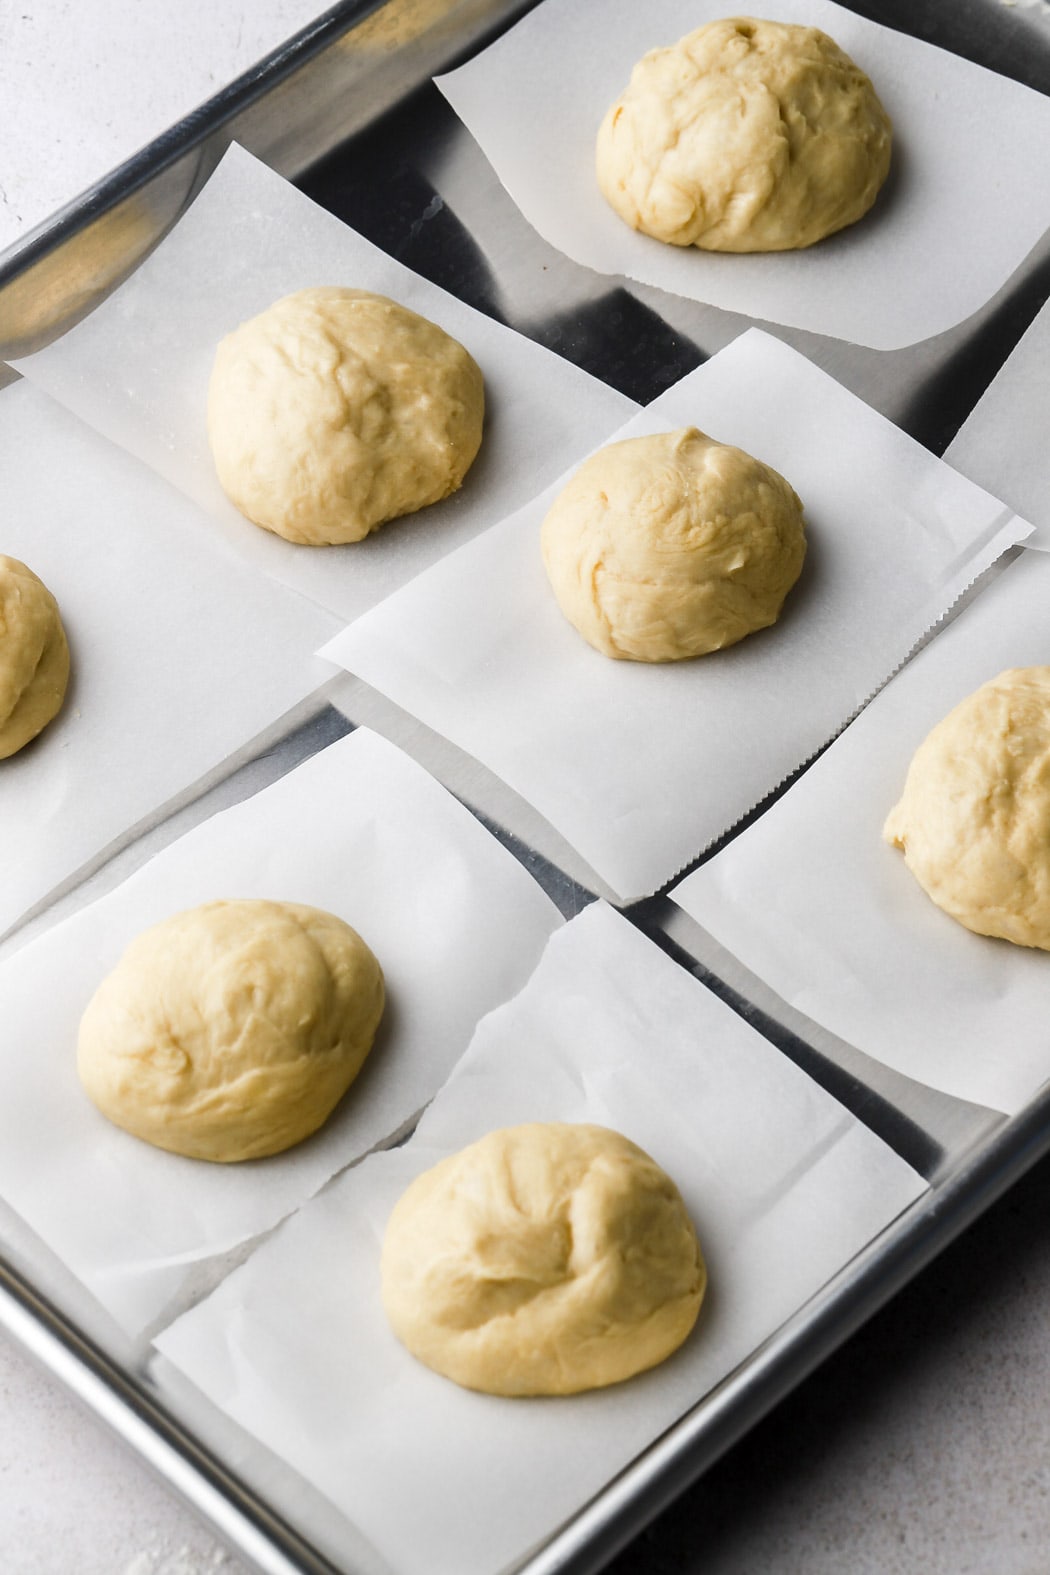
I prefer to just gently stretch the dough into a log and slice off chunks of dough. I just wing it but you can weigh them to make sure they’re even.
Slice off chunks, then grab one, place it onto the countertop and cup it with your fingers (dough still on counter, fingers around it like a cage). Now move your hand in a circular motion quickly around the dough (see video above for reference) until it’s a smooth ball.
You can make any size this way. They can be large and filled or tiny donut holes.
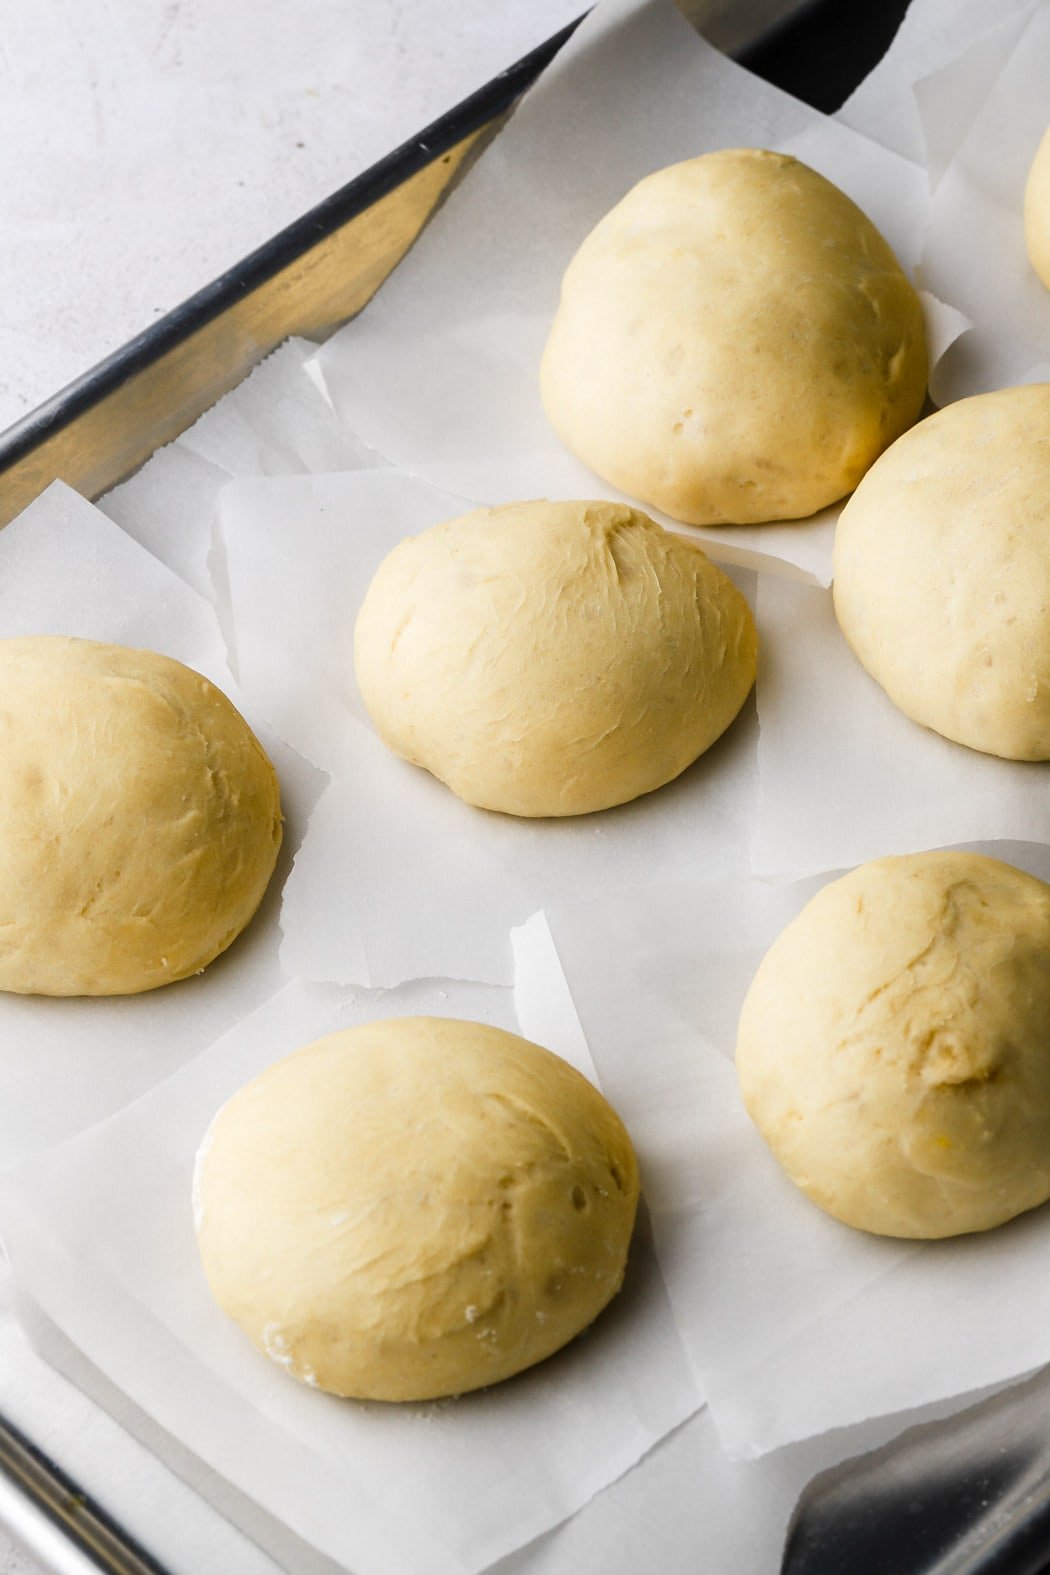
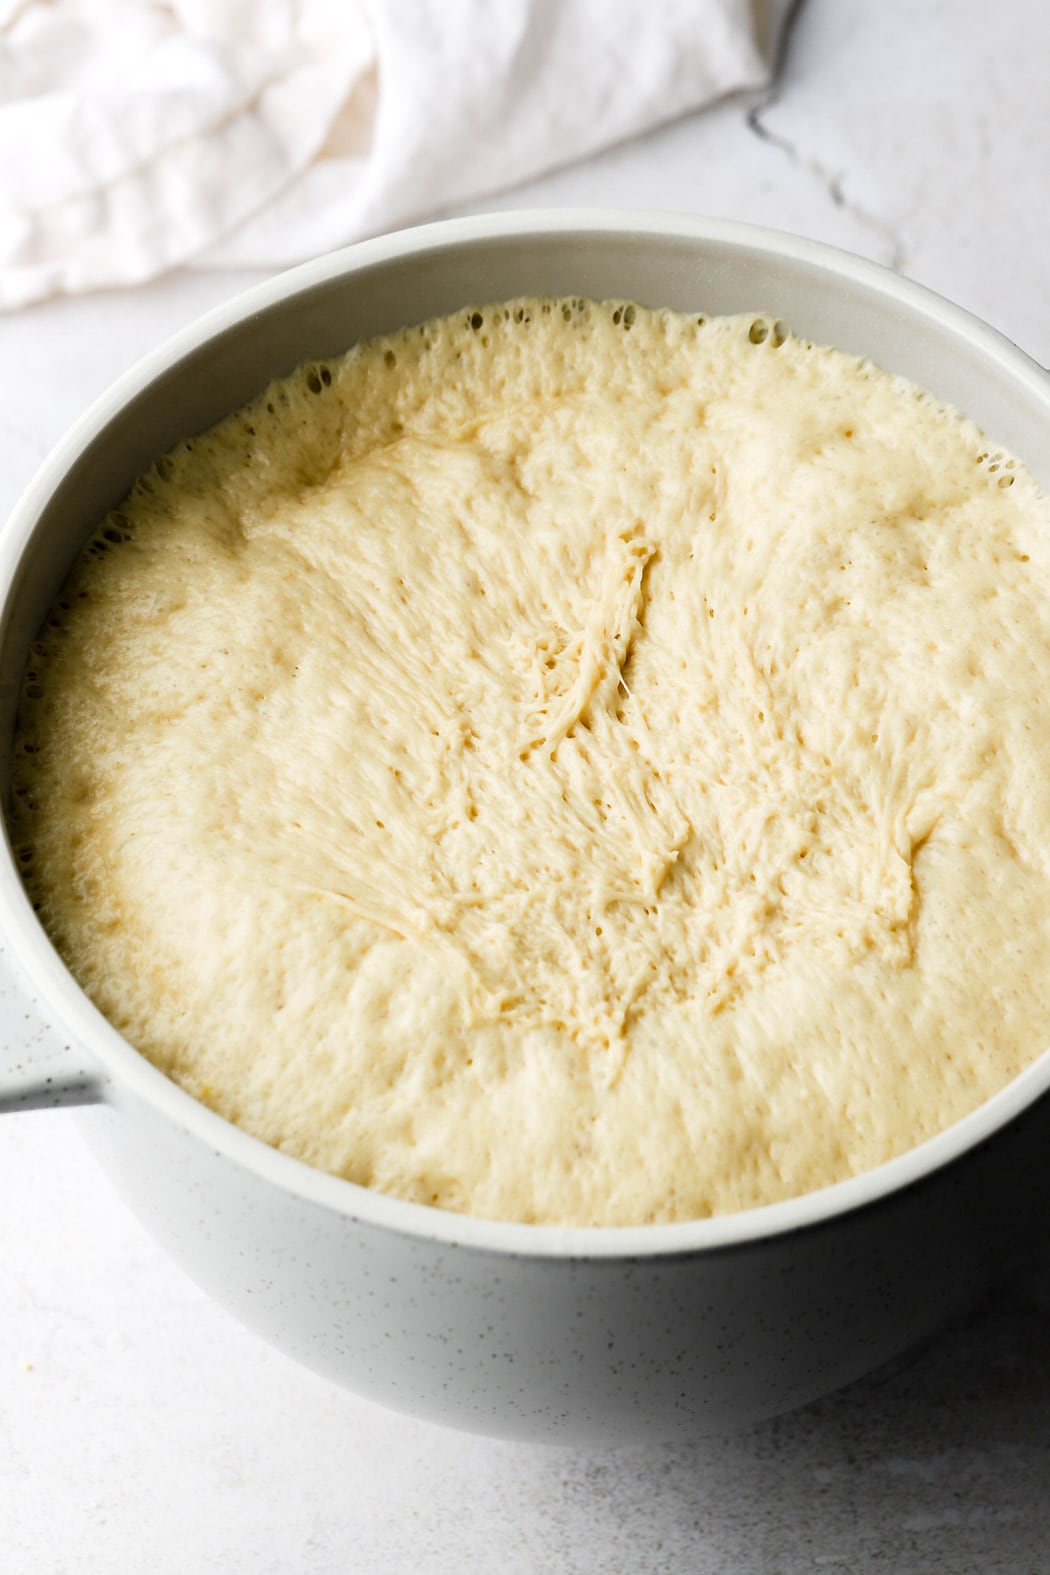
Rising and Proofing the dough
Rising and proofing are typically used interchangeably but the initial ‘resting time’ is actually the rising and the second ‘resting time’ is the proofing. The time needed for rising/proofing is dependent on the recipe and the environment.
Typically with instant yeast, you’re “allowed” to skip the first rise and just let the dough relax for just 10 minutes instead before shaping the dough. I prefer to still let it rise. It works both ways but I get a fluffier dough from letting it proof twice.
A general guideline is that the dough should double in size each time. It should also slowly spring back when you press on it, but also leave a small indent.
If the dough springs back quickly, then it needs more time to rise. If it doesn’t spring back at all, it may be over proofed and result in a flat, deflated bread.
Frying donuts
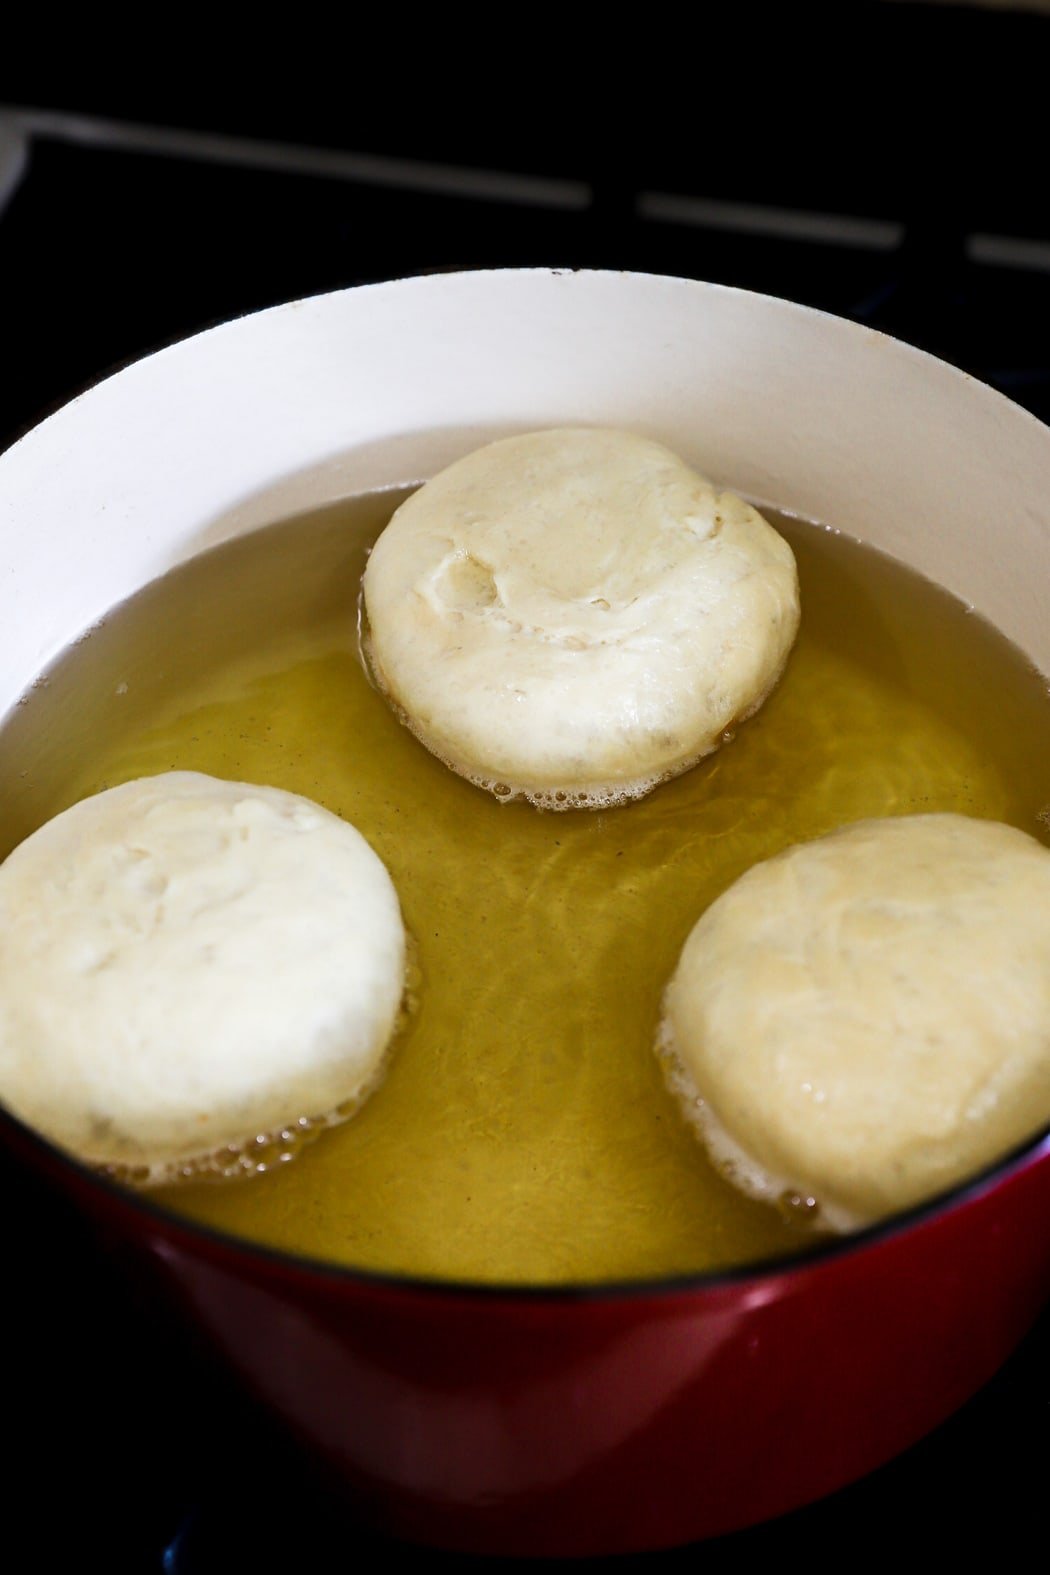
I would argue that this step is your “make it or break it”. For the best success, I recommend using a candy thermometer to make sure your oil is at the proper temperature throughout.
The ideal temperature for the oil is 360F (182C) which means you’ll want to use any kind of oil that has a smoke point higher than 400F (204C), just in case your oil overheats a little you don’t want to smoke your whole kitchen. I use vegetable, sunflower or canola oil.
To keep the oil at a more consistent temperature, avoid overcrowding the pot. I do 3-4 donuts at a time. Also avoid having no donuts in the pot as well. When you remove one donut, add a donut.
In place of a candy thermometer, you can also use a meat thermometer or an infrared thermometer to check your oil once in a while. To test the temperature of the oil with any kind of thermometer, stick the end of a wooden spoon into the oil. If it doesn’t bubble at all, it’s not hot enough, if it bubbles slowly and gently, it’s perfect. If the oil bubbles violently, it’s way too hot.
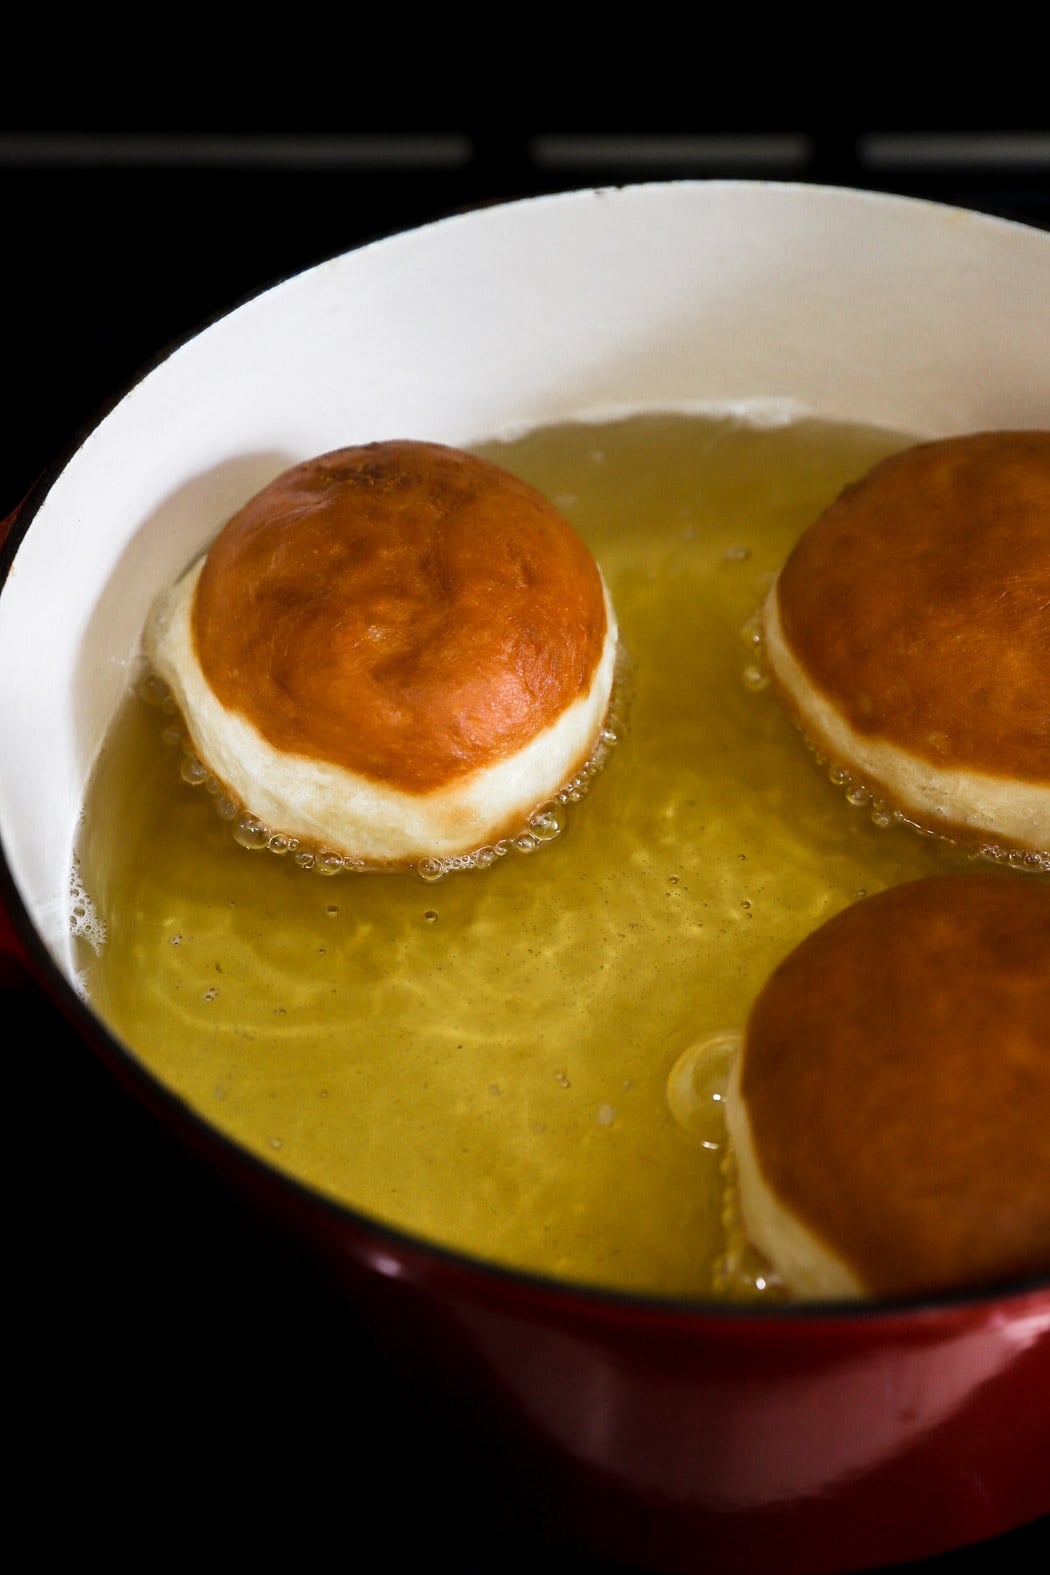
- If the oil is not hot enough, the donuts will not float properly, they will not have that distinct white line in the center (under-proofing can also make this happen), they will take longer than 2 minutes to brown on each side, they will absorb more oil, making them heavy and greasy.
- If the oil is too hot, the donuts will brown very quickly, less than 1 minutes on each side, but the center of the donuts will still be doughy so they will be heavy when you pull them out of the oil.
- If the oil is at the perfect temperature (you can give or take 5-10 degrees), the donuts will brown in 1-2 on each side and they should feel lighter when you lift them out of the oil.
How to air fry donuts
FRIENDS!! Yes, I tested this and it worked magically. The only difference is that the outside crust of the donut is dry since it’s not submerged in oil. So if you want to coat it in sugar you’ll have to brush it with a little butter or something because it doesn’t stick.
I only tested donut holes (about the size of a timbit). I did 400F (204C) for 4ish minutes, flipping halfway. They were perfect but I did not test the big boys but I’m sure it would work.
I would probably lower it to 360F for 5 minutes, then flip them over and do another 5 minutes. Test one first and see if it’s done in the center, then do the rest.
In the photo below, the smallest one is air-fried and the other ones are oil fried.

How to serve donuts
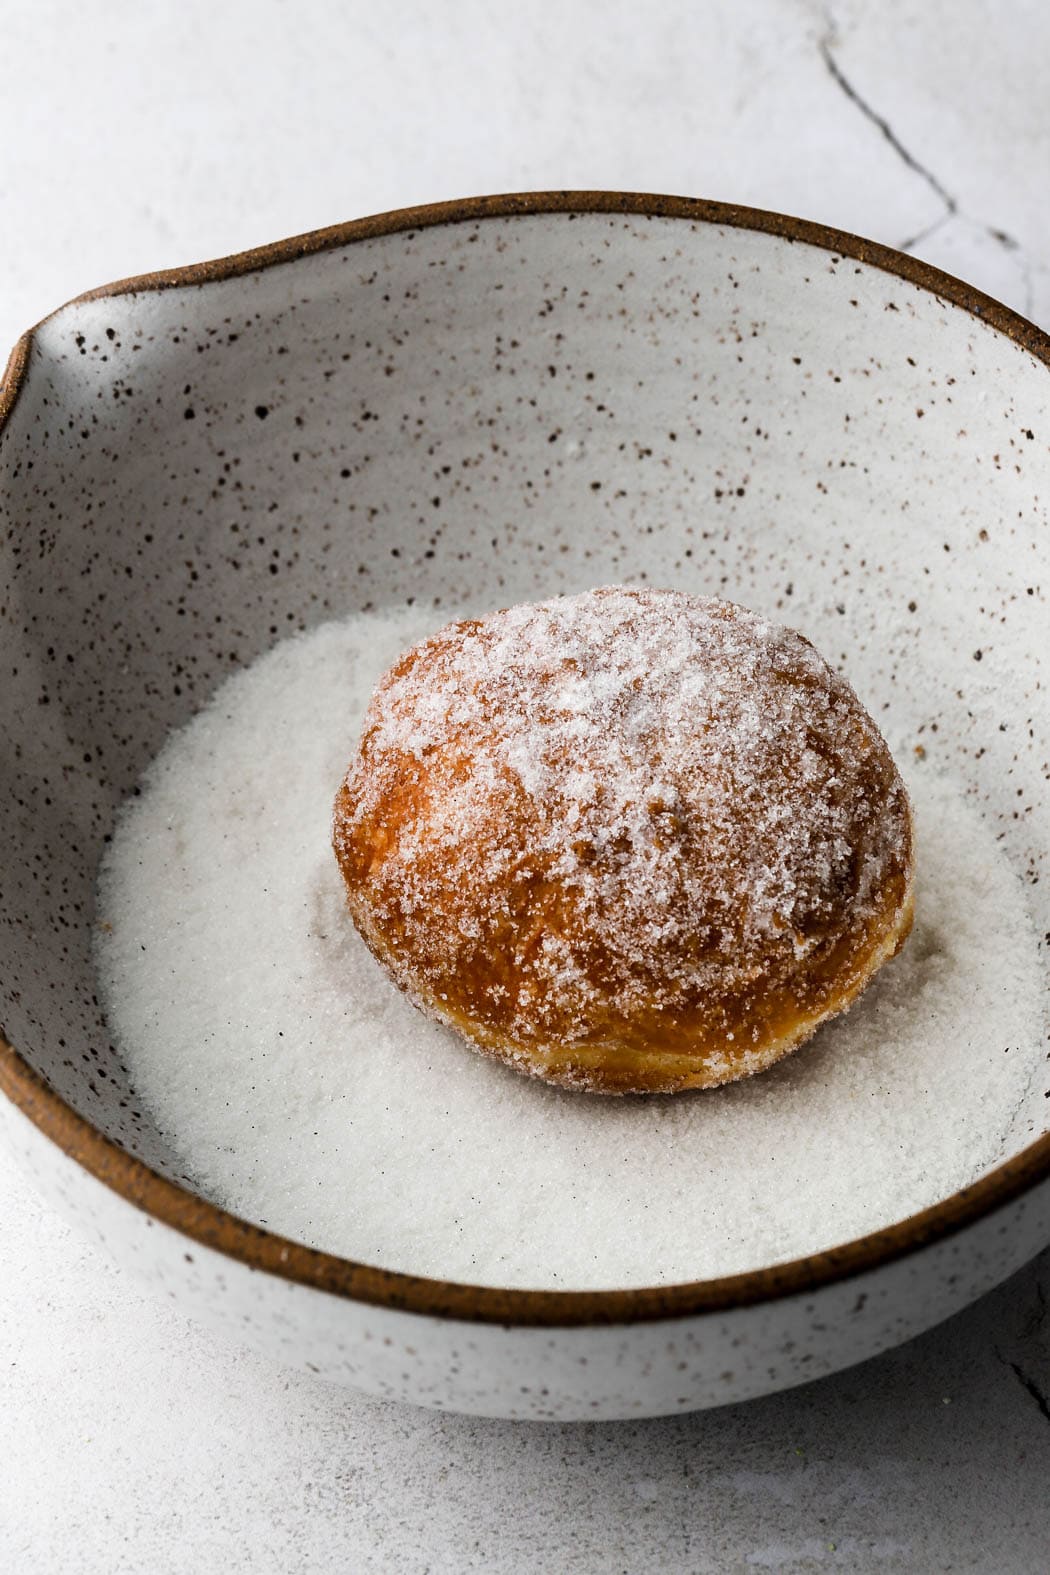
My favorite way to eat brioche donuts is just tossing them in cinnamon sugar while they’re still warm.
Try these classic donuts, tossed in vanilla sugar and filled with Bavarian cream. They can be filled with pastry cream, blueberry jam, rhubarb jam, lemon curd. Ganache is always good (combine any kind of chocolate with cream, option to whip it once it’s cooled too). Diplomat cream (can omit the lemon if you want) or chocolate mousse can be used as well.
Storing donuts
Brioche donuts are best served fresh and warm. If they’re not served immediately, it’s best to reserve any filling that requires refrigeration before serving.
If the donuts are not filled they can stay in an airtight container, at room temperature for about 3-4 days. Then refrigerate them for up to a week. When serving unfilled leftover brioche donuts, you can reheat them in the microwave for 10-15 seconds.
Donuts filled with a filling that can stay at room temperature for a few days (ganache, jam), can stay out. They can stay out for 3-4 days or as long as the filling is good. Probably not good to reheat these ones.
Donuts filled with lemon curd, Bavarian cream, pastry cream, etc. require refrigeration. Donuts need to be refrigerated in an airtight container and let come back to room temperature before serving.
To keep it simple, serve them fresh or fill them before serving. 🙂
If you’ve made it this far, I apologize for the length. I hope this post is helpful to make the best brioche donuts! Make sure to tag me @baranbakery on instagram and as always, have a blessed day and happy baking!
Love, B

Can I make a traditional “hole” doughnut with this recipe?
Yes
Can I prove these overnight if so how
Yes, you can I would do it for the first rise. Just cover it airtight and refrigerate until ready, then bring back to room temperature about 30-60 minutes before using.
Generally when I proof things overnight I use about half the amount of yeast but it should work either way.
dude did u not read hte entire recipe? READ THE RECIPE AND U WILL SEE SHE CLEARLY STATES HOW TO PROOF OVER NIGHT OMG WHAT IS POINT OF HER WRITING THE WHOLE DAMN B LOG IF YOU ARE NOT GOING TO READ WHOLE DAMN RECIPE THEN ASK SOMETHING STUPID LIKE THAT
So when they were fresh they were really nice. But after a few hours they became doughy
Hey ? Thank you for sharing the recipe! Can you please tell, what type of butter do you use for the batter?
You mean what brand? I’ve used Kroger brand, challenge butter and landolakes
I followed the recipe to a tee! (Not exaggerating–I did not deviate from anything). My oil was at exactly 360 degrees the entire time, but the outsides of the donuts were super dark brown, but none of them were cooked on the inside. I had to throw them away. I wonder what went wrong? At first I thought the oil was too hot, but it stayed right at 360 the whole time. I would love to give it another try!
Hi, it sounds like the oil may have been too hot for you, 360F works perfectly for me but you could reduce it down to 350F or 355F and that should do it! Def use the visual/physical cues, it should brown pretty evenly, they should float and leave a white line through the center and feel lighter in weight 🙂
Will this recipe work with bread flour instead of AP? Will it improve the flavor or texture, or diminish it? I read your comment on formulating this for AP flour, but wondering how bread flour would affect it. Thanks!
Hi Pamela I’ve made this recipe with both flours and they both work well. I didn’t notice much of a difference to be honest 🙂
Been wanting to try a brioche donut recipe, can’t wait to try this!
What size stand mixer do you use? mine overheated before the 15min of kneading was up. Or do you split the above into 2 batches so as to not overheat the mixer?
Hi Lonnie, I’m sorry that happened. I have a 5qt kitchen aid mixer and I mix the whole batch at once. Once of my mixers is 10 years old and the other is about 15-20 years old but I’ve never had either of them overheat.
Mine were a disaster. I definitely did something wrong. They took too long to rise, the yeast was not expired, they also took very long to knead well. I didn’t have a dough hook so I used the paddle attachment instead. Also they didn’tslide off the parchment paper… they were stuck to the bottom.
Then they were hard on the outside and very dense on the inside. A complete disaster.
I do not know what I did wrong. Help!
Hi Gigi, using a paddle attachment will not knead the dough correctly, you should do it by hand if you don’t have a hook attachment. Not kneading enough will make the gluten in the dough weak, making the dough stickier and not rise properly resulting in doughy, dense donuts.
These were delicious! I’d like to prep ahead of time for a brunch. Is it possible to leave the shaped donuts in the fridge or freezer for a day or two and fry when ready?
Hi Niki, I haven’t tested it recently on this specific recipe but in general with brioche it is ok cover it after shaping and then refrigerate it. Remove it from the fridge about an hour before frying and let it come to room temperature.
Sorry I can see now it’s in the longer bit at the top of the page rather than the shortened recipe!
No worries, thank you! I’ll add it there too
When do you put in the yeast i can’t see it mentioned?
Can you roll these out and cut them like a traditional doughnut?
yes, but the dough is a little stickier so just make sure your surface is floured 🙂