Hot Milk Sponge Cake
Hot milk sponge is one of my favorite cake bases because it’s light and fluffy but sturdy enough to hold up to different fillings and frostings in a layer cake.
What makes this cake unique is the mixing method. Instead of creaming butter and sugar together, hot milk sponge uses warmed milk and butter, which gives the cake its signature fine crumb, light texture, and milky, buttery flavor
I love using it for sheet cakes and layer cakes when I want a cross between a sponge cake and traditional creamed butter cake.
What is Hot Milk Sponge Cake
A hot milk sponge uses many of the same ingredients as a traditional butter cake but the mixing method is what changes the texture.
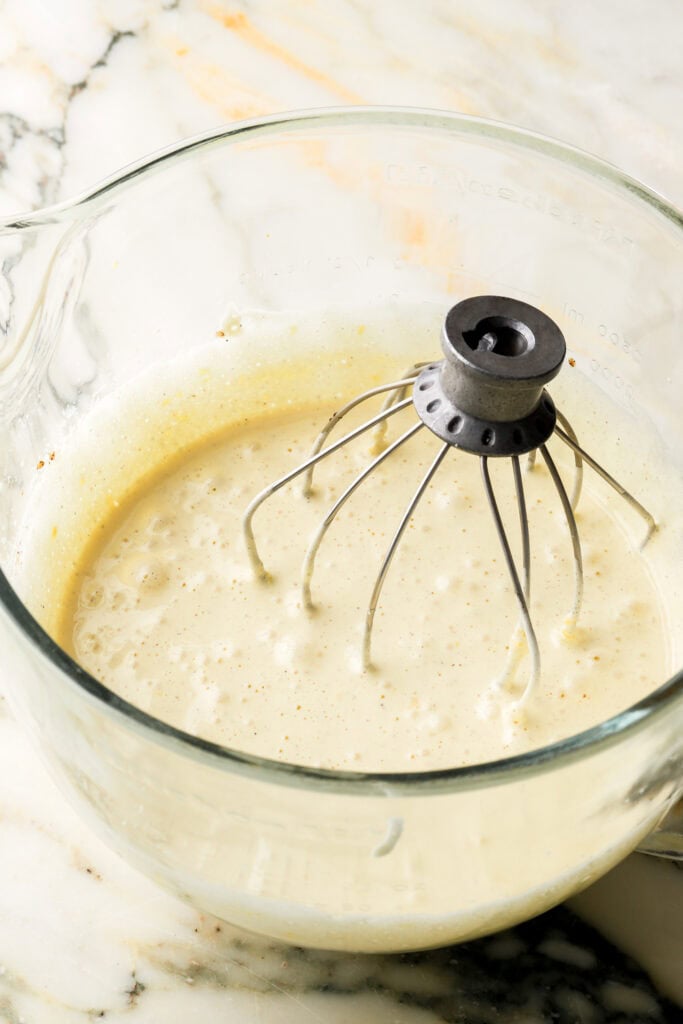
It starts off like a sponge cake/foam cake with the eggs being whipped with the sugar. This gives it that airy texture that sponge cakes are known for.
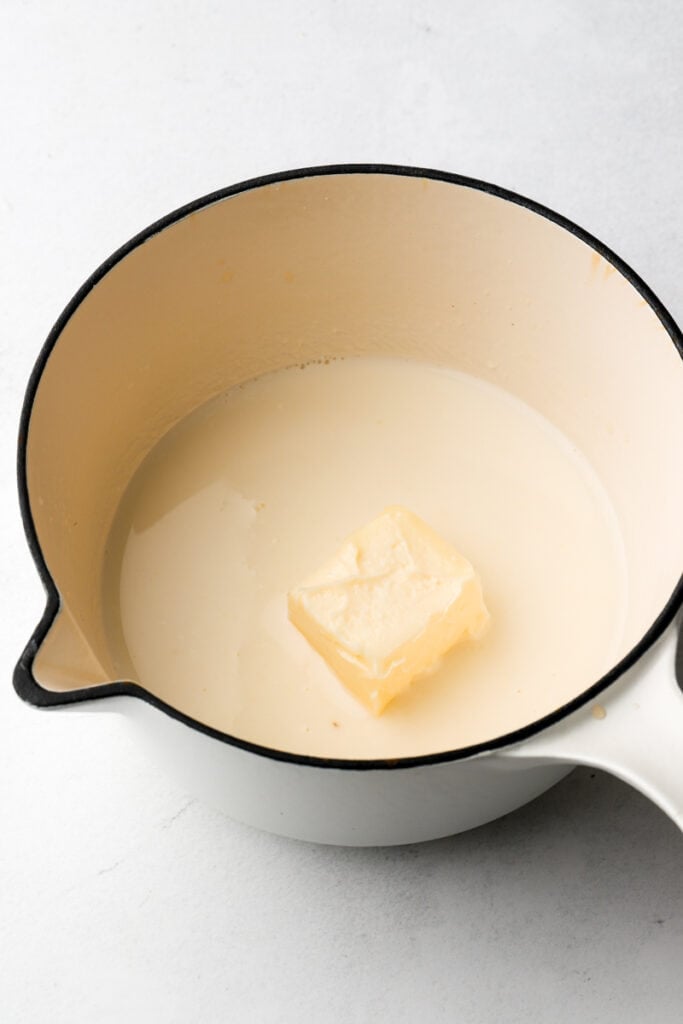
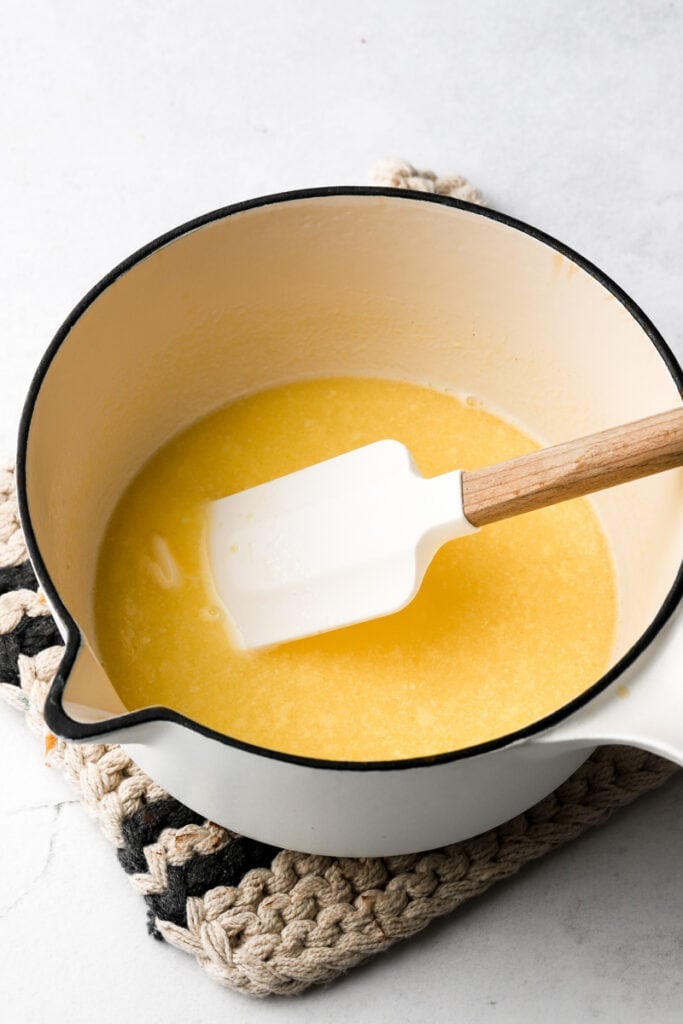
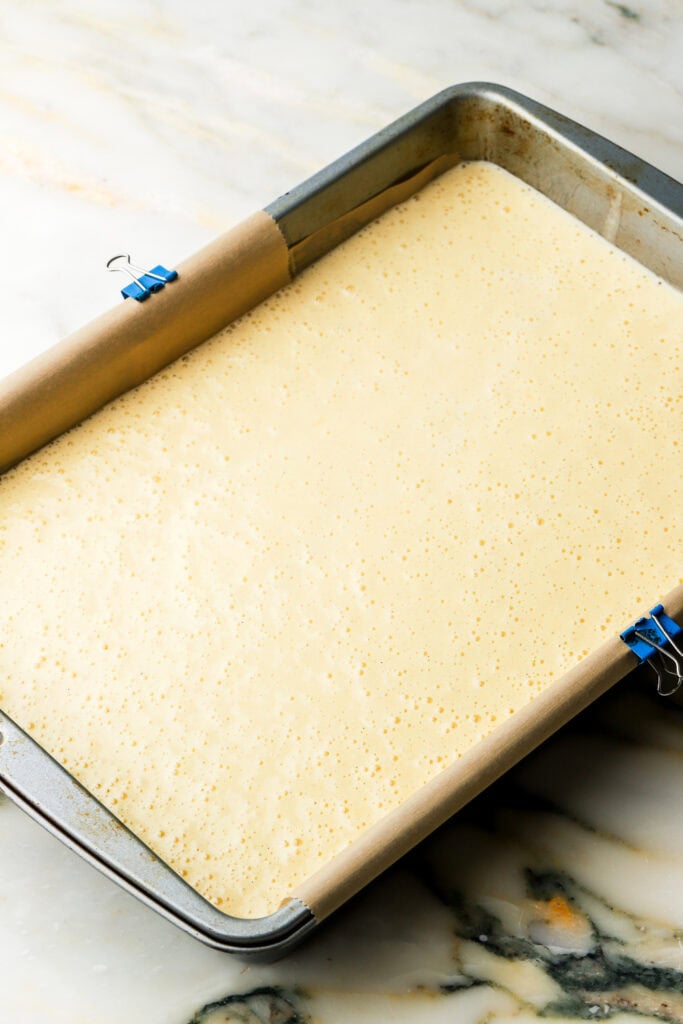
The name comes from the way the milk and butter are added. They’re cooked in a saucepan just until the butter is melted into the milk, then stream it into the batter after the dry ingredients.

Ingredient Notes & Substitutions
This section is just an overview — the full recipe with measurements is in the recipe card below.
- Eggs
Whipping the eggs incorporates air into the batter, which helps give the cake its light, spongy texture. For the most volume, make sure the eggs are at room temperature before whipping. - Hot milk and butter
This is what gives hot milk sponge its signature fine, soft crumb and buttery flavor. I recommend whole milk and salted butter for the best flavor, but reduced-fat milk, unsalted butter, and dairy-free alternatives can work too. - Flour
I use all-purpose flour for convenience, but cake flour works well too. - Sugar
This recipe uses a little more sugar than some traditional cakes, but it doesn’t come across overly sweet. The sugar helps create that light, fluffy texture by trapping air in the beaten eggs. I’ve tested it with less sugar and don’t recommend reducing it because the cake turns out much more dense. - Baking powder
Not always typical in sponge cakes, but because this cake also contains milk and butter, a little baking powder helps support the lift.
Tip: I highly recommend using a digital scale for the most accurate results, since dry ingredients are very easy to overmeasure with measuring cups.
The Method: How to Make Hot Milk Sponge
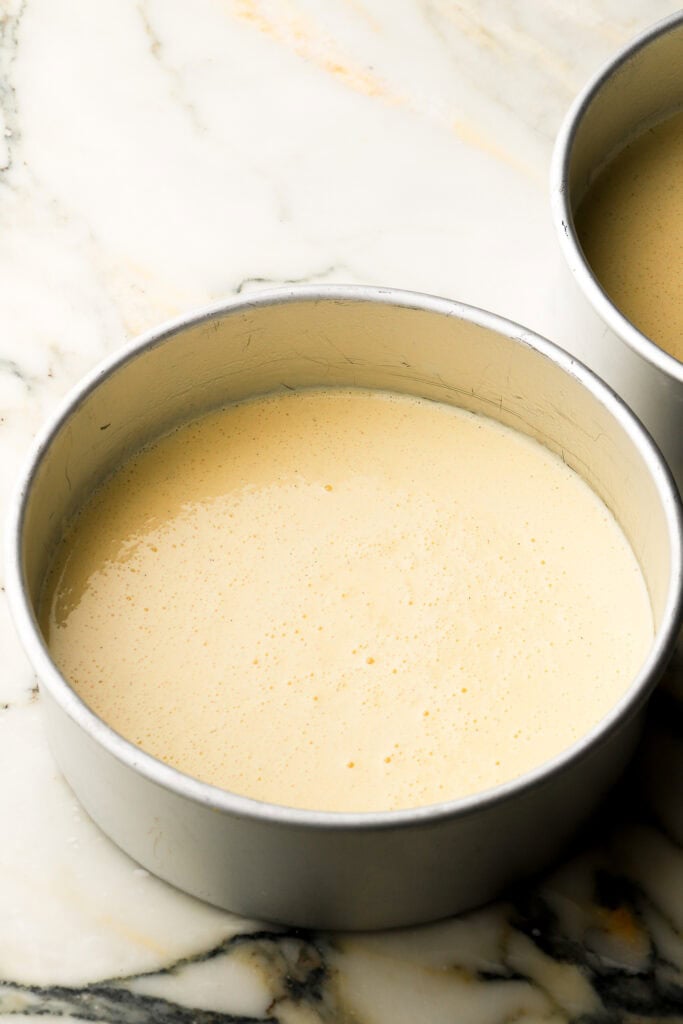
- Heat the milk and butter together just until melted.
- Beat the eggs and sugar until pale, thick, and fluffy.
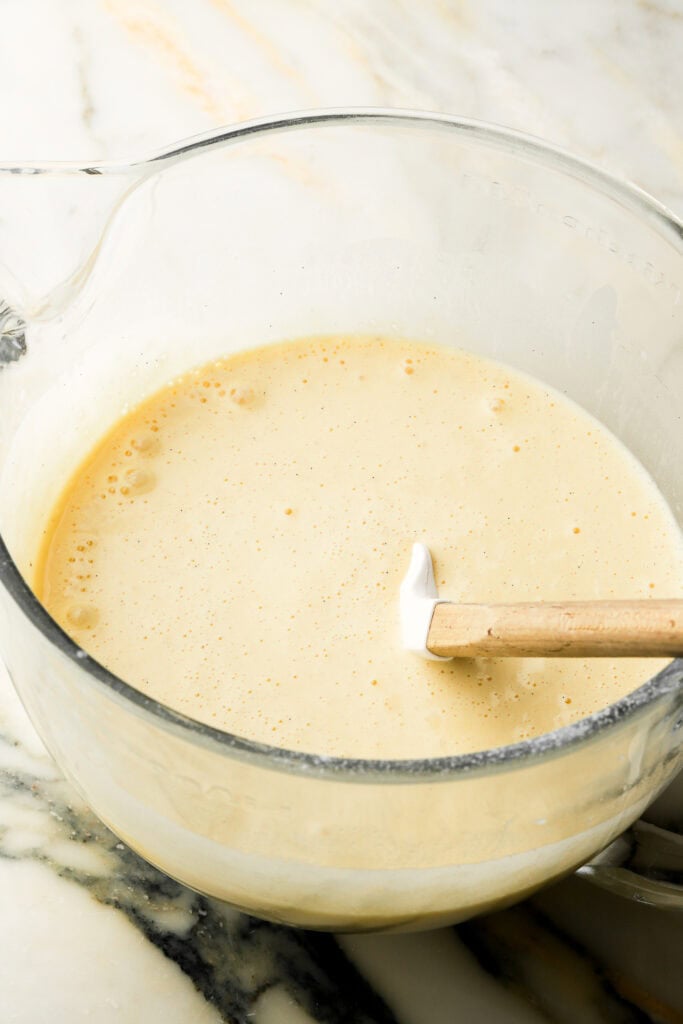
- Sift the dry ingredients over the egg mixture and gently mix just until incorporated.
- Stream in the hot milk mixture with the vanilla and mix just until smooth.
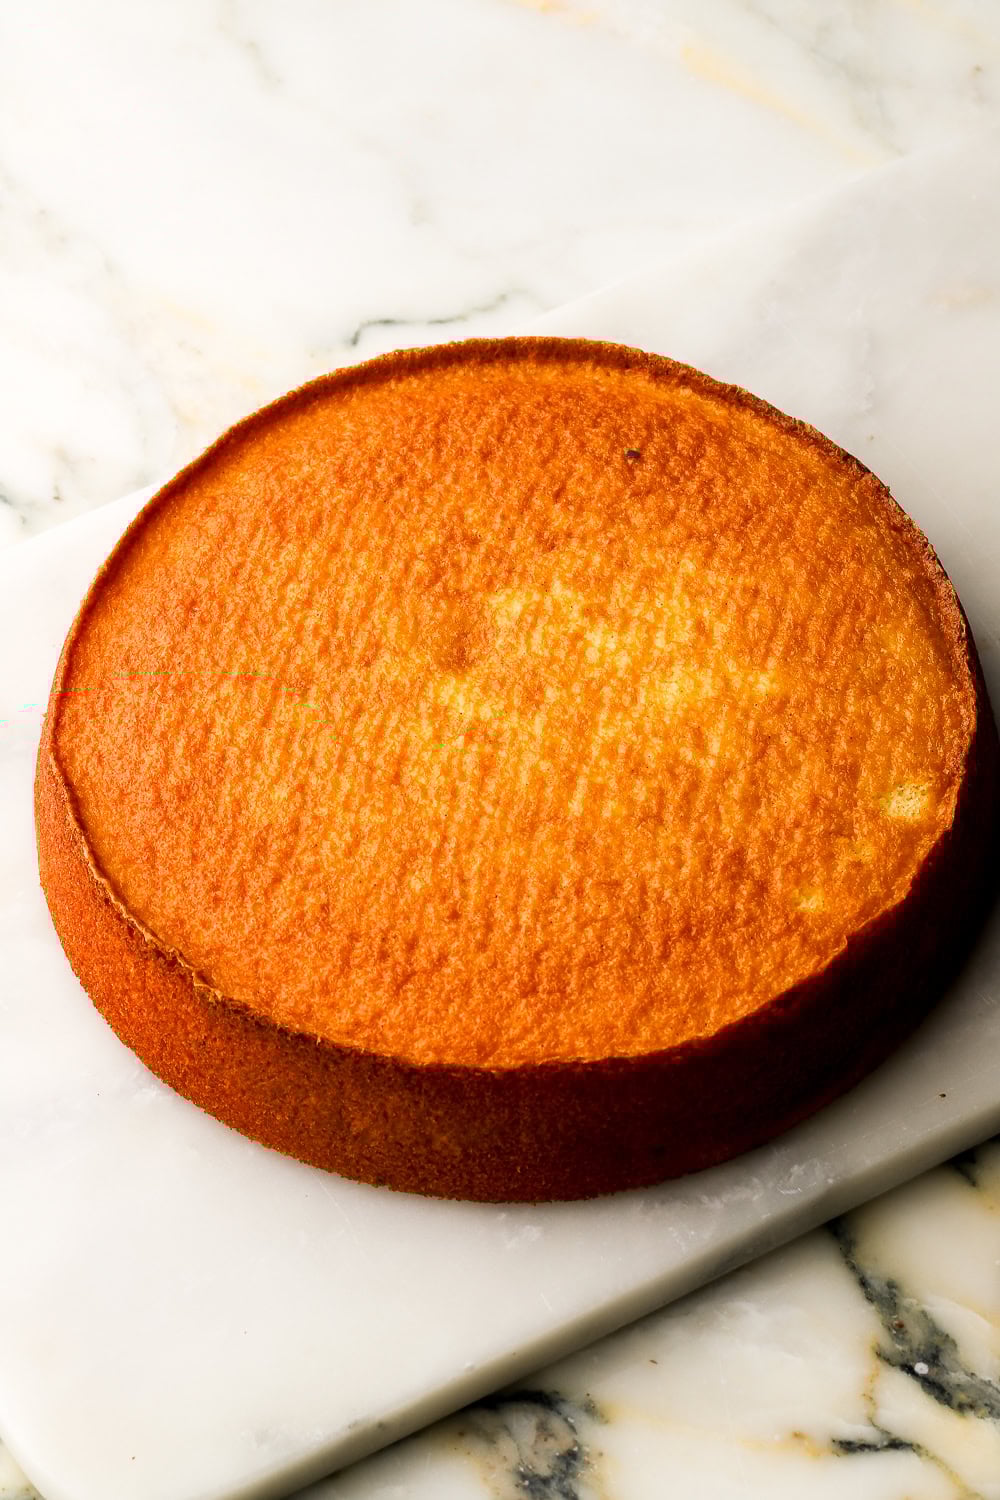
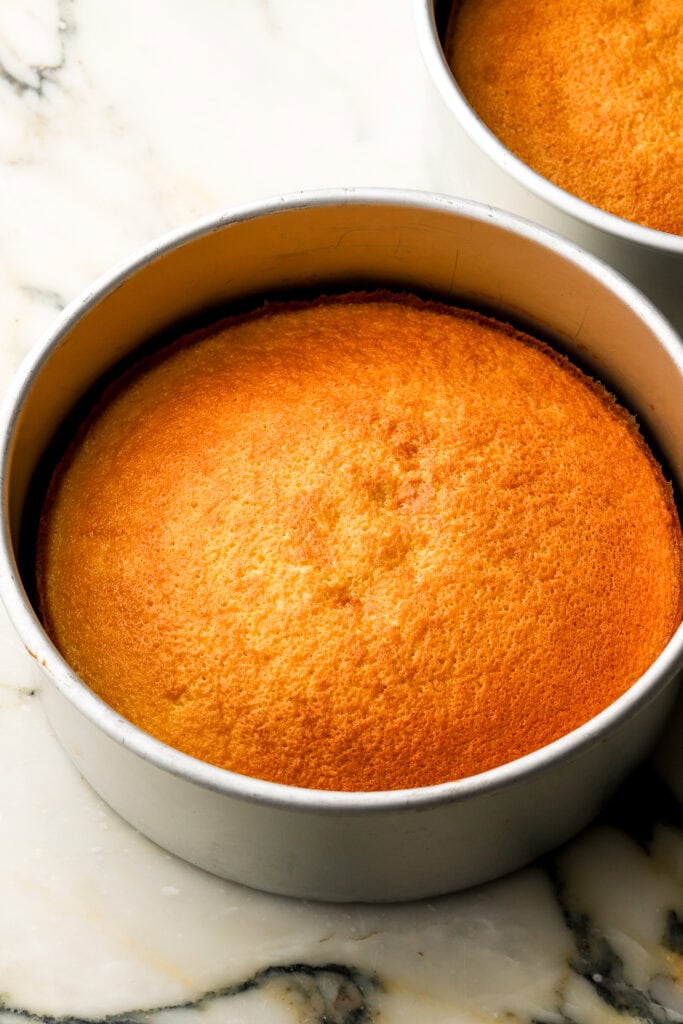
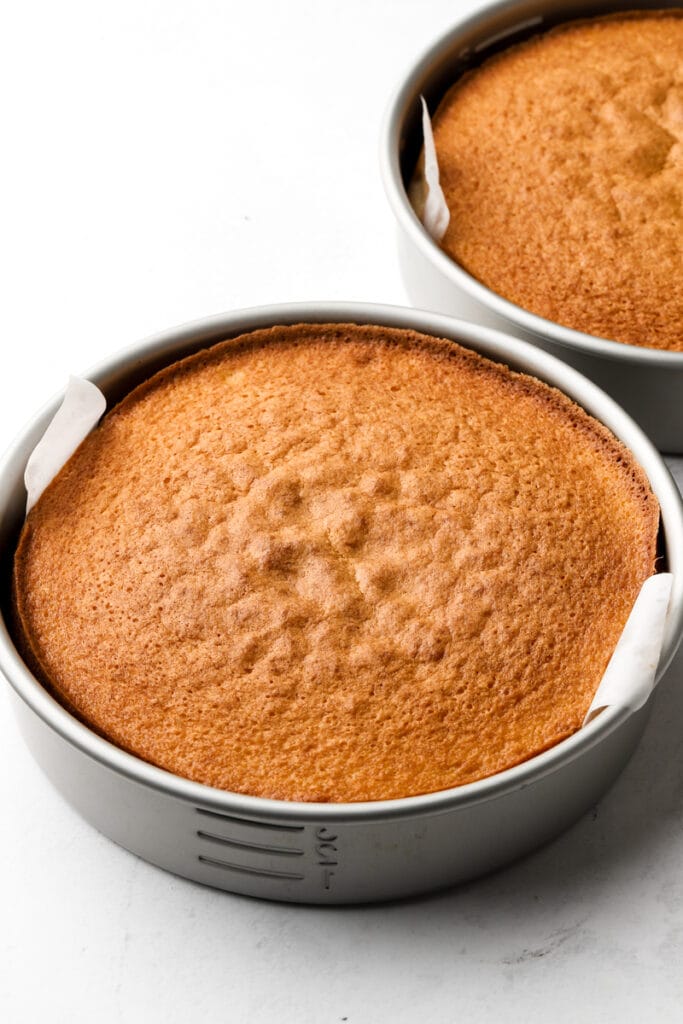
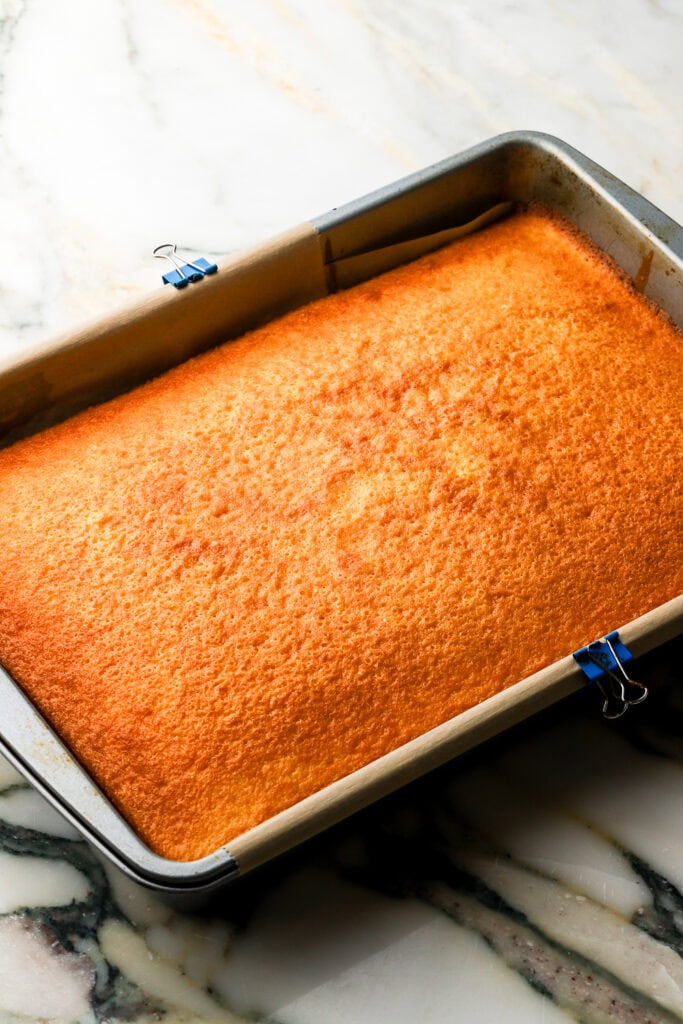
- Scrape the bowl well, divide the batter between the pans, and bake until golden brown and releases from the edge of the pan.
Note: This cake bakes darker than many vanilla cakes because of the higher sugar content, and it won’t fully spring back when done. Look for a deep golden brown top and the edges releasing from the pan rather than waiting for the usual spring-back or toothpick test.

How To Customize The Batter
One of my favorite things about hot milk sponge is how easy it is to adapt. Here are a few easy ways to customize it:
- Change the extract
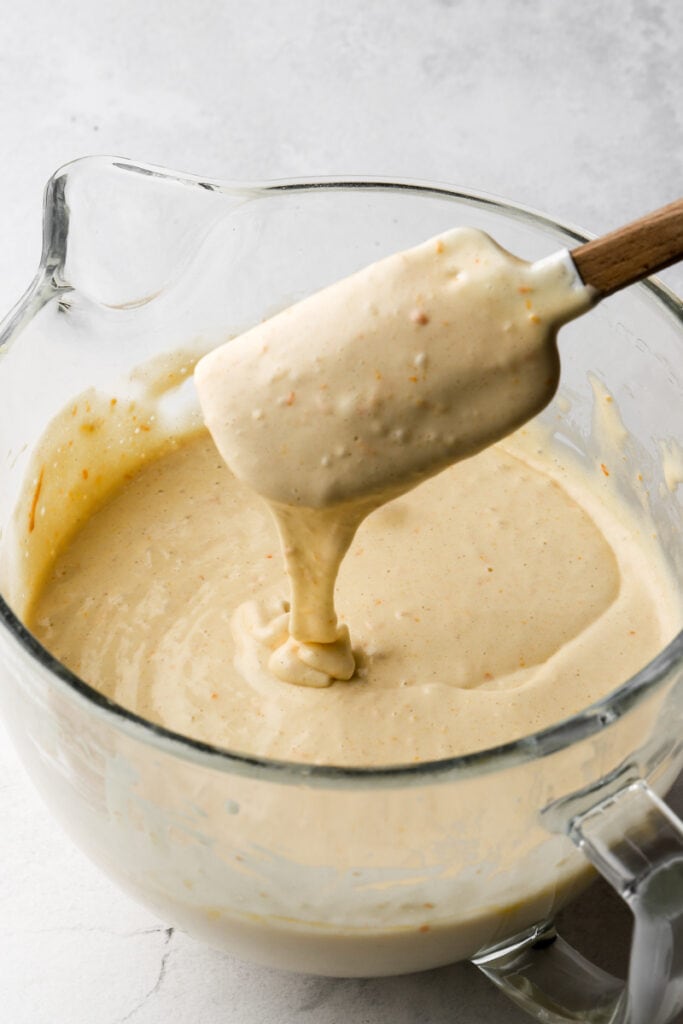
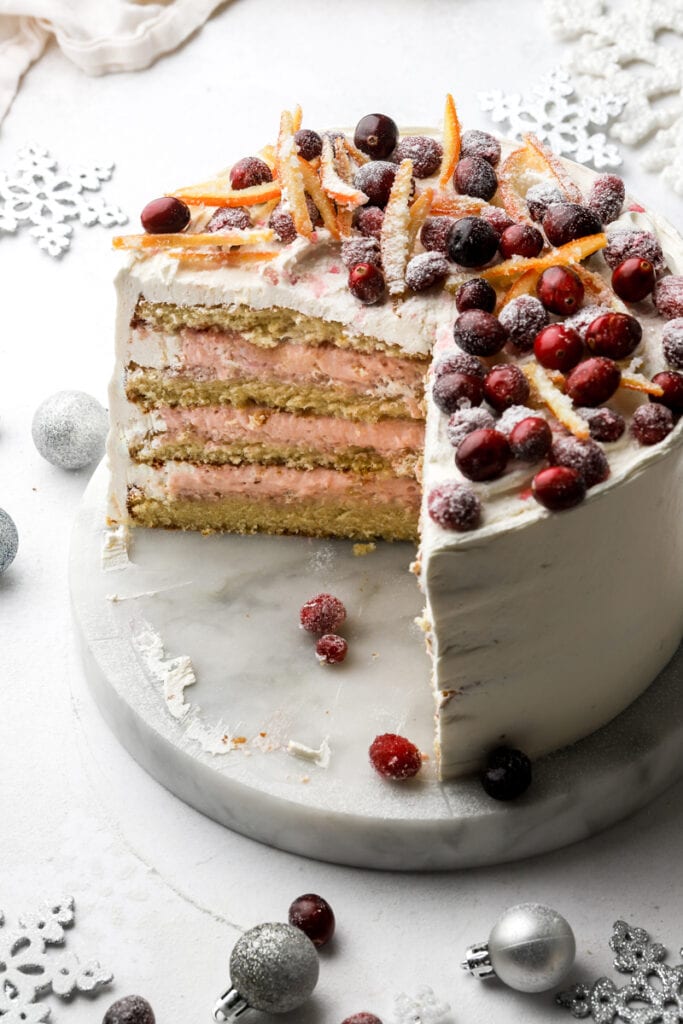
Swap some of the vanilla for other flavors like almond, coconut, lemon, or orange – depending on the flavor you’re going for. - Add citrus zest
Lemon, orange, or lime zest adds a fresh flavor without changing the texture of the cake. I did this with my Cranberry Orange Cake (two photos below). - Brown the butter
For a deeper, nuttier flavor, brown the butter before adding it to the milk. - Cocoa powder or nut flour
Swap a small portion of the flour for cocoa powder or a finely ground nut flour, but I wouldn’t replace more than about 2 tablespoons (20–30 grams). More than that can start to affect the texture too much.
What Pans to Use
Of course, you can double or triple the recipe to make larger cakes, but the recipe as written in the recipe card for two 8-inch cake layers also works for:
- 3 8-inch cake layers – bake for about 20 minutes
- 2 9-inch cake layers – bake for about 25 minutes
- 1 10-inch square sheet cake – bake for about 50 minutes
- 1 9×13” sheet cake – bake for about 45 minutes
Tip: In my oven, sheet cakes bake up flatter and less domed when I reduce the oven temperature to 325°F (163°C)instead of 350°F (177°C)and add a few extra minutes to the bake time.
How To Use a Hot Milk Sponge
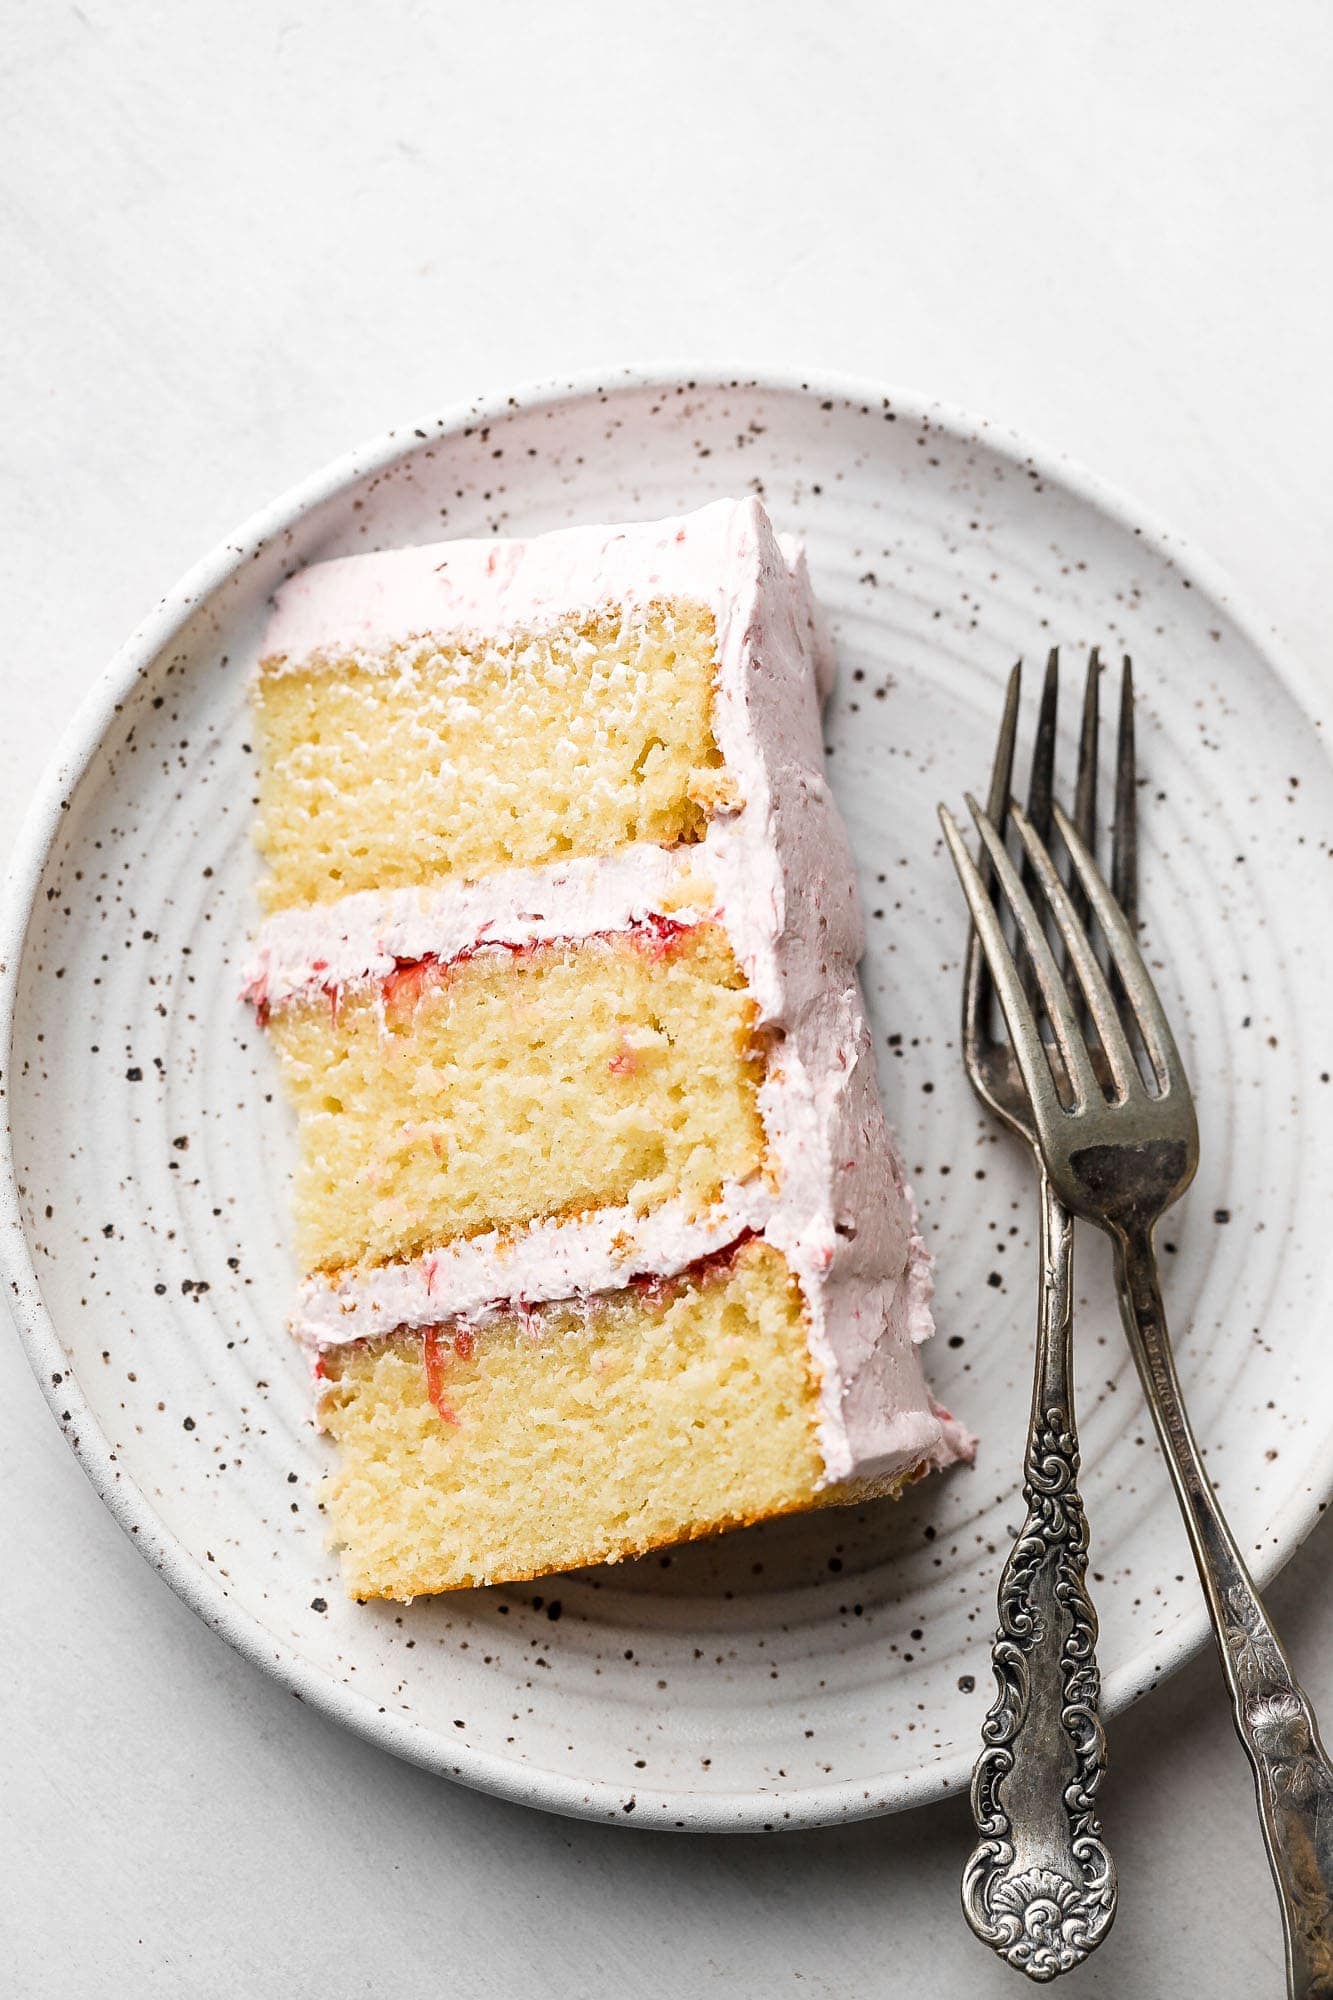
The beauty of this cake is that it sits somewhere between a sponge cake and a butter cake, which makes it incredibly versatile. It’s light and fluffy like a sponge, but a little sturdier and richer, so it can replace almost any vanilla cake recipe of the same size.
I most often bake it as either a sheet cake or a layer cake.
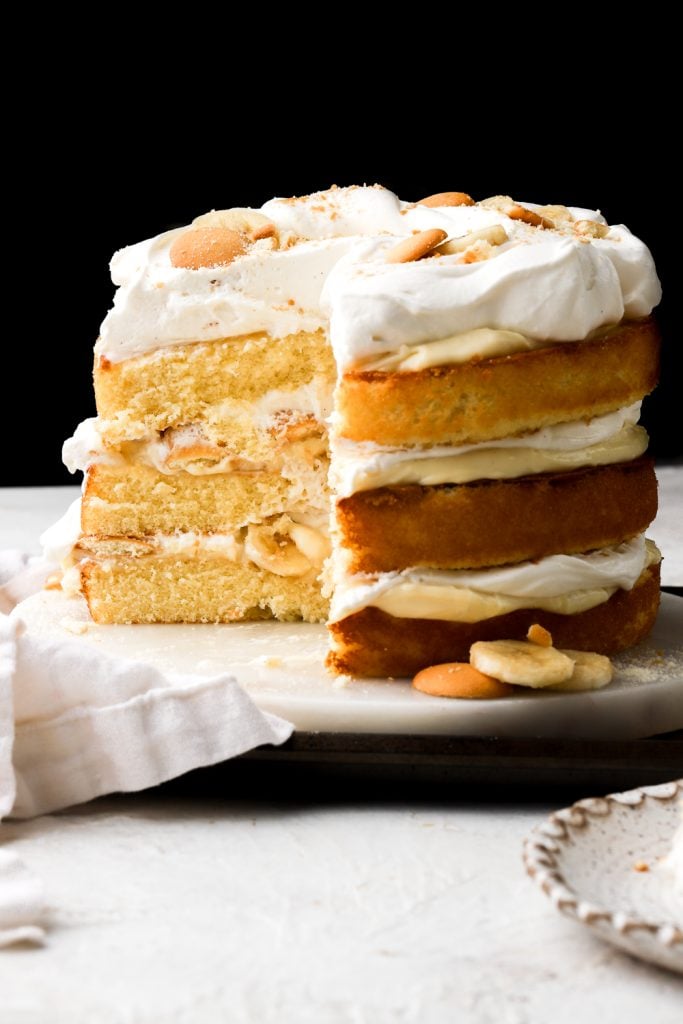
Because it’s on the sweeter side, I prefer pairing it with less sweet frostings and fillings. European-style buttercreams like Swiss or French buttercream work especially well, and Crème Mousseline is another great option. Whipped cream-based fillings are beautiful with it too, and I especially recommend my Chantilly Cream, Mascarpone Cream, or Diplomat Cream.
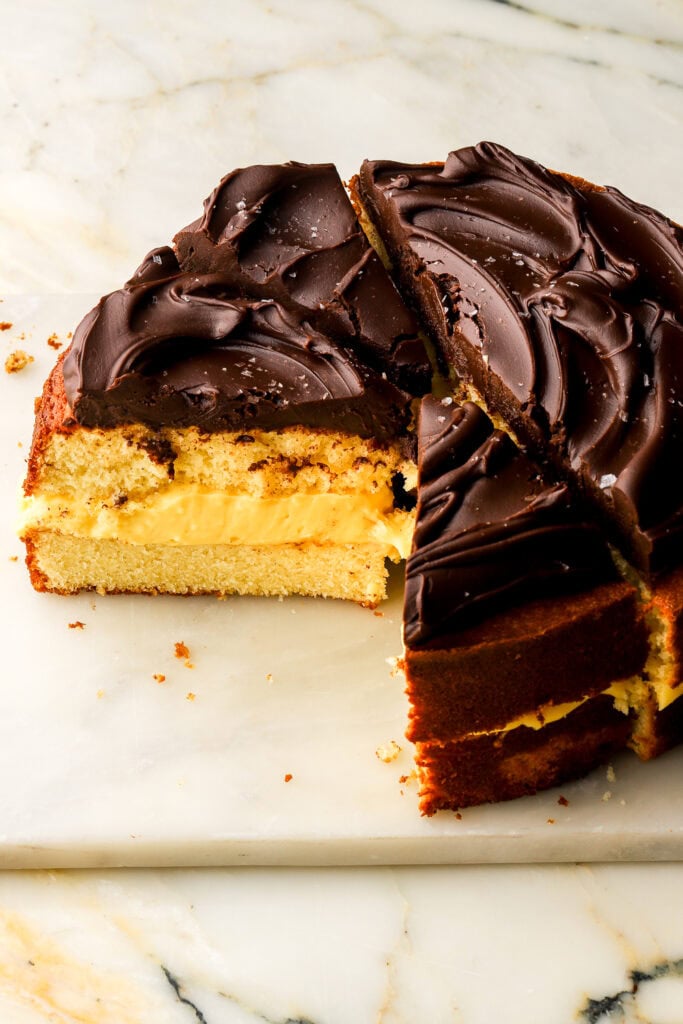
I used Chantilly Cream in my Banana Pudding Cake and Peaches & Cream Cake, while my Boston Cream Pie uses pastry cream and chocolate ganache. For my Cranberry Orange Cake, I filled it with diplomat cream and frosted with Swiss meringue buttercream.
Storing and Serving
The baked cake layers can be stored at room temperature overnight before frosting. After that, storage depends on the type of frosting used.
Whipped cream-based fillings and frostings need to be refrigerated, while buttercream-frosted cakes can generally be stored and served at room temperature for 1 to 2 days.
Because of that in-between texture, this cake is great served either cold or at room temperature.
I hope you enjoy this cake and I’d love to see how you use it in your baking.
As always, have a blessed day and happy baking!
Love, B