

Classic Tiramisu Recipe
Tiramisu is such a classic recipe that has been made soooo many different ways but always contains the essentials – lady fingers dipped in coffee and layered with mascarpone cream.
So after 7-8 attempts, this is my favorite version of Tiramisu.
It’s super versatile – it can be made with store bought or homemade ladyfingers, whipped cream or egg whites, options to cook the eggs if you prefer, different size pans, all the details are in the post!
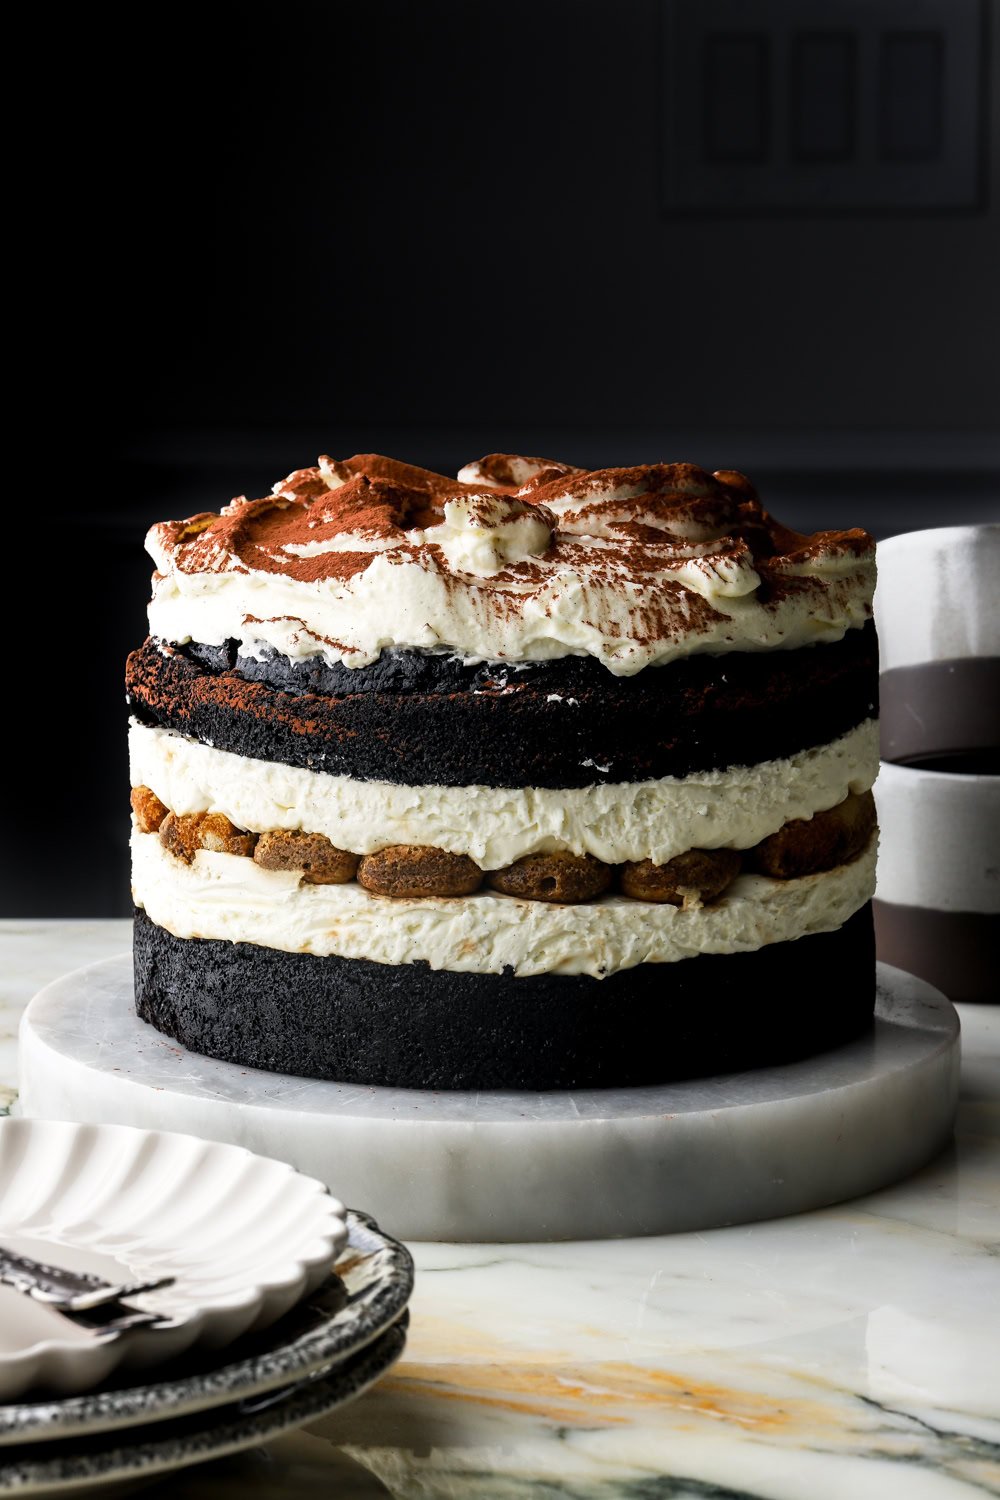
If you’re a tiramisu lover, make sure to try my Tiramisu Cake and my Tiramisu Latte. They’re both family and reader favorites! I also have a Tiramisu Cupcakes, Chocolate Tiramisu Cake and an Oreo Tiramisu.
[adthrive-in-post-video-player video-id=”Lz9gCGmi” upload-date=”2024-07-19T18:44:39.000Z” name=”Tiramisu.MOV” description=”Tiramisu is such a classic recipe that has been made soooo many different ways but always contains the essentials – lady fingers dipped in coffee and layered with mascarpone cream. So after 7-8 attempts, this is my favorite version of Tiramisu. It’s super versatile – it can be made with homemade or store bought ladyfingers, whipped cream or egg whites, options to cook the eggs if you prefer, different size pans, all the details are in the post!” player-type=”default” override-embed=”default”]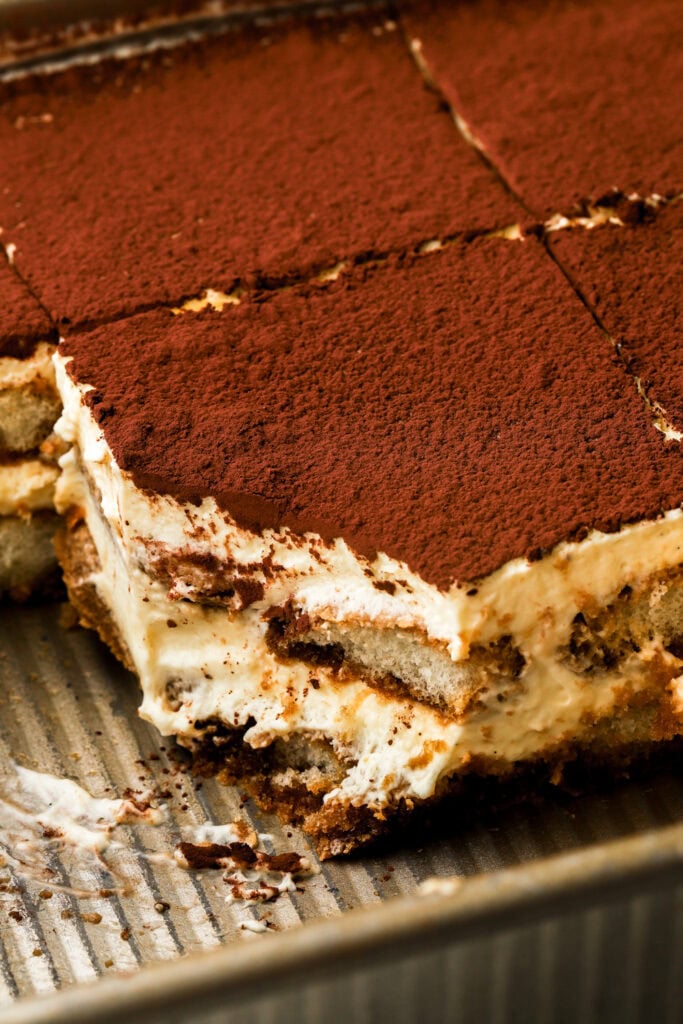
What is Tiramisu?
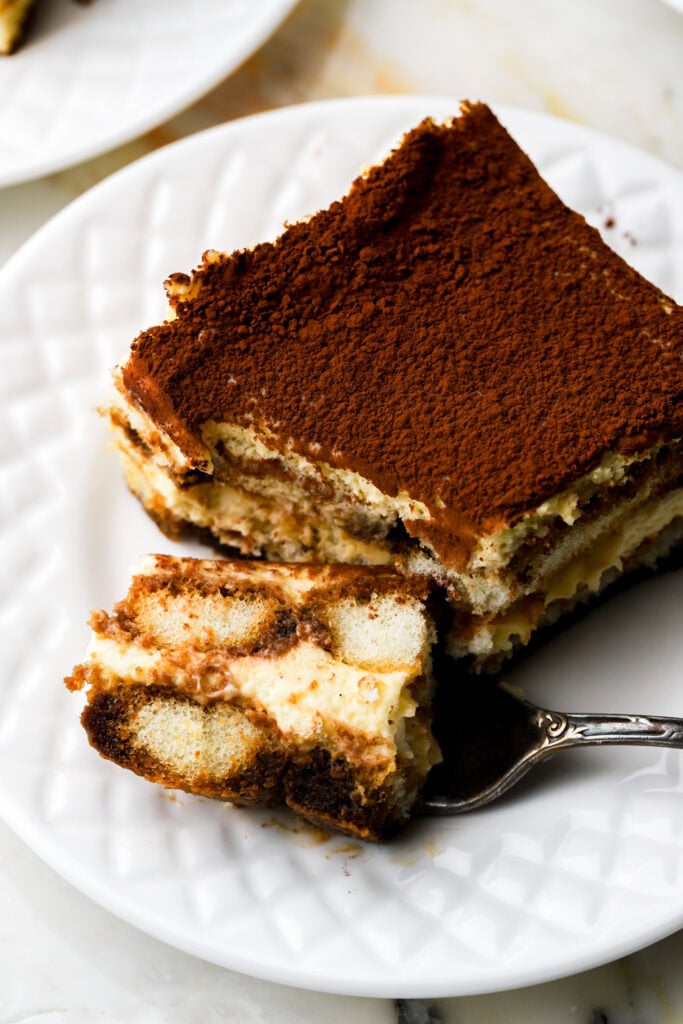
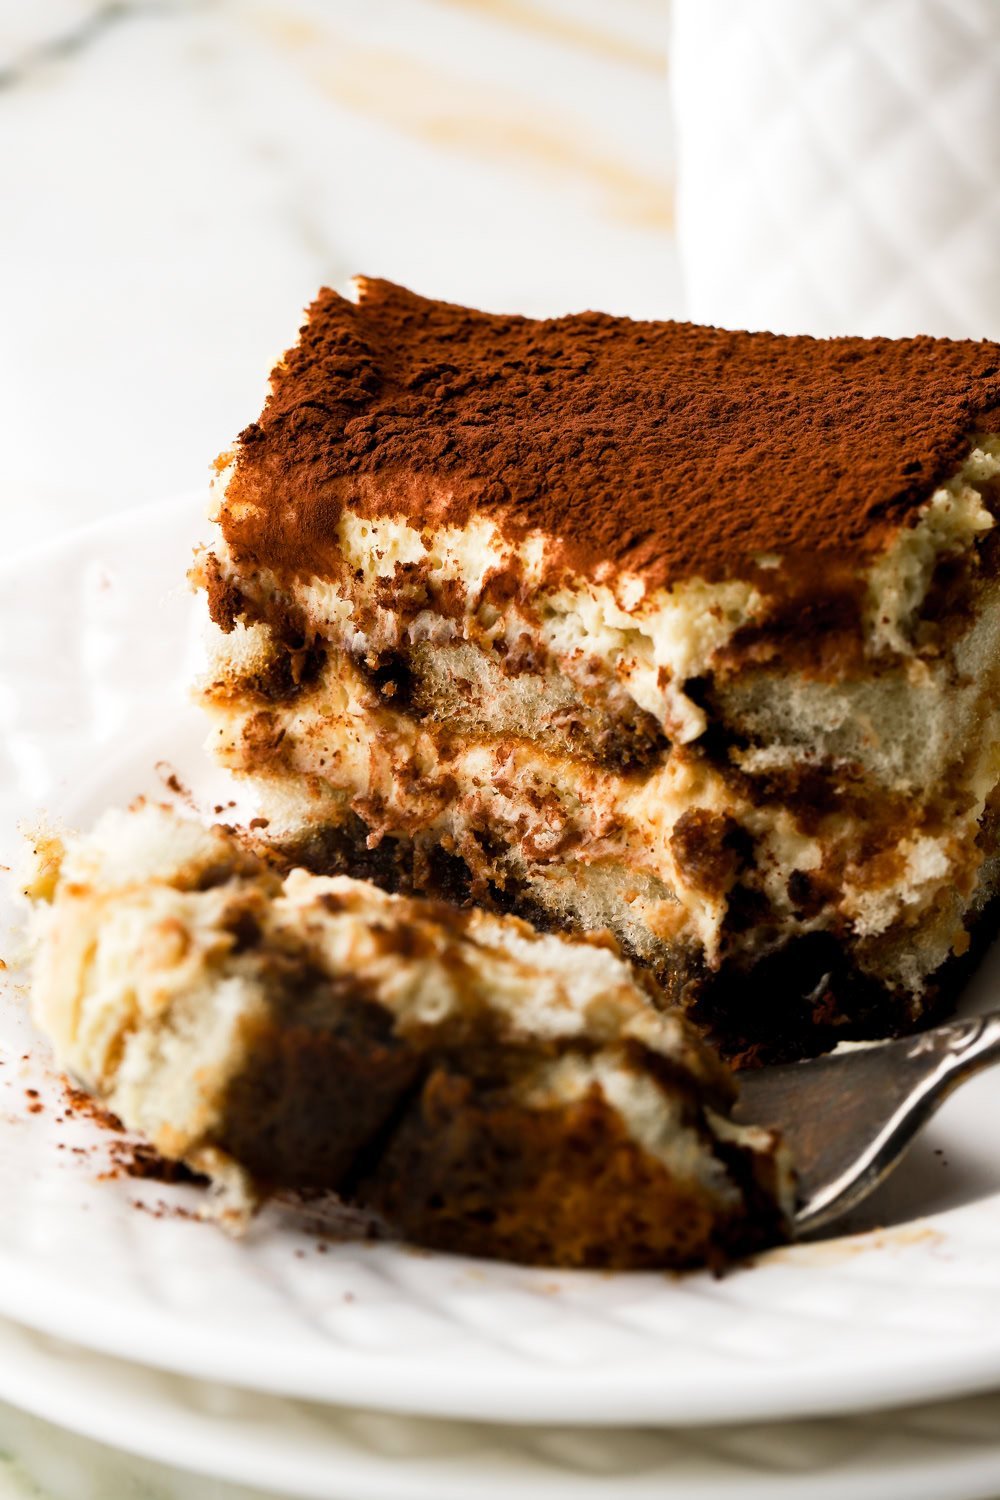
I’ve done soooo much digging to find what is actually authentic Tiramisu. It’s an italian dessert made up of ladyfingers soaked in coffee, usually espresso actually. Then it gets layered with mascarpone cream and topped with cocoa powder.
Some people spike the coffee with alcohol like marsala wine or brandy but according to my research that’s actually not as traditional as some might believe. I left mine plain but if I were to spike it, I would go with amaretto (an Italian almond flavored liqueur) because it’s more subtle and compliments the cake SO WELL.
From my understanding, mascarpone cream is traditionally made with just egg yolks, sugar and mascarpone. Some people like to add whipped egg whites or whipped cream to the cream to lighten it up a little, I tested both and either works great.
Step-by-Step Instructions
- Start by brewing the espresso so it has time to cool as you prepare the cream.
- Beat the egg whites with half of the sugar, just until stiff peaks start to form.
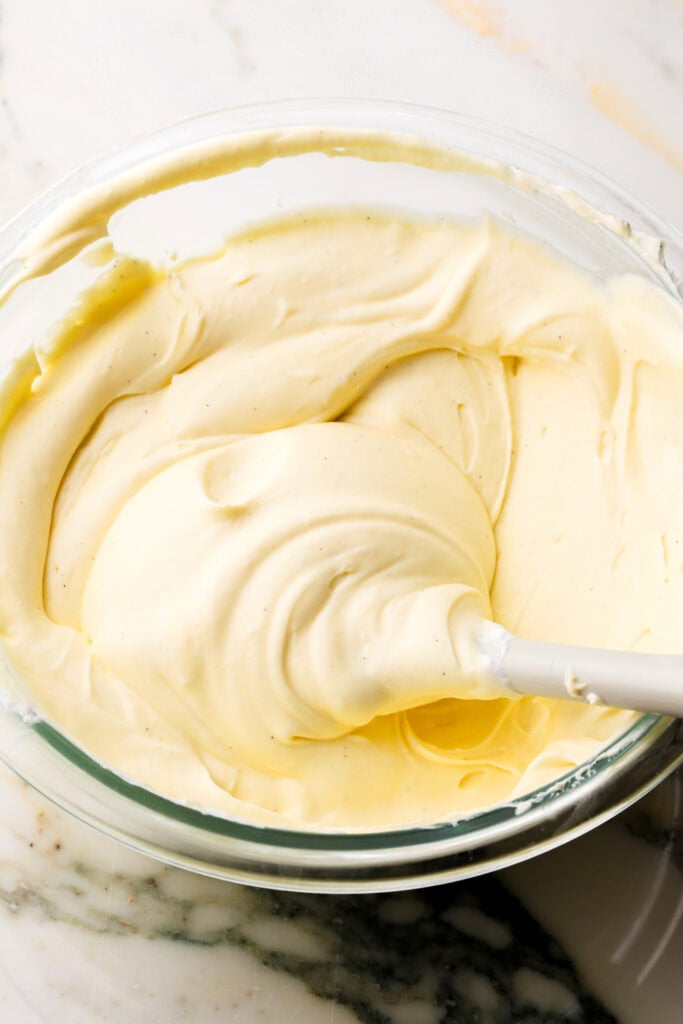
- Beat the egg yolks, mascarpone, vanilla and the other half of the sugar for a few minutes, until the mixture is pale and fluffy.
- Add ⅓ of the egg whites to the egg yolks and mix them in to thin it out a bit. Then add another ⅓ of the egg whites and gently fold it in, repeating with the last ⅓.
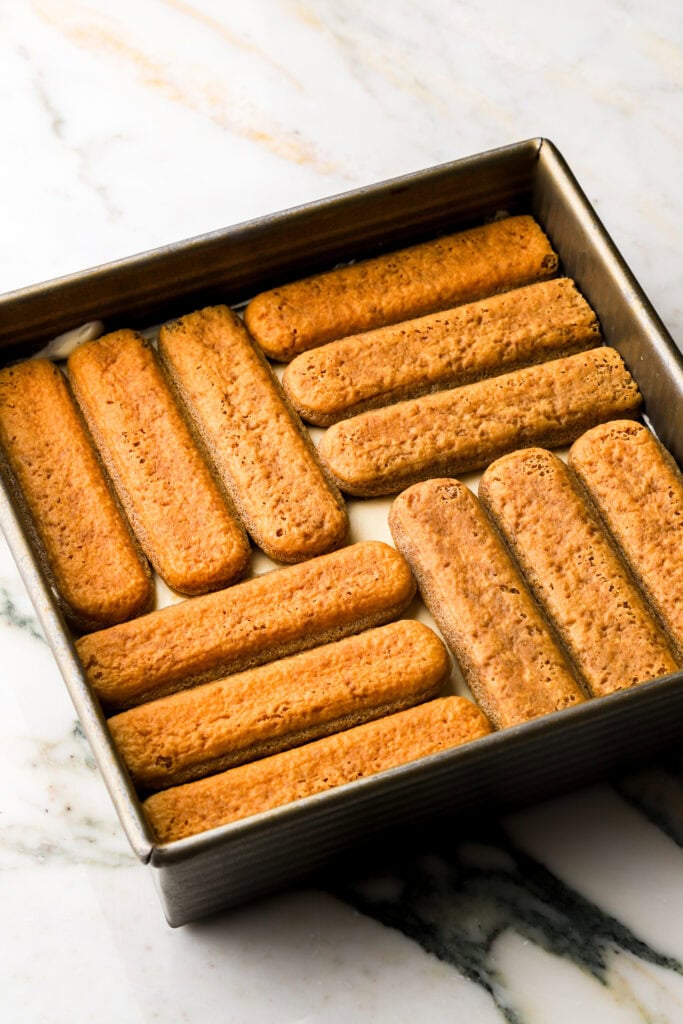
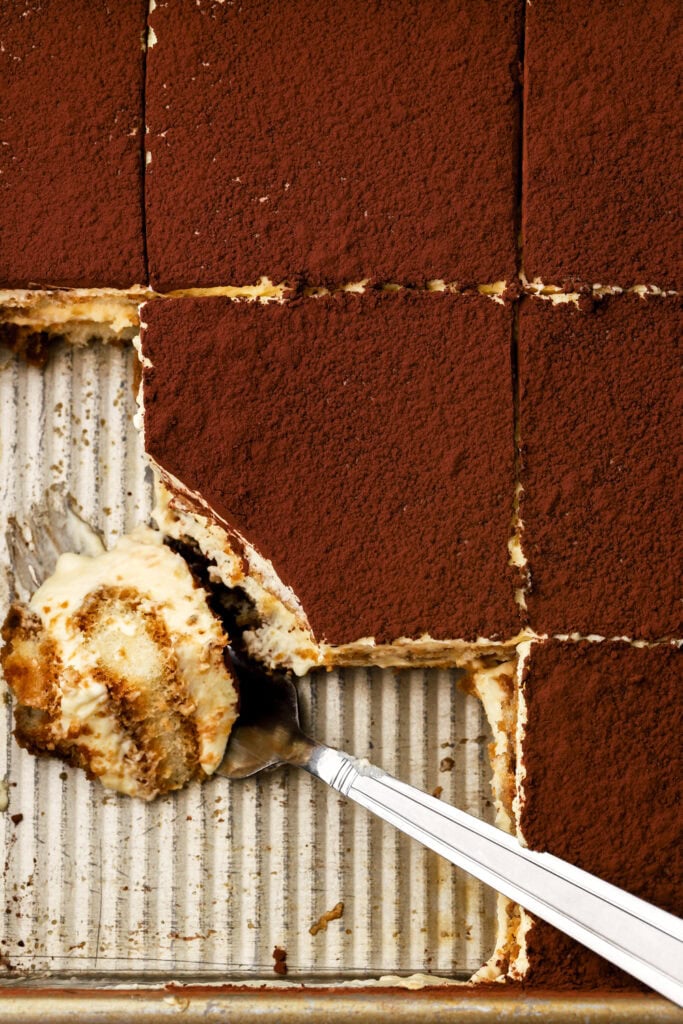
- Dip the lady fingers in the espresso for 1 second on each side and place them flat in a serving dish (I had to trim one side of the ladyfingers to fit them perfectly in the 8 inch square pan).
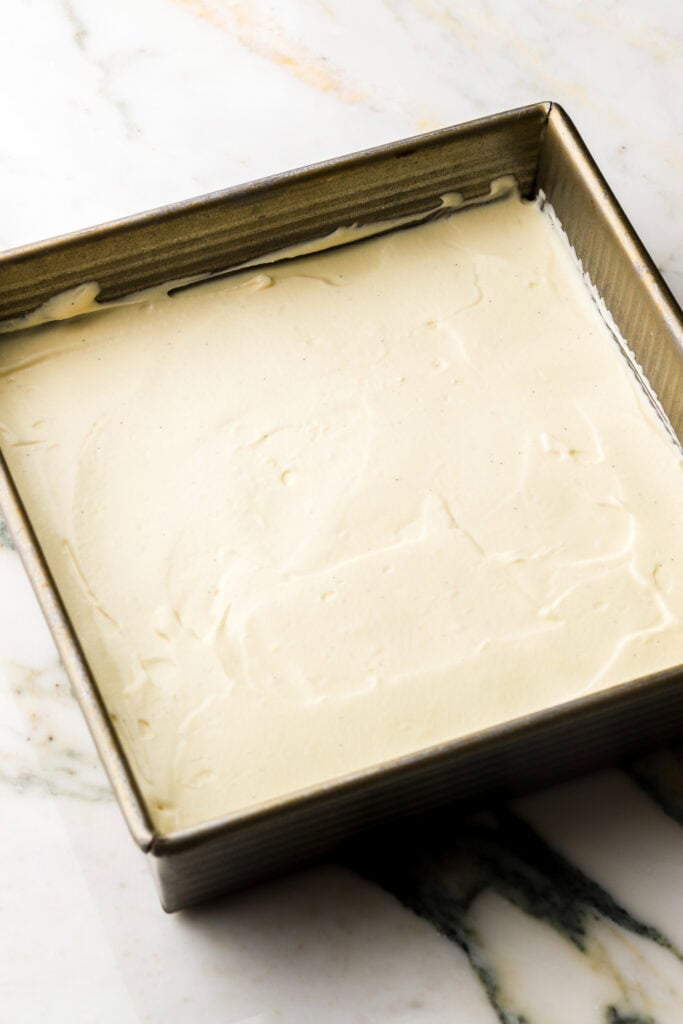
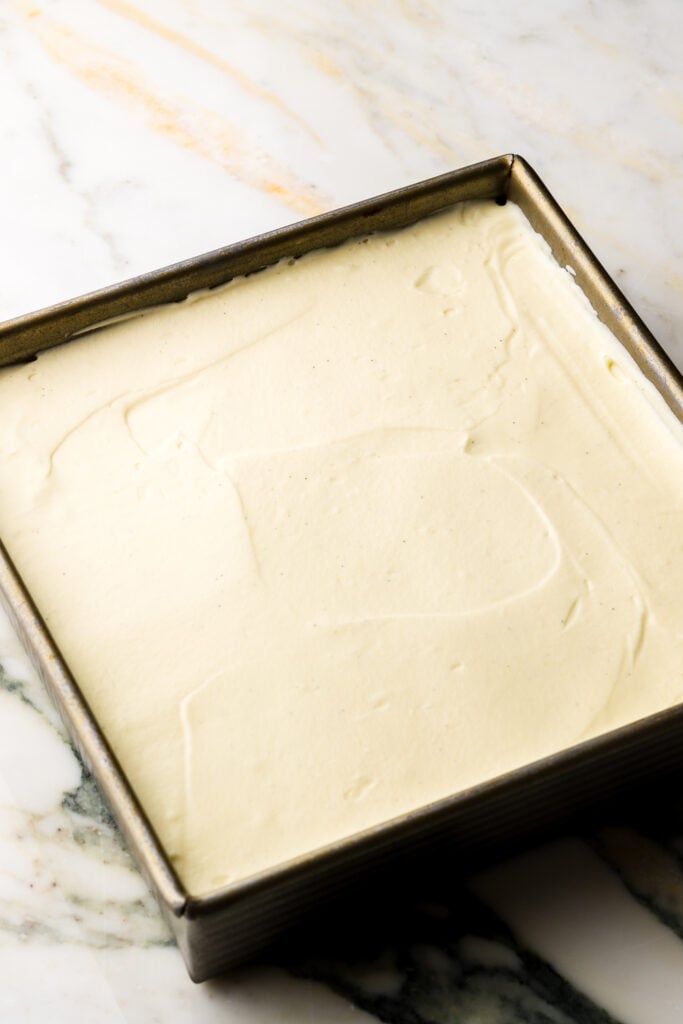
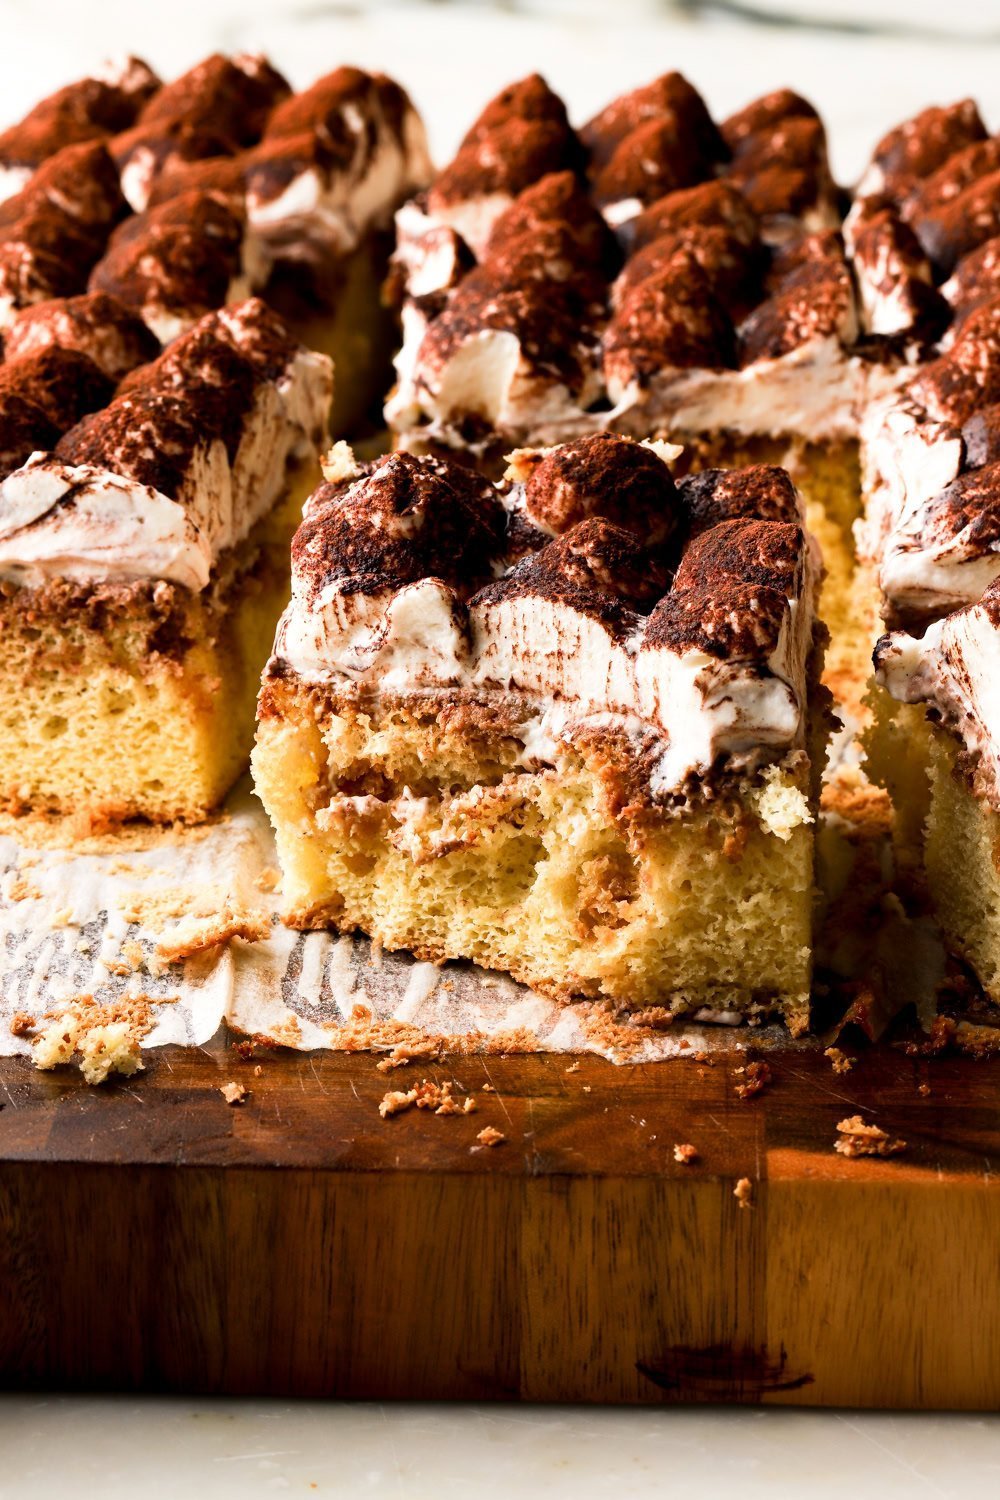
- Spread half of the mascarpone cream on top of the lady fingers and then repeat with the second layer of ladyfingers and second half of the cream. Refrigerate the cake for at least 8 hours. I like to do this the night before serving.
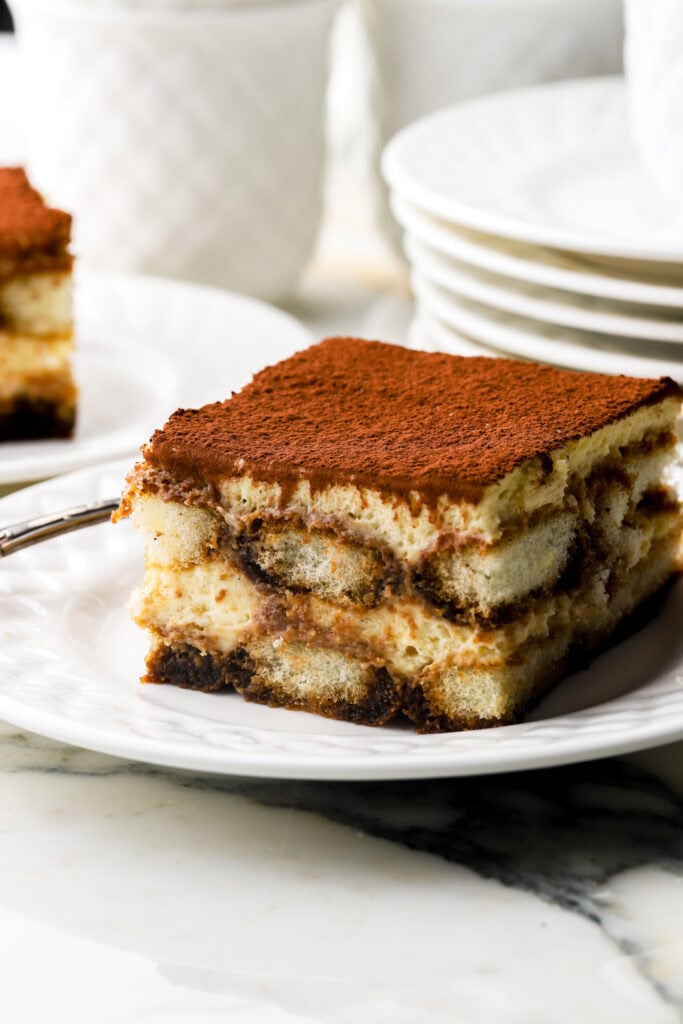
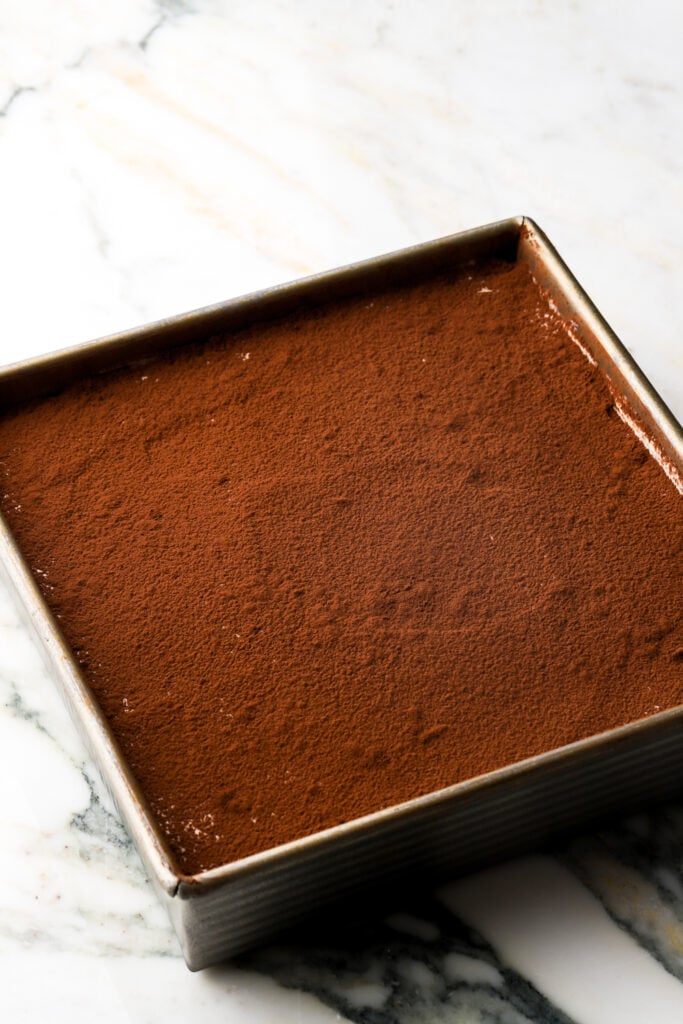
- Dust the cake with unsweetened cocoa powder – if you do this right away, the longer the cocoa powder sits on the cake, the more “wet” it’ll look (which can look unpleasant). I like to assemble the cake the night before, dust with cocoa powder the next morning and serve it for dinner that day. The reason I dust it with the cocoa powder in the morning rather than just before serving is because if it sits just a little in the fridge with the cocoa powder, it won’t be quite as powdery. Sometimes if it’s freshly dusted, it can make people choke on the cocoa powder when they take a bite lol.

Whipped Cream or Whipped Egg Whites
Ok I studied this a lot. I took polls on instagram, researched it on google and tested both versions several times. At first I was 100% whipped cream because it was sooo creamy and more full bodied. HOWEVER, after several more tests, the recipe I loved most is able to be made with either the whipped cream or the whipped egg whites and there’s something I love about both of them so I say either is fine!
Whipped cream is certainly more creamy and slightly thicker, making it feel just a little heavier and more indulgent.
Whipped egg whites feel SO light and a little more silky which I think is a little more tiramisu-like.
I love convenience so considering the fact that we already have the egg whites waiting for us AND it feels more authentic (even though apparently authentic is just egg yolks and mascarpone? lol) I wrote the recipe with egg whites. If I am serving Tiramisu, this is the version I would make so that’s what I wrote in the recipe card.
I used just as many egg whites as were left from the egg yolks so 3 large egg whites. This can be replaced by 1 cup of heavy whipping cream, whipped just until stiff peaks start to form (don’t over whip). If you’re doubling the recipe, you can do like 1 ¾ cup of heavy whipping cream because it is slightly more volume than the egg whites.
*If you notice the photos, the ones with the pan and/or blue vase and plates is the Tiramisu made with whipped cream. The photos with the stacks of white plates is the Tiramisu made with egg whites. You’ll notice the cream made with whipped cream looks a little thicker/fuller, whereas the cream with the egg whites looks more airy. But to be honest, I doubt most people would even notice a difference when eating it!

How to cook the eggs
Personally, I’m ok with raw eggs but I did test a few ways to cook it if you’re not.
- Swiss Method – This is basically how a swiss meringue is done – place a small pan of hot water on the stove and bring the water to a simmer. Then place a bowl with the egg yolks and half the sugar on top and whisk constantly until the sugar is dissolved or the temperature reaches 145F (63C). Then remove from the heat, continue to whisk for a little and then place into another bowl with a lid. Refrigerate it until it’s chilled (can also place it into an ice bath if you want to speed this up). Beat with the mascarpone once it’s chilled. Fold in the whipped egg whites in 3-4 increments (once you’re done cooking those).
- The same exact process can be done with the egg whites but no need to chill it. When the sugar has dissolved, just move it to the stand mixer (or use a hand mixer) and beat at full speed just until stiff peaks are starting to form (may still be a little warm, that’s ok).
- French Method – basically the same way I make a french buttercream – in a small pot place half of the sugar with a little water (just enough to cover the sugar) and cook over medium-low heat until it reaches 240F (116C). Once the sugar is around 225F (107C) place the egg yolks in the bowl of a stand mixer and start beating with the whisk attachment at medium speed. Once the sugar reaches full temperature, stream the sugar syrup into the egg yolks along the edge of the bowl while the mixer is still running (make sure not to stream it straight into the moving whisk). The heat from the syrup will cook the egg yolks. Once the sugar syrup is all in, turn the mixer up to medium-high and beat until the egg yolks are pale and fluffy and has cooled. Add in room temperature mascarpone and mix until it’s combined. Fold in the whipped egg whites in 3-4 increments (once you’re done cooking those)
- The exact same process can be followed for the egg whites, beating just until stiff peaks start to form.
- Custard Method – Place the egg yolks, sugar and mascarpone into a small pot over low heat and whisk continuously until it all melts and comes together. The mixture will go from chunky to melted and then it will just slightly thicken again (can check temp for eggs if you want). Remove and place in a bowl. Cover with a lid and refrigerate until it’s chilled (or place into an ice bath if you want to speed this up). Once it’s chilled, fold in whipped egg whites in 3-4 increments (once you’re done cooking those with method 1 or 2) (or you could do the whipped cream if you don’t want to bother with cooking the egg whites).
What pan to make tiramisu in
I tested this cake in a few different sizes but at the end of the day, you can assemble it in literally anything, even mini little serving cups (I did it in coupe glasses with Oreo Tiramisu!) but you might need a few more or less lady fingers depending on the size.
The sizes I’ve tried
- Full batch – square 8 inch pan or round 9 inch pan.
- Double batch – 9×13” pan or 10” square pan
- You can also just assemble it in any size pan you want and if there’s any cream left over, just make little individual cups or make a smaller one.
- Makes 6-10 cup servings. I tested it in 7 ounce cups and got 7 servings so smaller cups will obviously give you a few more and vise versa.
Notes for homemade ladyfingers
I prefer to make this tiramisu with store bought ladyfingers because it’s more precise. If you’re making the homemade lady fingers, you want to get them as close to the same size as possible, not just so it looks pretty and uniform but so they dry out an equal amount because when you dip them, you want to get an even soak on them.
Make sure to also make them at least a few days in advance and let them dry out overnight for 1-2 days.
When you soak them in the espresso, they will take longer to absorb the liquid. I know this sounds crazy compared to the 1 second dipping for store bought ladyfingers but I counted 8-10 Mississippi’s for the homemade ladyfingers. Again, this depends on how well they are baked (over baked will be more dry and absorb more, under baked will absorb less) and how long they sit out to dry (more dry will absorb quicker). The best description I can give is that when I dip the ladyfingers in the coffee, I gently squeeze the outside of the ladyfinger and when it starts to get softer, is when I take it out of the coffee.
How to store finished Tiramisu
Tiramisu has to be refrigerated and is best served chilled. Store it in the fridge for up to a week (it may get a little soggier by the end of the week) or freeze in an airtight container for a few weeks. Thaw in the fridge before serving.

I hope you love my version of Tiramisu! If you have any questions, please comment down below – those will get answered much quicker than email or through social media.
If you’ve tried this, I would very much appreciate a star rating or review as well.
As always, have a blessed day and happy baking!
Love, B


Hi!! Can I use cream cheese instead of mascarpone? It’s too expensive here in y country
Made this and it was soooo sooo sooo light, delicious and easy to make. Followed recipe exactly. Everyone that tried it was obsessed ? my go to tiramisu recipe. Honestly your whole website is my go -to for dessert recipes!! Thankyou!!
Hi Sargena, thank you so much! I’m so l glad you like the tiramisu and all my recipes, I appreciate you making them!! <3