

Sandwich Bread
Finally sharing my super easy sandwich bread recipe!
With 5 Ingredients you probably already have and a few hours (mostly hands off), you’ll have bread that’s perfect for any occasion and so much better than anything you can buy at the store!
I mean I don’t know about you, but if I have one weakness, it’s homemade bread.
I also have an easy, Overnight Italian Bread or if you’re feeling fancy, homemade croissants are my most popular recipe.
What is Sandwich Bread?
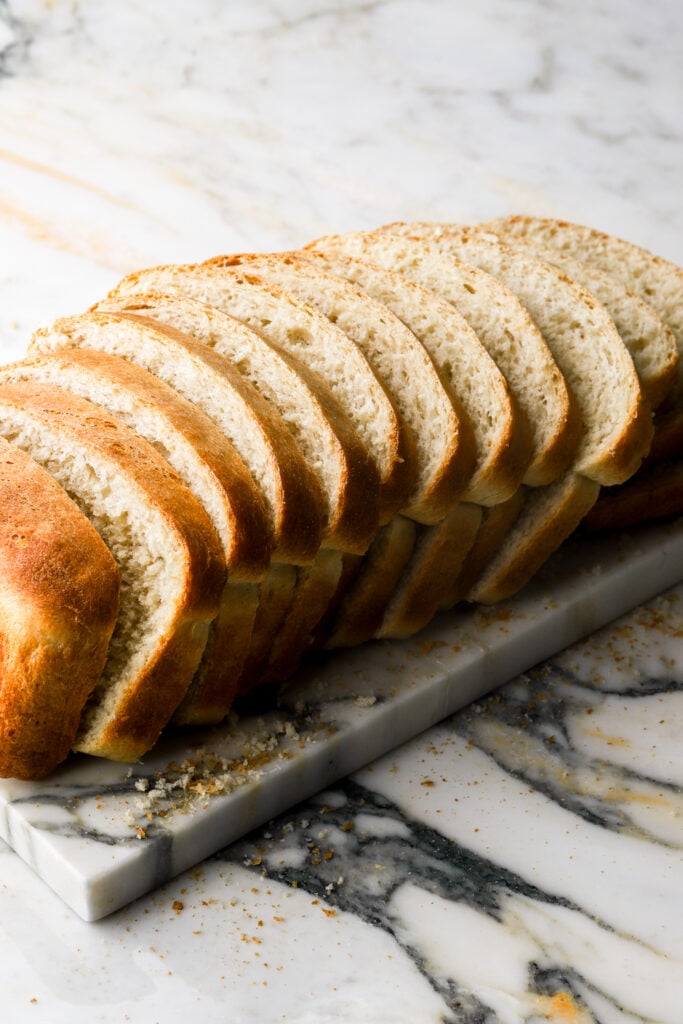
There are sooooo many types of breads and so many different recipes for each type of bread. Sandwich bread is known as a soft, fluffy bread that’s the same shape throughout, perfect for making sandwiches.
Artisan bread is traditionally lean, meaning it’s just made of just flour, salt, yeast and water. Brioche dough is very enriched, meaning we’ve added sugar, butter, eggs and/or milk. Sandwich bread is only slightly enriched so it lands somewhere in the middle of that. I add a tiny bit of honey (or sugar) and butter (or oil).
Old school bread generally follows a 5:3 ratio, meaning there are 5 parts flour and 3 parts water. Personally, I find that ratio to be my favorite so I kept it the same. I have 500 grams of flour and almost 300 grams of water. My recipes uses just under 300 grams but with the added fat we’re just over 300 grams so it balances out well.
Ingredients & Substitutions
Making bread sounds more intimidating than it is. It’s a very simple process, it’s just more of timely matter. Make sure you’re giving the dough enough kneading time and enough rising time and make sure to follow visual cues more than the actual time on a clock because every environment is different.
*full recipe is in the recipe card at the bottom!
- Flour: I’ve used both all-purpose flour and bread flour for this recipe and both work totally fine. I like King Arthur’s Organic Flour (bread or AP).
- I have also tested this with whole wheat flour and it requires more hydration so if I was to substitute half the recipe for whole wheat flour, I would increase the water to about 11-12 ounces and possibly 14-16 ounces if you were only using whole wheat flour. You want the dough to still be soft and tacky.
- Water: A lot of people add milk to sandwich bread. I don’t find it necessary but you can sub the water for milk if you prefer. There is an enzyme in milk that weakens the gluten in flour so to counteract that you want to make sure to always heat up the milk. Just before a boil, when the milk is scalding, around 181 °F (83 °C) , the enzyme gets denatured. However, yeast dies over 120F (48C) so after heating the milk, you want to let it cool for a little (this is best practice but if you don’t heat it up that high, your bread will likely still rise fine).
- Butter: I recommend salted butter but unsalted also works. The butter can be softened or melted if desired. Oil also works fine, I’ve used olive oil, avocado oil and vegetable oil.
- Sugar: I like to use honey since I make it for my kids but sugar also works fine. The bread will be more white in color if you’re using sugar instead of honey.
- Yeast: this recipe works with both active dry yeast and instant yeast. I follow the same process for most of the dough except for active dry yeast, you’ll want to activate the yeast (see below) and for instant yeast, you can just add it in with all of the ingredients.
TIP: I HIGHLY recommend using a digital scale, as dry ingredients are almost always over measured.
Step-by-Step, How To Make Sandwich Bread
- Place the warm water in the bowl of a stand mixer with the honey.
- If using active dry yeast, add that, mix and allow it to rest for 10 minutes. If using instant or rapid rise yeast, skip the resting time.
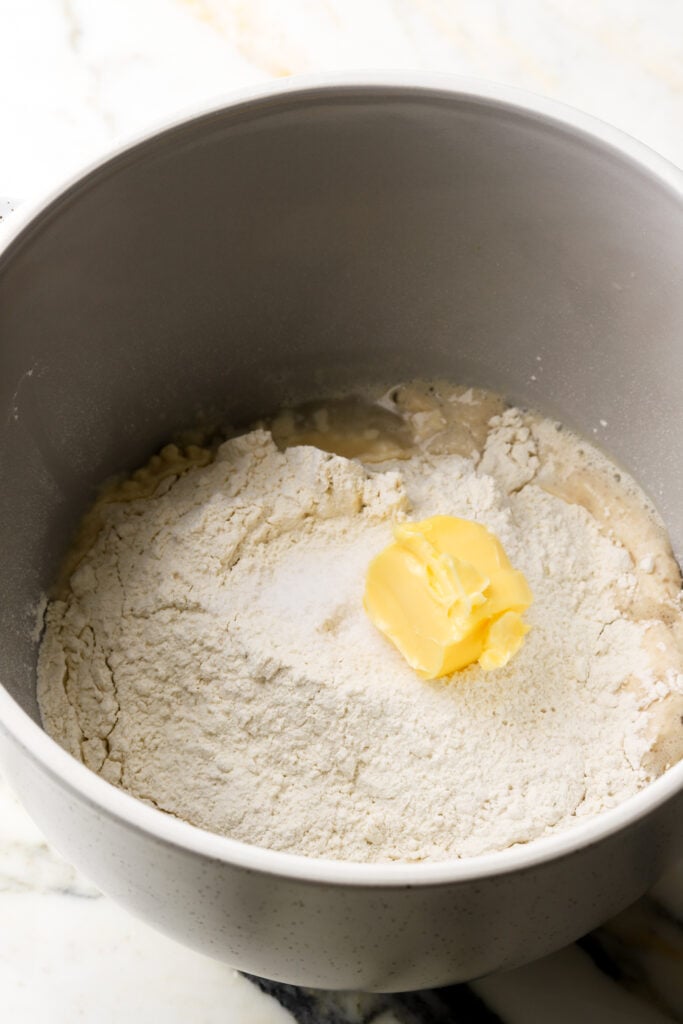
- Add flour, salt and softened butter. Use a dough hook to mix on low speed until it’s comes together.
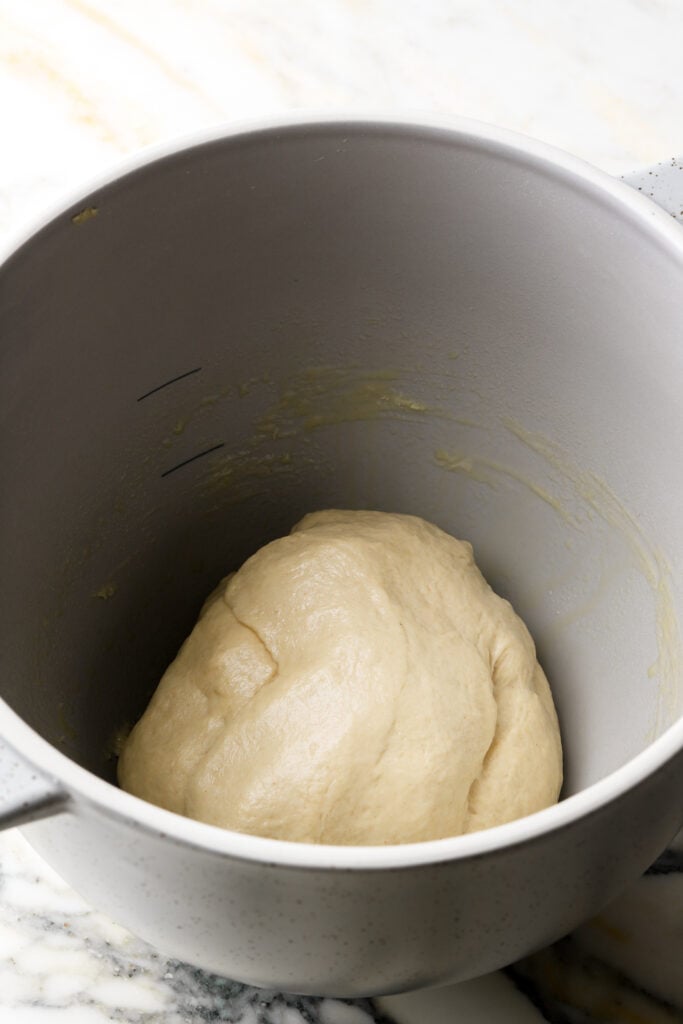
- Use the dough hook to knead on low (speed 2 kitchen aid) for about 10 minutes. Every 3ish minutes, I take the dough off the hook, reposition it and continue kneading.
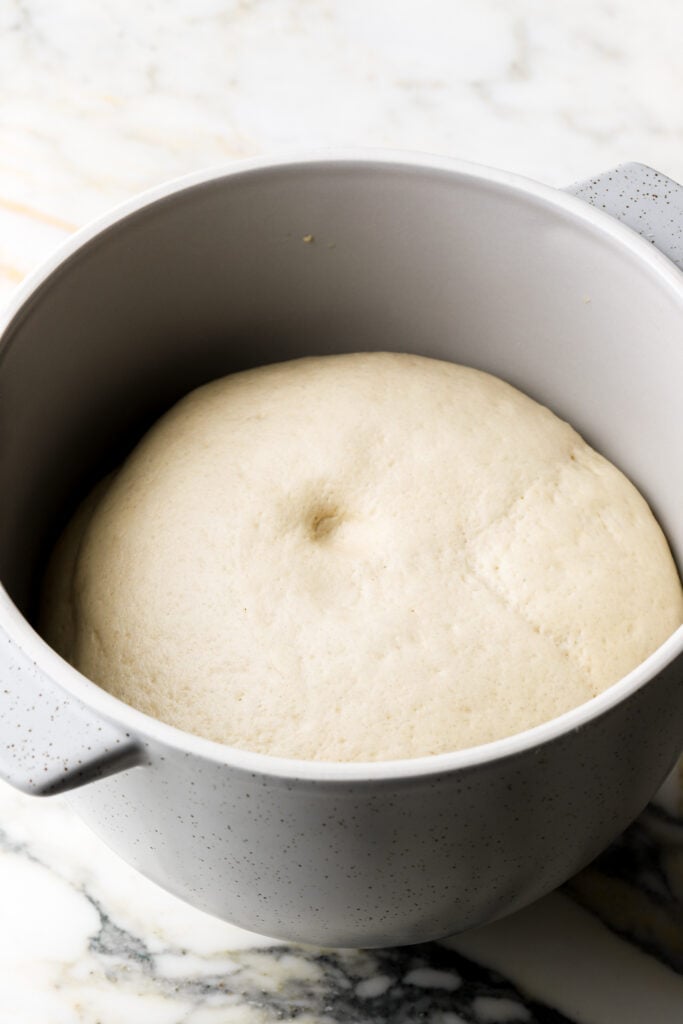
- Grease the edge of the bowl and cover. Rest in a warm place for about 1 hour. The dough should double in size.
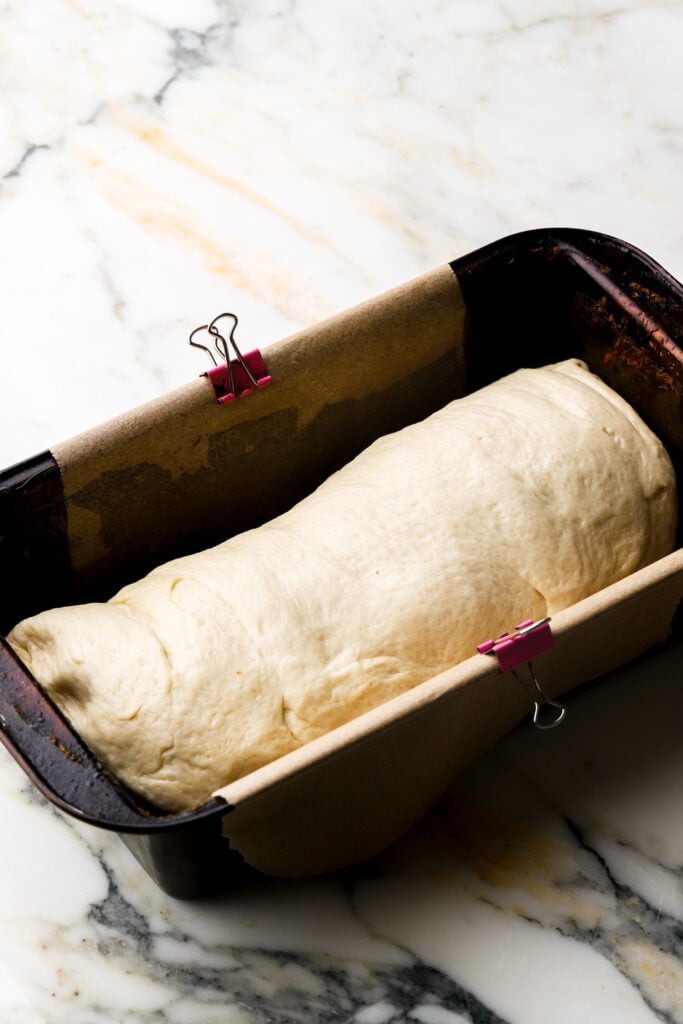
- Punch the dough down, stretch it out into a rectangle, the width of the loaf pan. Roll it up into a log and place it in the loaf pan.
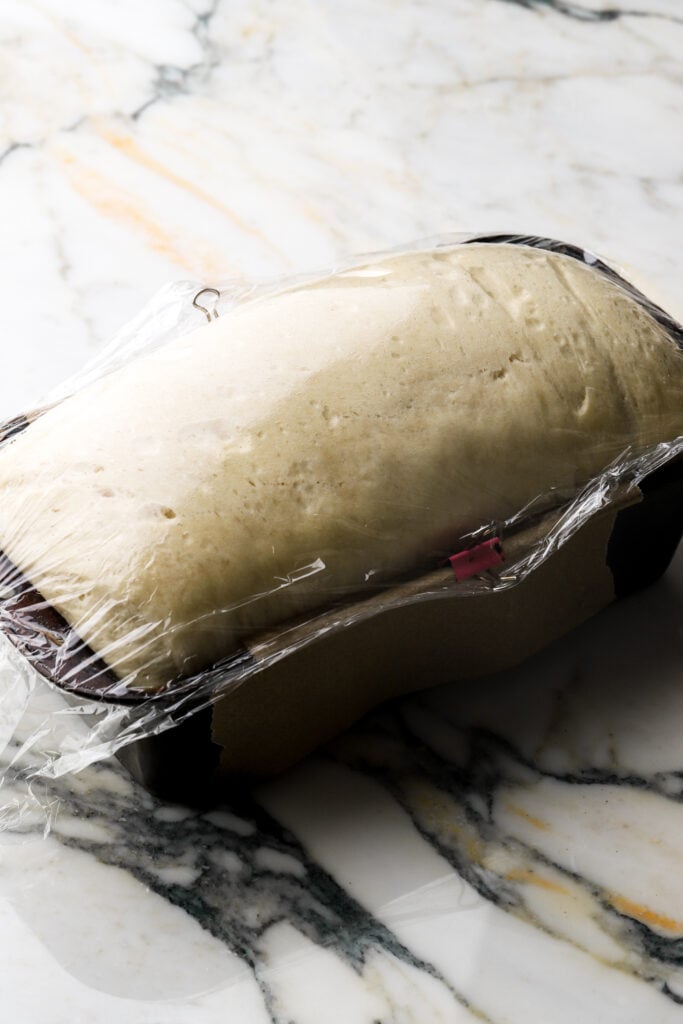
- Loosely cover with plastic wrap and rest in a warm place for another hour.
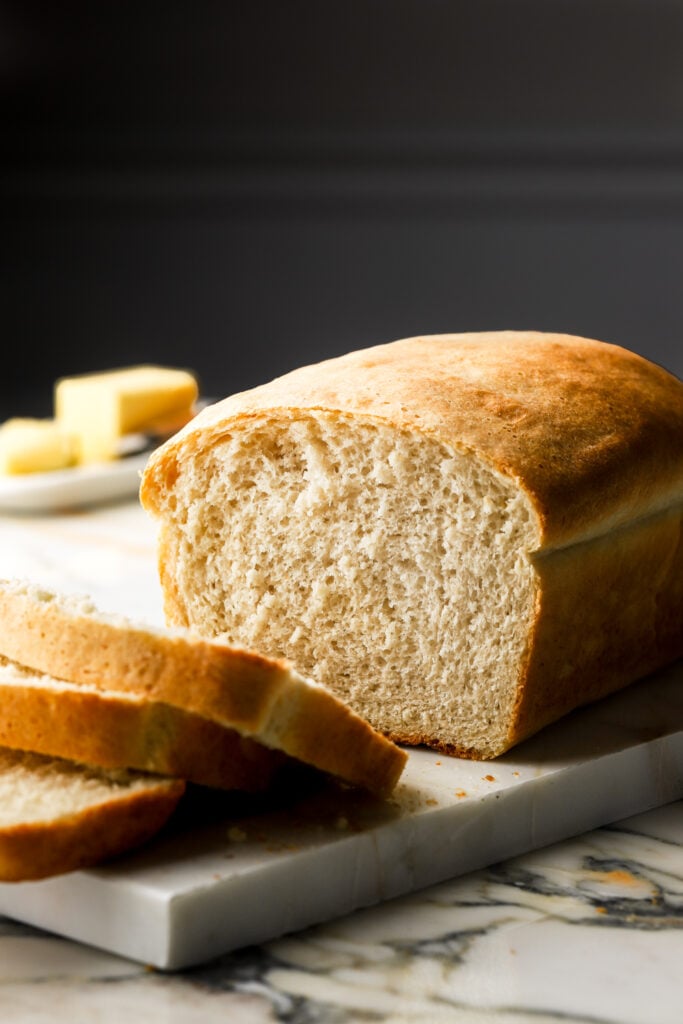
- Bake for about 20 minutes, the top should lightly brown and the loaf will feel light when you take it out of the oven.
- Allow to cool for at least 30-60 minutes before slicing.
What kind of yeast to use for sandwich bread
I wanted to do a whole separate section on this to explain how to use both active dry yeast and instant yeast in this recipe. I’ve made this recipe many many times with both types and both of them turn out amazing.
The recipe is written using instant yeast because it’s easier and quicker but if you want to substitute it for active dry yeast, just follow these instructions.
Unlike instant yeast, active dry yeast needs to be activated. To do this, combine the warm water with the yeast and the honey in a large cup, mix it and let it rest for 10 minutes. The water should develop a thick layer of foam on top.
If the water and yeast mixture doesn’t foam after at least 10-15 minutes, then the water was either too hot and kills the yeast or the yeast has expired. To be safe, make sure the water is lower than 120 °F (50 °C).
After the mixture has foamed, combine it with the rest of the ingredients and proceed to kneading.
If using instant yeast, I just add it into the bowl with all the rest of the ingredients.
Sometimes active dry yeast can take longer to rise so make sure to read the proofing section on that for visual cues.
Kneading the dough
You’ll want to knead the dough for about 10 minutes with the stand mixer or about 15-20 minutes by hand.
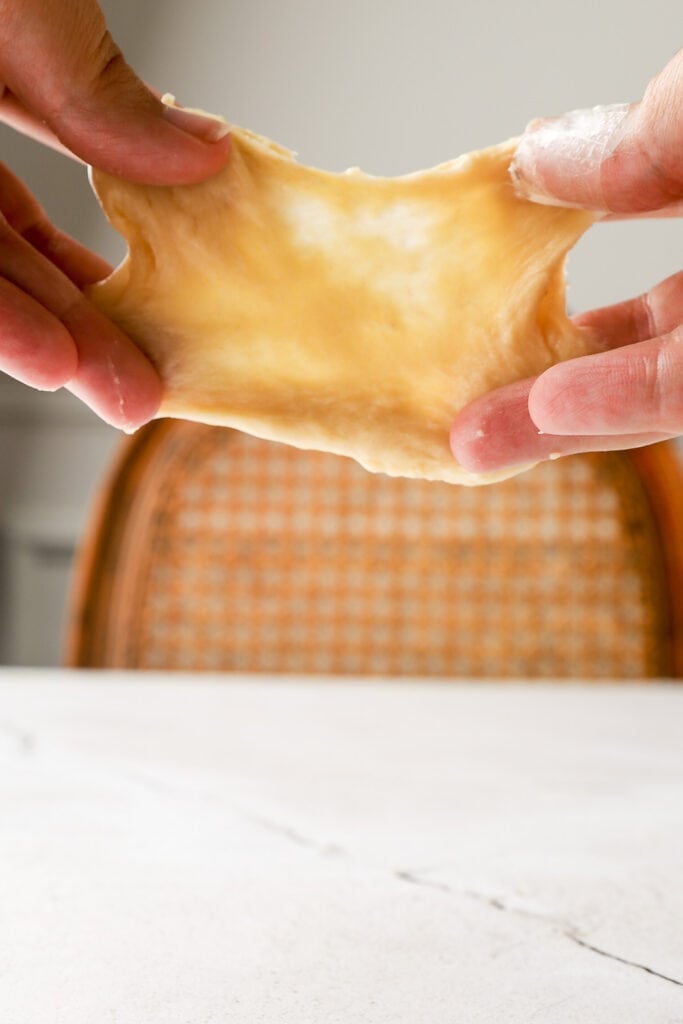
The dough should not be tacky, it may be a little sticky at first but as you knead the gluten will develop and stick to itself more than to the edge of the bowl or your fingers. It will form a nice ball around the dough hook and not stick to the edges anymore.
The dough should pass the windowpane test so stretch it out between your fingers and you should see light come through it before it tears.
If you don’t knead it enough, the gluten won’t be strong enough to rise nice and tall when it’s baking.
What temperature to proof dough at?
You want to make sure your dough is proofing at a comfortable temperature. Generally, room temperature is fine but if it’s slightly warmer, you’ll get a much quicker rise.
Yeast dies at around 120F (50C) so make sure the temperature is lower than that. I recommend anywhere between 75F (24C) to 100F (38C).
The dough can also be proofed in the refrigerator. This is called a retarding proof because it really slows down the process. The Benefit of this is that you can just pop the dough in the fridge overnight and the dough will develop a stronger flavor if it proofs for longer.
You can refrigerate the dough overnight for the first proof or the second proof, just bring it back to room temperature before proceeding with the recipe.
Rising and Proofing the dough
Rising and proofing are typically used interchangeably but the initial ‘resting time’ is actually the rising and the second ‘resting time’ is the proofing. The time needed for rising/proofing is dependent on the recipe and the environment.
Typically with instant yeast, you’re “allowed” to skip the first rise and just let the dough relax for just 10 minutes instead before shaping the dough. I prefer to still let it rise. It works both ways but I get a fluffier dough from letting it proof twice.
A general guideline is that the dough should double in size each time. It should also slowly spring back when you press on it, but also leave a small indent.
If the dough springs back quickly, then it needs more time to rise. If it doesn’t spring back at all, it MAY (not necessarily will) be over proofed and result in a flat, deflated bread.
How to shape sandwich bread
After the first proof, I just stretch my dough out into a rectangle. Make sure the width is the size of your loaf pan and then just start on a short end and roll it into a log, similar to a Swiss roll.
Make sure you roll it quite loose, not super tight or anything. Then place it in the loaf pan, lined with parchment paper, and let it rise in there before baking.
Egg wash for sandwich bread
This is totally optional! Sometimes I do an egg wash because it makes the crust more soft and squishy and my kids like that. I also like that it browns the bread more.
I just beat an egg (or egg yolk with a little water/milk if you have one leftover) and brush it on top of the dough just before putting it in the oven.
Other options are brushing it with melted butter or even olive oil but those won’t brown quite the same as the egg.
If you want to top the loaf with sea salt flakes, sesame seeds or everything bagel seasoning, etc. you’ll need the egg wash because butter and oil won’t stick to the loaf the same way an egg wash does.
The photos pictured don’t have any sort of wash on the crust.
How to bake sandwich bread
My oven runs super hot on the bottom so besides pie, I pretty much bake everything on convection (which means the fan is circulating the heat around).
I bake this bread at 425F (218C) for about 20 minutes. I always recommend an oven thermometer just because oven’s can vary.
The internal temp of the bread should be at least 195F (90C) when it’s done but mine is usually around 200F (93C).
Don’t go based on the color on the top and don’t bother sticking a knife in there cuz that won’t do anything with dough.
If it’s fully baked, the bread should feel light when you pick it up though.
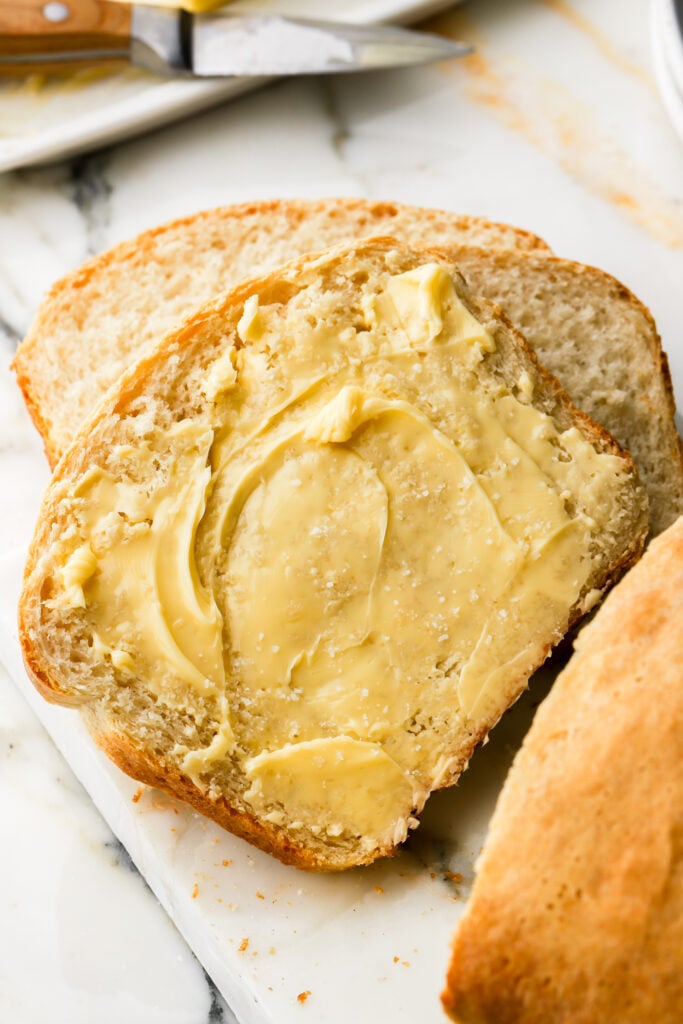
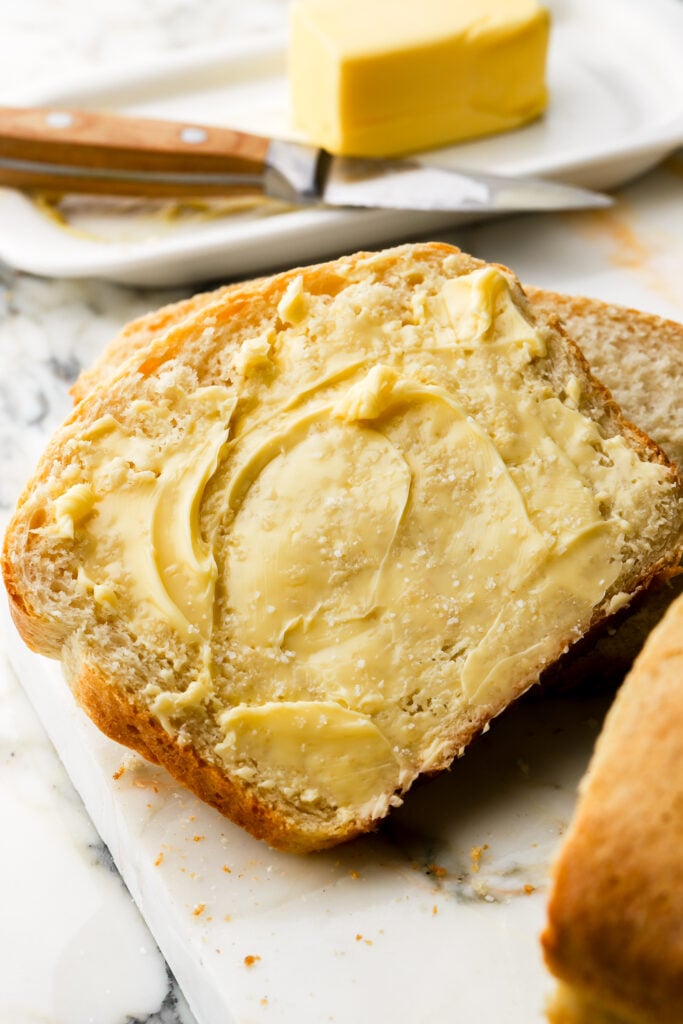
How to serve sandwich bread
My personal favorite way to eat any bread is warm with European butter and flakey sea salt. I could literally live off that alone.
I’ve also used this bread to make the absolute best grilled cheese sandwiches and my kids love it for peanut butter and jelly sandwiches.
I use it for avocado toast in the morning as well. However, it is softer so I recommend toasting it well if you’re going to put something like avocados, eggs, etc. so it’s a little more firm.
How to store sandwich bread
Obviously bread is always best fresh cuz there’s nothing like a warm slice of bread.
However, this sandwich bread keeps really well! I leave it on the counter in a ziplock bag for 4-5 days and if it hasn’t gotten eaten by then, I refrigerate it for up to a week or freeze it for longer.
If it’s from the fridge I usually microwave it for 10 seconds for the kids or toast it for myself.
If it dries out at all, just toast it and spread some butter or avocados on top and it’s good to go.
If you’ve made it this far, I apologize for the length but I hope this post is helpful to make a super easy and fluffy loaf of bread at home!
If you make it, I’d love it if you left me a review or a 5-star rating and as always, have a blessed day and happy baking!
Love, B


Fluffy inside, crunchy outside. This will be my go to sandwich bread recipe when I don’t have milk in the house. The second rise went a really quickly (maybe because it was warm in the house) I had to pop it in the oven after 45 minutes.
My dough ball just got pushed around the bowl, and never actually formed on the hook. Also, it’s a bit dense and tough the next day. I feel like I did something wrong!
Oh no! It is a pretty “wet” dough. I do my mixing in a bread maker which has a tall and deep bowl. (but bake in the oven). I wonder if that helps getting the dough well kneaded. Also I do punch it down before the first and second proof (not sure if that matters).
After it fully cools I put it in a bag (but leave the bag sightly open) and it stays fresh for me at least 5 days. I wonder what’s different. I use King Arthur Bread Flour.
Bread can be finicky. 🙁
Those pictures in the recipe are pretty spot on to how it looks through the process for me.
Using this recipe with yeast for the first time. I’m on the last “set” before it goes into the oven. Can’t wait to try it with my homemade Swedish Meatballs.
Go to recipe for sandwich bread! I reduce the salt to 8 to 10g, otherwise the recipe is great!
Super good! Make it all the time. Can you double the recipe?
Thank you Koda, I haven’t tried it but if you’re weighing the ingredients then yes, it should be fine to double 🙂
I haven’t made bread in many years, so I was a little nervous to go at it again. This recipe not only made it easy, but the bread is outstanding! Will definitely make it again!
Great and simple recipe sandwich bread recipe…. I noticed the amount of salt seemed to be a bit too much so i scaled it down to 1 tsp. Delicious and will be making again
This turned out really well – we just found it to be a little too salty. We’ll reduce the salt to 10 grams next time.
I tried making this recipe and it seemed like my dough never firmed up when kneading on the mixer. It was like it was more soupy/sticky. I followed the exact ingredients. Not sure why it wasn’t coming together.
Hi Rebecca, did you weigh your ingredients?
I just made this recipe and it turned out so delicious! Will be using this recipe again, very yummy and soft with a nice crispy crust.
Tried to mix it with my hands and it did not rise at all ?? any advice if you don’t have a stand mixer?
Did it pass the windowpane test after kneading it?
My new go to sandwich bread recipe! Super simple and tasty. My husband loves it. Already made it twice this week! Fluffy and light but still holds up well for actually making sandwiches. Definitely recommend.
Thank you Natalie, I’m so glad you guys like it 🙂
Super easy recipe to follow and it really turns out great. Just a bit too salty for me, but I’ll just put less in next time! 100% will be making again.