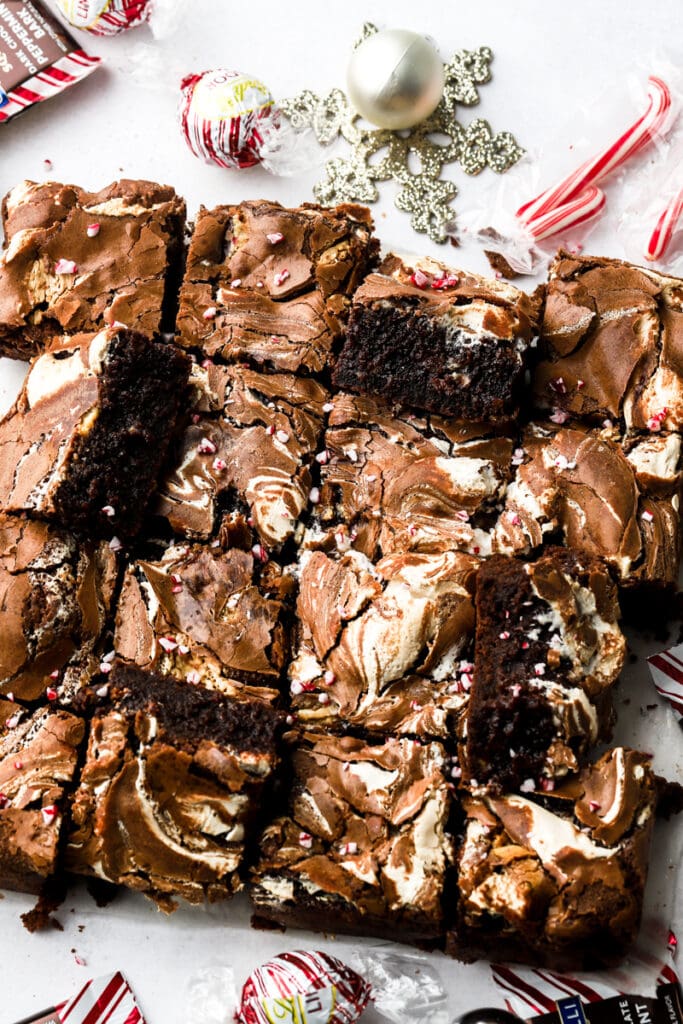
Marshmallow Peppermint Brownies
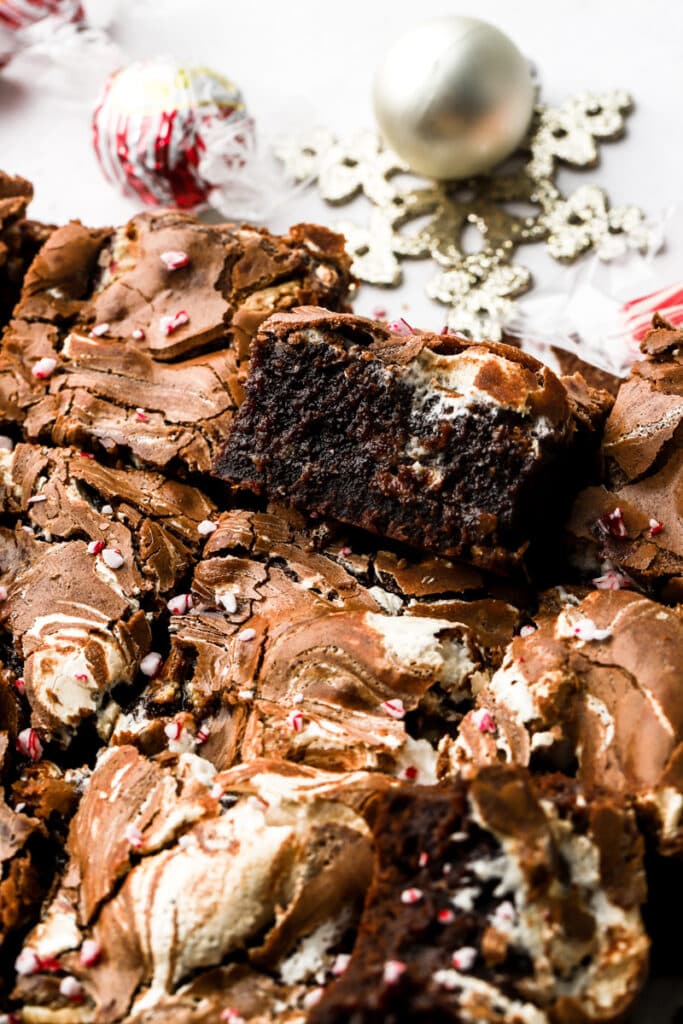
Marshmallow peppermint brownies are the perfect fudge-y brownies studded with white chocolate peppermint truffles and swirls of marshmallow fluff.

What makes these the best peppermint brownies?
If you’re not familiar with my brownies, I encourage you to check out my PERFECT Fudge Brownies to see why I love them so much. Basically, they’re the perfect combination; thick, chocolatey, fudgy, gooey but not in a “too under-baked” way.
So let’s make them festive, shall we?! I’ve been seeing so many versions of peppermint brownies that all look so good. I couldn’t decide between doing a layer of peppermint frosting or just peppermint ganache or a peppermint marbled chocolate swirl.
So I kept postponing it until marshmallows popped into my head! I knew I had to try it because although I love chocolate with peppermint, it can be too intense sometimes. Marshmallow fluff kind of lightens that up a little.
These brownies are made similar to my biscoff brownies. I also have oreo fudge brownies and hot chocolate brownies that I think you’ll love. If you’re here for the chocolate peppermint, try my dark chocolate peppermint cookies or my chocolate peppermint cake, the frosting is to die for!

Ingredients & Substitutions
- Butter: the butter gets melted so it doesn’t matter if it’s cold but it is quicker if the butter is already soft. I like salted butter but unsalted works too, just add an extra ¼ tsp of salt.
- Chocolate: you can use milk chocolate, semi-sweet chocolate or dark chocolate. I prefer dark chocolate for this recipe because the marshmallow and the white chocolate are already sweet.
- Eggs: always use large, room temperature eggs. Pop them in hot water for 5-10 minutes if they’re cold.
- Sugar: I use both brown sugar and granulated sugar in this recipe for the perfect flavor and texture combination.
- Flour: I always use all-purpose flour and I HIGHLY recommend using a digital scale, as flour is almost always over measured.
- Cocoa Powder: the better quality your cocoa powder is, the better your brownies will taste! My favorite is King Arthur Dutch Process Cocoa Powder or Rodelle Dutch Process Cocoa Powder.
- Don’t use sweetened cocoa powder though!
- Salt: salt brings out the flavor in all baked goods.
- Marshmallow Fluff: I used store bought marshmallow fluff to swirl into the brownies. I’m sure it would also work with homemade but I haven’t tested it on this specific recipe.
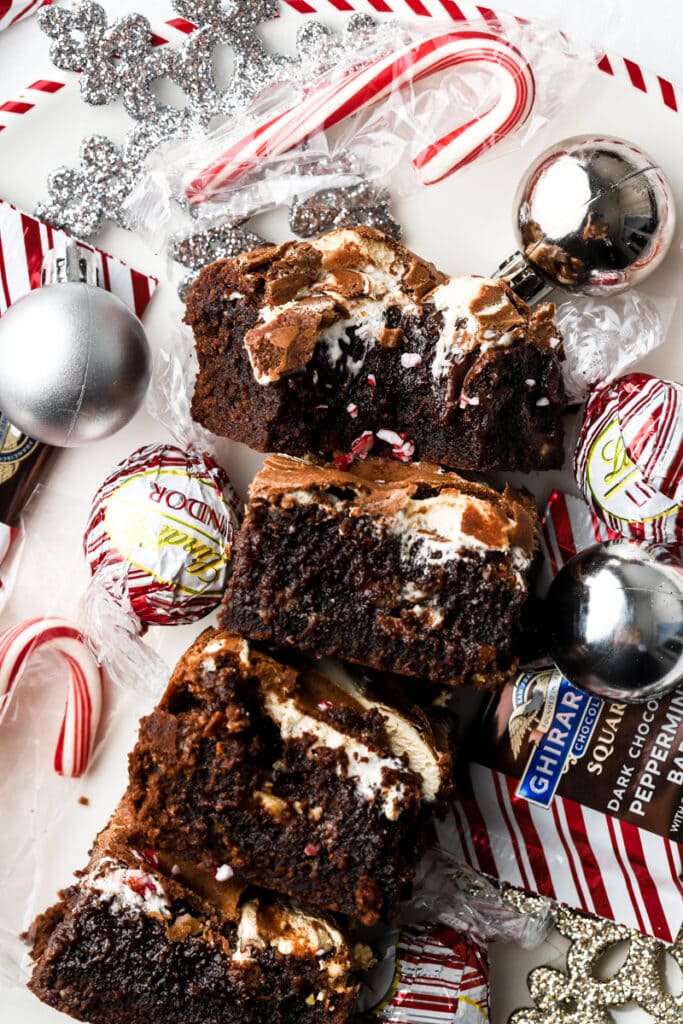
- Peppermint Chocolates: You can use any kind of peppermint chocolates you like, I used half Lindt White Chocolate Truffles and half Ghirardelli Peppermint Bark Squares.
- The peppermint flavor is more subtle since I just used peppermint chocolates and no extract. Feel free to add 1/4 tsp of peppermint extract to the batter as well if you want it stronger.
Step-by-Step Instructions
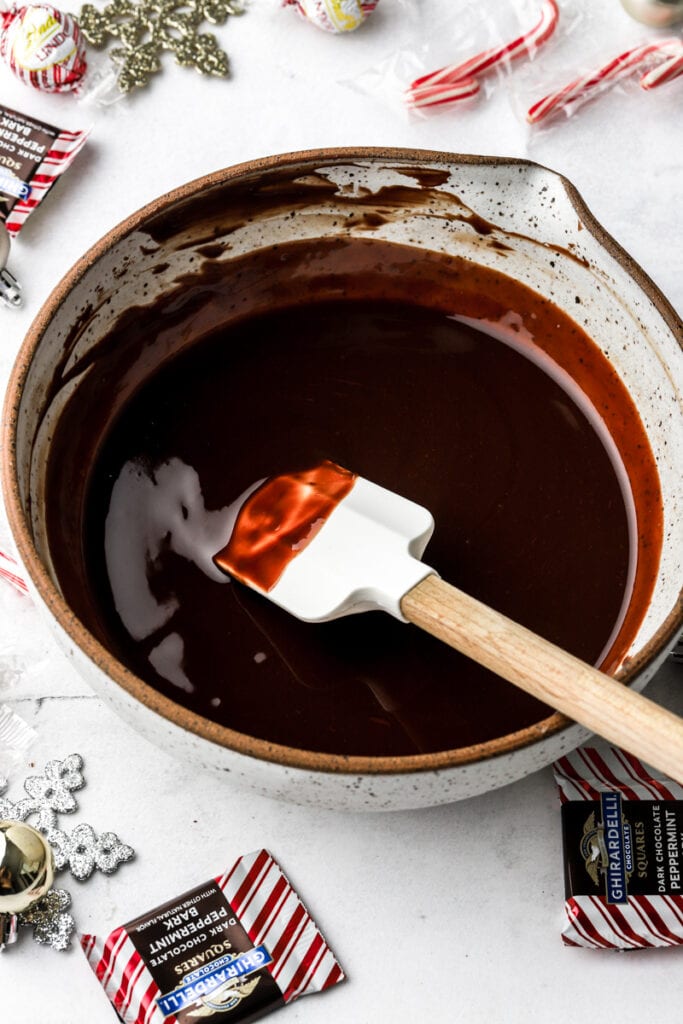
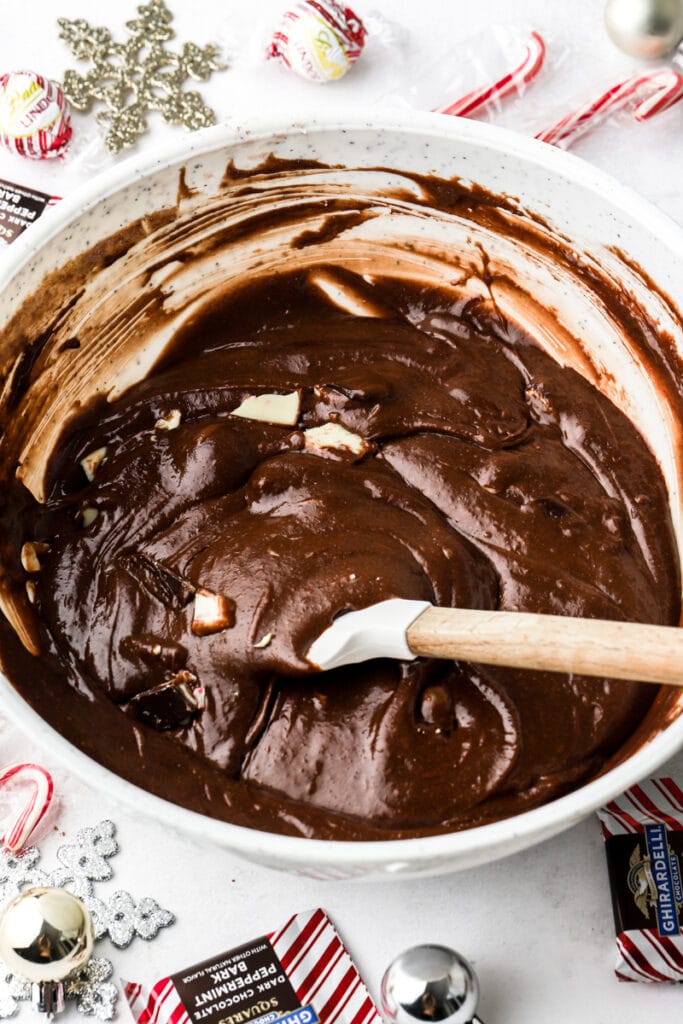
Step 1: Melt the butter with the chocolate chips and stir until they’re completely smooth.
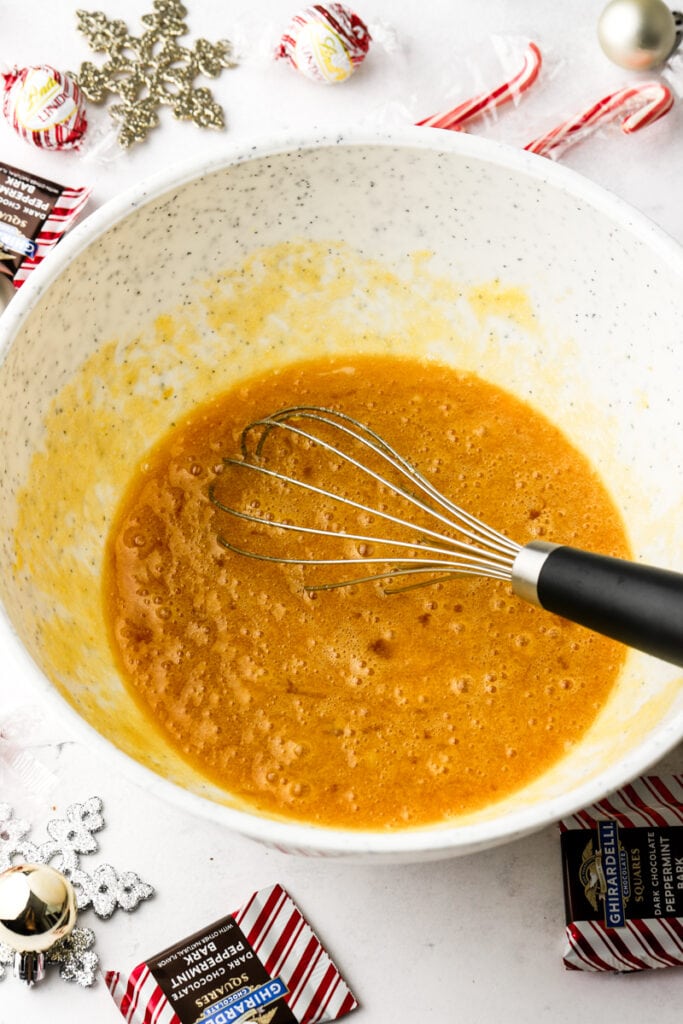
Step 2: Whisk the eggs with the sugars JUST until they’re barely combined. You want it to still be kind of gloopy/eggy, not super thin and smooth.
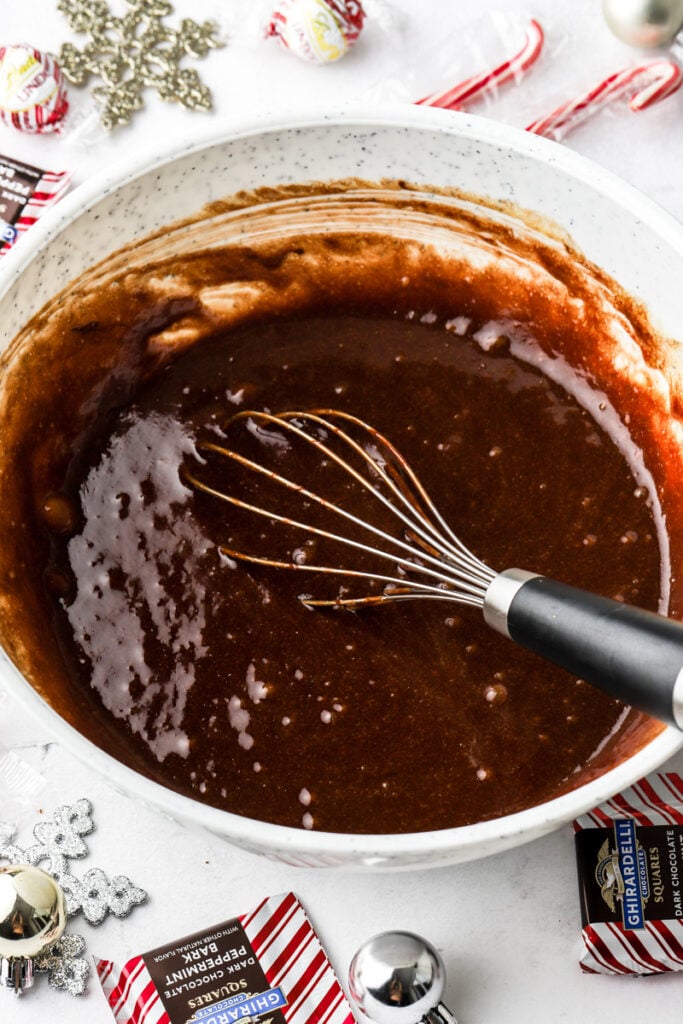
Step 3: Add the chocolate mixture to the egg mixture and whisk just until they’re combined, again still a little gloopy.
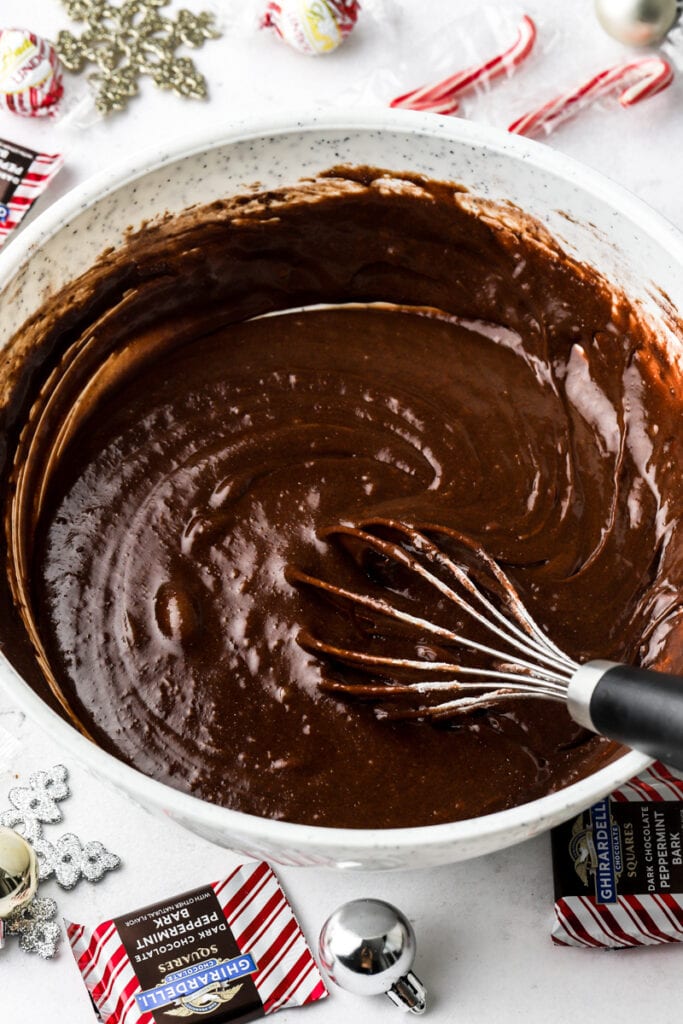
Step 4: Add the dry ingredients to the wet ingredients and whisk just until the dry ingredients are incorporated.
Step 5: Fold in the chopped peppermint chocolates just until they’re evenly distributed.
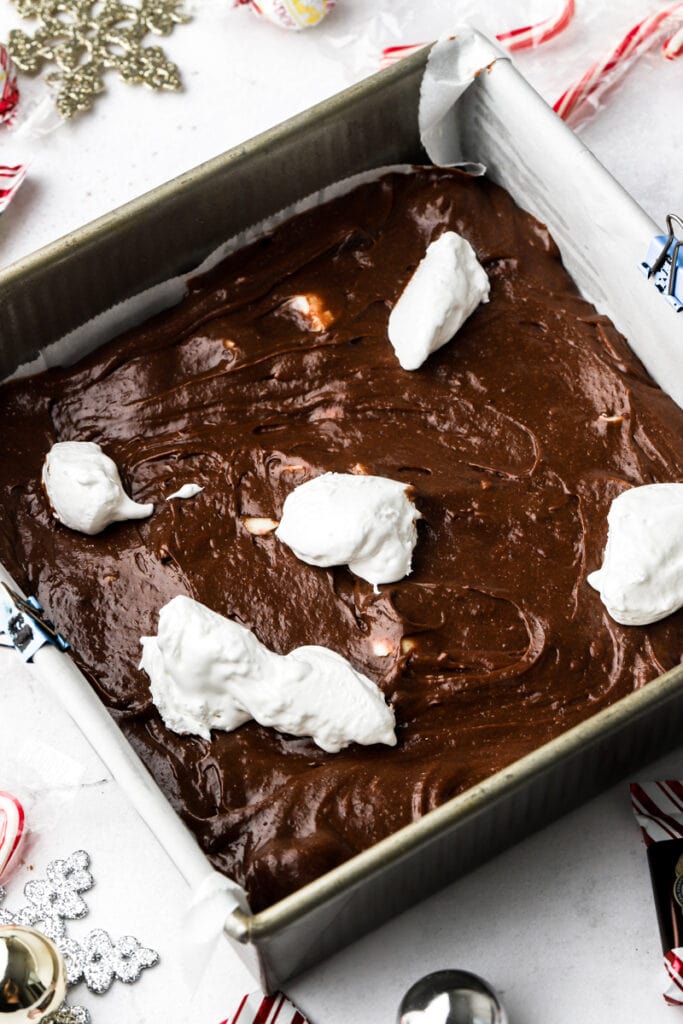
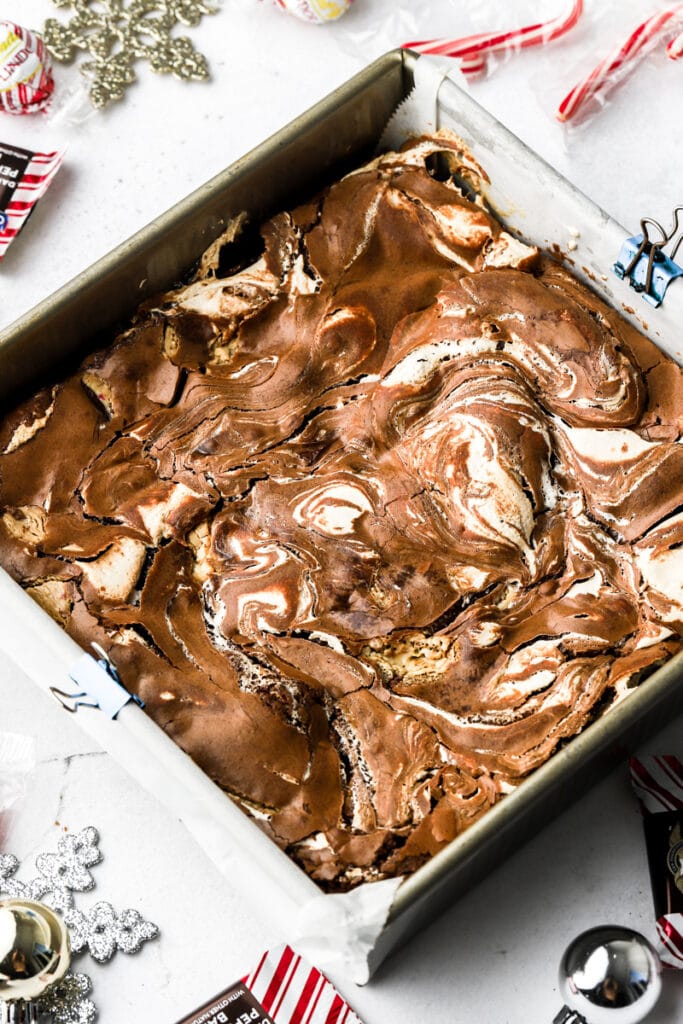
Step 6: Spread ⅔ of the brownie batter in the pan and then place globs of marshmallow fluff on top. Repeat with the rest of the brownie batter and more globs of marshmallow fluff.

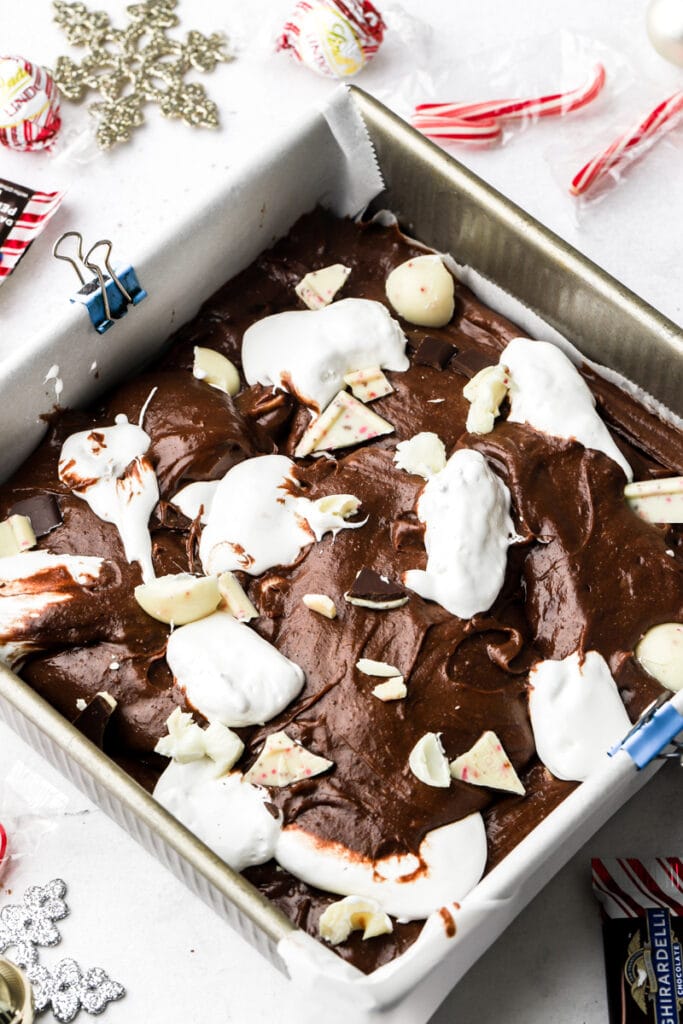
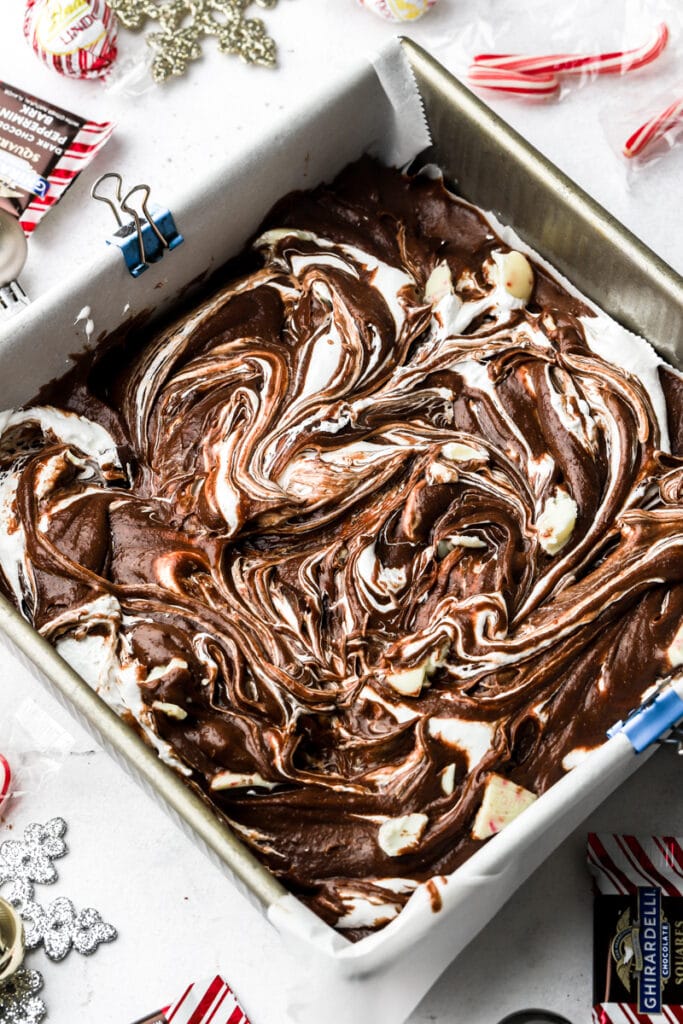
Step 7: Top with a few extra pieces of peppermint chocolates and swirl the marshmallow into the brownie batter gently just so they’re slightly covered by some brownie batter but not too much, you want the globs to stay thick so they’re visible when you bite into them.
Step 9: Bake for about 40 minutes, remove the pan from the oven and rap it on the counter. Return to bake for another 5-15 minutes until center is soft but no longer jiggly. Allow to cool completely to room temperature.
When are marshmallow brownies done baking?
Brownies are by far the hardest thing for me to assess when they’re done baking. This is especially difficult when you have a meringue top instead of a thin crackle, because the top gets hard and crunchy so touching it with your finger doesn’t really help. I make these brownies with a paper thin, crackle top because:
- They taste better
- They bake up better
- They’re quicker to make
When the top of your brownies have a thin little crackle on top instead of a thick meringue, you can press on it with your finger to see how firm the brownies are underneath. When you move the pan, if the batter jiggles, it’s definitely not done baking.
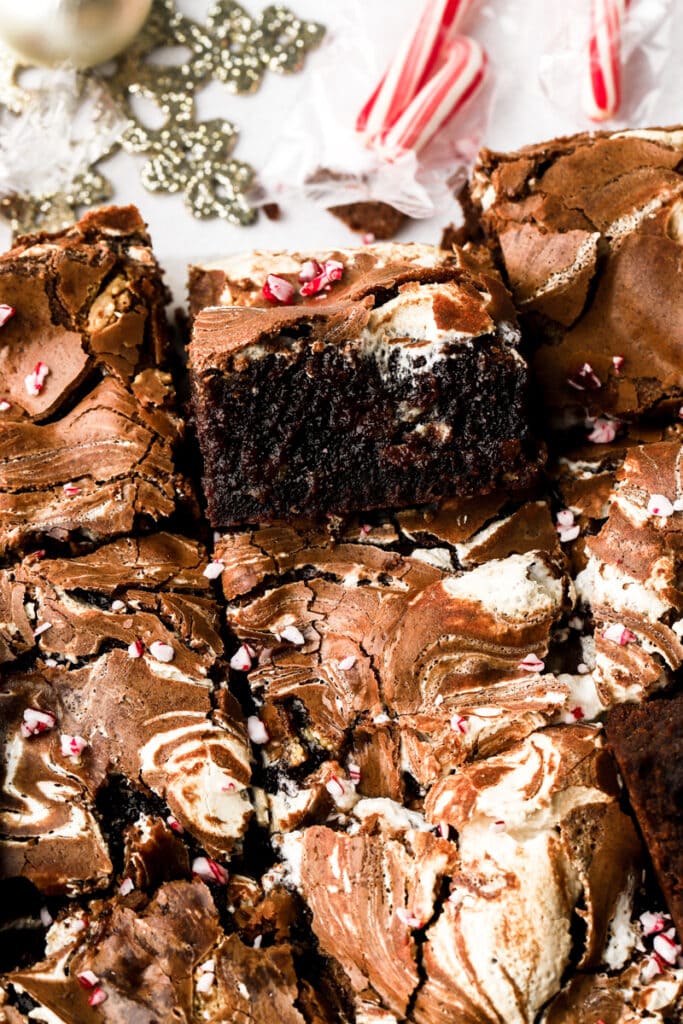
You want to be able to push your finger on the top (in the center) and feel some resistance. It should feel like a brownie that’s a little “too gooey but almost perfect”. At this point, you’ll remove them from the oven and they will continue to bake as they’re cooling. If they’re firm when you remove them from the oven, they won’t be very gooey once they’re completely cooled and everyone wants gooey marshmallow brownies.
*In these photos, I have a slightly thicker crackly top then I usually do with traditional brownies, that’s from the added marshmallow fluff. It may need an additional 10ish minutes of baking than my regular brownies (if you’re familiar with those).
Can I just use the toothpick test?
Many people like to insert a toothpick into the center of baked goods to test for doneness. Usually if the toothpick is clean or if there are only a few moist crumbs on it then a cake is done baking. That doesn’t work for brownies. We want gooey, fudge brownies so when we remove them from the oven, they will still be a little undercooked and will finish baking as they cool.
How to get a thin crackly top for homemade brownies?
I know some people are all for the meringue topping but not all brownies are created equal. These brownies will require extra baking time if the top is too thick and meringue-like. The brownies will end up with super crispy edges and a really gooey center.
To avoid making the meringue all you have to do is avoid overmixing. Do NOT beat the eggs and sugar in the beginning. So many recipes say to beat the eggs and sugar before adding the rest of the ingredients, well don’t.
All I do for these brownies (tested like 10x) is combine the eggs with the sugar, use a whisk to lightly mix them and then continue whisking as you add the melted chocolate/butter mixture. Then fold in the dry ingredients until they’re just barely combined.
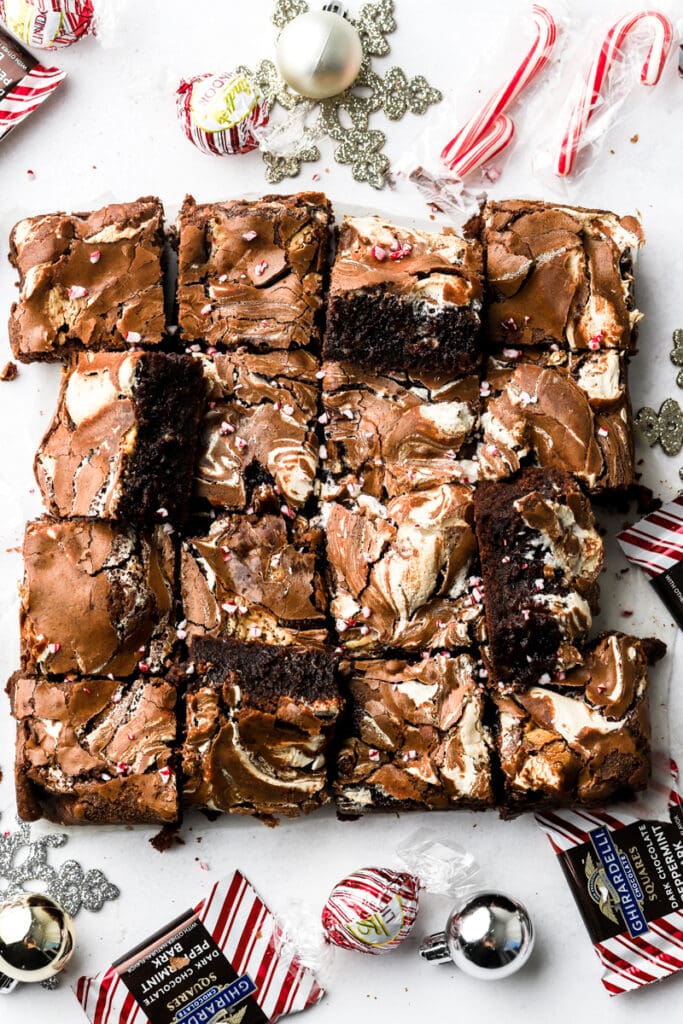
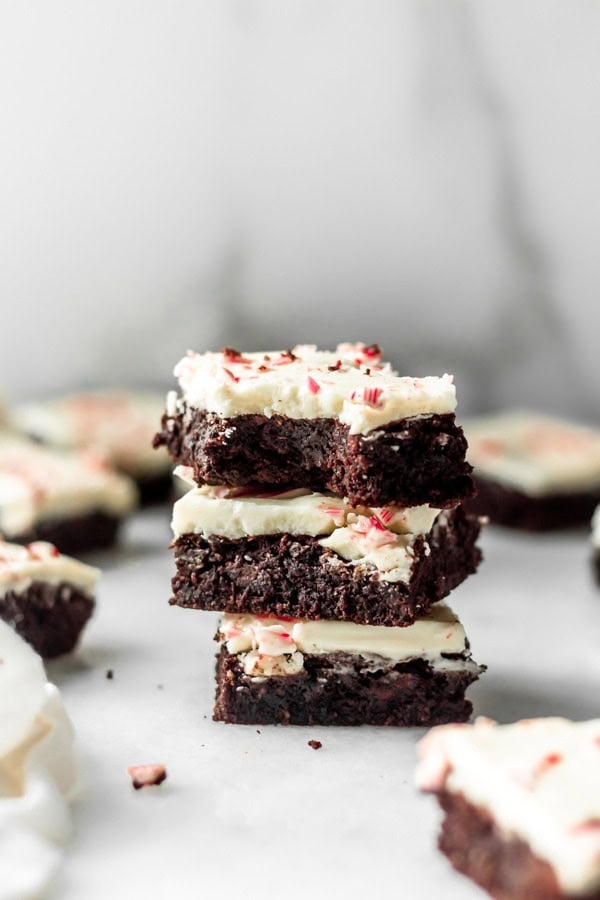
How to perfectly slice brownies?
Ok I don’t know if it’s just me but if I’m not careful to take these extra steps, my brownies always end up looking like a pile of not so tasty brown stuff instead of a delicious pile of brownies.
To get my brownies perfectly sliced even with the marshmallow fluff swirl and the peppermint chocolates throughout, it’s best to chill the brownies briefly. I froze them for about 20 minutes after they’ve cooled and then I ALWAYS run my large knife under hot water between every slice I cut.
Yes, between every slice. Because they’re fudgy, some of the gooey chocolate gets stuck on the knife and if you just go to cut another slice it gets less and less pretty.
How to store peppermint brownies?
Once the brownies have cooled completely, store them in an airtight container. They can stay at room temperature for a few days and in the refrigerator for 7-10 days. Make sure to bring them to room temperature or warmer when serving.
To freeze the brownies, place them in an airtight container or wrap each one in plastic wrap. Then place into a freezer bag and freezer for 2-3 months. Thaw at room temperature before serving.
Frequently Asked Questions
I used half Lindt White Chocolate Truffles and half Ghirardelli Peppermint Bark Squares to give the brownies a peppermint flavor. If you can’t find these, feel free to use any peppermint chocolate or plain white chocolate and add 1/4-1/2 tsp of peppermint extract.
I used Jet Puffed marshmallow fluff for the swirls. I’ve also tried Kroger brand which works fine so I’m sure any will work.
I haven’t tested it on these brownies but I have tested homemade marshmallow fluff swirled into my fluffernutter banana cake and it worked well so I’m sure it would work for these as well. I would do 2 large egg whites with 1/2 cup granulated sugar.
There are so many brownie recipes out there and I’m sure so many of them are amazing but I hope you give my marshmallow peppermint brownies a chance.
If you make these brownies, make sure to leave a star review if you liked it. If not, please comment below and let me know what you think.
As always, have a blessed day and happy baking!