
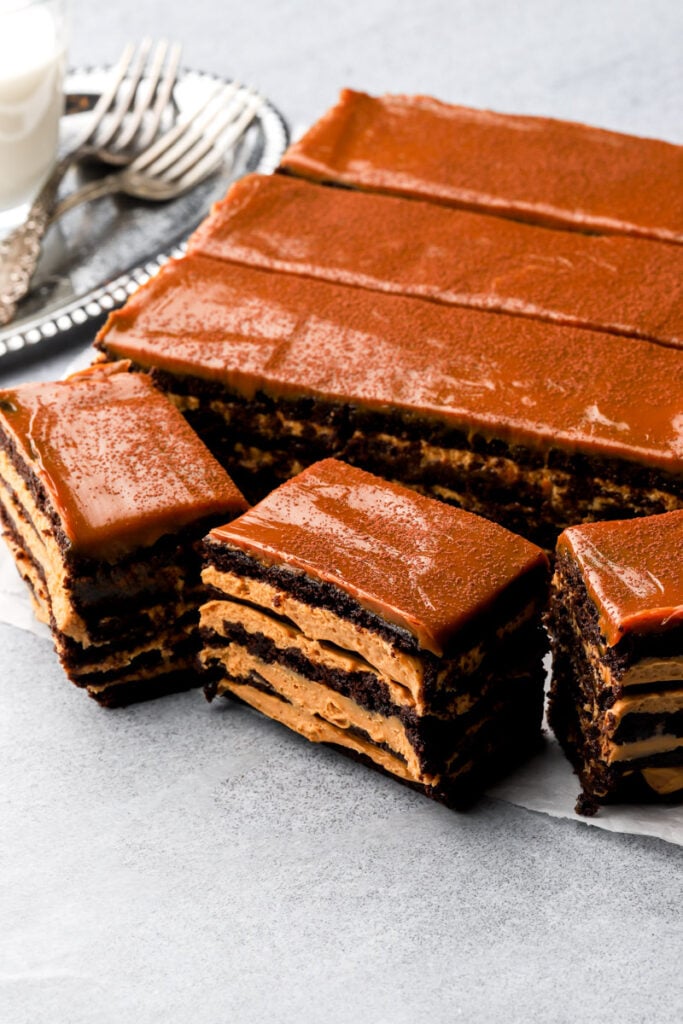
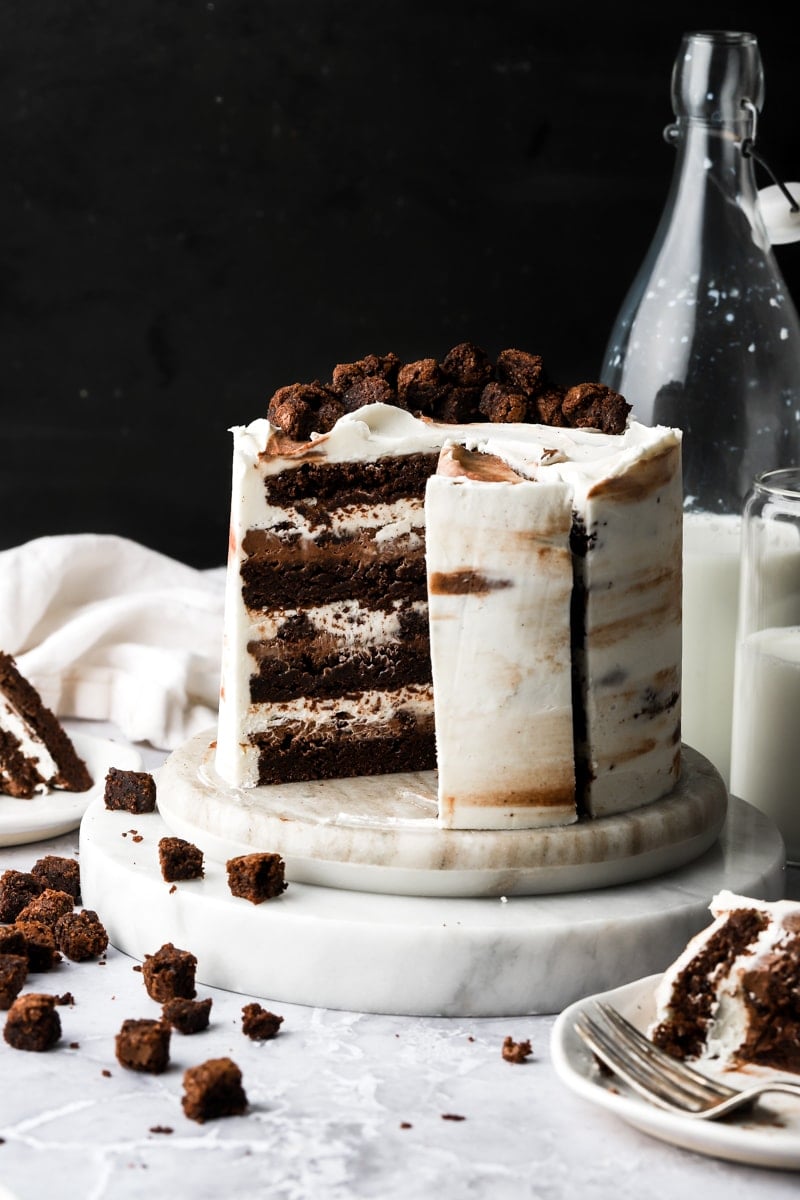
Chocotorta
Chocotorta is an Argentinian dark chocolate biscuit cake with a dulce de leche cream cheese filling. It’s dark, rich and super indulgent and since we can’t find chocolinas in the US, we’re making our own biscuit layers.
Why you’ll love this recipe
- This cake is SUPER indulgent, unique and very impressive to guests.
- You can make the homemade biscuit layers like I did or you can use store bought biscuits if you want to simplify it.
- Don’t tell anyone but you can also make the filling with peanut butter, cookie butter and/or nutella (I can’t wait to try these versions).
- This cake can be made days ahead of time and still taste just as good as it was the first day.
If you like this recipe I also think you’ll love my chocolate mousse cake and my chocolate ganache cake. I also have a similar style cake, made of biscuits, called lazy cake. It’s very rich and indulgent just like this chocotorta.
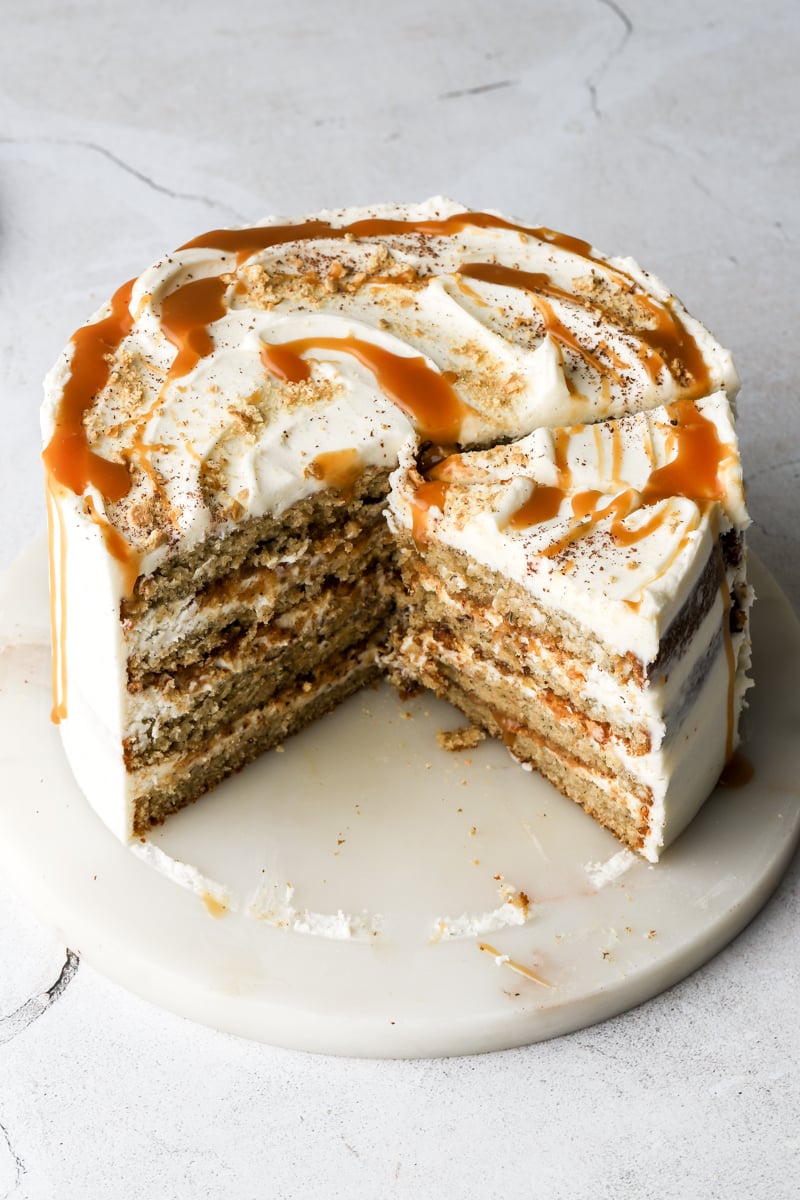
If you’re loving the chocolate caramel combo I have a fabulous chocolate caramel cake and caramel stuffed chocolate chip cookies.
What is chocotorta?
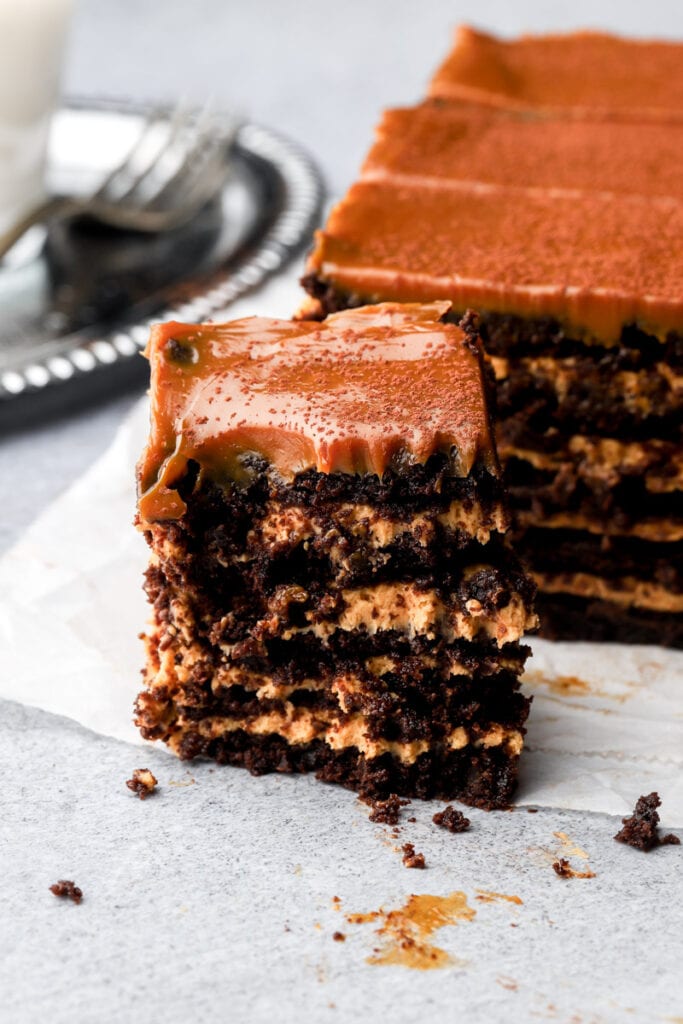
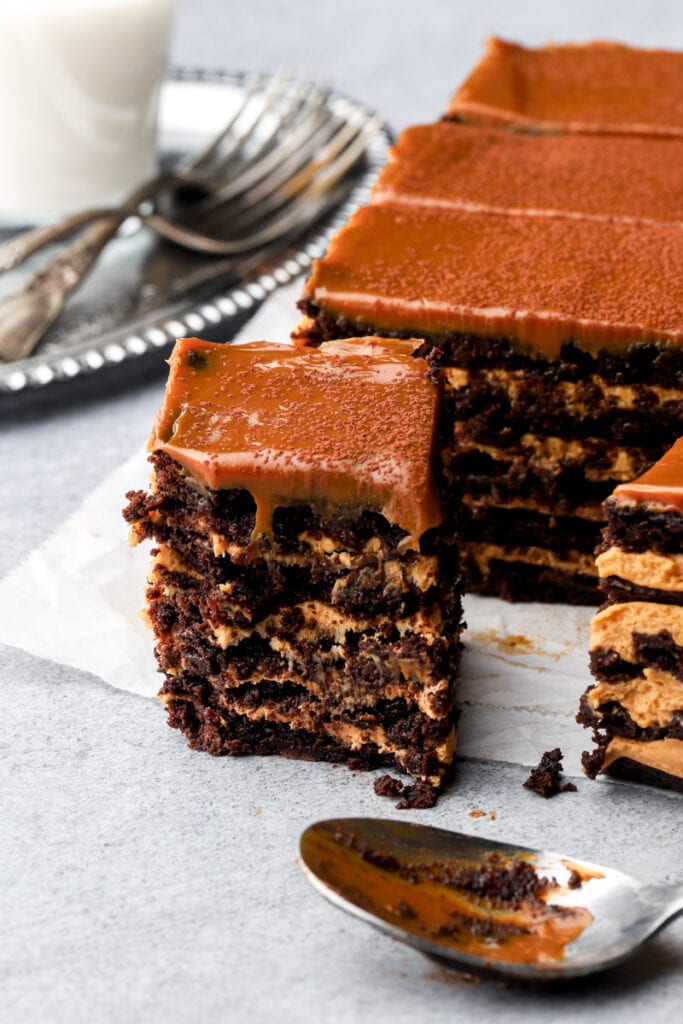
Chocotorta is a traditional Argentinian cake made from chocolate biscuits called Chocolinas. It’s made similar to tiramisu and icebox cakes but with a cream cheese dulce de leche filling. The cookies are soaked in coffee (or chocolate milk) and arranged into a flat layer and then spread a thin layer of the filling. Repeat with desired number of layers.
Chocolinas aren’t sold in the US and a lot of other chocolate biscuits that I could find are far too sweet for this cake, in my opinion. So I made my own but to keep it simple, I just left the biscuit layers whole instead of baking them as cookies. So they’re like thin, biscuit textured, cake layers.
You can use any chocolate biscuits you want, read the FAQs section to see how I would work with a sweeter biscuit though.
What is dulce de leche?
Dulce de leche is caramelized sweetened condensed milk. You can either make it yourself by caramelizing it slowly on the stove or in the oven or you can buy it pre-made. The flavor is very similar to caramel sauce but has a much thicker and creamier consistency, like peanut butter.
If you can’t find dulce de leche at the store, I recommend making your own from sweetened condensed milk. If you don’t want to make your own, the best substitute would be cookie butter or peanut butter but they’ll give it a different flavor. I don’t recommend using caramel sauce because the consistency is too soft and the filling can leak.

Ingredients & Substitutions
- Flour: I use all purpose flour in most of my recipes and I HIGHLY recommend using a digital scale, as flour is so often over measured.
- Baking Powder/Soda: I use baking powder because I use dutch process cocoa but it may be a good idea to use ¾ tsp baking soda instead if you are using natural cocoa powder (to balance the pH).
- Sugar: I used light brown sugar in the biscuit dough. The recipe should also work fine with granulated sugar or dark brown sugar. I don’t recommend cutting any out, the cookies are very dark and bitter on their own.
- Butter: I like to use salted butter but unsalted butter also works, just add a little extra pinch of salt to the recipe. Dairy free butter works as well.
- Eggs: make sure to use cold, large eggs.
- Room temperature eggs also work but the biscuit dough will be softer and more difficult to spread in the pan. You can refrigerate the finished dough for a 15-30 minutes as well if it is difficult to spread.
- Cocoa Powder: I used dutch processed cocoa powder because I like the dark color and flavor. My favorite brands are Rodelle and Ghirardelli.
- Natural cocoa powder also works but I would sub the baking powder for ¾ tsp of baking soda if using natural cocoa.
- Cream Cheese: Make sure you use full-fat cream cheese, preferably Philadelphia brand.
- Vanilla: I usually just use a simple vanilla extract in cake batters but I like to use vanilla bean paste for buttercreams, frostings and fillings.
- Dulce de leche: I used one can ofstore bought dulce de leche for the filling and ⅔ of a can for the topping.
- Coffee: I just used a cup of Americano. Brewed coffee also works well. I think the filling is sweet enough so I didn’t sweeten the coffee at all.
Step-by-Step Instructions
Step 1: Make the biscuit layers by creaming together the butter with the brown sugar until it’s light and fluffy.
Step 2: Add in the eggs and continue beating until the mixture is well combined and light and fluffy.
Step 3: Add the cocoa powder, salt and baking powder and beat at low speed until it’s well combined.
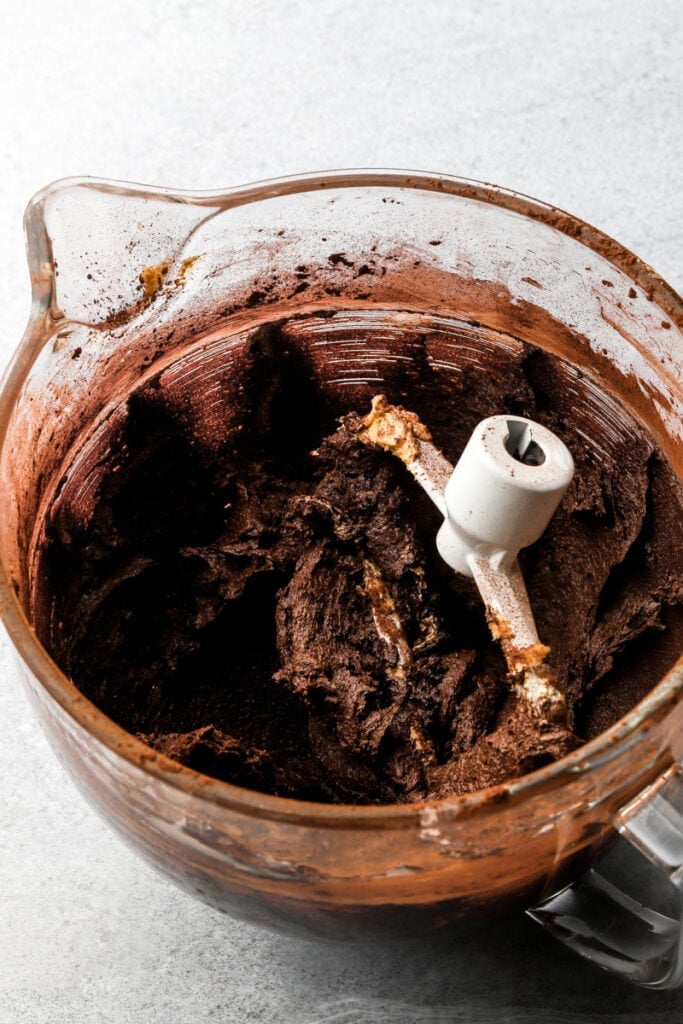
Step 4: Add the flour and beat at low speed just until the last streak of flour is combined. The mixture should feel like a soft cookie dough that would be difficult to roll.
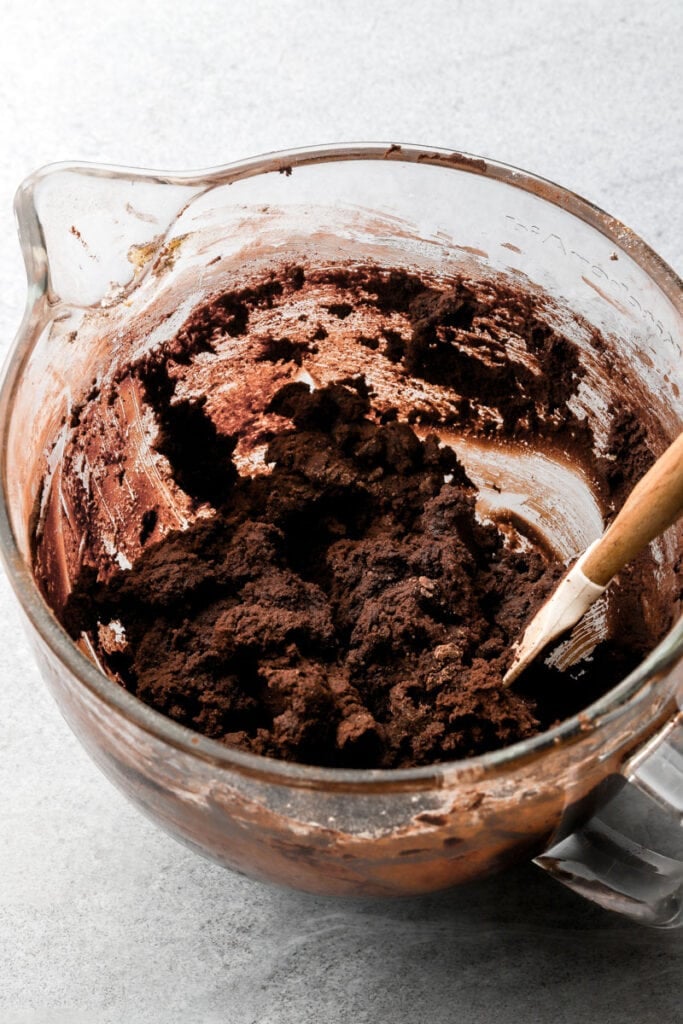
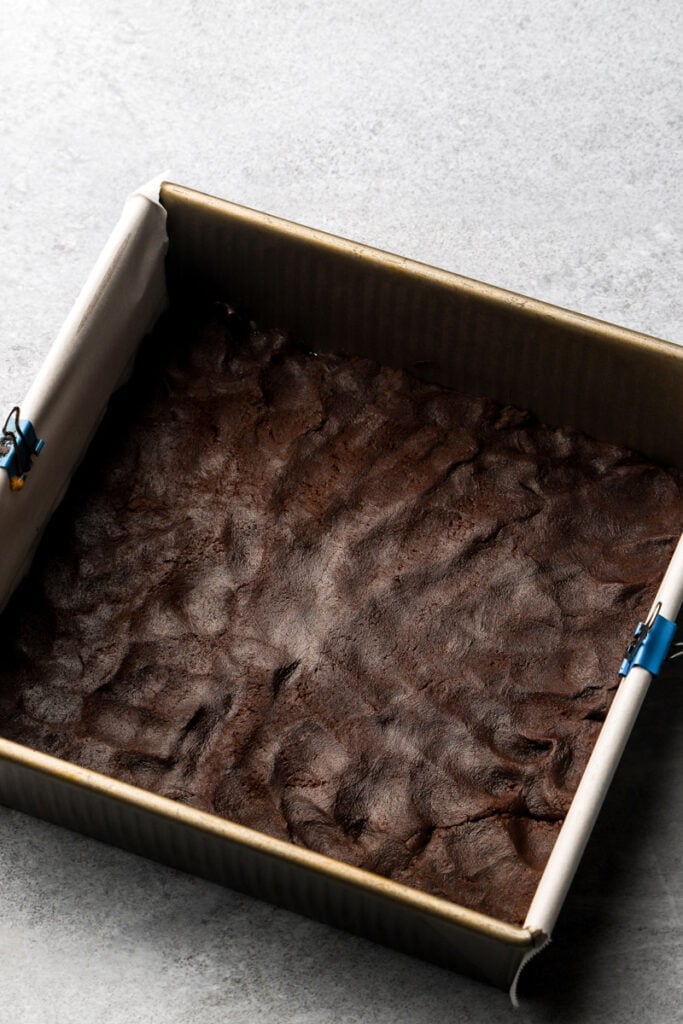
Step 5: Split the biscuit dough into 5 parts, about 265 grams or 8ish ounces each. Spread into the prepared pan (can do 1 at a time if you only have 1 pan). If the batter sticks to your fingers, feel free to lightly grease your fingers with baking spray or butter or just dip them in a little water, it’ll prevent the sticking.
Spread as evenly as possible and bake until the edges look set and the center is puffed. Press on it gently in the center and it should feel like a really soft cookie, not wet underneath.
*You can refrigerate the finished dough for a 15-30 minutes as well if it is too difficult to spread.
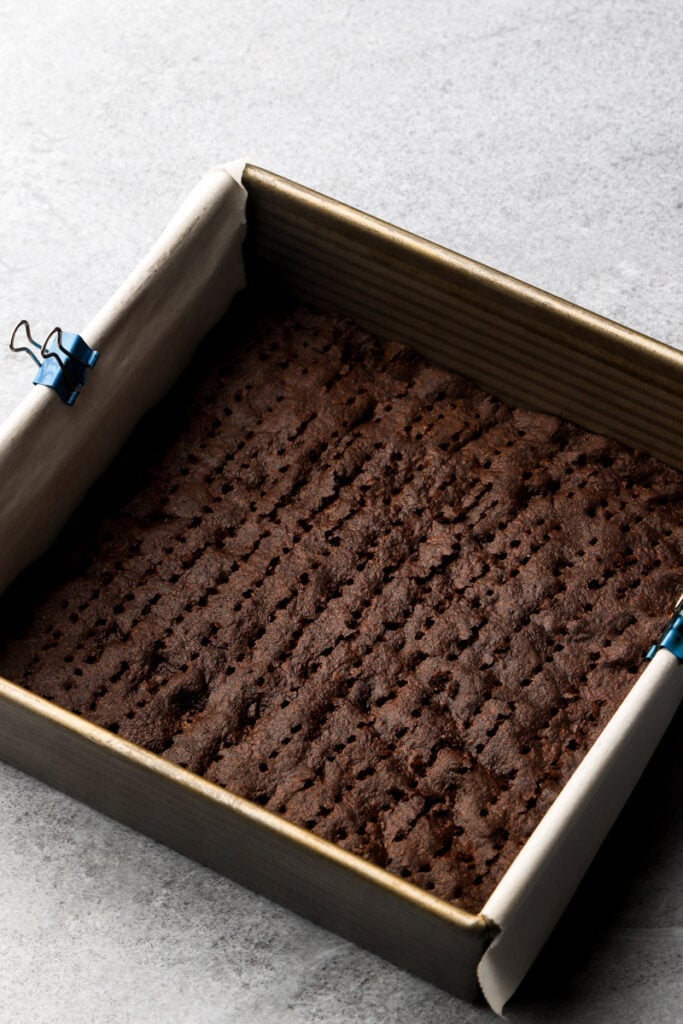
Step 6: Remove from the oven, and use a fork to poke little holes into the biscuit layers (for the coffee to soak into). Let it cool for a few minutes and then gently remove it using the flaps of the parchment paper (if they break a little when handling, it’s ok because it’s like an icebox cake, it’ll still stay together). Place it on a cooling rack and bake the next layer.
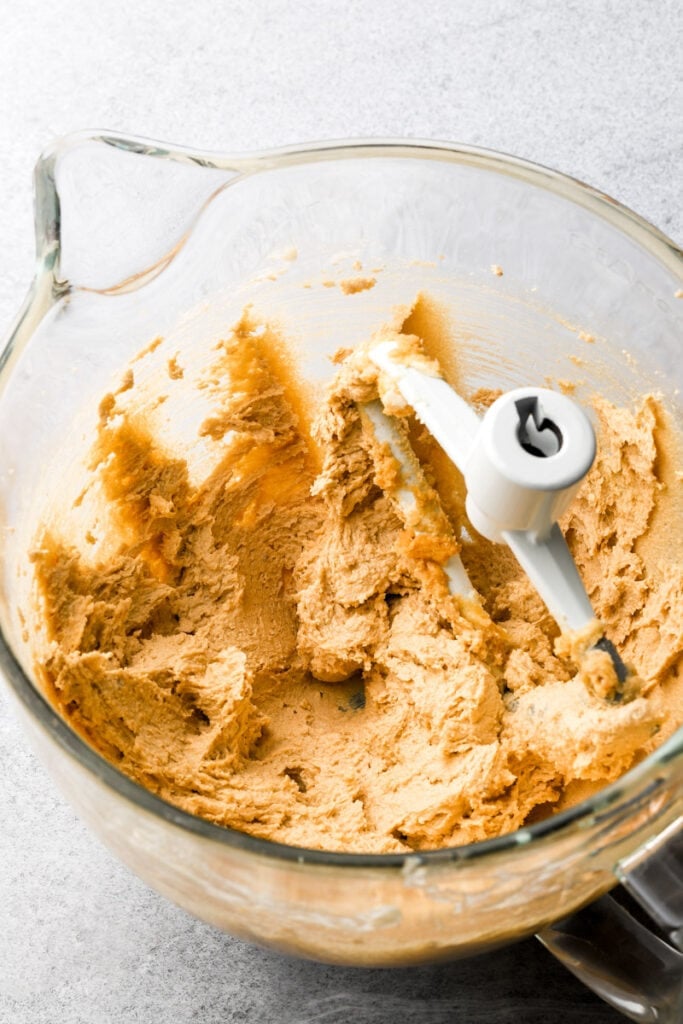
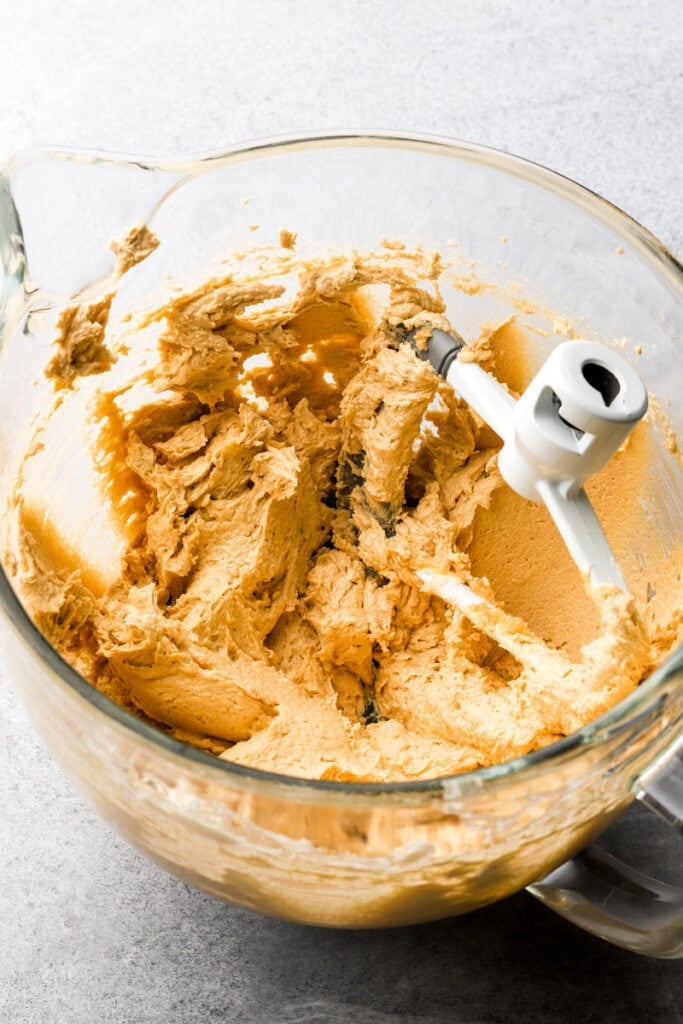
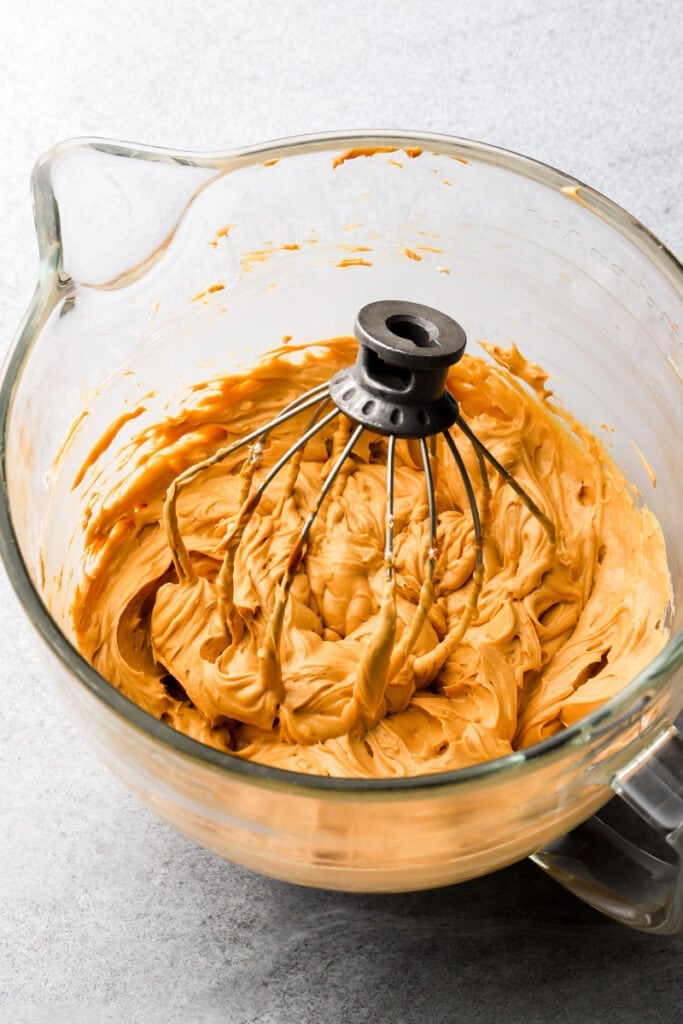
Step 7: Make the filling when the biscuit layers are cooling. Cream together the cream cheese with the dulce de leche. Add a little salt and vanilla and mix until it’s smooth and silky.
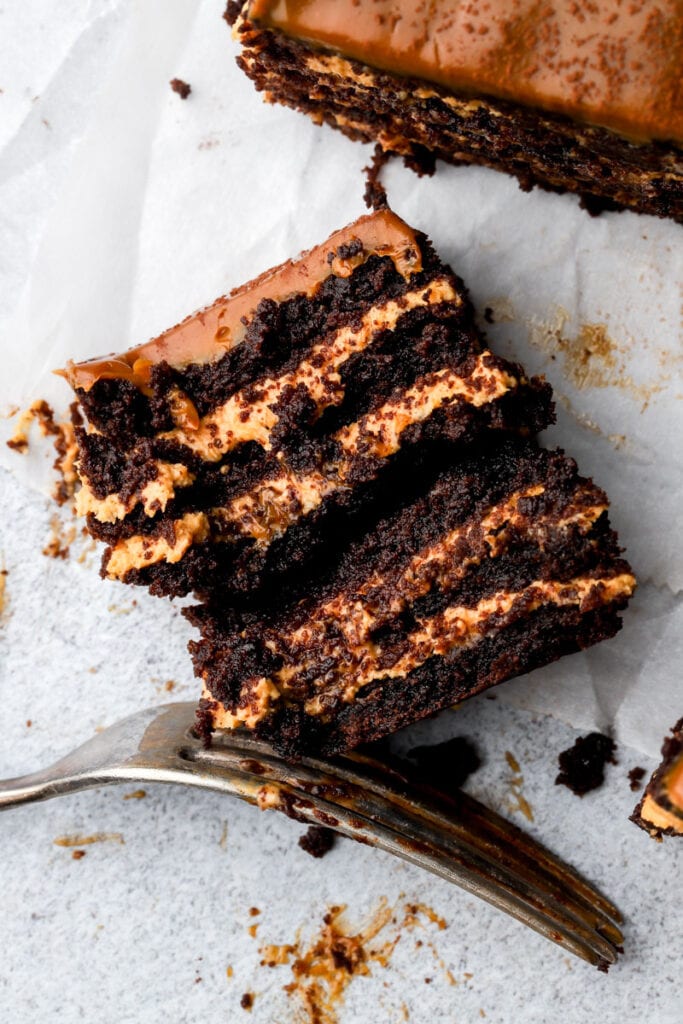
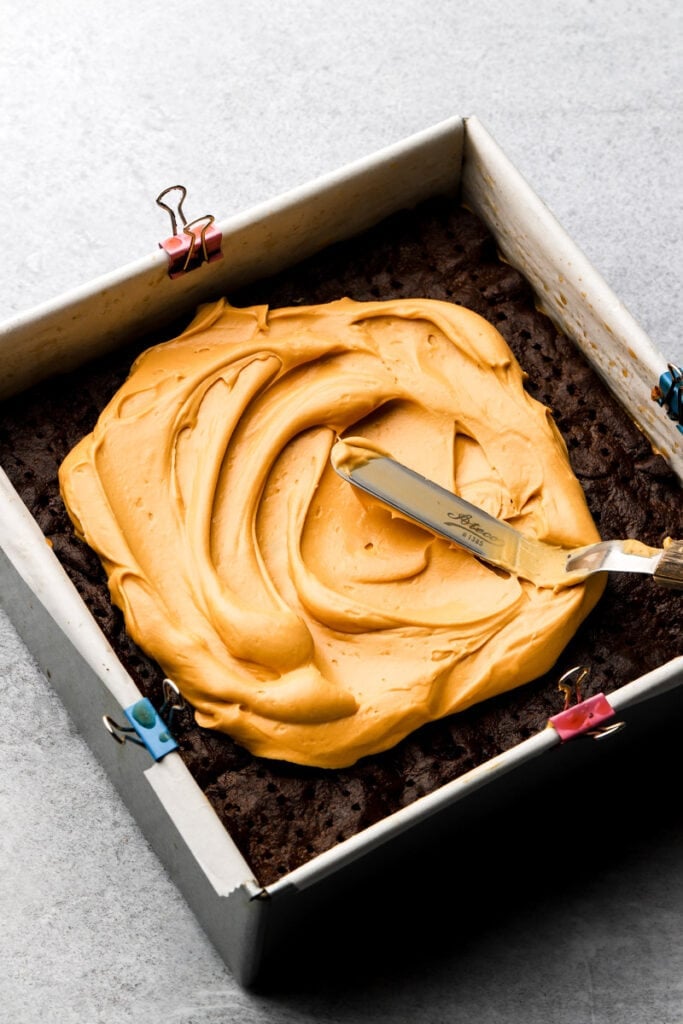
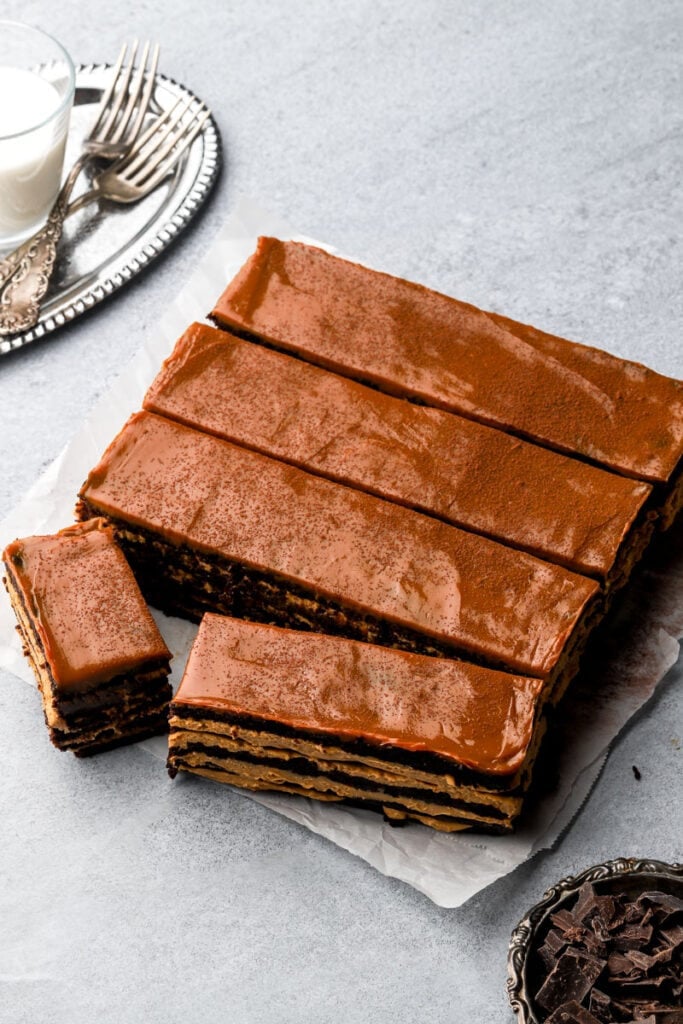
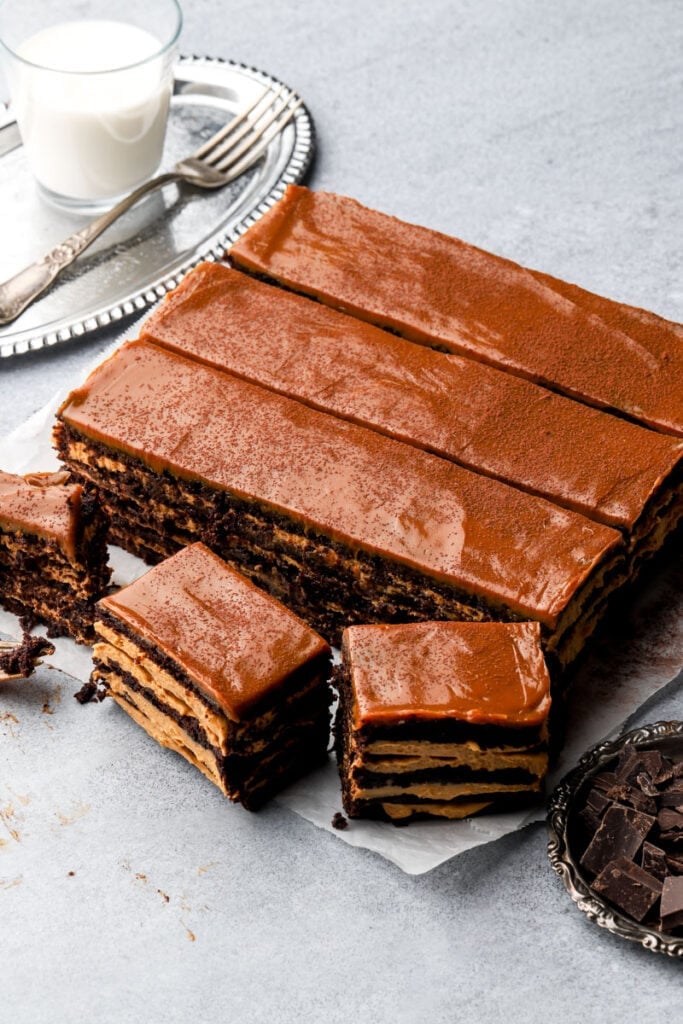
Step 8: Assemble the cake by placing the first layer of biscuit on the bottom of the pan you baked it in (with the parchment and an overhang). Use a pastry brush to soak the biscuit layer with a few tablespoons of coffee.
Spread a layer of the dulce de leche filling and then place the next layer of cake on top and repeat. I used about 7 ounces of filling per layer, with none left for the top.
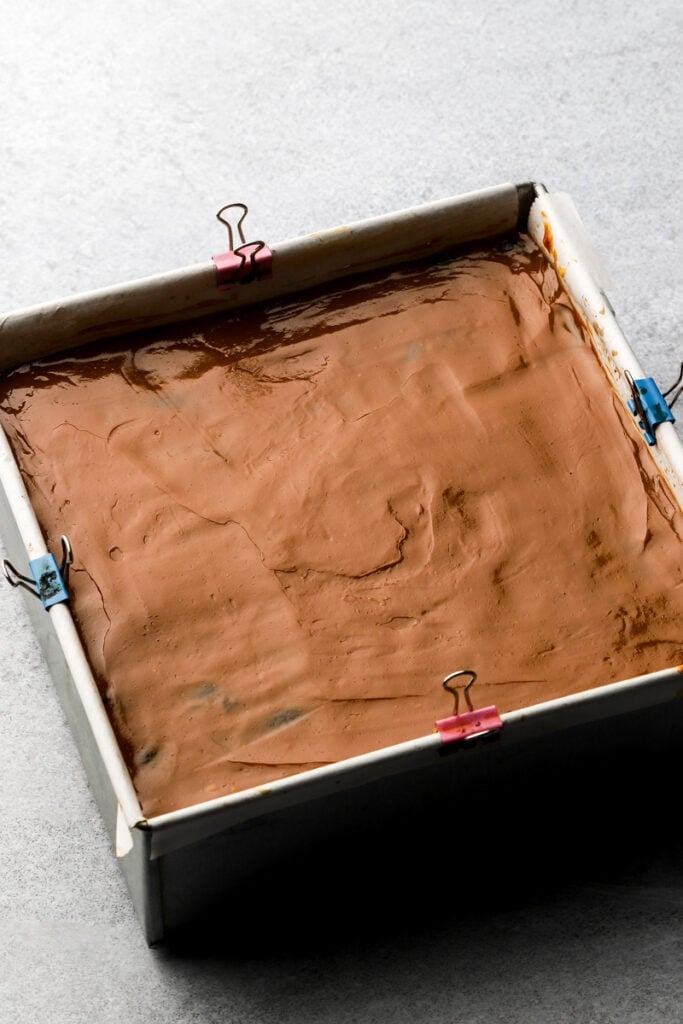
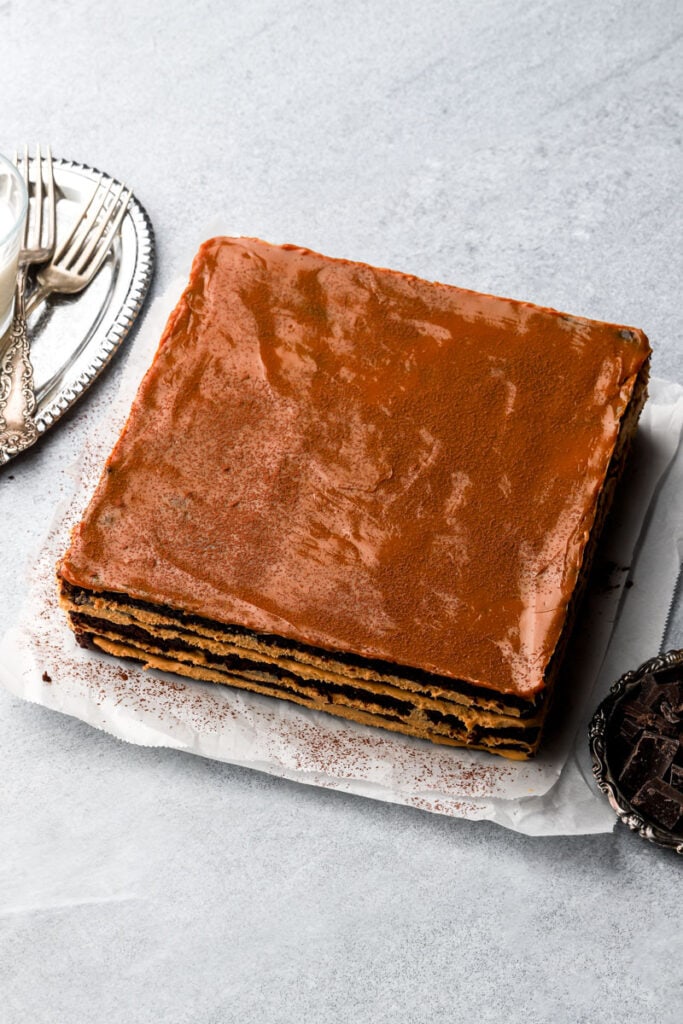
Step 9: Spread a layer of dulce de leche on top and dust with a little cocoa powder. Can also make a chocolate ganache topping or just save some filling for the top (use 5-6oz of filling for each layer instead and you’ll have enough for the top).
Refrigerate for at least 4 hours or overnight. Serve cold, slightly chilled or at room temperature.
Preparing the cake pan for baking
I baked these in an 8 inch square pan and lightly sprayed the whole thing with baking spray. Then I used two long pieces of parchment paper to line my square pan and I left an overhang on both sides, clipped with a binder clip so I can easily remove the biscuits.
If you have a springform pan, that would be convenient and you can skip the lining (maybe just line the bottom to be safe).
If you’re using a round pan, just cut a long strip of parchment to fit the width of your pan so you can have an overhang to easily remove the layers. The parchment doesn’t have to be round on the bottom, it’s fine it doesn’t cover the whole bottom of the pan.
Assembling the cake
This chocotorta is made similar to an icebox cake where you layer the “biscuits” with the filling in a pan and then remove it from the pan once it’s chilled. If you’re making an 8 inch cake like I did, you’ll need a deep pan (8×3) to assemble all the layers.
If you make it a larger cake, like 10 inches, you’ll end up with less layers making a shorter cake so a normal height pan is fine for this. (You can make this cake in any size, just divide the biscuit dough evenly to have even layers.)
I used two long pieces of parchment paper to line my square pan and I left an overhang on both sides, clipped with a binder clip so I can easily remove the cake, just like I did when baking the layers
The parchment won’t stay nice and straight in a round pan so another option is to line it with plastic wrap (only when assembling, not baking).
If none of these options work for you, but you still want this look, you can also assemble this chocotorta the same way I made my Fraisier cake with acetate. I tried it this way and had trouble getting the biscuits in evenly without ruining the layer of cream so I recommend breaking the biscuit layers in half to get them in.
If you have a springform pan, that would be the easiest way to do it or if you have money to spend, this removable bottom pan looks awesome.
You can layer and frost this cake like any traditional layer cake, it just might have a slightly different look but still be just as good!
Last but not least, you can also assemble this cake in a pan and serve it without removing it from the pan, similar to a traditional Tiramisu or a trifle.
Frequently Asked Questions
You can use dairy free butter in the biscuit layers but I have not worked with dairy free cream cheese or dairy free dulce de leche.
I haven’t tested this cake or any of my cookies with gf flour but all my traditional cake recipes work well with a 1:1 gluten-free flour like Bob’s Red Mill and King Arthur Flour so I don’t see why it wouldn’t work.
You can refrigerate the cake for several hours or overnight and when you remove it from the pan, you can decorate it with buttercream as you would any other cake.
My favorite buttercream for decorating is Swiss meringue buttercream.
Yes! You can definitely use any store bought chocolate biscuits like chocolinas, nabisco, kedem chocolate tea biscuits, goya chocolate cookies. Just keep in mind that most of these cookies are sweeter than mine so the cake will be slightly sweeter.
You could balance that a little by using a stronger coffee brew and by replacing the dulce de leche on top with a layer of dark chocolate ganache.
How to make ahead
You can make the whole cake days in advance and refrigerate it (covered) or freeze it. The cake holds up SO WELL. You cannot tell that it’s not fresh at all because the coffee soak keeps the biscuits moist.
How to store finished cake
Because of the cream cheese in the filling you’ll need to refrigerate the cake. Store it in the fridge in an airtight container or covered with plastic wrap/foil/cake dome. Serve it cold, slightly chilled or at room temperature.
To freeze the whole cake, refrigerate it until it’s firm. Then wrap it in plastic wrap so it’s completely covered. Then wrap it in aluminum foil and freeze.
To freeze slices, place the slices in an airtight container and then place the container in a freezer bag, squeezing out all the excess air.
Thaw by leaving it at room temperature for a few hours before serving or just refrigerating overnight night.
Thanks so much for reading today’s post, if you have any questions just comment down below. Make sure to leave it in the comment section because I can’t answer in the rating section.
If you make this super indulgent chocotorta, I’d love it if you left a star rating for me. If it’s less than five stars, please let me know why! 🙂
As always, have a blessed day and happy baking!
Love, B


This is not only my first time making this recipe, but my first time even having chocotorta. I was grateful to see a recipe for the chocolate biscuit and I followed it as closely as I could, but ended up not having quite as much sugar on hand as needed – about 90 grams shy. I baked the cookie layers for 20 minutes because the dough was still very soft and wet after the recommended 10. After they cooled, the texture was similar to a dense brownie: chewy, crispy around the edges, firm. The torta sat in the refrigerator overnight after it was assembled and in the morning it was ready for a taste test. I have nothing to compare it to, so no idea how close or far off my chocotorta is, but it’s very tasty! It’s quite sweet despite the missing sugar, though I probably wouldn’t cut out any more due to the inherent bitterness of all that cocoa (and the espresso). The dulce de leche and cream cheese combo is stellar. I only used one can of sweetened condensed milk and I feel like that’s plenty. Thank you for the recipe!
Hi Aggie, thank you so much for the review. I’m so glad the recipe worked well for you!!
I’ll say it’s definitely not traditional since I made my own biscuit layers but it sure is tasty!
Hello, your recipe indicated that Chocolinas are not available in the U.S. Amazon sells Chocolinas Galletas De Chocolate by Bagley; would this be acceptable? Thank you
Yes!