
Bakery-Style Chocolate Chip Cookies
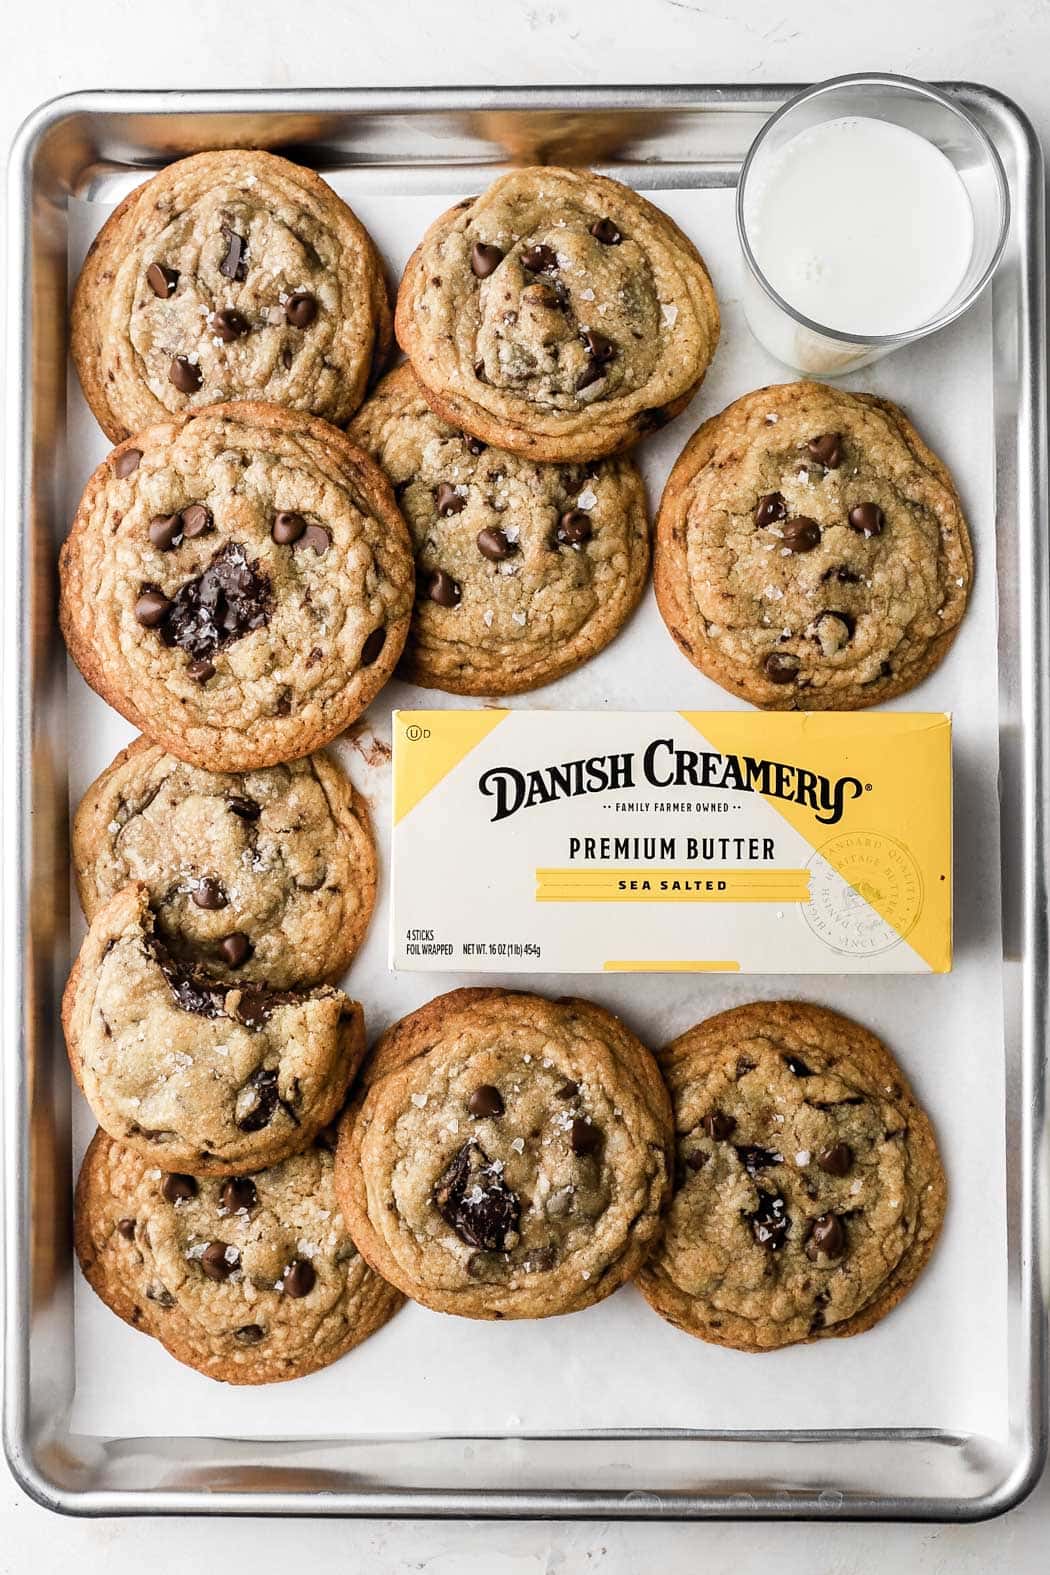
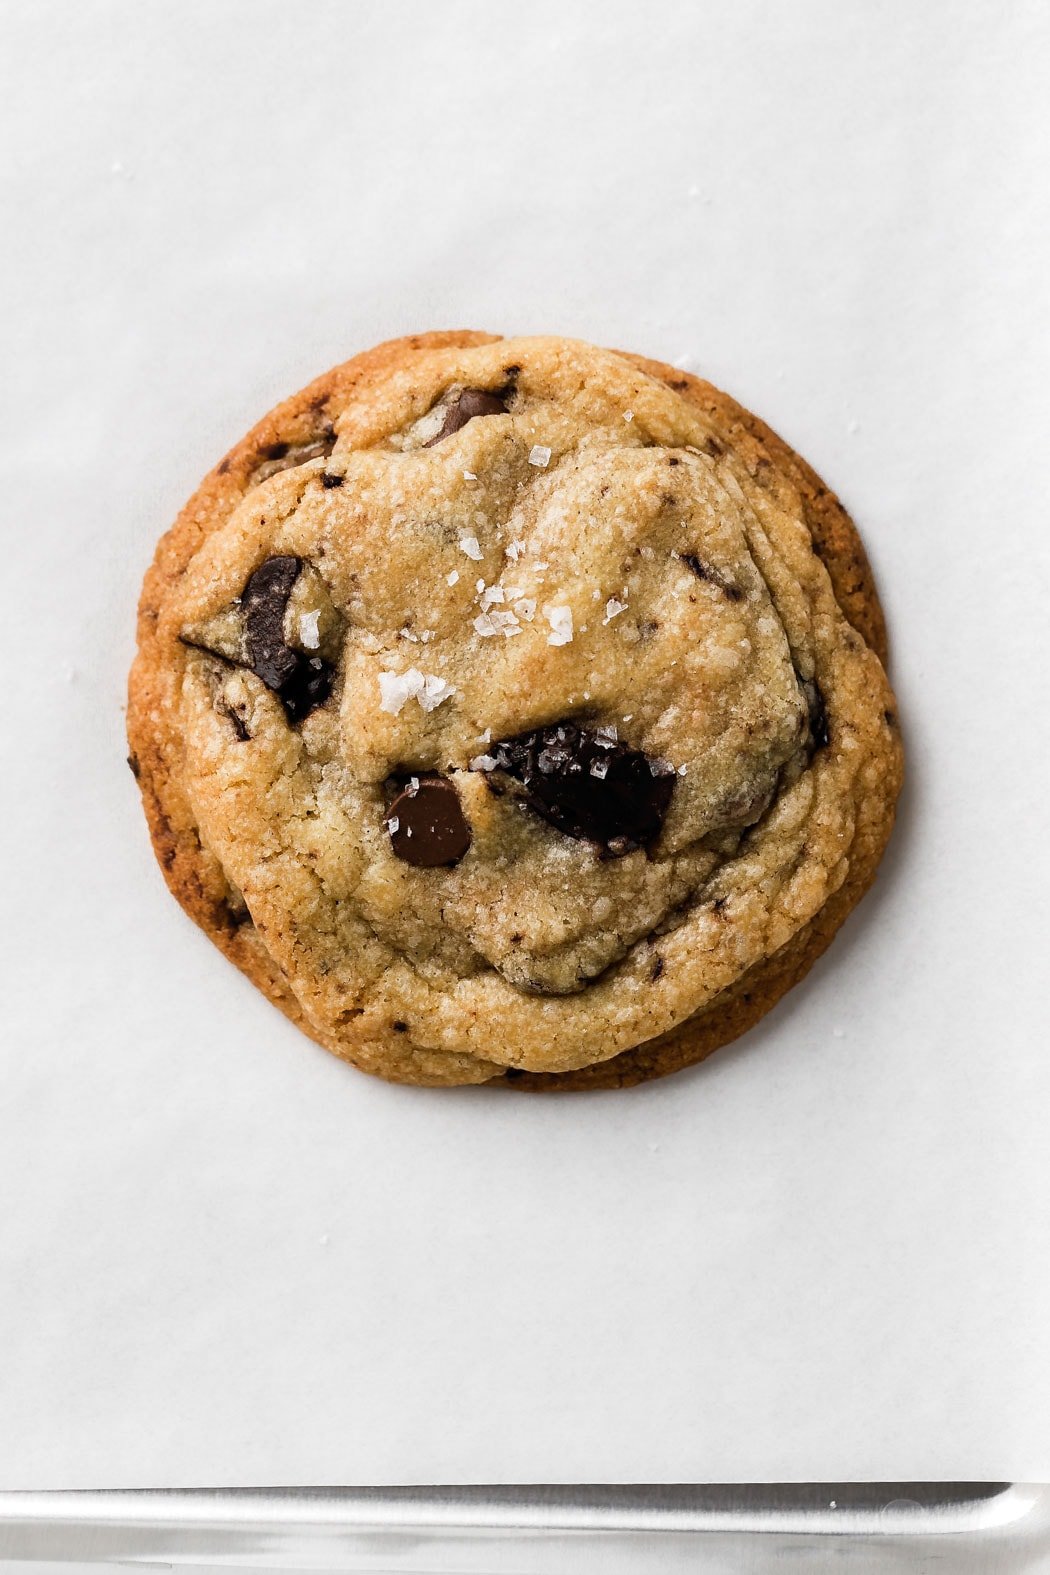
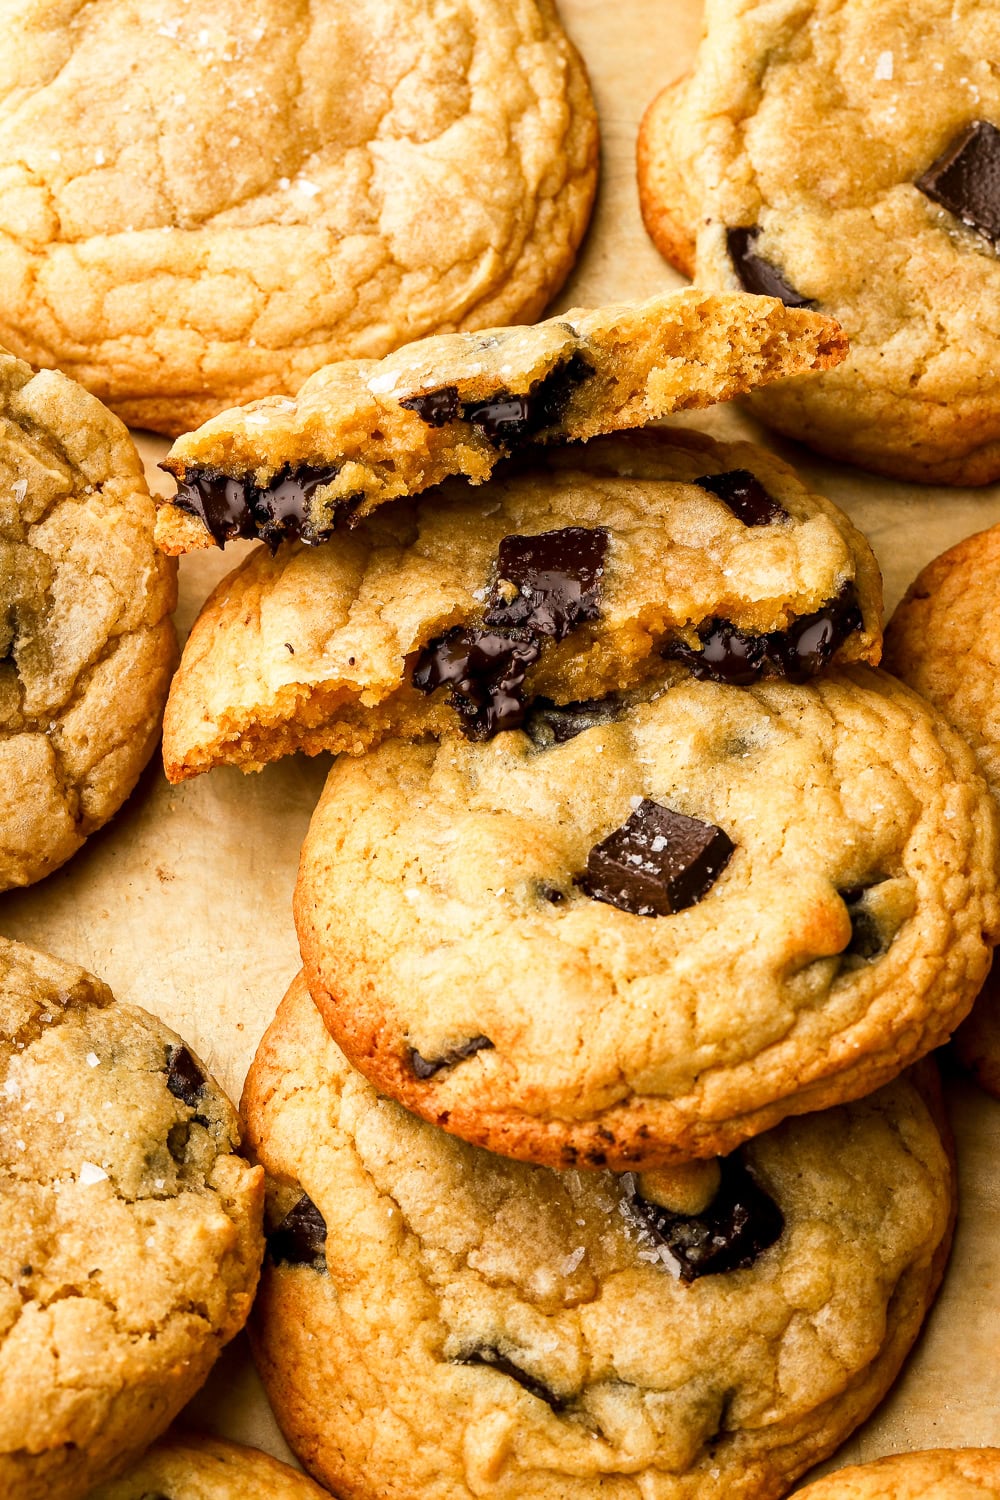
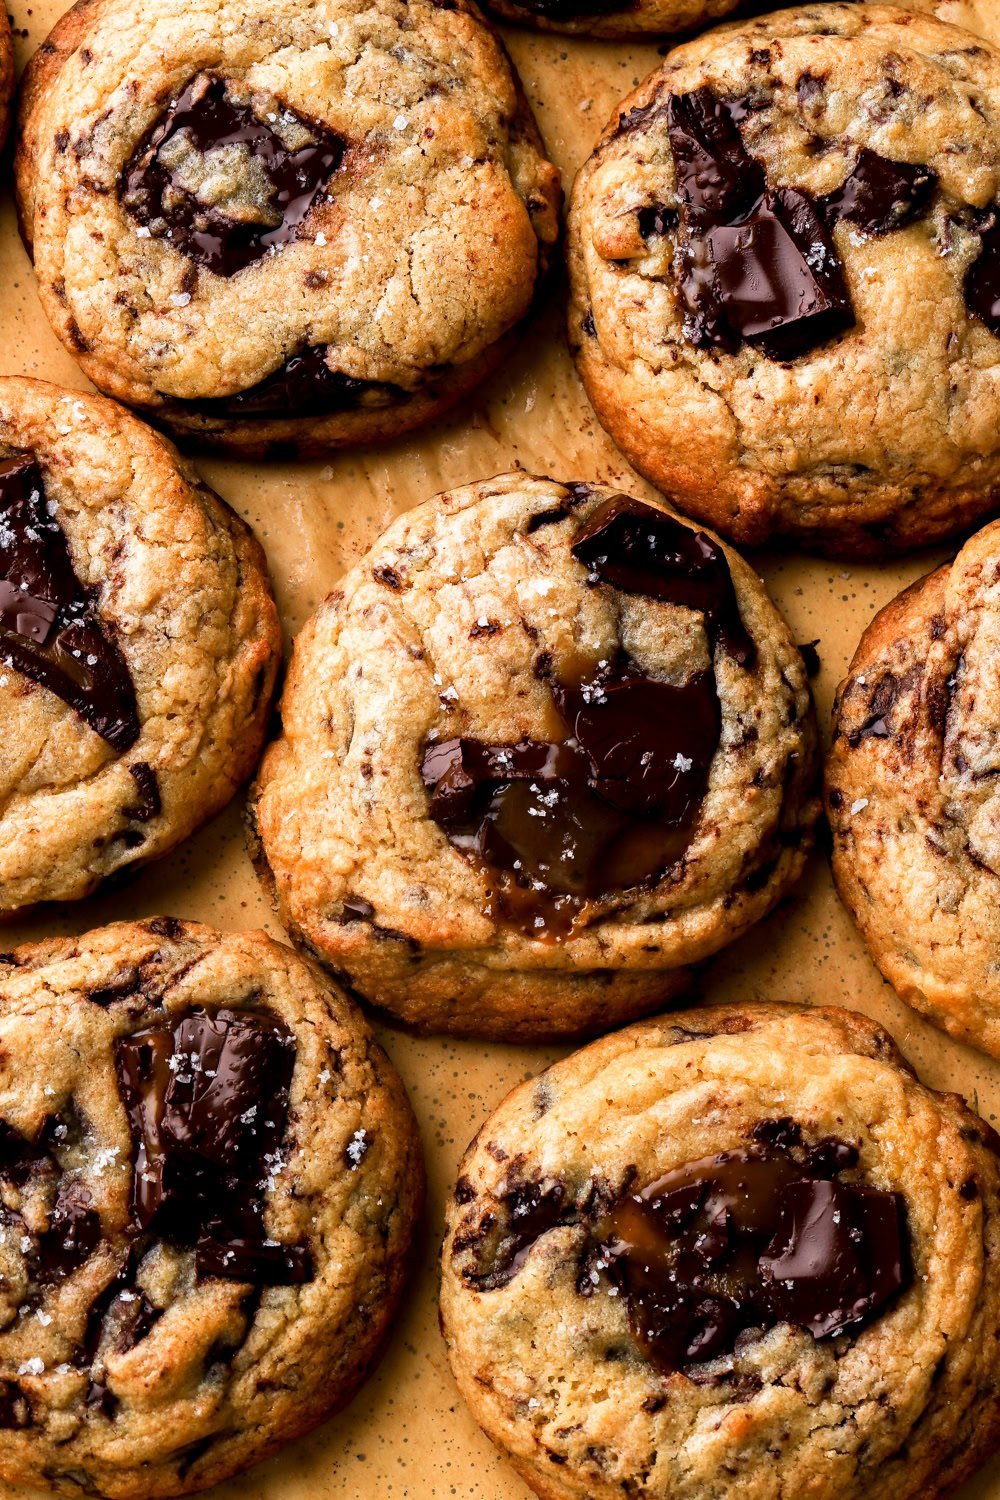
These Bakery Style Chocolate Chip Cookies are thick, crisp on the outside, soft and gooey on the inside and filled with chocolate chips and chocolate chunks!

If you know me, you know my weakness is cookies. My cookie collection on the blog is growing and I finally got around to making my own bakery style chocolate chip cookies!
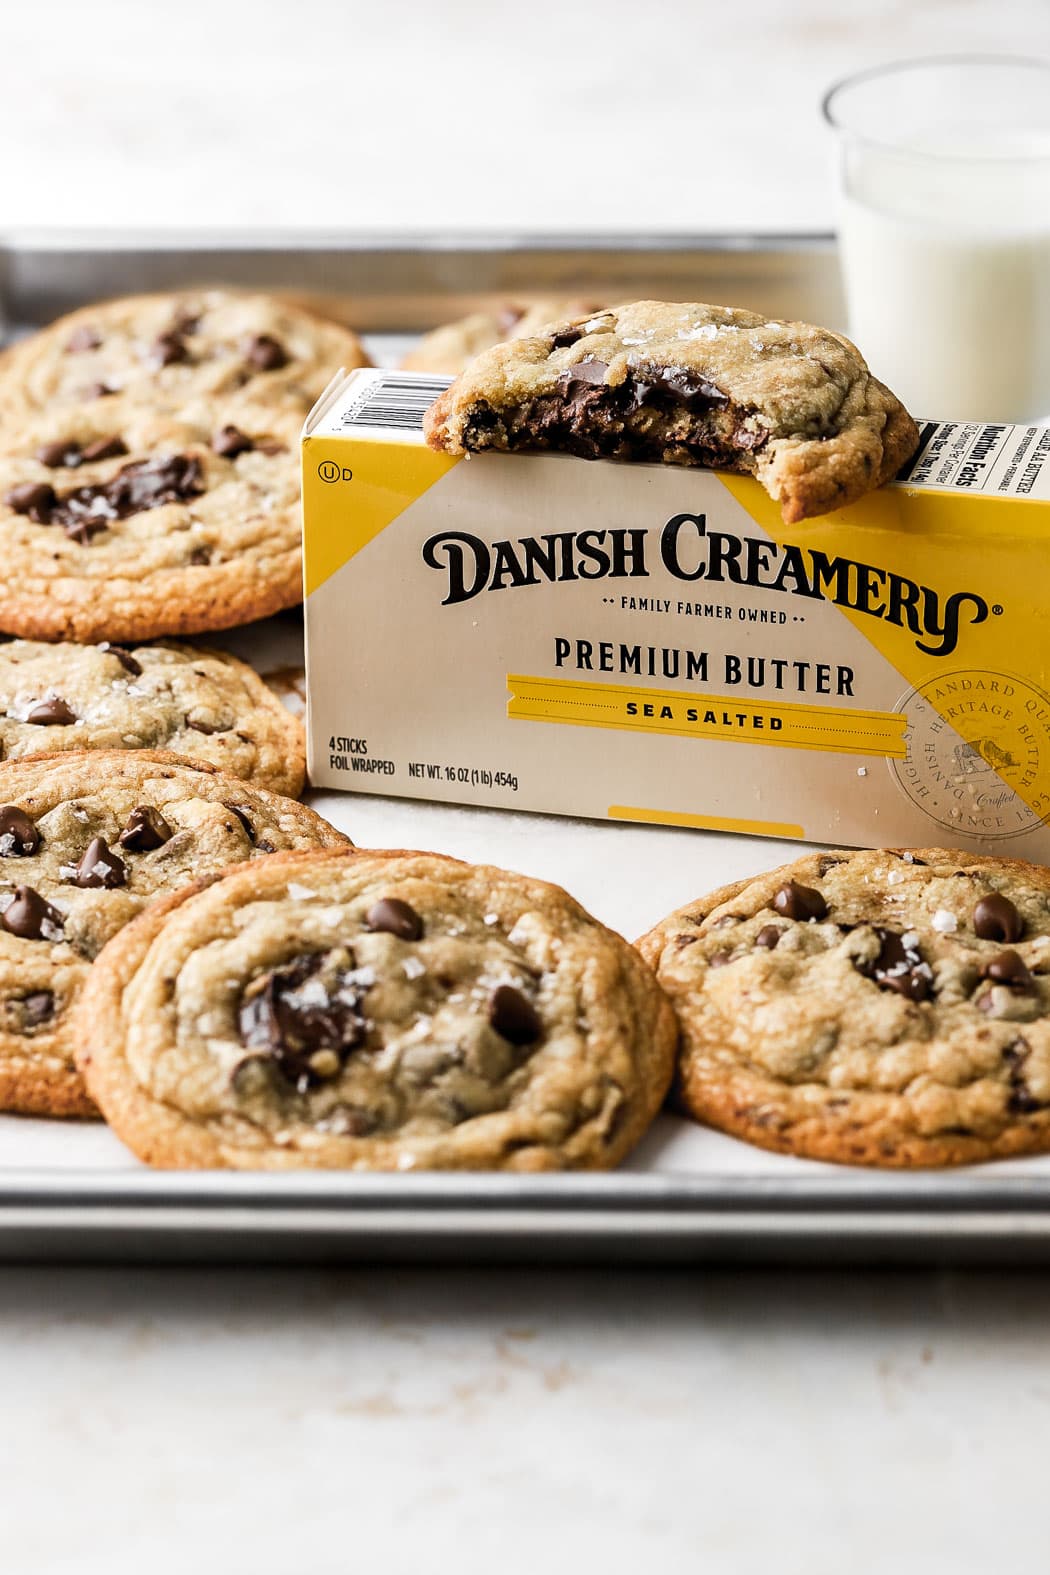
I’ve always wanted to develop this recipe and I thought a partnership with my friends at Danish Creamery would be the perfect opportunity. Why? Because butter is golddddd in these cookies! I’m a die hard fan of salted butter in cookies, and Danish Creamery’s salted butter is everything.
Justifying the title “bakery-style chocolate chip cookies”
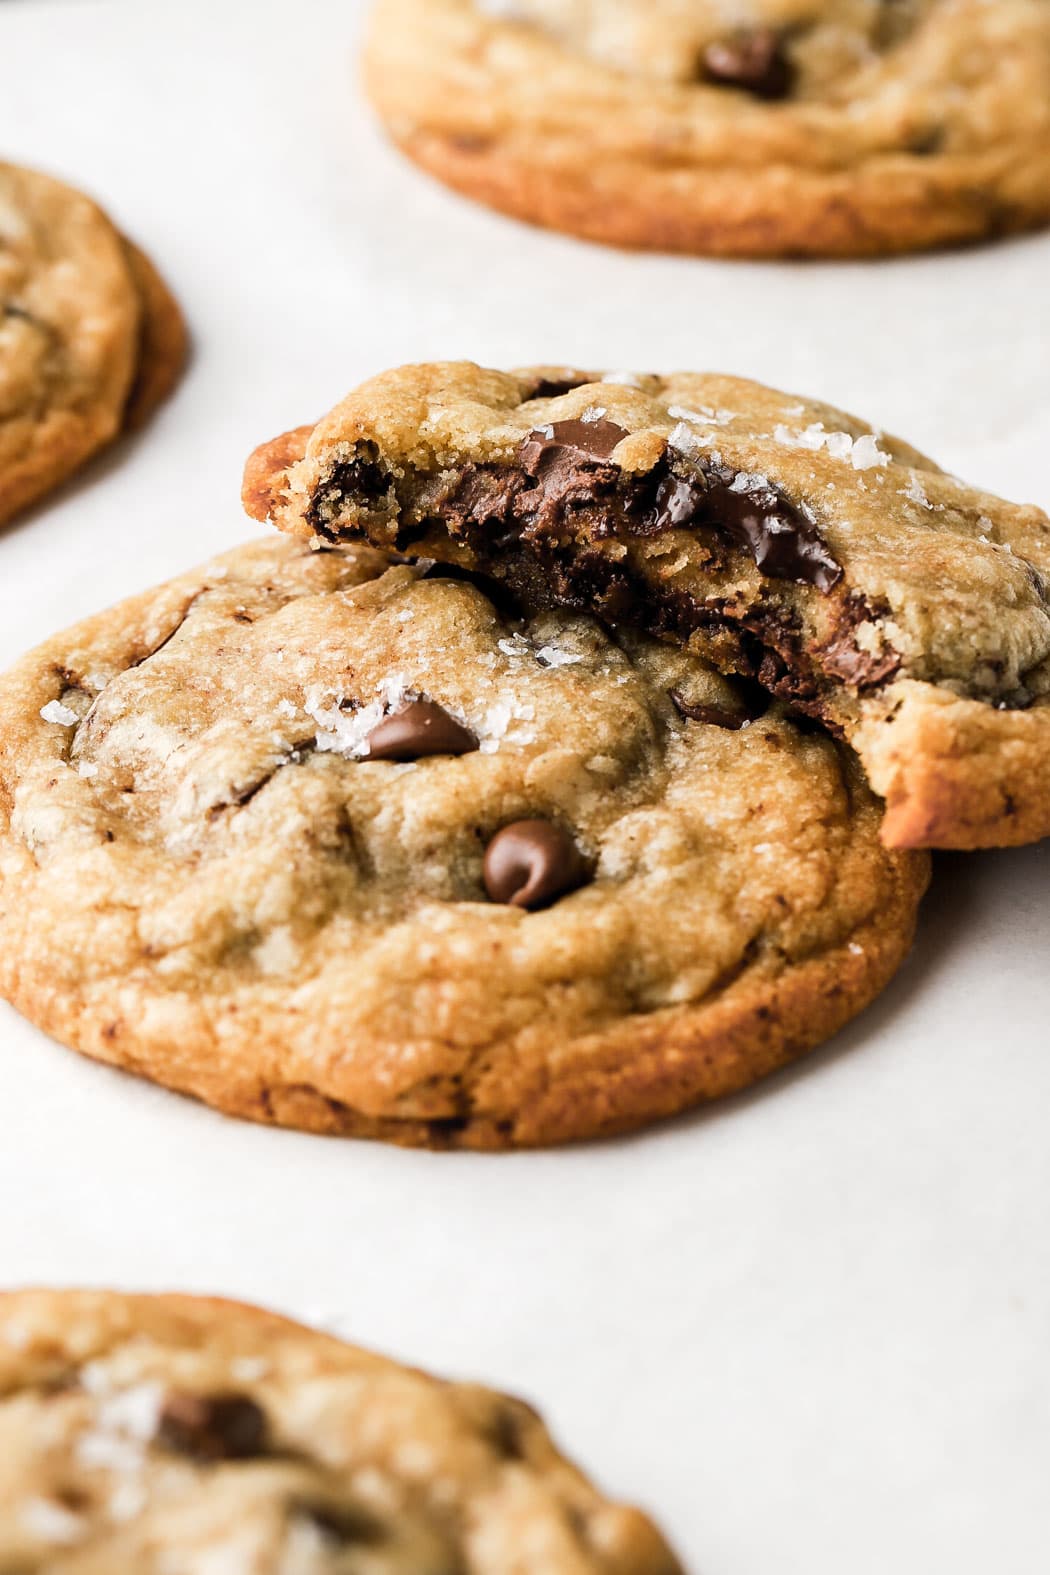
Cookies can range from thin to thick, crispy to gooey soft, and small to large in size. I feel like everyone would have their own opinion on what a bakery style chocolate chip cookie is. However, to me they have to be large in size and thick. Definitely crisp on the outside with those perfect wrinkles around the edge and soft and gooey on the inside but without being under-baked.
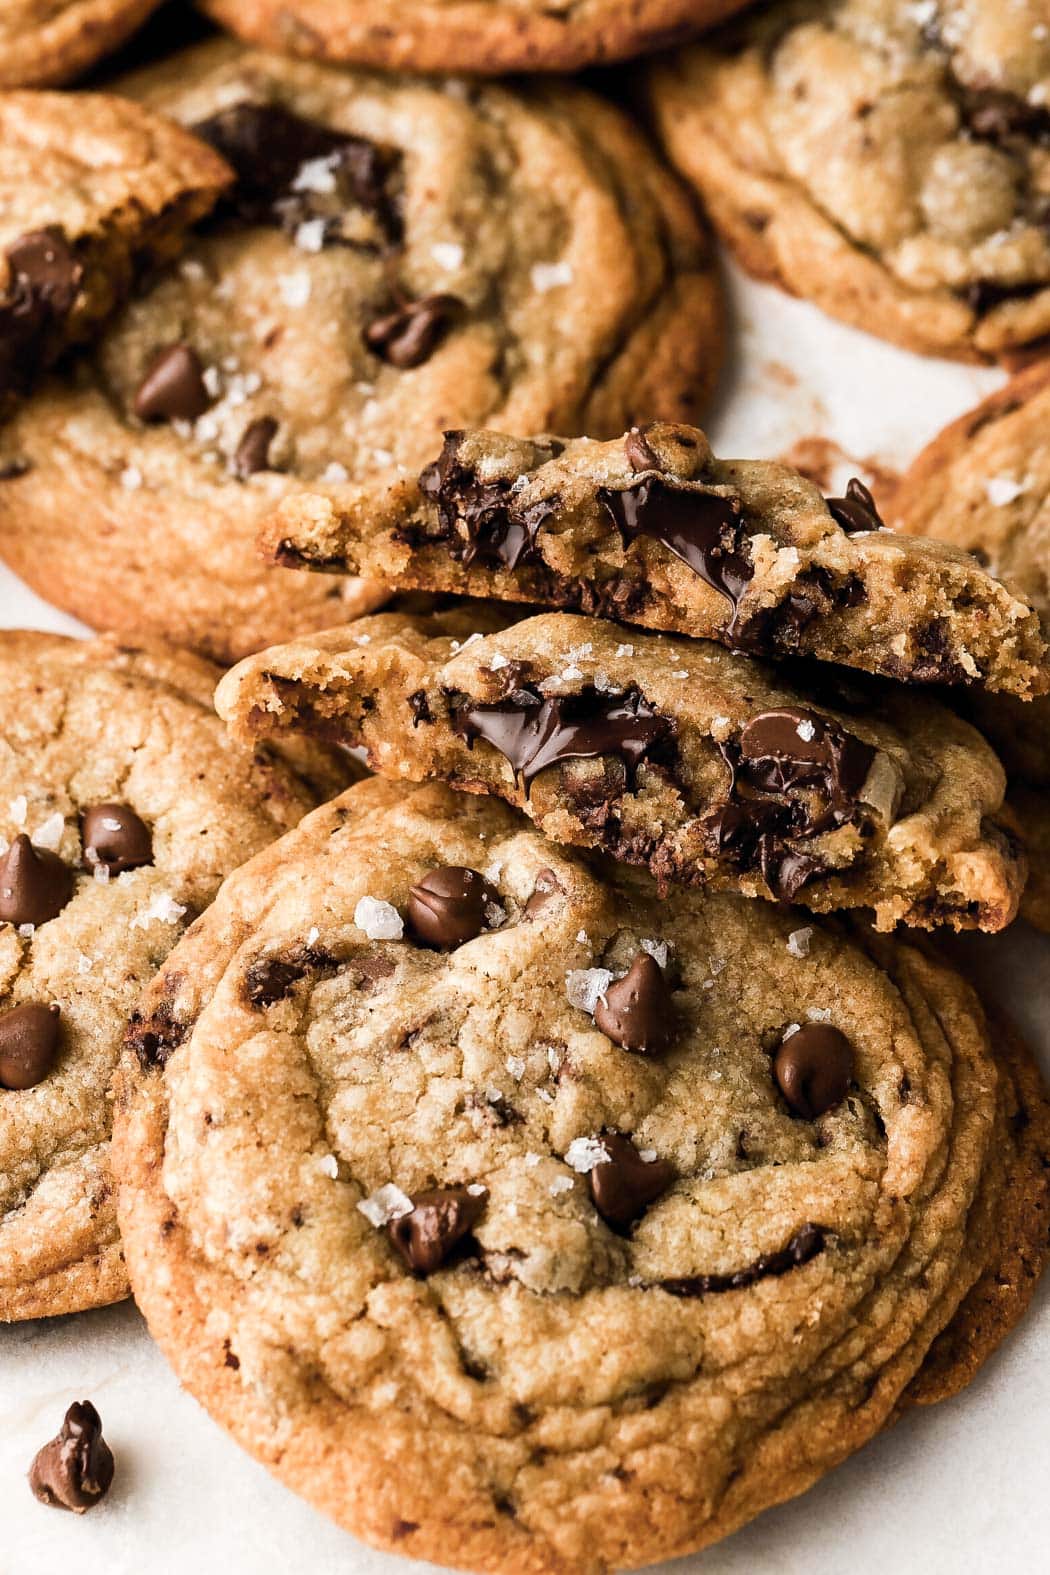
I also wanted a more complex flavor to justify that bakery-style title so I browned half the butter and used both milk chocolate chips and dark chocolate chunks.
How to make bakery style chocolate chip cookies
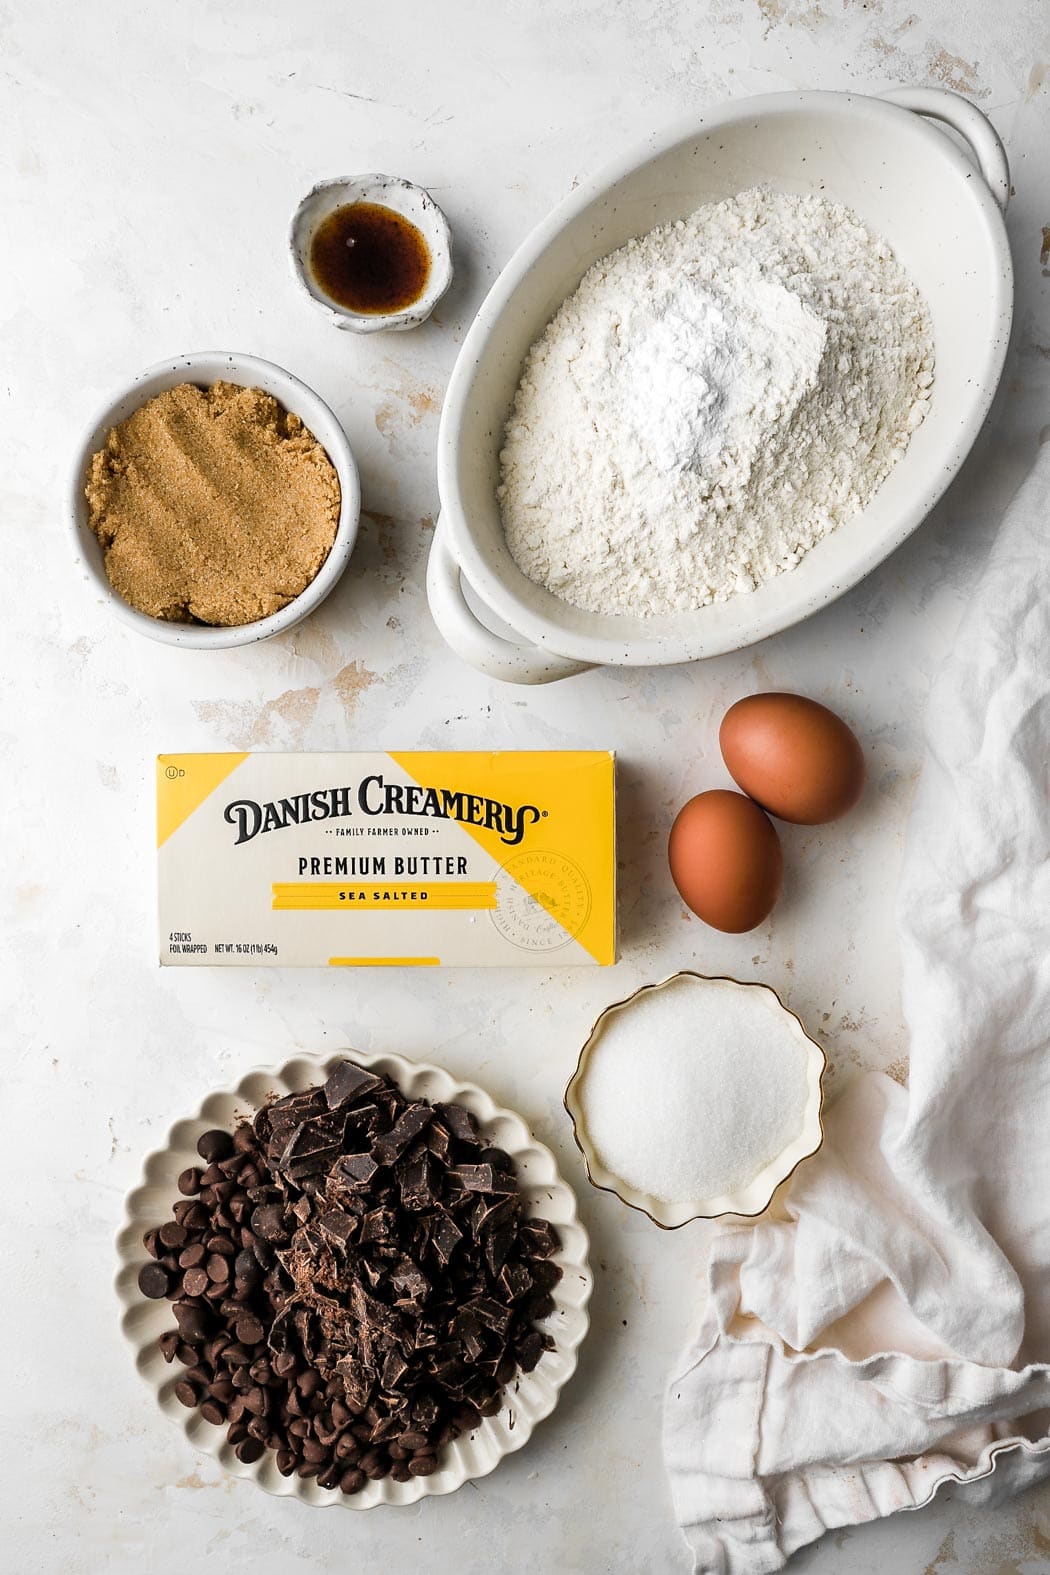
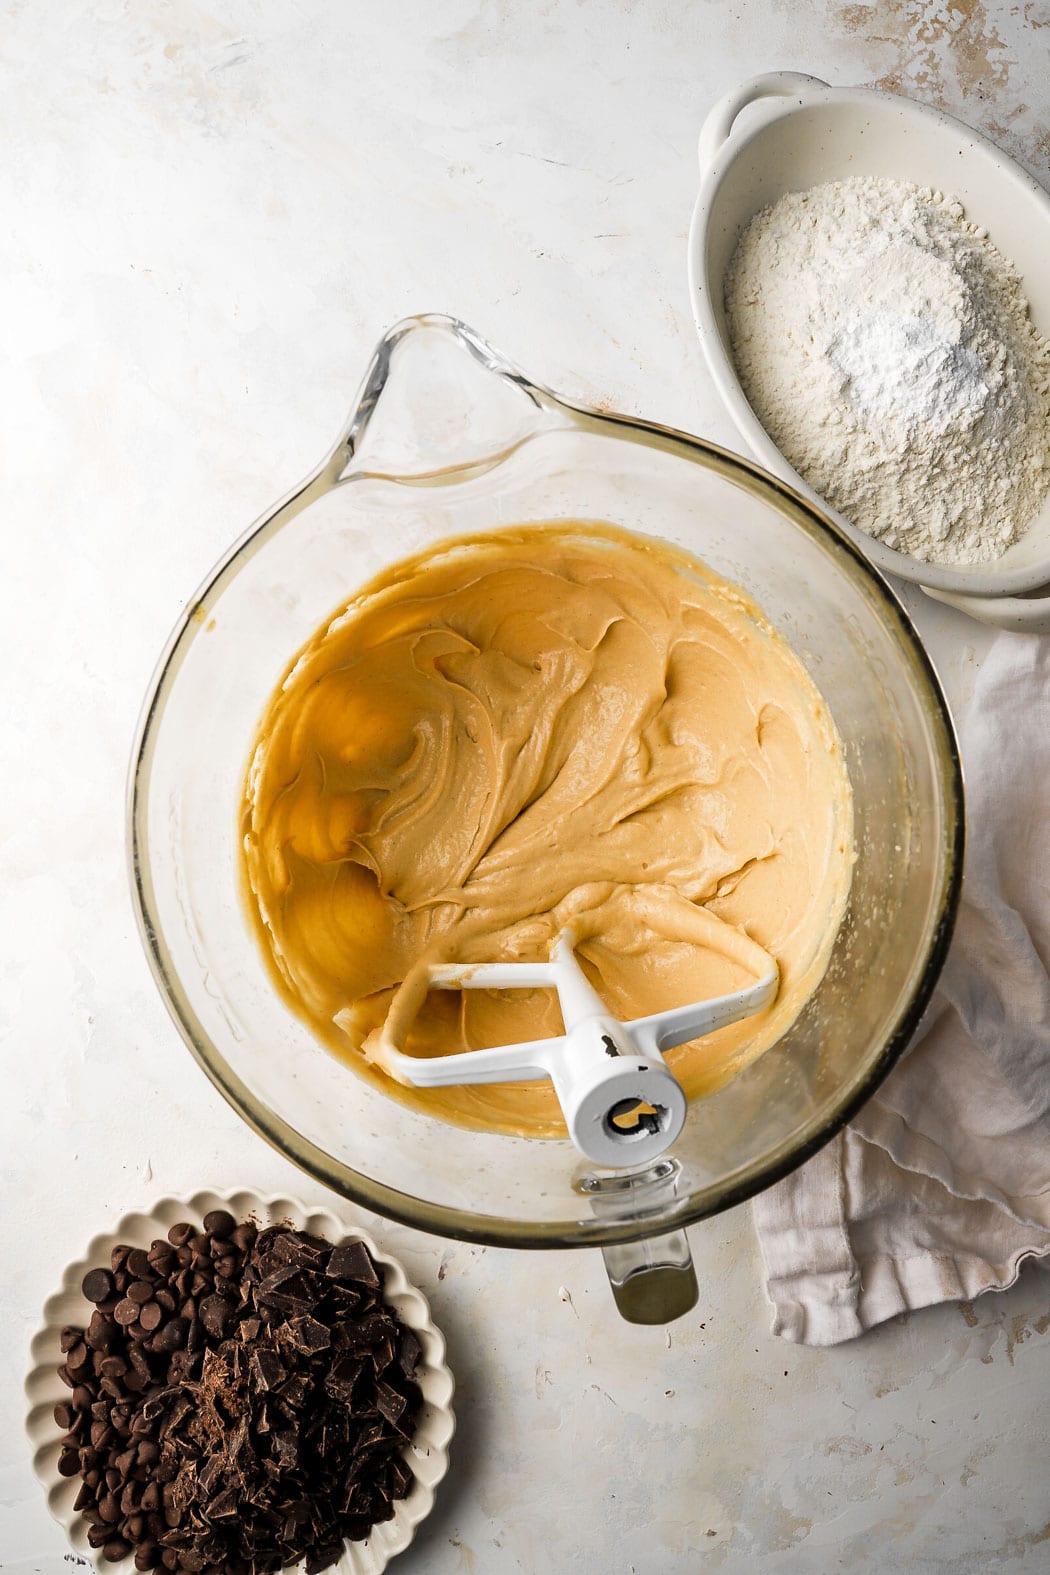
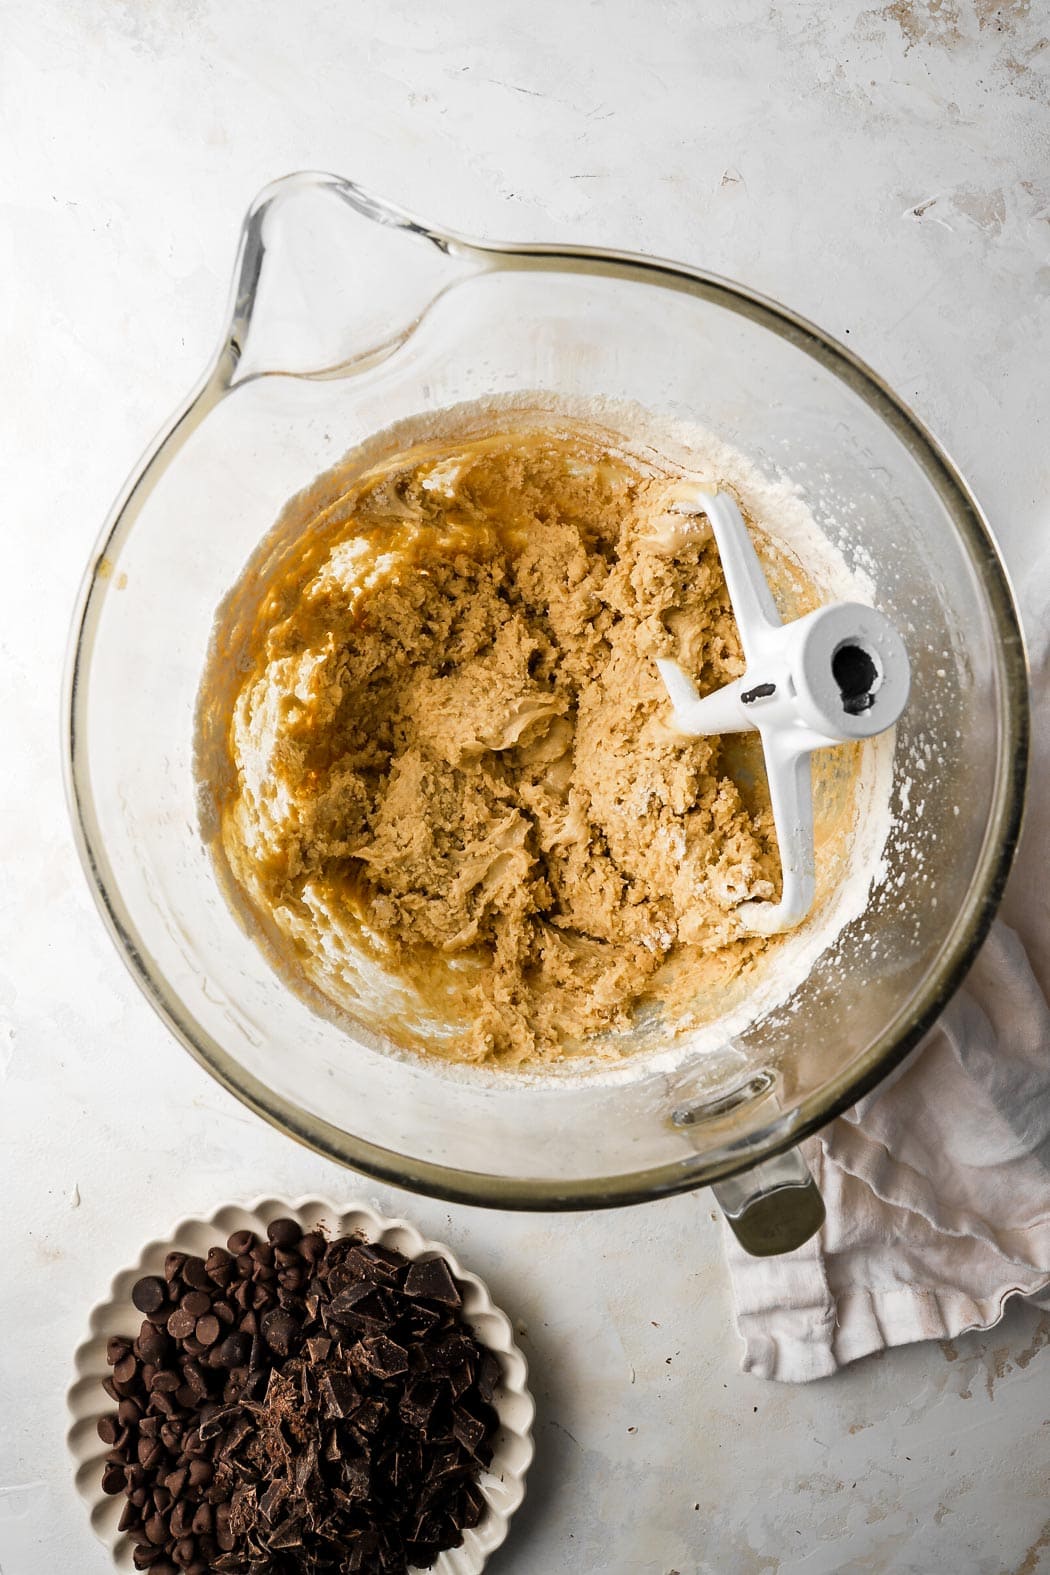
It is important to use proper ingredients to get bakery style chocolate chip cookies perfectly thick and soft. The most important ones are flour and butter. Measuring the flour properly is important. I HIGHLY recommend using a digital scale, to prevent over-measuring the flour which can result in your cookies spreading poorly.
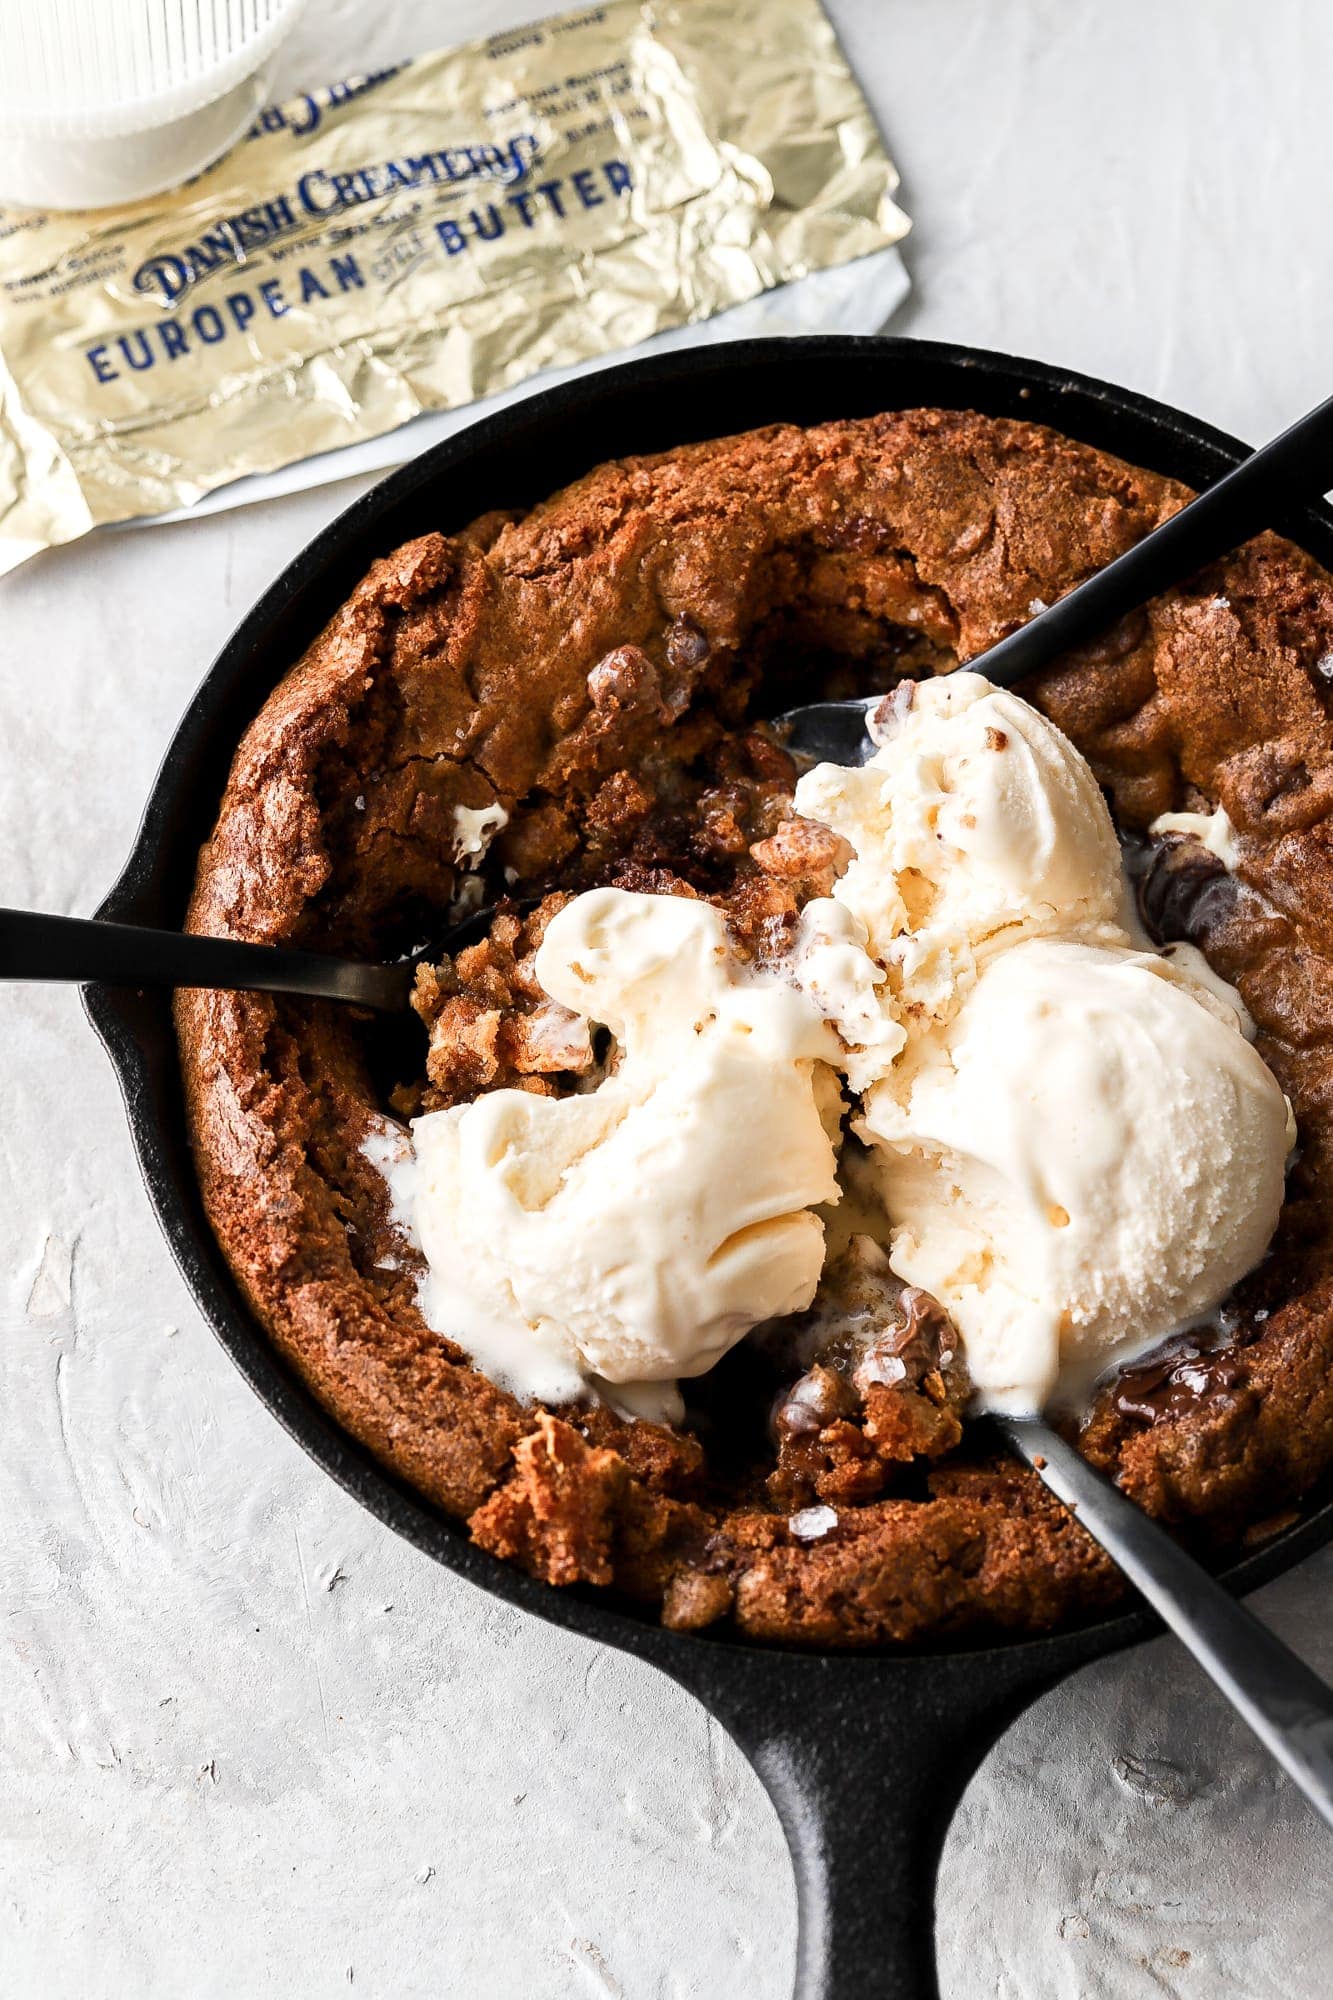
Next, butter. High quality butter makes a huge difference, which is why I use Danish Creamery Premium Sea Salted Butter. Their butter is made of only pure sweet cream and sea salt and is churned the Danish way, giving it a creamy texture and making it rich in flavor.
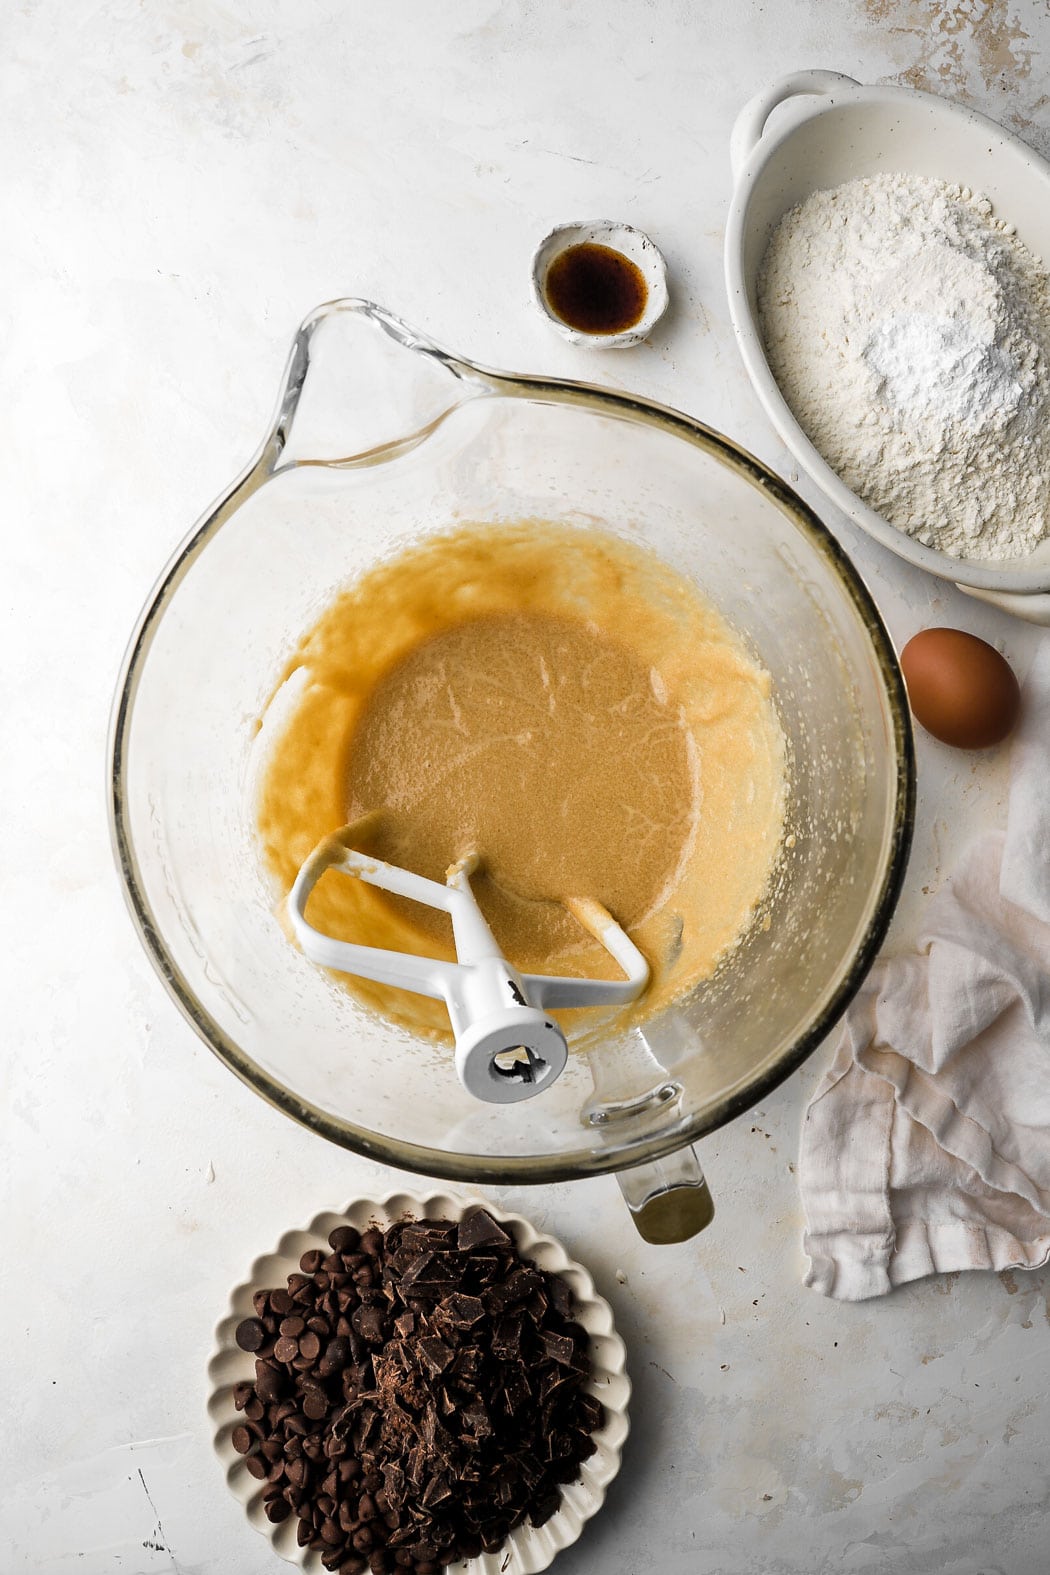
To give it even more flavor I browned half of the butter. The result? Literally your new favorite cookie. Browning the butter only takes a few extra minutes and I don’t even wait for the butter to cool to use it because nobody has time for that. My Brown Butter post shows you exactly how easy it is.
Note: if you skip the browning butter process, omit like a tablespoon of the butter or add an extra tablespoon of flour.
Ingredients:
- Flour: I used all-purpose flour for this recipe. The amount of flour matters more than the brand of flour so measure properly. I highly recommend a digital scale, if not then fluff up your flour and lightly spoon it into your measuring cup, leveling off the top. When in doubt, less is better than more lol.
- Sugar: Sugar is necessary if you want great cookies. I like using granulated and light brown sugar. The granulated sugar gives it that slight crisp around the edges and the brown sugar gives it a more complex flavor and a slight chew. You can also sub light brown sugar for dark brown sugar but I would definitely not do all granulated or all dark brown sugar.
- Butter: Salted butter in cookies is life! Brown butter in cookies is double life. Danish Creamery Premium Sea Salted Butter (and half browned) is TRIPLE LIFE. lol that’s a bit dramatic but since butter is a big part of the cookie flavor, the quality is important.
- Egg: I use 1 large, room temperature egg. If you are in a pinch you can rest it under warm water for 5-10 minutes.
- Vanilla: Vanilla is also a must. I use vanilla bean paste or pure vanilla extract for the most flavor.
- Baking Powder: Just baking powder, no baking soda. If you have to, you can use ½ tsp baking soda in place of the baking powder but the cookies may spread a tiny bit more and be slightly darker in color.
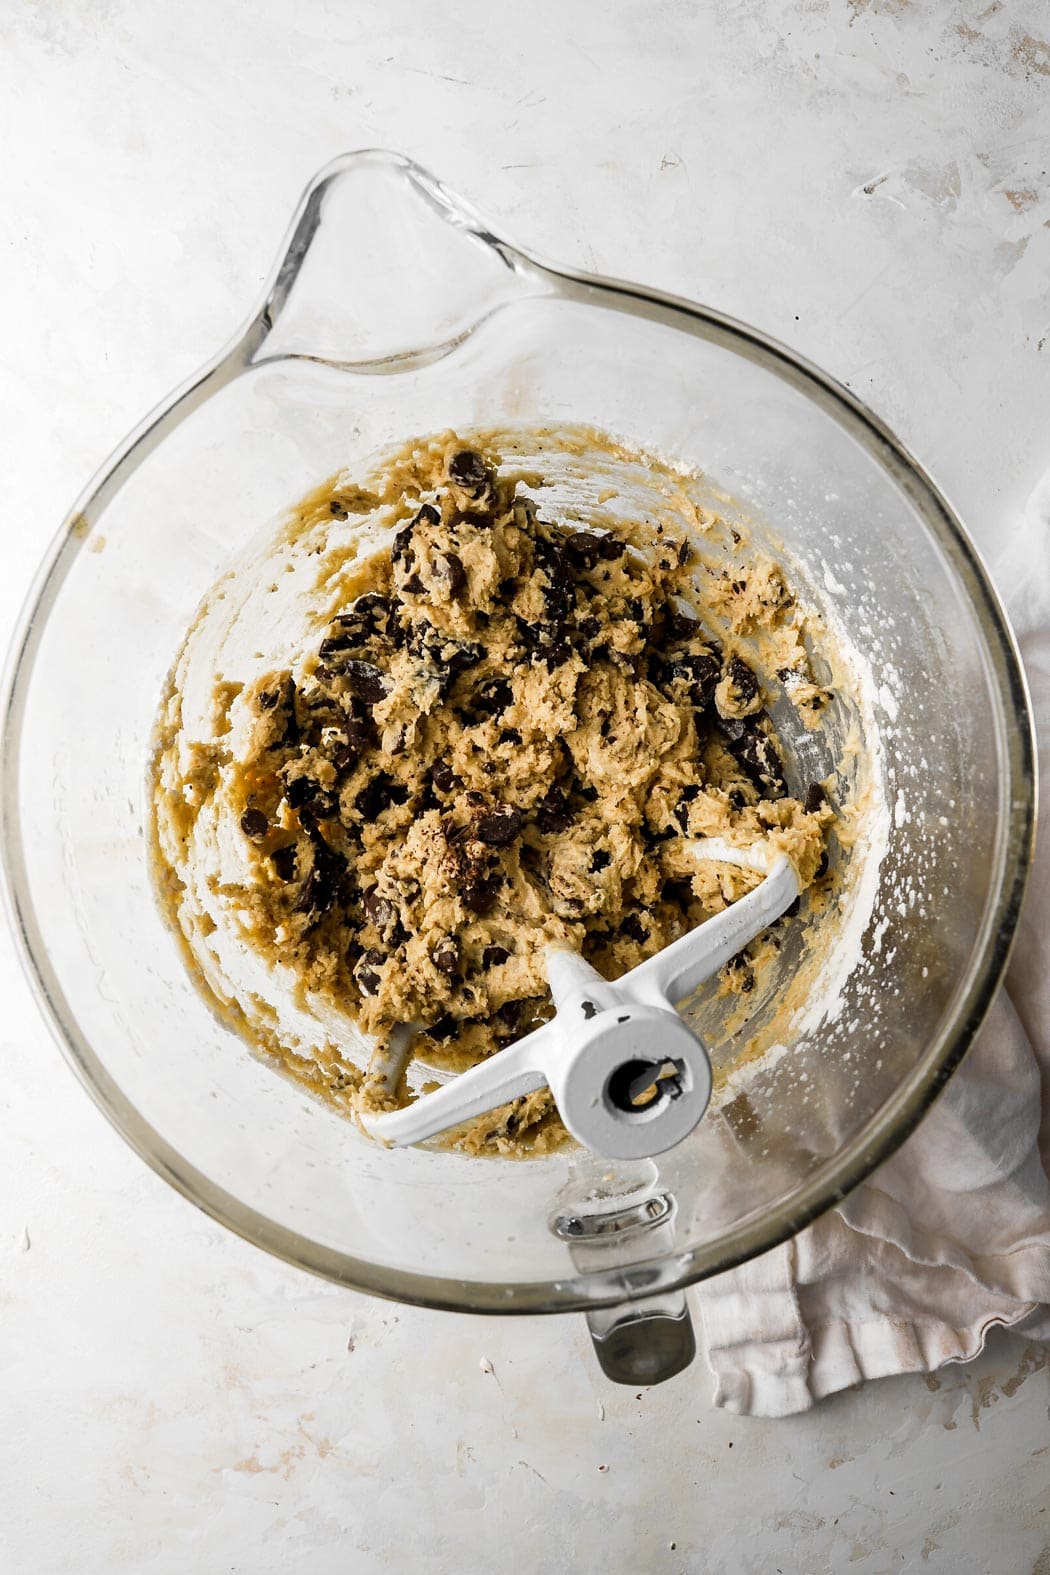
- Chocolate: I used dark chocolate and milk chocolate for a more intriguing flavor.
What kind of chocolate to use
Ok so I know people are always going to use whatever chocolate they have on hand lol so I’ll just give you a heads up on what’s going to happen.
I use half milk chocolate chips and half chopped up dark chocolate bars. The chocolate chips stay chunky, giving the cookie some texture and keeps the cookie from spreading more. The chopped dark chocolate gives the cookie intense chocolate flavor and melted pools of chocolate.
If you use just chocolate chips (milk or dark), most chocolate chips will hold their shape and prevent the cookies from spreading as much. Using all chopped up baking chocolate will do the opposite. The chocolate will melt into the cookie and the cookie will spread more and be flatter with less chew and no chunks.
So I recommend the combination of both types of chocolate but you can do all milk or all dark chocolate if you prefer them super sweet or dark and intense.
How to properly bake cookies
I recommend using a convection oven. I explain the difference in my Small Batch Chocolate Chip Cookies post and I did a reel showing how these cookies are baked in both a convection (fan) and conventional (no fan) oven but I’ll explain a little here too.
Some convection ovens (not all) automatically lower the heat by 25F. If I set my convection oven at 350F, it’ll read 325F. If yours doesn’t do that then set it directly to 325F, if yours automatically adjusts like mine then set it at 350F.
If you’re baking in a conventional (no fan) oven, then bake it at 325F but you’ll need to add an extra minute or so. The heat will come mostly from the bottom so the bottom of your cookie will be slightly darker than the rest of your cookie. It’s still great so don’t hesitate but if you want to avoid the bottom getting a little darker, I recommend baking in a light color stainless steel pan.

How to know when cookies are done baking
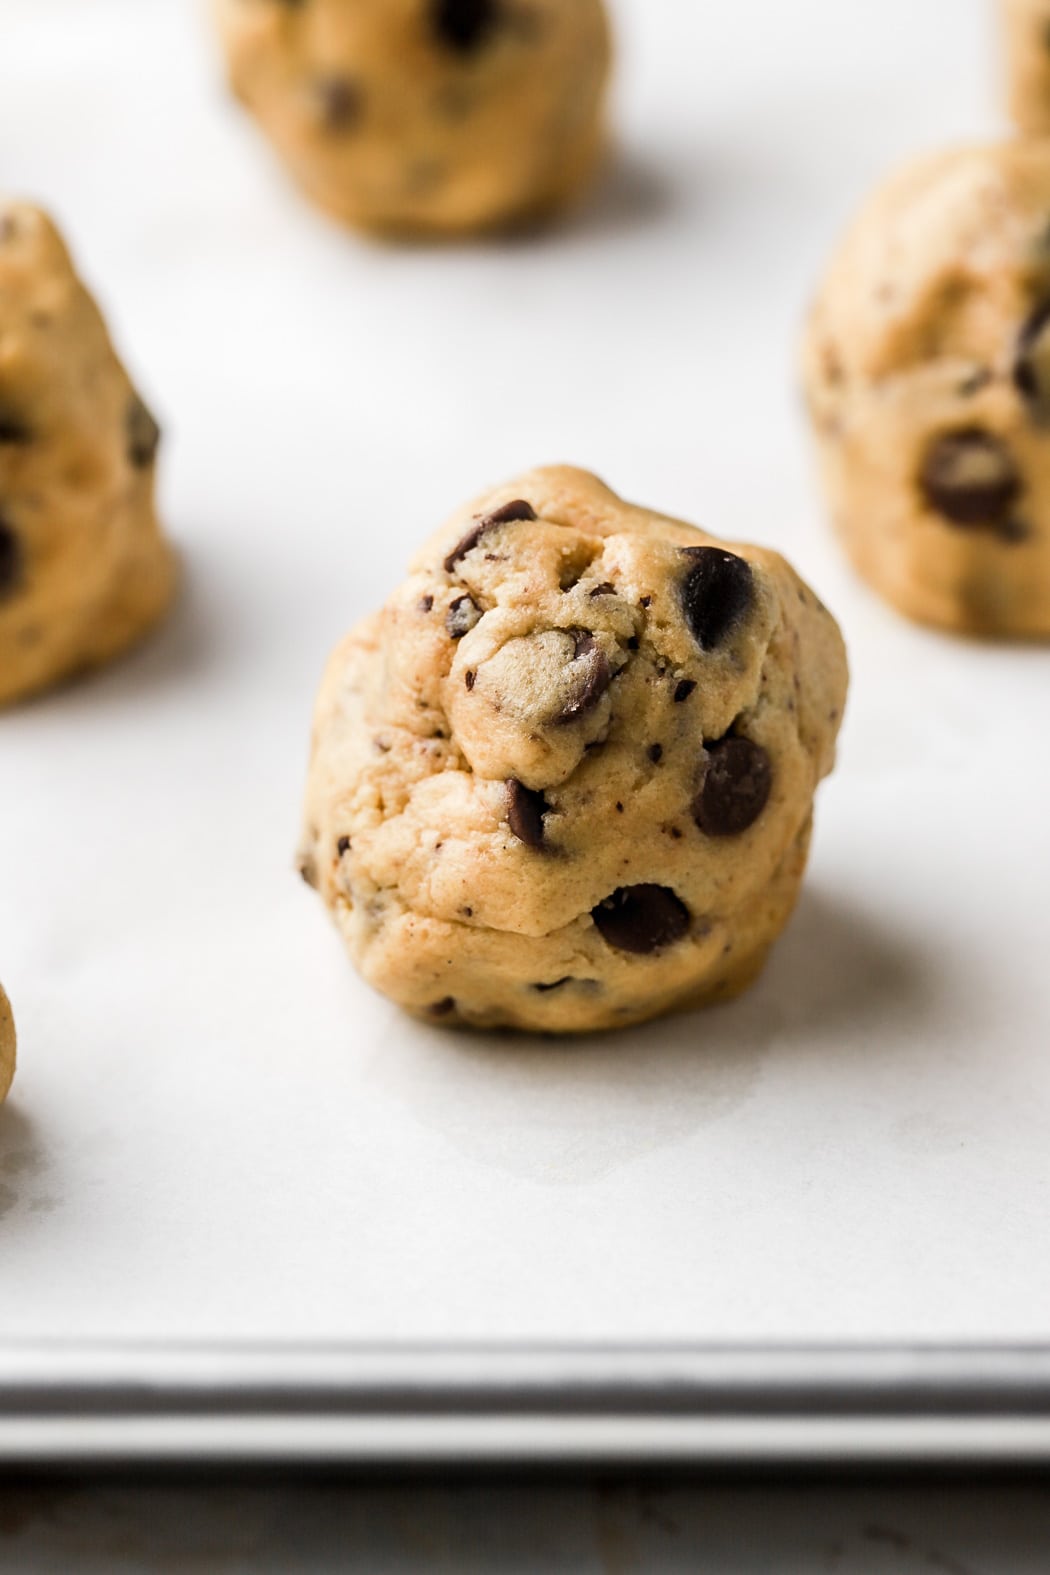
This is like the most important part of baking a cookie, it’s make it or break it here. Your cookies will cook from the bottom and the sides first. You’ll see the edges start to brown and the center will look wet. Then the center will begin to puff and it won’t look wet anymore but it won’t look fully baked either. That’s when they’re done.
You want the edges golden brown and the center puffed. Then remove them from the oven, slam the pan on the counter so they set, top with a generous pinch of sea salt flakes and let the cookies rest for 10 minutes on the hot pan.
Frequently Asked Questions
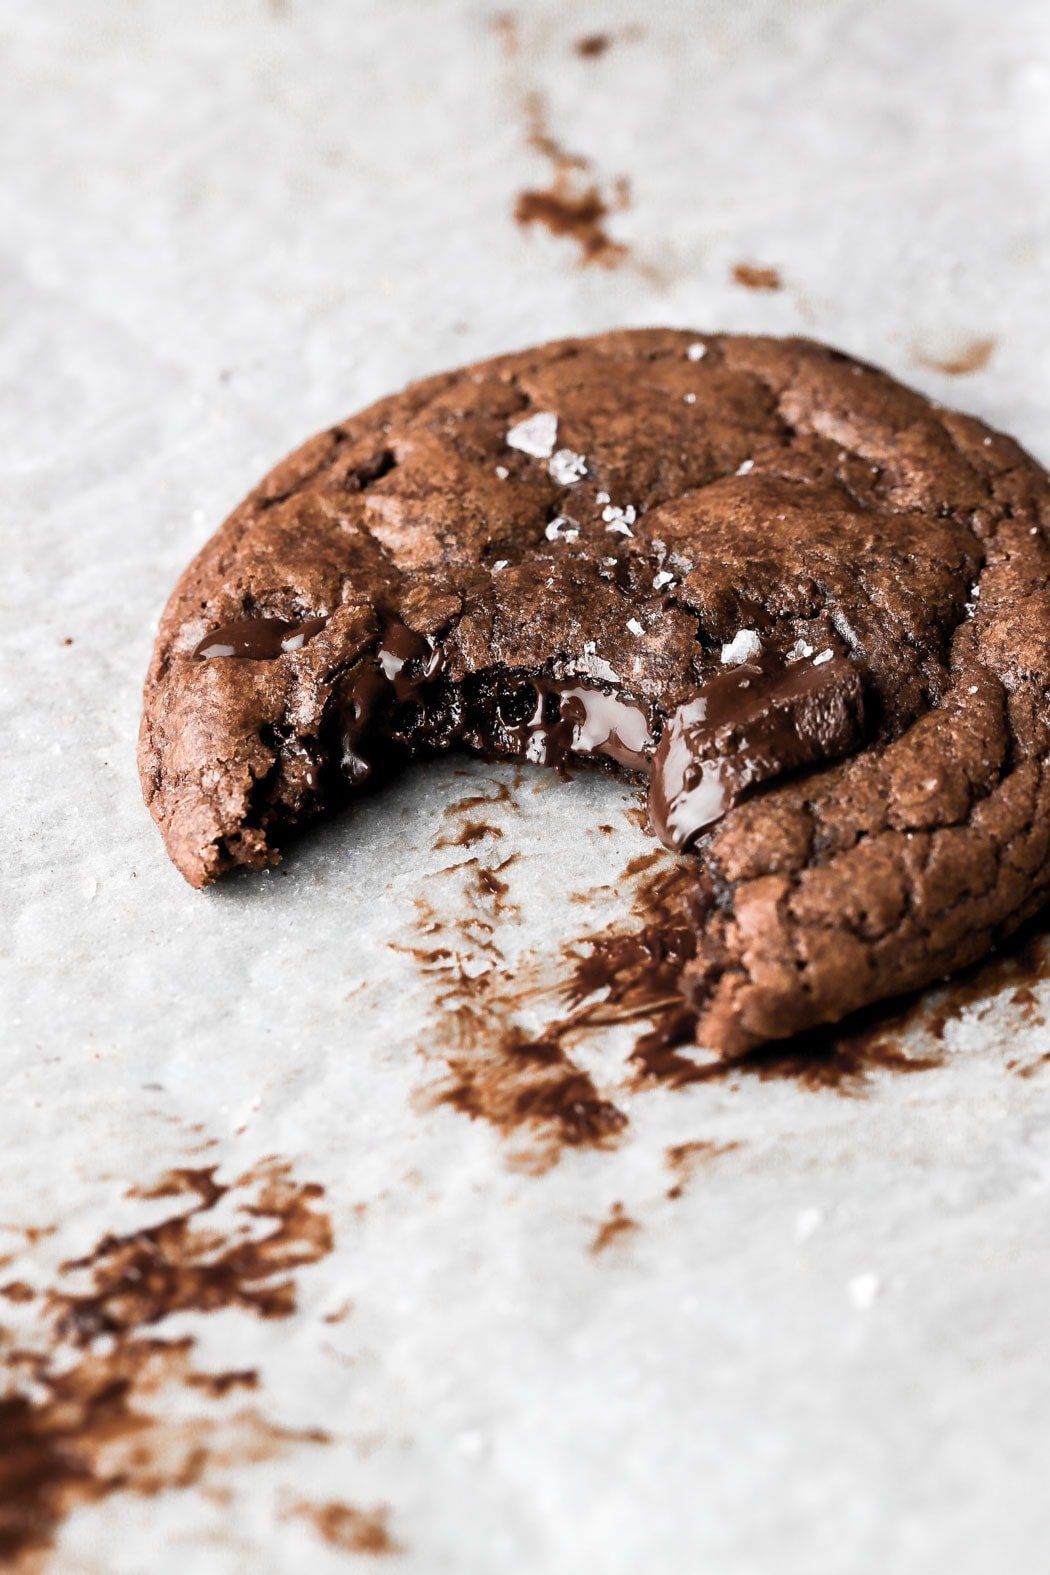
Not really because it only uses 1 egg… if you really want you can whisk the egg and split in half lol. Otherwise I recommend just trying some of my small batch cookie recipes:
Small Batch Chocolate Chip Cookies
Caramel Chocolate Chip Cookies
Cookies and Cream Cookies
Small Batch Chocolate Cookies
Yes! After you’ve made the dough into rounds you can freeze them in a freezer bag for 1-2 months. When you want to bake them, bake as you normally would with just a few extra minutes, until the edges are browned and the center is puffed and no longer looks wet.
Of course! The possibilities are endless but some add-ins I recommend are:
Sub half of the chocolate chips for walnuts or hazelnuts.
Sub half of the chocolate chips with pecans or macadamia nuts and the other half of chocolate chips with white chocolate chips.
Replace the chocolate chips with chopped peanut butter cups
Replace ½ of the chocolate chips with 4 roughly chopped Oreo
Replace all the chocolate chips with white chocolate chips and add 2 Tbsp of sprinkles and a tsp of artificial vanilla extract
I haven’t tested it with these ones but I don’t see why not. These cookies are four ounces each so I would do 2 ounces each and bake for about 8-10 minutes.
How to store chocolate chip cookies
Store your bakery style chocolate chip cookies at room temperature in an airtight container or ziplock bag for 2-3 days. Before serving again, just microwave for 5-10 seconds!
You can also wrap each one individually and place them in a freezer bag, squeezing out all the excess air and freeze for 1-2 months. Thaw them at room temperature and microwave them for 5-10 seconds before serving.
Thanks so much for reading today’s post! If you have any questions just comment down below, I’m happy to answer! If you make these bakery style chocolate chip cookies I would love to see them! Make sure to tag me @baranbakery and @danishcreamery on instagram.
As always, have a blessed day and happy baking!
Love, B
This post was sponsored by Danish Creamery, all thoughts and opinions are 100% my own. Thanks so much for supporting the brands that support Baran Bakery!

I’ve been using this recipe for over a year now. It is the absolute best and never disappoints. I always get rave reviews so I’m making them for all my Xmas gifts this year. Thank you so much!
Hi. I have a question. What kind of chocolate to use ? Does it have to be of some kind? Because when i cooked the cookies the chocolate that I used did not melt. Thank you for your answer.
I use a mix of chocolate chips and baking chocolate. I use Ghirardelli or nestle chips and Ghirardelli or Trader Joe’s chocolate bar and chop that up 🙂
Could I make smaller cookie?
I haven’t tested it with these ones but I don’t see why not. These cookies are four ounces each so I would do 2 ounces each and bake for about 8-10 minutes.
Do you wait for the brown butter to cool off?
Hi! When you put dough in the fridge you cover it or let it with any type of lid. Plastic or napkin? thank you ?
if it’s just for an hour or two i dont cover it. if i leave it longer, like overnight then i put them in a plastic bag or cover the tray with plastic wrap.
Hi!! What’s happend if i just use 200g of butter?
they’ll be slightly drier. reduce the flour by a couple tablespoons?
If you don’t have salted Danish butter can you use another salted butter?
Yes ?
These look yum!! I have a lactose intolerance, can I sub butter for margarine? Is it the same amount?
Hi Sylvia, so sorry I just saw this. I’ve only tried vegan butter not margarine and that works
Margarine is a little bit softer so I think they would spread more
Hi. If I don’t have vanilla bean paste, can I sub vanilla extract? If so, would the measurement be the same? Thanks so much!
Hey, yeah vanilla extract works too 🙂 same amount
Good morning!
I baked these last night and they turned out fantastic!! Great recipe! But this morning they were super hard. Is that how they keep overnight? I warmed mine up in the morning and it was great, just want to be sure they are supposed to be like that. Thank you!!
Hi Rosa, thanks for trying them out, glad you liked them! Cookies will definitely harden once they cool off. If I store them airtight they’re still ok, mostly chewy. But they get soft if you microwave them. 🙂