
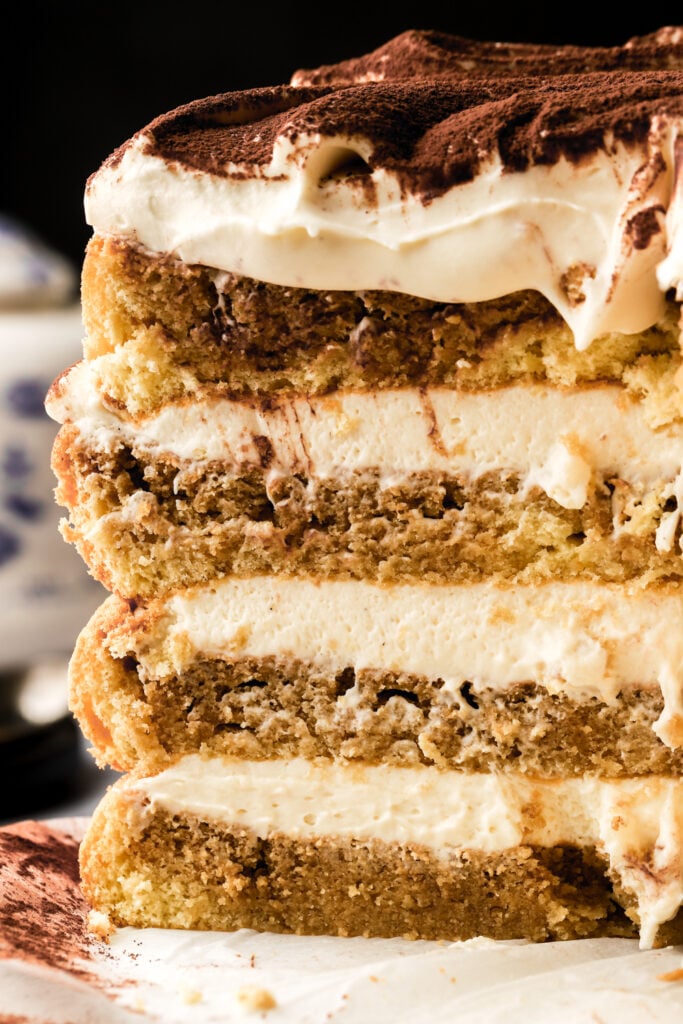
Tiramisu Cake with Italian Sponges
This cake was the start of it all.
Well technically my Tiramisu Latte was my first Tiramisu inspired recipe on here but this cake started the obsession.
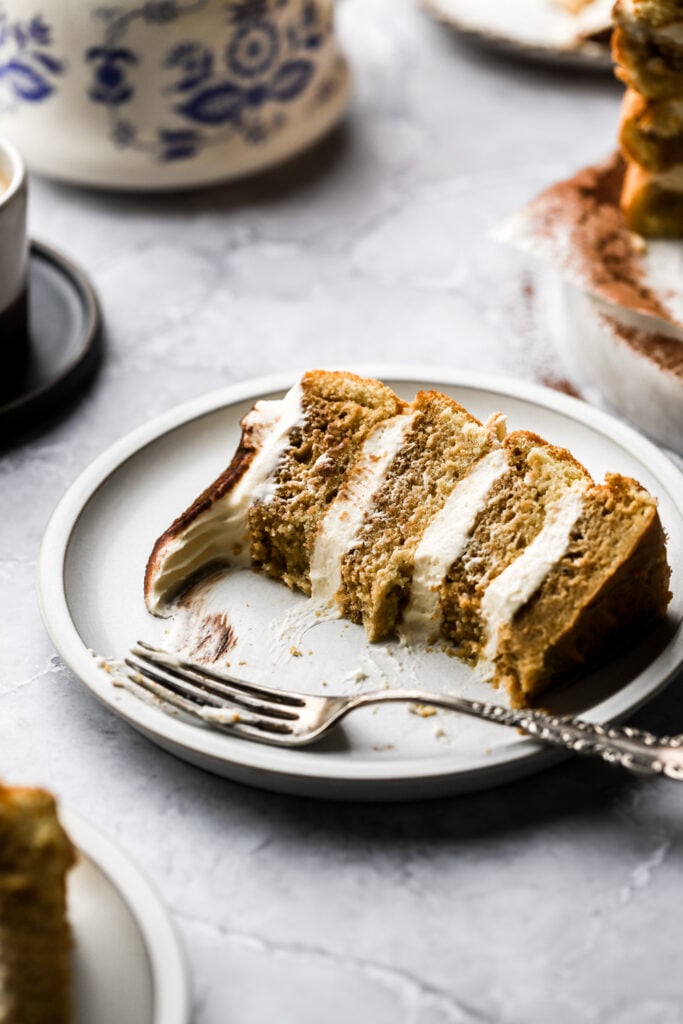
I used a traditional Italian Sponge Cake because unlike standard butter cakes, it’s naturally airy and oil-free—meaning it’s built to soak up liquid like a literal sponge. It’s the perfect vehicle for that bold coffee soak.
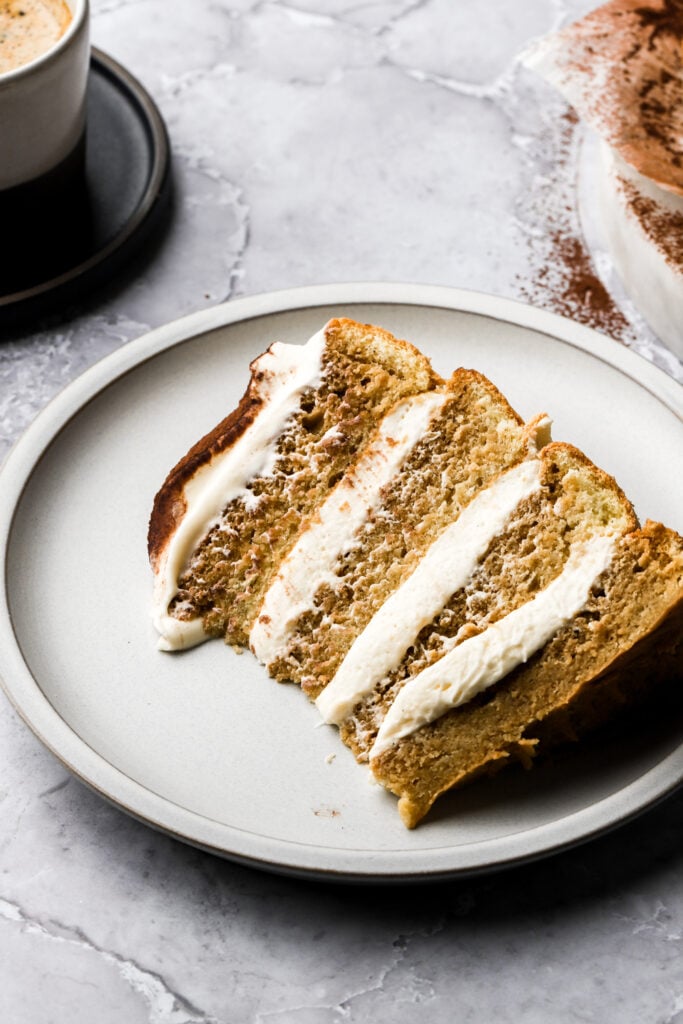
If you’ve ever made Tiramisu, the cream is quite soft – it would never hold up a towering layer cake. I’ve frosted this with the dreamiest mascarpone whipped cream. It’s light, airy, and stable, yet still delivers that signature velvety flavor.
I’ve since become obsessed and made Tiramisu Cupcakes, Tiramisu Brownies, Tiramisu Cookies and like 10 more Tiramisu desserts lol.
Step-by-Step Instructions
There’s three parts to this fabulous Tiramisu Cake
- The Sponge – it’s a simple biscuit sponge which is made with the same ingredients and same method as lady fingers.
- The Coffee Soak – this is where all the flavor comes in so you can technically get as creative as you want here! I once added honey and cinnamon to the espresso of my Tiramisu recipe, you could do that here too!
- The Mascarpone Cream – It’s a simple mascarpone whip that’s so light and fluffy and tastes like classic tiramisu but thick enough to hold up the cake.
Sponge Cake
As always, I HIGHLY recommend using a digital scale, as dry ingredients are almost always over measured.
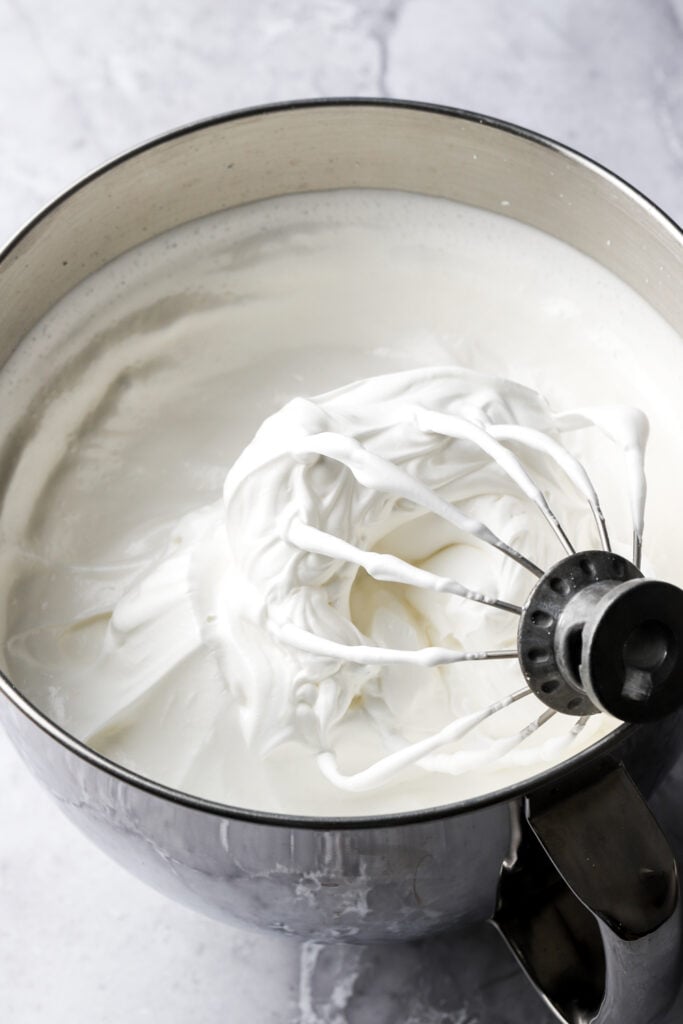
- Start making the cake by separating the egg yolks from the whites. Beat the egg whites with the sugar until it’s super thick and fluffy and holds stiff peaks. This may take about 5-10 minutes. Don’t over-whip after you get stiff peaks.
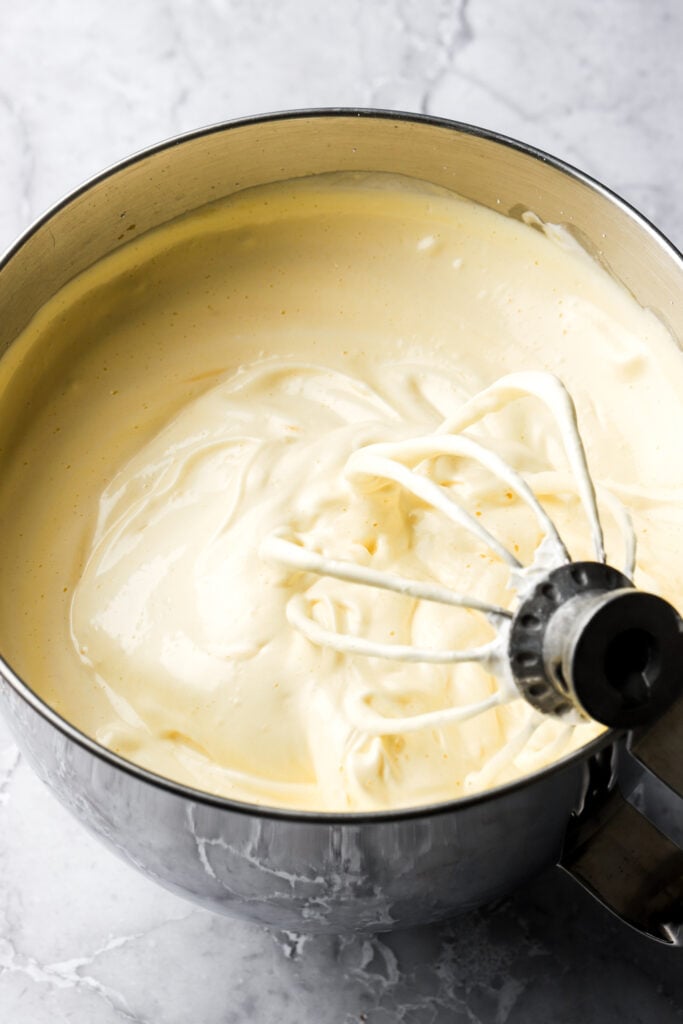
- Add the egg yolks and vanilla and beat at medium-high speed, JUST until it’s combined. Again, don’t over-whip because the egg yolks will just deflate the air from the egg whites.
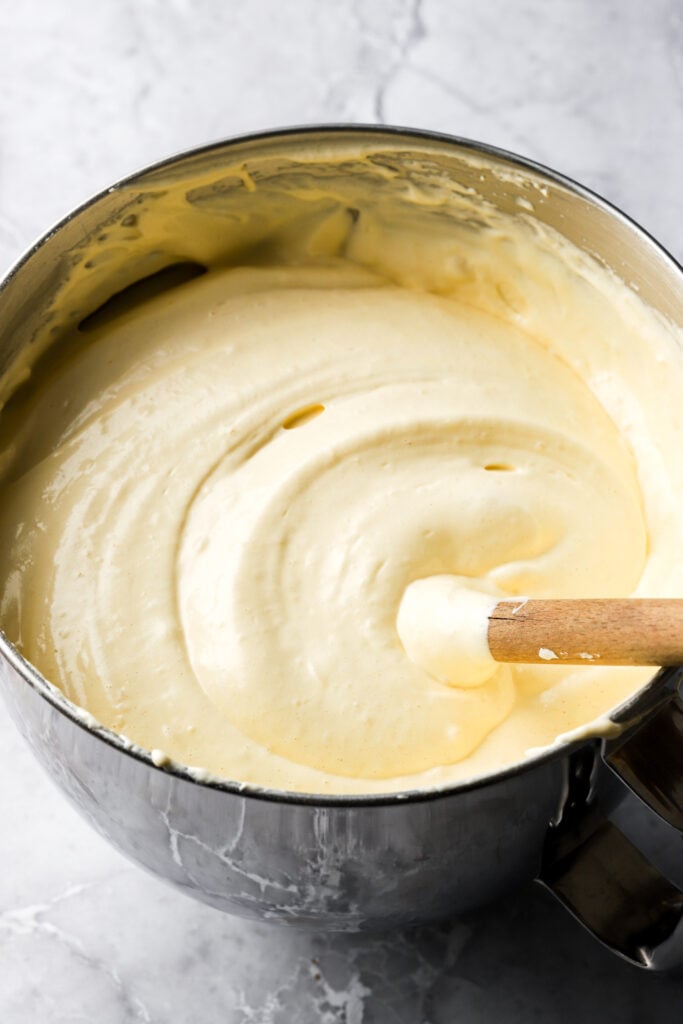
- Sift in the flour, baking powder and salt and beat at medium-low speed, JUST until most of the flour is mixed in. Then use a rubber spatula to scrape the edge and bottom of the bowl and fold the mixture a couple of times, just until the last streak of flour is combined.
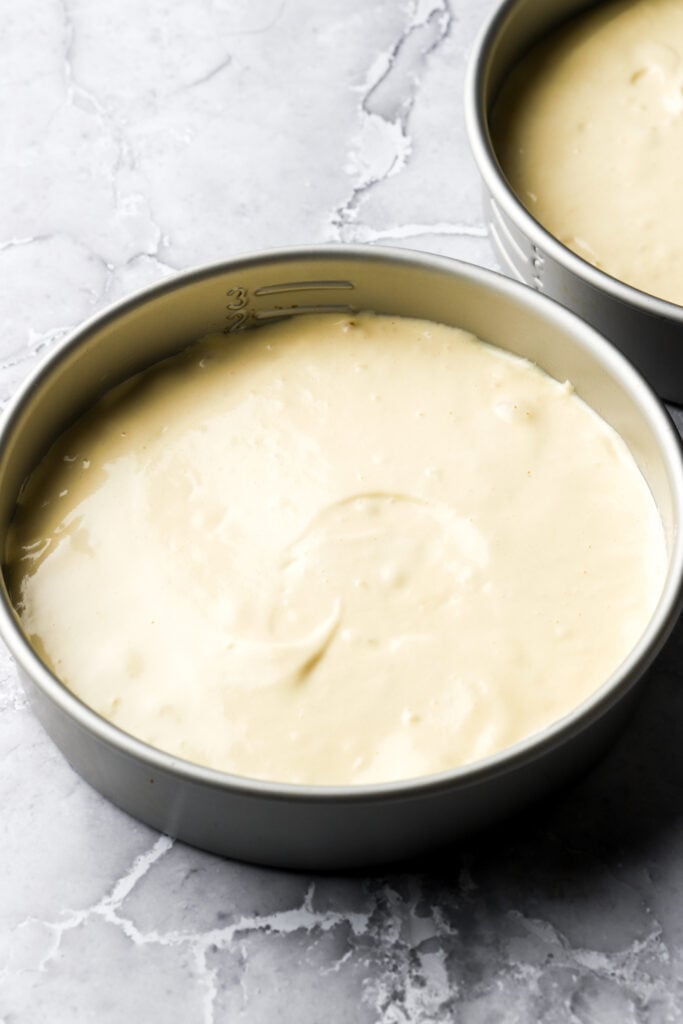
- Distribute the batter evenly among the prepared pans. I lightly grease the pan and line the bottom with parchment paper.
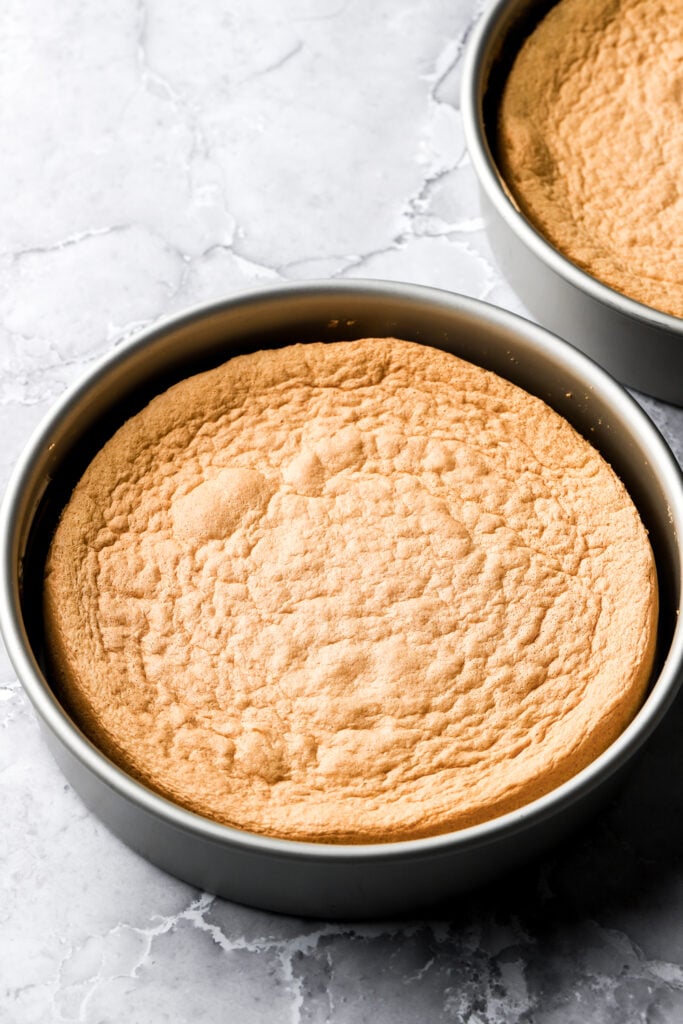
- Bake the cakes for about 15-18ish minutes, or until their golden brown and the edges release from the pan. When you press on it, the cake should spring back when it’s fully baked.
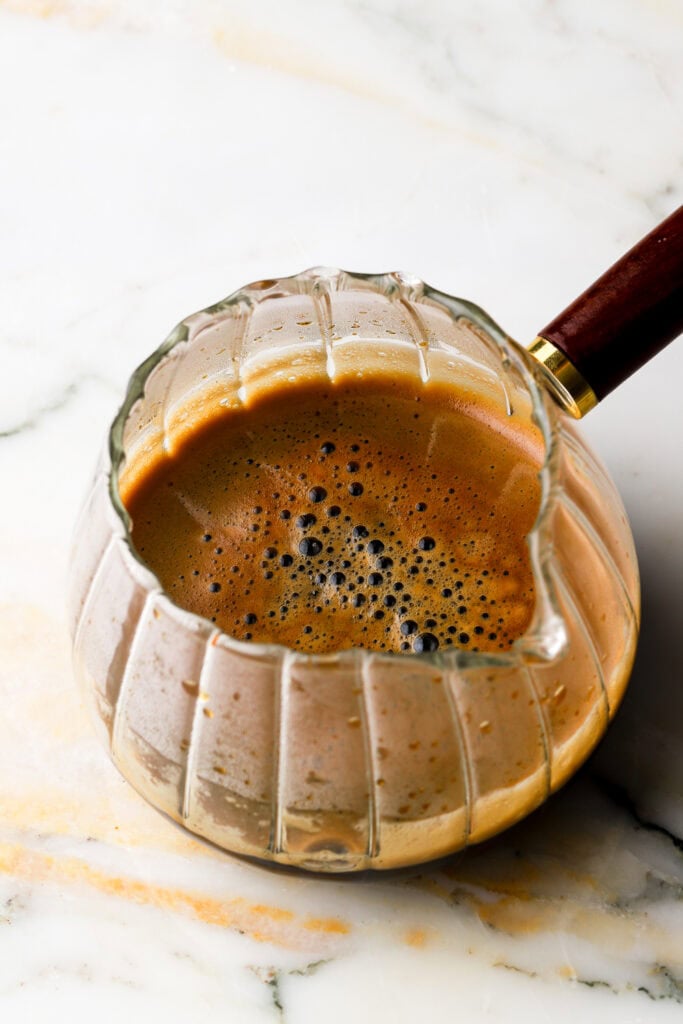
- Make the coffee soak by dissolving the sugar in the hot coffee (I love straight espresso but if you don’t like it as strong you can use cold brew, drip coffee or americano).
There’s about 42 ounces of batter total so if you’re doing four layers like I did, you’ll need about 10.5 ounces per cake pan.
If you’re doing three layers in a bigger pan, you would need about 14 ounces of batter per pan.
Coffee Soak
For most of my other tiramisu desserts I use straight espresso because I love that strong bold flavor. However when I made this cake I used an Americano (espresso with water which is similar to a brewed coffee) because this sponge absorbs a lot more than something like my cupcakes.
Of course, you could make it as strong as you want though – I will try it with just espresso next time.
- Brew coffee and mix it with sugar until it’s dissolved.
- Let the coffee cool while the cake is cooling and then mix with any flavorings (like amaretto or rum or kahlua).
- Poke holes into the cake with a fork and slowly and gently use a spoon to spread some of the coffee on top of it to soak into the holes. Try to not do this quickly so that it doesn’t all run off the sides of the cupcake and make a puddle.
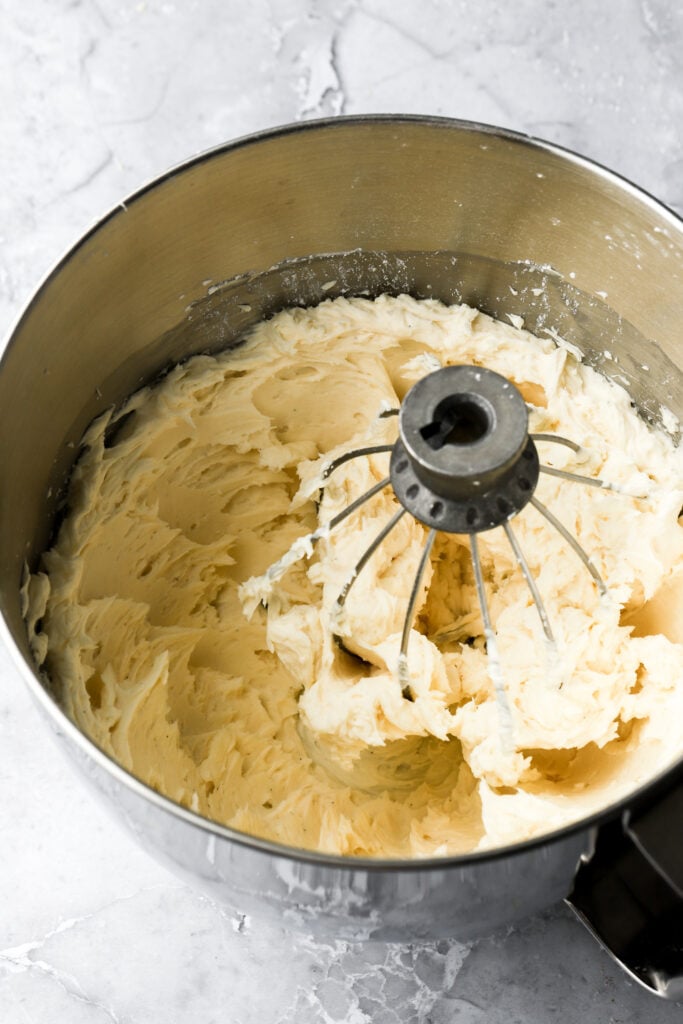
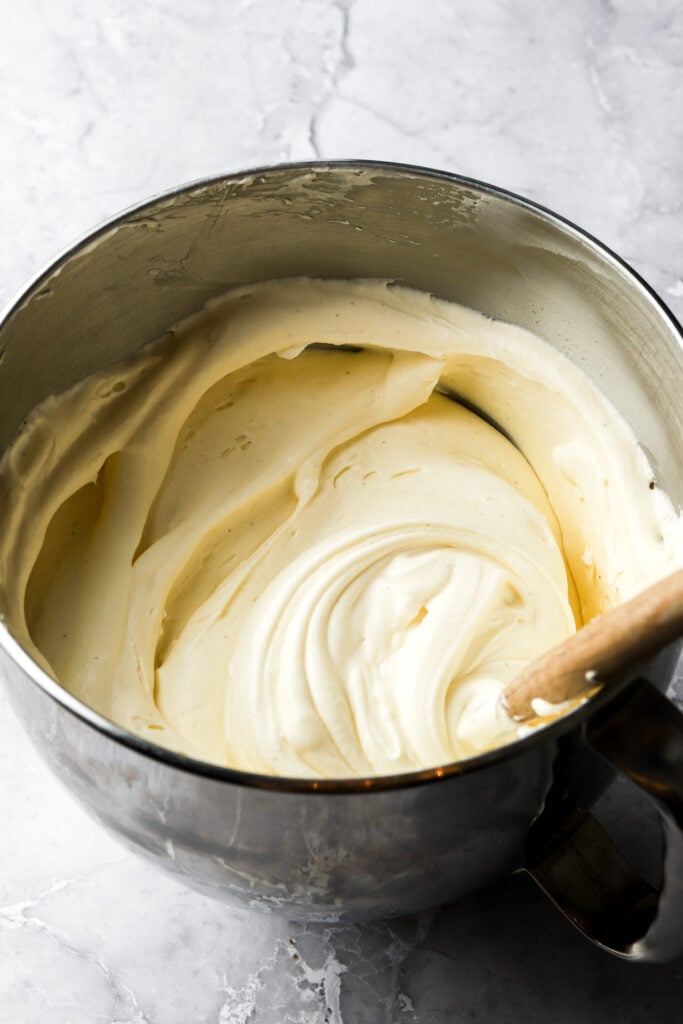
Mascarpone Cream
I recommend the Belgiososo brand of mascarpone because it seems to have less liquid than other brands I’ve tried.
I’ve never had any issues with this mascarpone cream separating or curdling when using that brand and it does stay well at room temperature for a while.
- Make the mascarpone cream by beating together the cold mascarpone with the powdered sugar until it’s completely smooth (start slow so the sugar doesn’t blow everywhere).
- Add the vanilla bean paste and turn the mixer to medium speed.
- With the mixer running, stream in the cold heavy whipping cream in 3-4 increments, stopping to scrape the edge of the bowl each time.
- Once all the heavy whipping cream is added, it may seem soft so turn the mixer up to full speed and it should thicken and hold peaks within a couple of minutes. Don’t over-beat once you’ve reached this stage.
Assemble
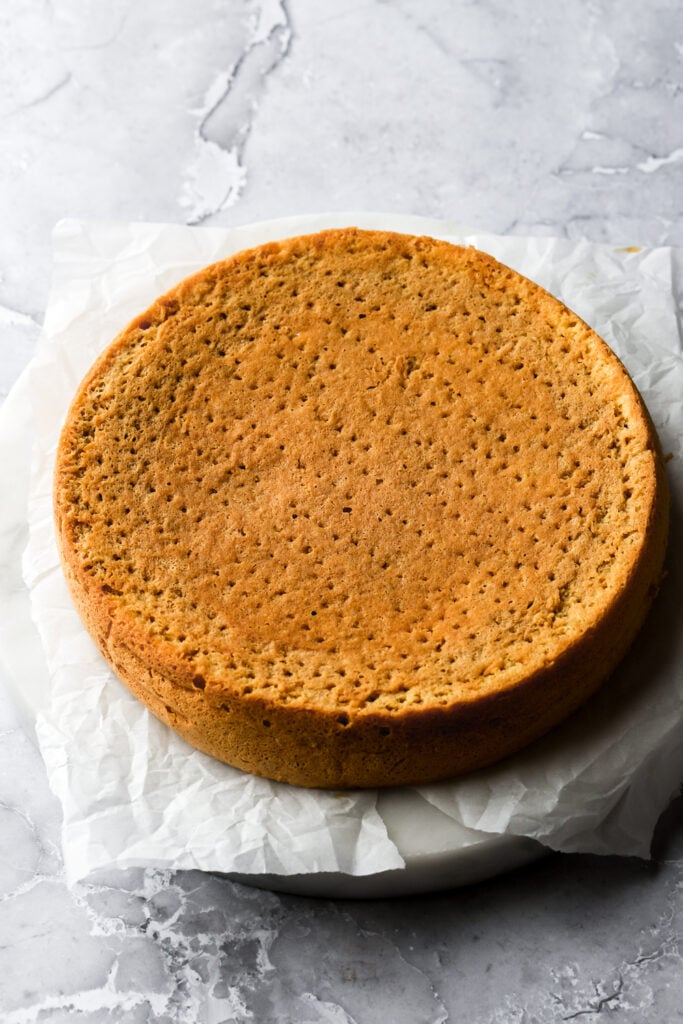
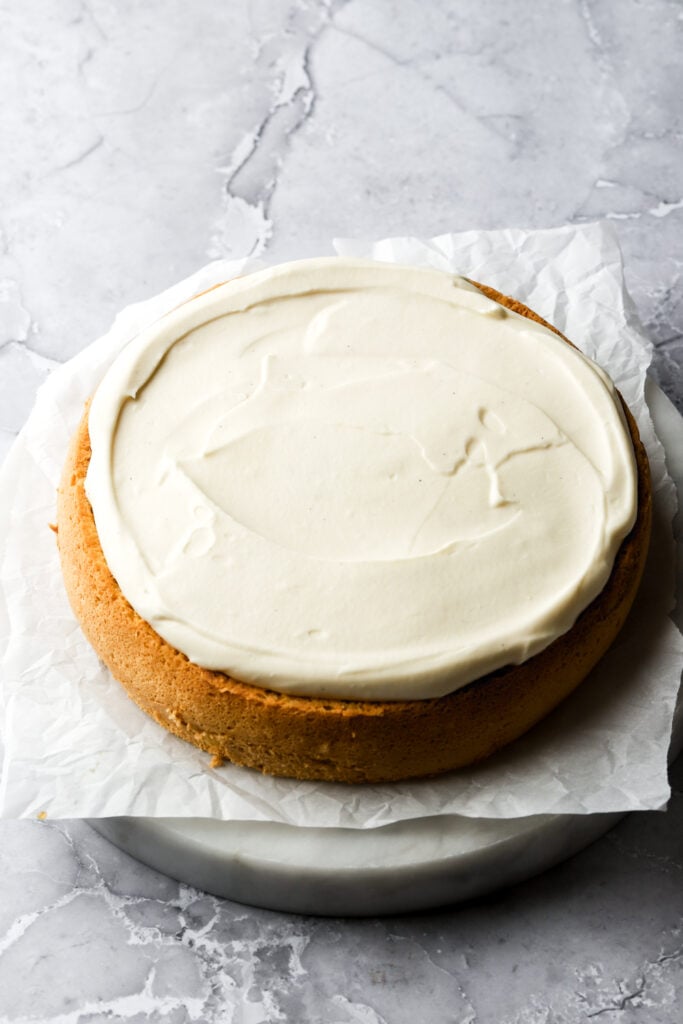
- Flip all the cakes over onto their tops (so bottoms up) and use a fork to make holes in them, similar to a poke cake (except smaller holes that are closer together – see photo below).
- Then place the first layer of cake onto a cake board/flat surface and spoon ½ cup of the coffee mixture over the first layer.
- Top with a generous layer of mascarpone cream. If you want to leave the cake naked like I did, don’t spread the mascarpone all the way to the edge of the cake, leave a little wiggle room so that when you place the next layers on top, the cream will not squish off the cake.
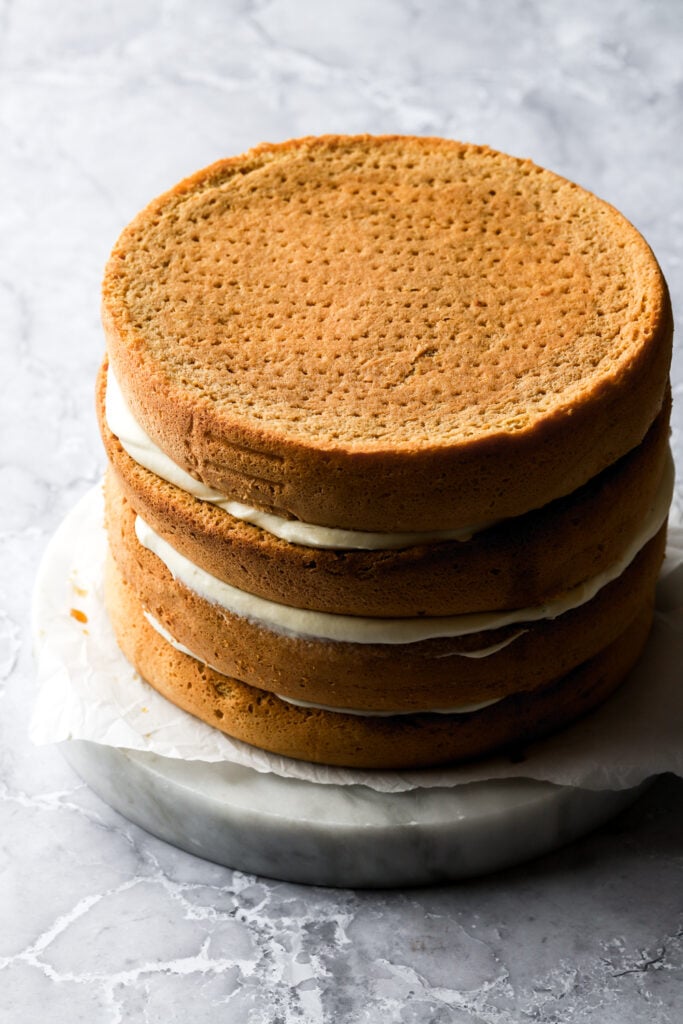
- Repeat with the rest of the layers. Feel free to refrigerate or freeze the cake between stacking each layer to make sure it stays solid and sturdy.
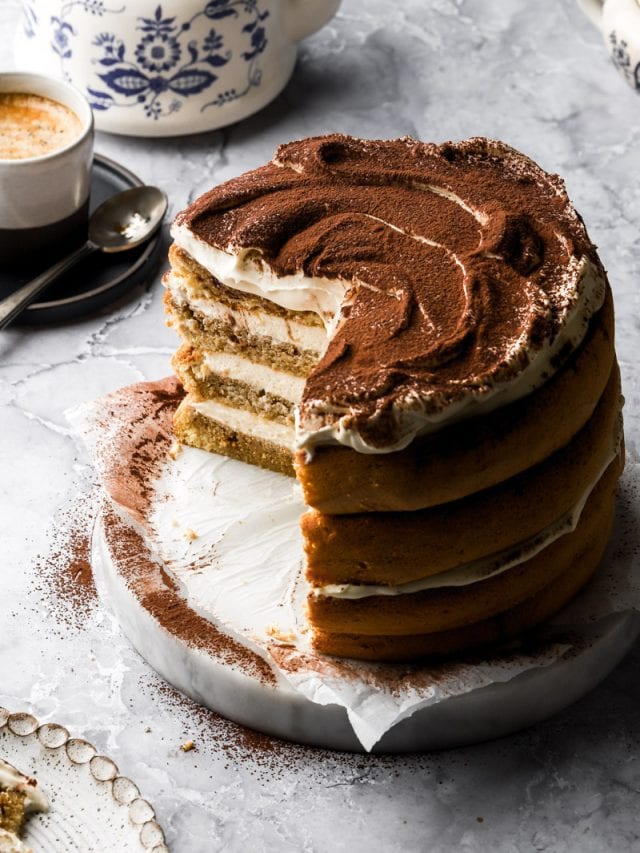
- Create some swirls with a spoon on the top layer of mascarpone and then top generously with cocoa powder.
TIP: dust with cocoa powder before serving so the cocoa powder doesn’t melt into the cream on top.

A Note on the Size of This Cake
I tested this cake in a few different sizes and I just loved the way this one looked.
The cake photographed is four 8 inch layers which is really tall for a sponge cake and can be difficult to assemble. If you do it this way, just be very gentle with the last two layers and refrigerate quickly between layers too if needed.
Also when you get to slicing and there’s only half of it left, it will topple over so just slice the whole thing or lay it down.
The cake can be baked:
- Half batch – three layer 6 inch cake; about 7-8 oz each and bake for about 14-16 minutes.
- Half batch – two layer 8 inch cake; about 10-11 oz each and bake for about 18-20 minutes.
- Full batch – four layer 8 inch cake; about 10-11 oz each and bake for about 18-20 minutes. This is what I did but it makes a really tall (not super sturdy) cake.
- Full batch – three layer 9 inch cake; about 14 oz each and bake for about 18-20 minutes (do about ⅔ cup coffee soak for layer instead of ½ cup).
- Full batch – four layer 9 inch cake; about 10-11 oz each and bake for about 15-17 minutes
- Full batch – two layer 10 inch cake; about 21 oz each and bake for about 25ish minutes.
- Full batch – two 9×13 inch pans (can do one at a time); about 21 oz each and bake for 25ish minutes.
TIP: I recommend baking this full batch in a 9 inch pan and making three layers so it’s not wobbly.
Decorating My Tiramisu Cake
Sponge cakes are much more squishy than traditional shortened cakes (like my vanilla cake) so again, the four layers is risky here.
If you want to frost the outside of the cake, you will have enough mascarpone cream to LIGHTLY cover it; however, make sure to refrigerate the cake for at least 1-2 hours before frosting the outside.
If you want to actually decorate the cake with buttercream, you can use any type of buttercream recipe you like (there’s like 10 in my cookbook, Frosted) but my favorite for decorating is Swiss Meringue Buttercream.
However, since the sponge cake is soaked in liquid, it will settle over the next few hours so I recommend refrigerating it for at least 4-6 hours, preferably overnight, before frosting the outside of the cake. The cake will be a little shorter the next day and you don’t want that to ruin your decor.
I recommend piping a border of the Swiss meringue buttercream onto each layer of cake and using the mascarpone cream as a filling.
You can see an example of this in my chocolate ganache cake. If you do it this way, you can refrigerate the cake for only 30-60 minutes so the buttercream sets and then frost the outside.
Serving & Storing Sponge Cakes
I recommend refrigerating the cake for at least 4-6 hours or overnight before serving.
This allows the coffee to soak well into the cake and the mascarpone cream to set a little so it doesn’t squish out as much when you slice it.
The cake can be served cold or slightly chilled but I don’t recommend leave it out at room temperature for too long because it is soft and has a cheese based cream.
The cake has to be stored in the refrigerator. It’s always best airtight but these sponges won’t dry out super quick like standard butter cakes so it’s fine for a couple of days.
I hope you enjoy this cake version of tiramisu!
If you have any questions, please comment down below – those will get answered much quicker than email or through social media.
If you loved this cake as much as I do, I would very much appreciate a 5-star rating or review in the recipe card below.
As always, have a blessed day and happy baking!
Love, B


It’s the 2nd time that I make this cake since the first time was an absolute hit! I just baked the 3 layers but need to assemble it tomorrow. Should I keep them in the fridge? If yes, seperately or it’s OK one on top of each other and add parchemin paper in between? Thank you
Hey Jamie! If the cake layers aren’t frosted they can just sit out at room temperature, TBH I would just cover them loosely with a towel and let them be overnight. Tomorrow soak them with the coffee syrup and they’ll be perfect.
Thank you for your quick reply
I made this for my Birthday and WOW, it was the perfect birthday cake. Such a hit in my house and dare I say better than traditional tiramisu. The mascarpone cream was slightly melting while I was decorating, please let me know if there’s any way to make it more stable. Otherwise after chilling it was wonderful and absolutely delicious.
Hi! So glad you liked it, thank you for sharing!!
The mascarpone cream isn’t good for decorating so I just keep it simple with a light frost. There’s definitely some tips to help keep it from melting:
1. Make sure you whip it long enough to hold stiff peaks since it’s mostly whipped cream.
2. Make it right before frosting the cake, don’t make it ahead of time.
3. Refrigerate or freeze the cake between stacking layers, especially if your house is warm.
4. Try to work in a cooler environment if you can.
If you want to truly decorate the cake, I recommend doing a border of swiss meringue buttercream, filling in the center with the mascarpone cream and frosting the outside of the cake with the buttercream as well. I would use half the recipe of the mascarpone cream for that and a double batch of this buttercream.
https://baranbakery.com/how-to-make-swiss-meringue-buttercream/
This cake was a hit on my daughter’s birthday and I’ve been asked to make it again. This recipe is a keeper. Thank you for sharing it.
The way you describe the Italian Sponge Cake as ‘built to soak up liquid like a literal sponge’ makes it feel so perfectly designed for the coffee soak—like the cake itself is part of the flavor’s journey.Coborns weekly ad
I made your Tiramisu cake and it was loved by all. Your recipe is easy to follow, love the additional details (nutrients), helpful suggestions and its so thoughtful to mention at each section how much of the next ingredient needs to be added so don’t have to scrolling back and worth between the list of ingredients and recipe. I’m sure I will be making more of your cakes, they look delicious.
Followed this recipe though I used four bread pans instead of rounds. Measured 10.5oz prebake. Sliced finished cakes in half to create two four layer tiramisu. Made one dryer and one soaked (did make more coffee soak than original recipe to achieve the two finishes.)Both were fabulous. Will absolutely use thus recipe again.
Hi Jeanette, I’m so glad you liked the cake!!! And thank you so much for the review 🤍