

Easy Overnight Italian Bread
Once you make homemade bread, you’ll never go back to buying bread. This overnight Italian bread is my new favorite.
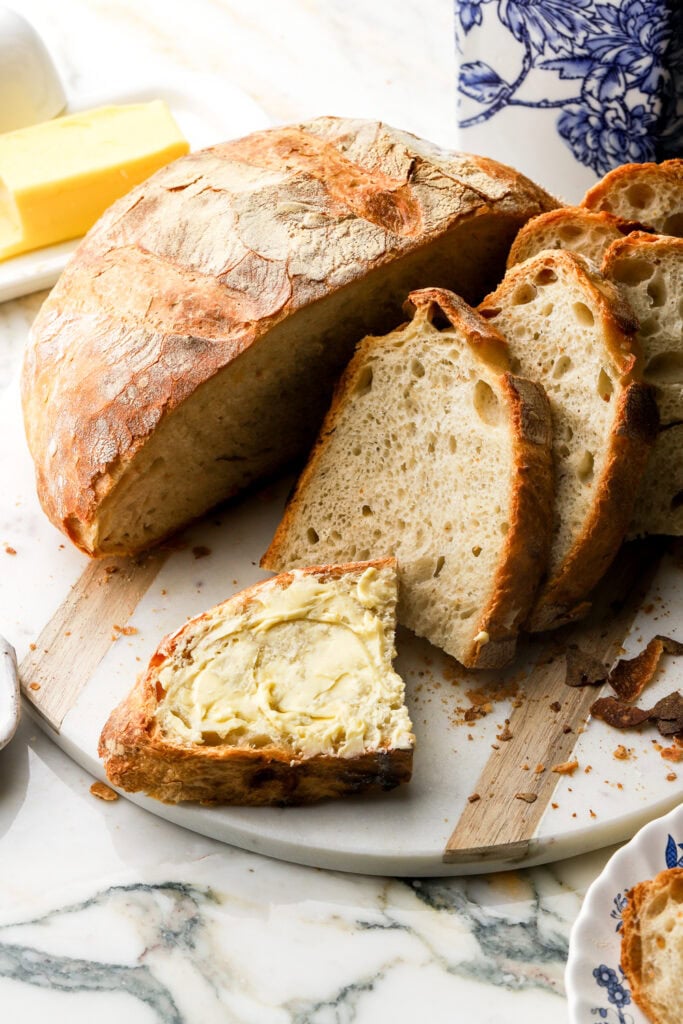
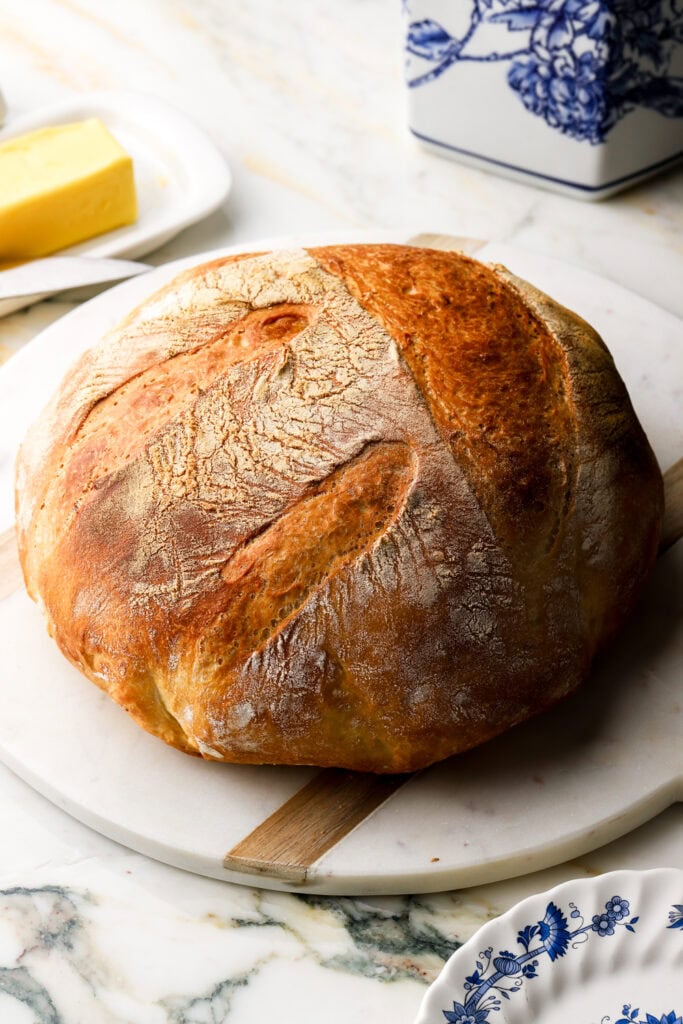
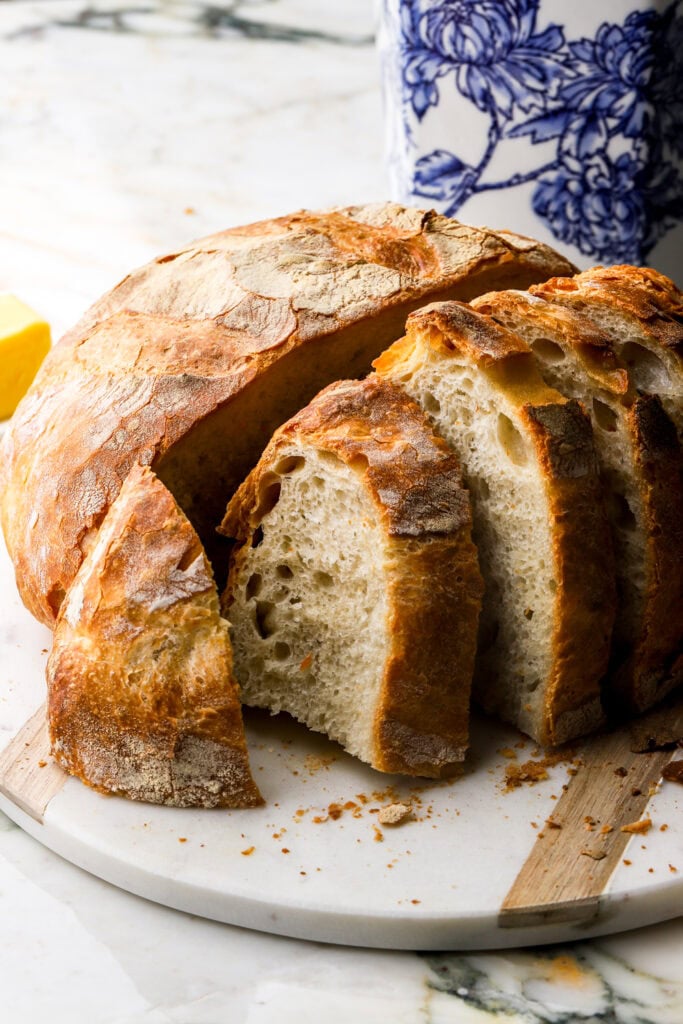
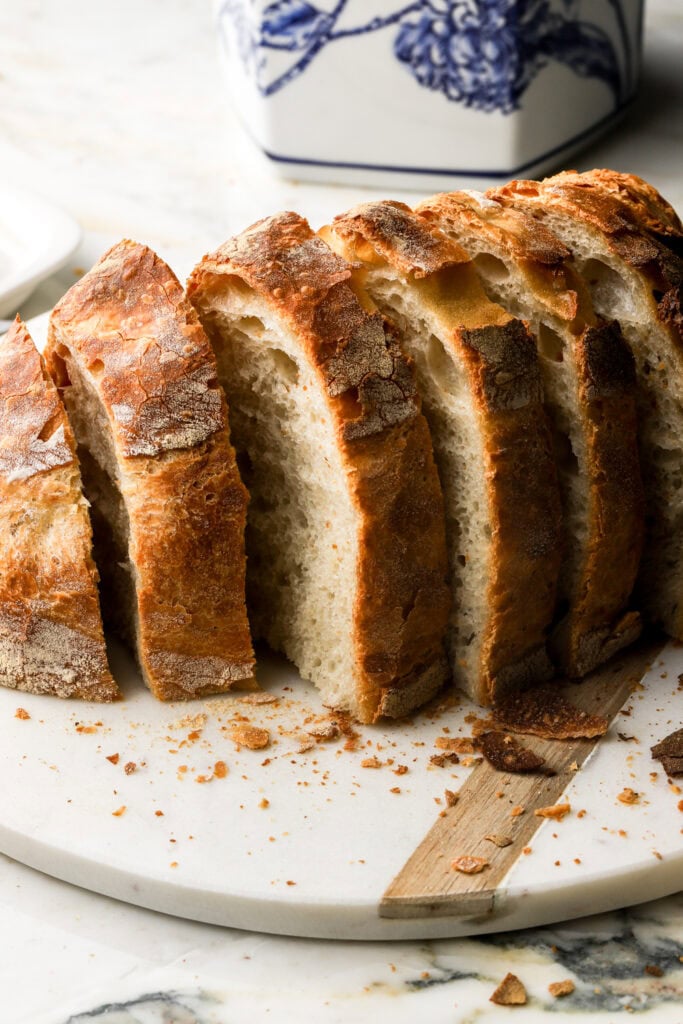
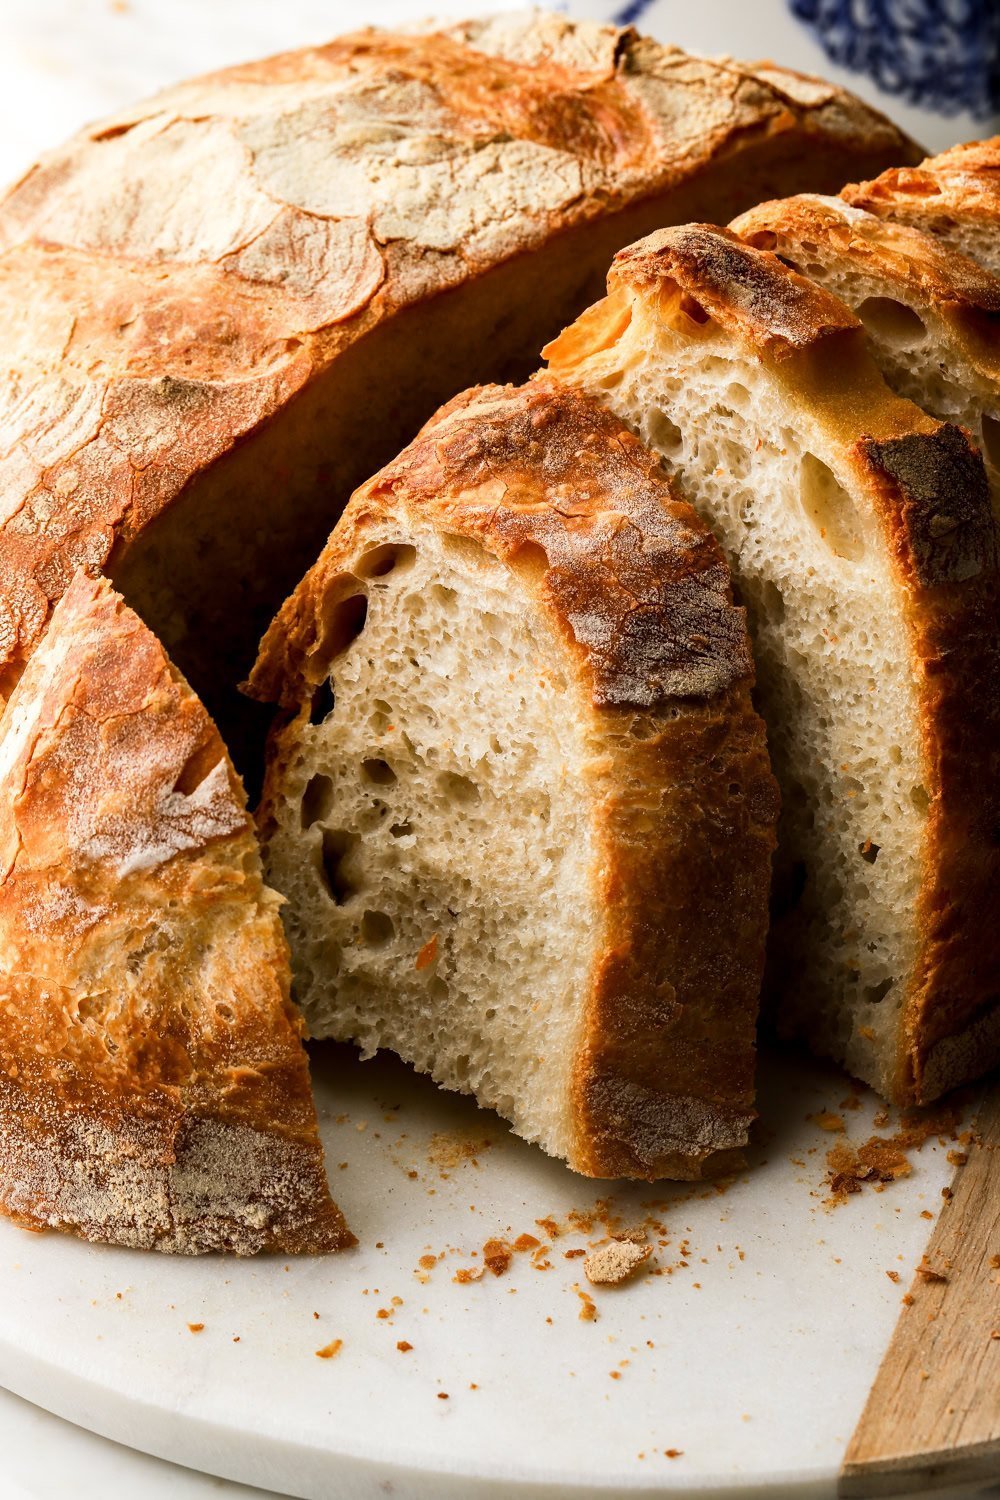
The crust is crispy and chewy but the crumb is so tender and fluffy. It’s perfect as toast, for sandwiches, grilled cheeses, dipping in soups or dips, etc.
I have a website where I post a ton of dessert recipes but the truth is, bread is my weakness. I love bread.
I’ve been making bread on and off for the last 6 years but really haven’t posted my own recipe until that’s all my kids wanted to eat so my first bread recipe on here was my Sandwich bread. But you better believe I’ll be posting more!
This bread has only 5 simple ingredients, minimal hands on time and can be made quick or overnight.
What is Italian Bread?
There are sooooo many types of breads and so many different recipes for each type of bread.
Artisan bread is traditionally lean, meaning it’s just made of just flour, salt, yeast and water.
Brioche dough is very enriched, meaning we’ve added sugar, butter, eggs and/or milk.
This Italian bread is only slightly enriched, even less than my sandwich bread – I add just a tiny bit of fat like butter or olive oil.
Even Italian bread has so many different types like focaccia, ciabatta, etc.
This bread is inspired by a bread I had at an Italian restaurant that was to die for. The crust is crispy and chewy but the crumb is so tender and fluffy.
It’s a no-knead bread and it still holds a great shape thanks to the stretch and fold method and of course, the long overnight rise time.
Ingredients & Substitutions
*full recipe is in the recipe card at the bottom!
Making bread sounds more intimidating than it is. It’s a very simple process, it’s just more of a timely matter.
This is a no-knead bread but giving it time to rise overnight is essential for the structure and flavor.
- Flour: I use both all-purpose flour and bread flour for this recipe and both work totally fine. I like bread flour best because the higher gluten content gives it a better structure and chew.
- I highly recommend weighing your flour with a digital scale.
- Water: I use warm water but it really doesn’t matter here. I don’t even “activate” my active dry yeast so as long as the water isn’t very hot, the temperature doesn’t really matter.
- Yeast: this recipe works with both active dry yeast and instant yeast. I follow the same process for both, I don’t even activate my active dry yeast, I just add it in with all of the ingredients and let it rest overnight.
- You’ll notice that for 5 cups (600g) of flour, I only have ½ tsp of yeast. That’s because when you let something rise for a long time, you don’t need nearly as much. The more you add, the quicker it will rise but it will lack structure and flavor.
- Fat: I initially made this bread without fat, just water, salt, yeast and flour. However, after I tried that bread at the Italian restaurant, the crumb was so tender I knew they had to have some fat added to the dough. I prefer butter, but avocado or olive oil work just as well. The photos are made with olive oil so you can see the inside is a bit spongier and darker in color than it would be with butter.
TIP: I HIGHLY recommend using a digital scale, as dry ingredients are almost always over measured.
What Kind of Yeast to Use
The recipe is written using active dry yeast because that’s what I had on hand but if you want to substitute it for instant yeast, just follow the same instructions.
Unlike instant yeast, active dry yeast usually needs to be activated by combining the warm water with the yeast in a large cup, mixing it and letting it rest for 10 minutes. The water should develop a thick layer of foam on top. I skipped this. I saw someone use active dry yeast without activating it first so I tried it and it worked.
I believe activating it let’s you know that the yeast is good and it would make it rise quicker in a recipe that is used right away but because this is rising overnight, I just mixed everything in a bowl together at the same time, like you would for instant yeast.
PRO TIP: If you’re wanting to make this recipe quick and no as an overnight, you can. I recommend using 1 packet or 7 grams/2 1/4 tsp of instant yeast instead and allow it to rise just enough to double in size, this should take only 1-2 hours as opposed to overnight. You are loosing a little bit of flavor here but it works great still.
How To Make Italian Bread
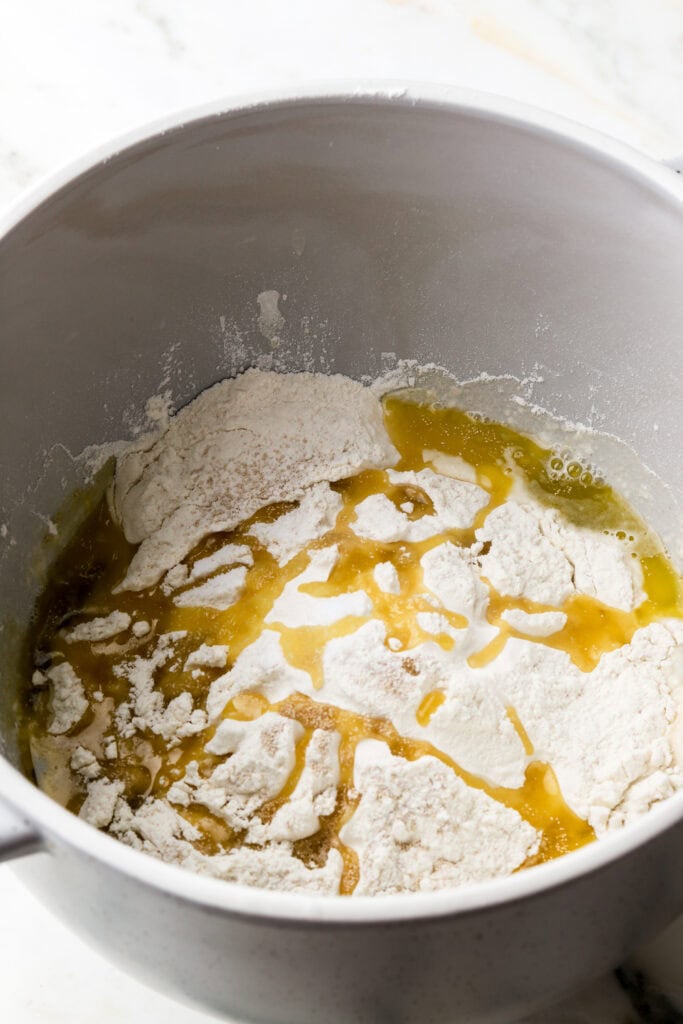
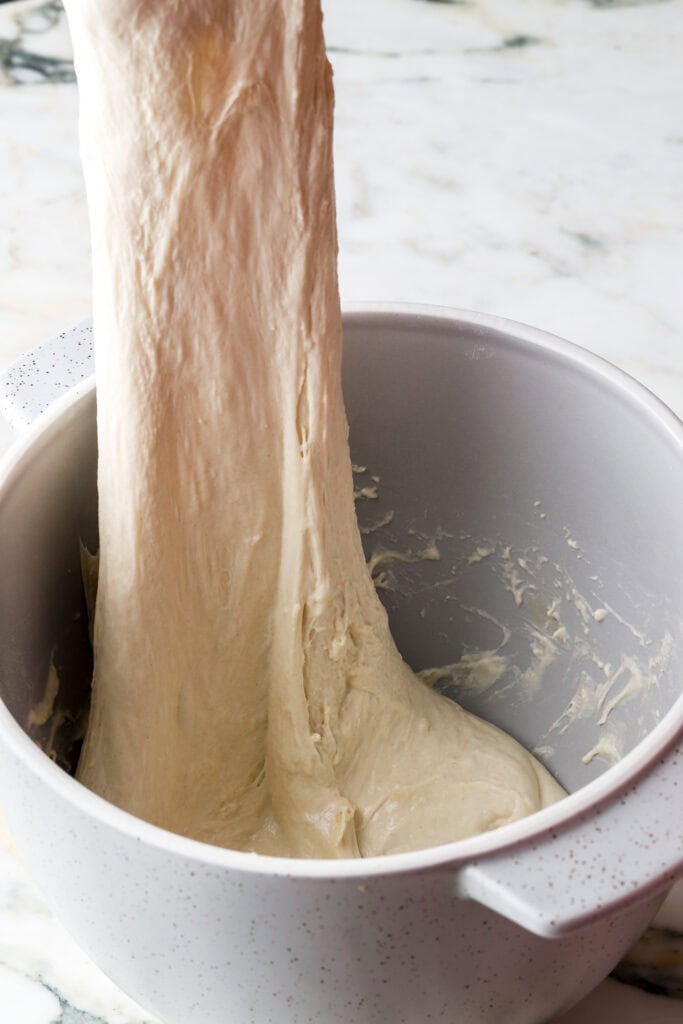
- Start by adding all the ingredients to a large bowl. I use the bowl of my stand mixer.
- Use the hook attachment or just a wooden spoon to mix the dough until the flour is hydrated. The dough will be very shaggy. Cover and let it rest for about 30 minutes.
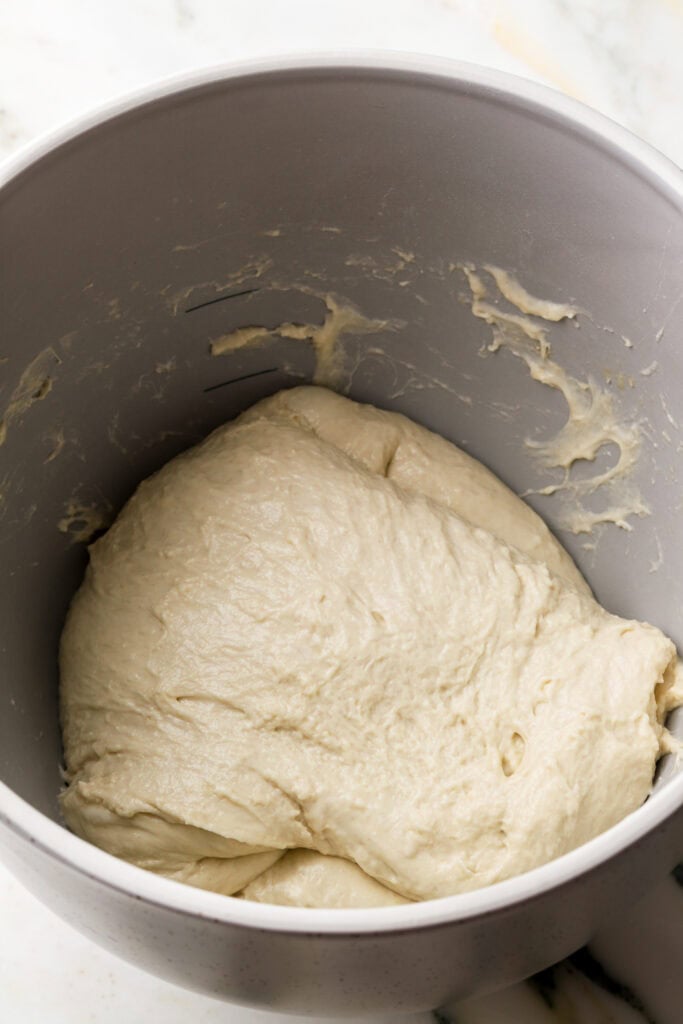
- To do the stretch and folds, I wet my hand with cold water and then stretch the dough out as far as you can without it tearing, and fold it over itself. Turn the bowl 90 degrees and repeat for four folds (like around the clock).
- Allow the dough to rest for another 30ish minutes and repeat with another set of folds. Cover the bowl and allow it to rest overnight or for at least 8 hours. I usually do 10-12 hours.
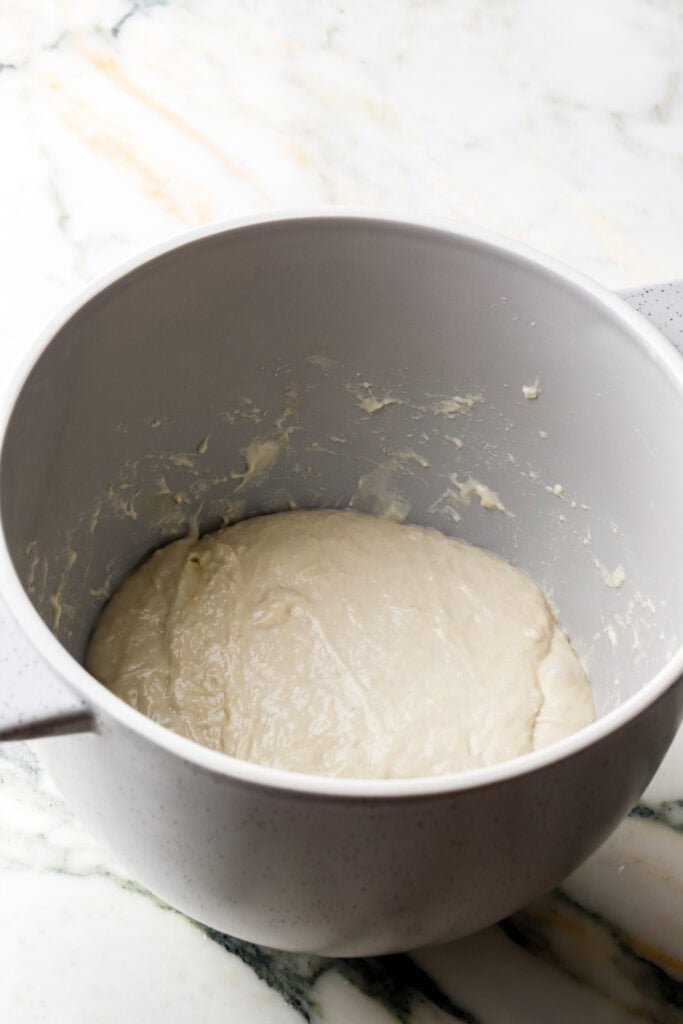
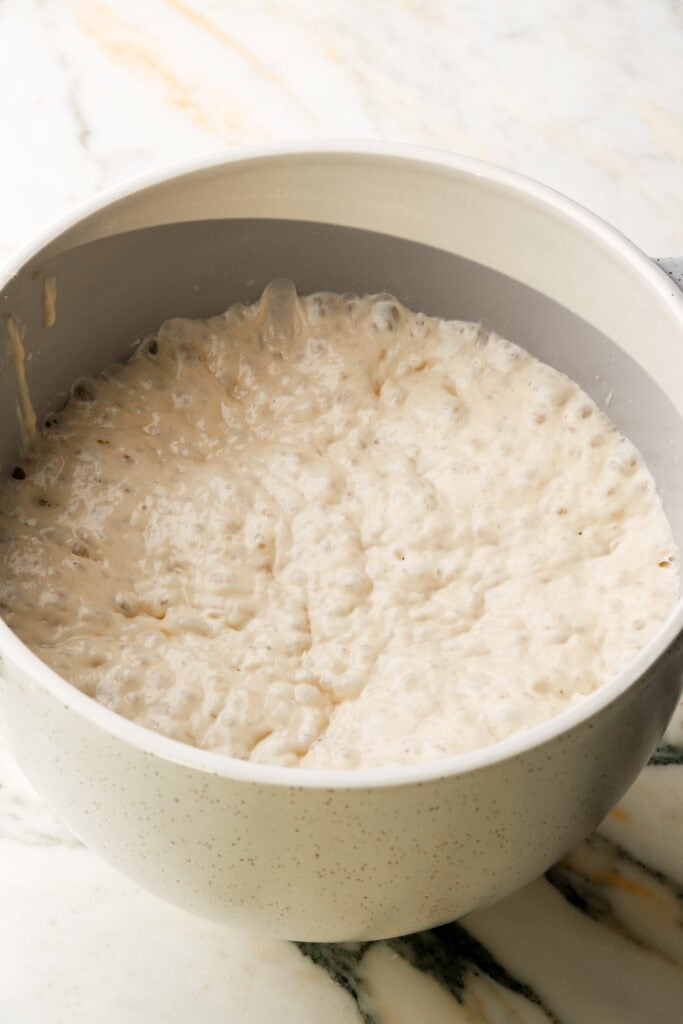
- After the long rest, the dough should look very bubbly like it does below.
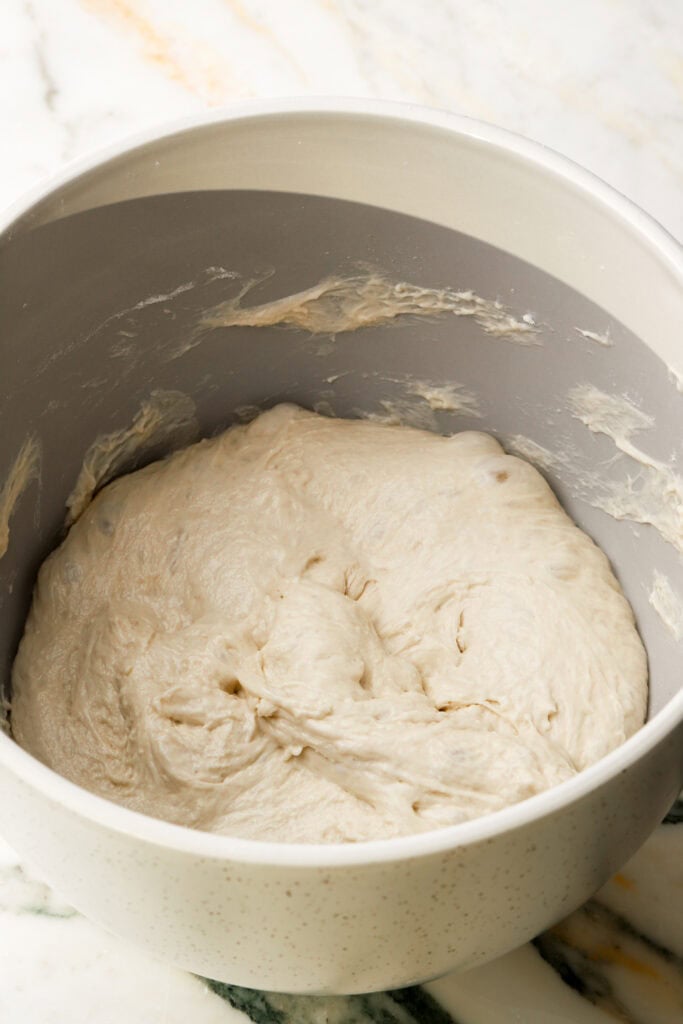
- Stretch the dough away from the edges of the bowl (but don’t punch out all the air).
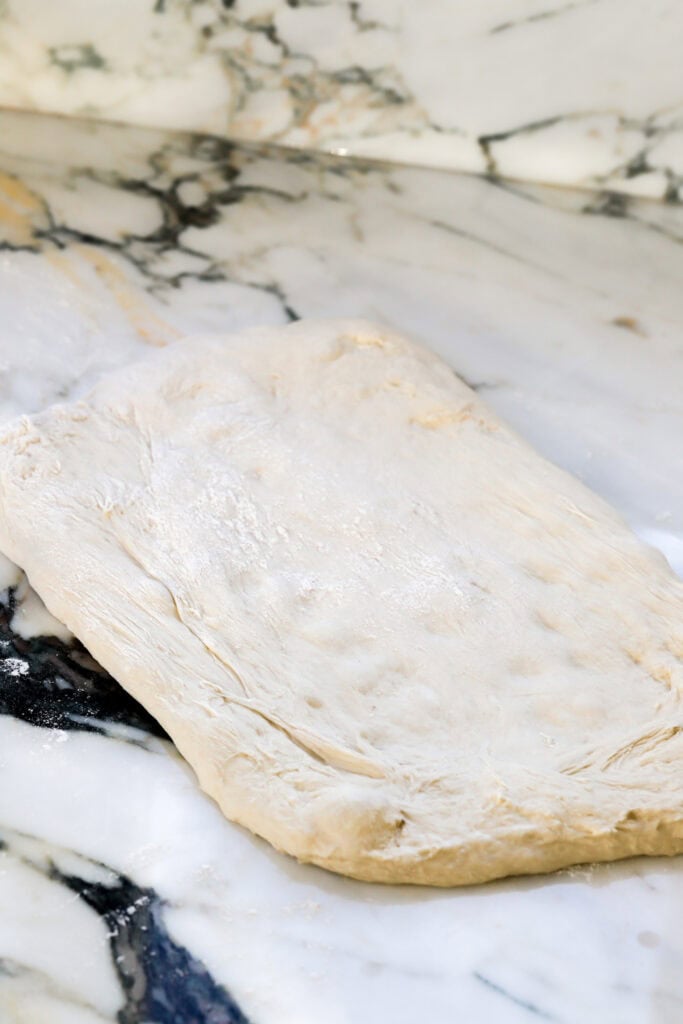
- Dump the dough out onto a lightly floured surface and shape it into a rectangle. Don’t roll it out with a rolling pin, just stretch it out a bit with your hands.
- Fold the dough into thirds, like a letter going into an envelope.
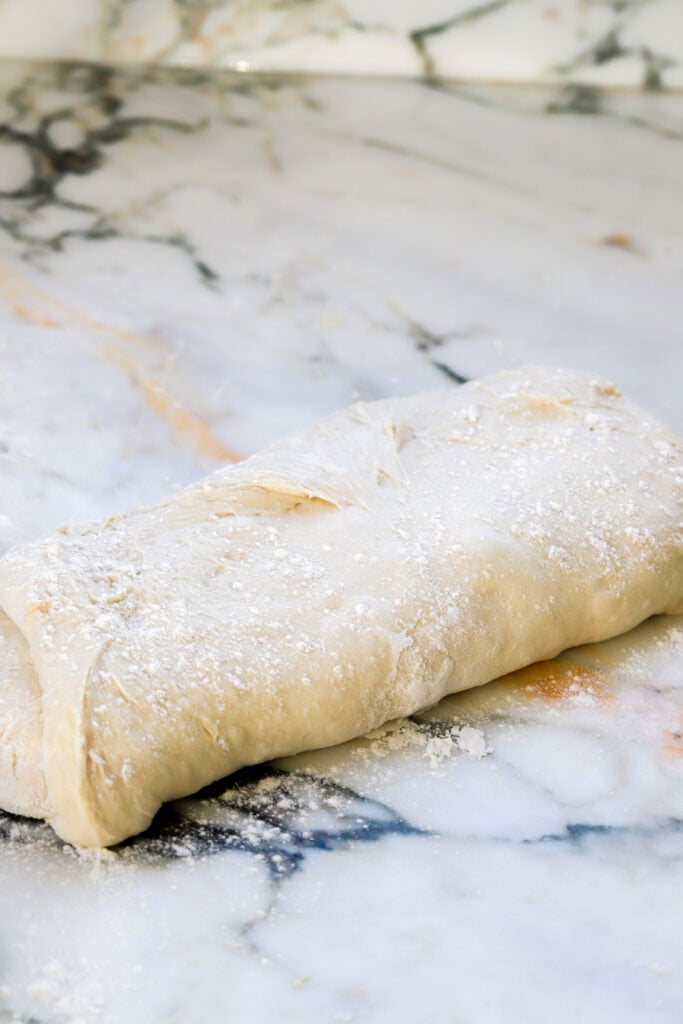
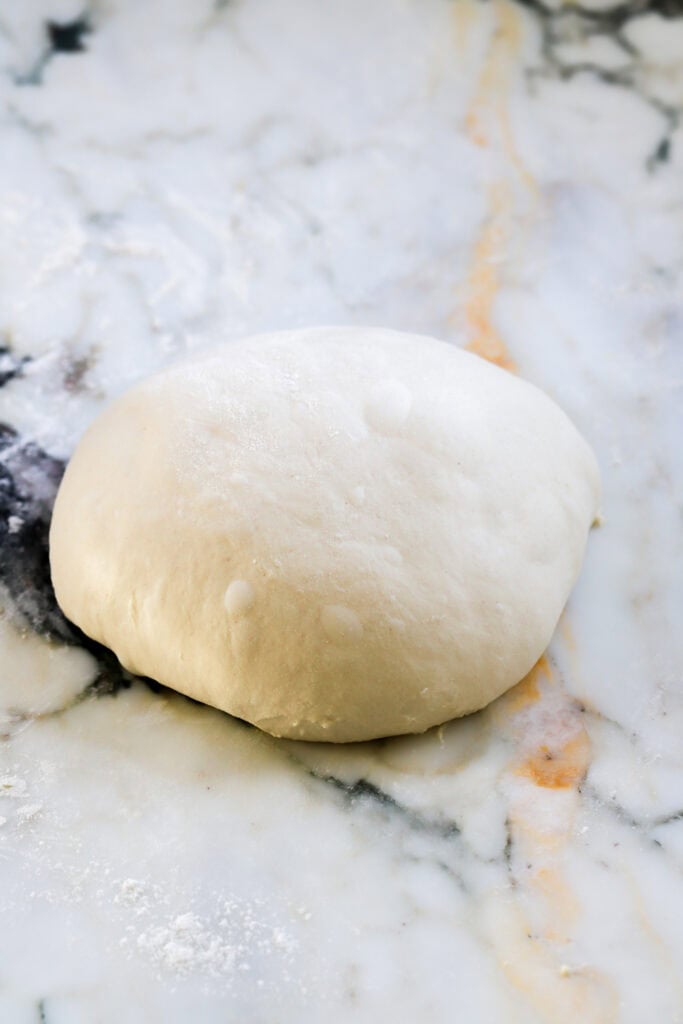
- Now starting at a short end, start rolling the dough over itself and it should form a ball(ish) shape with the layers on the side exposed. Press down on those sides to hide the layers and scoot the dough ball around a bit to form a nice ball shape (easier to understand if you watch the video).
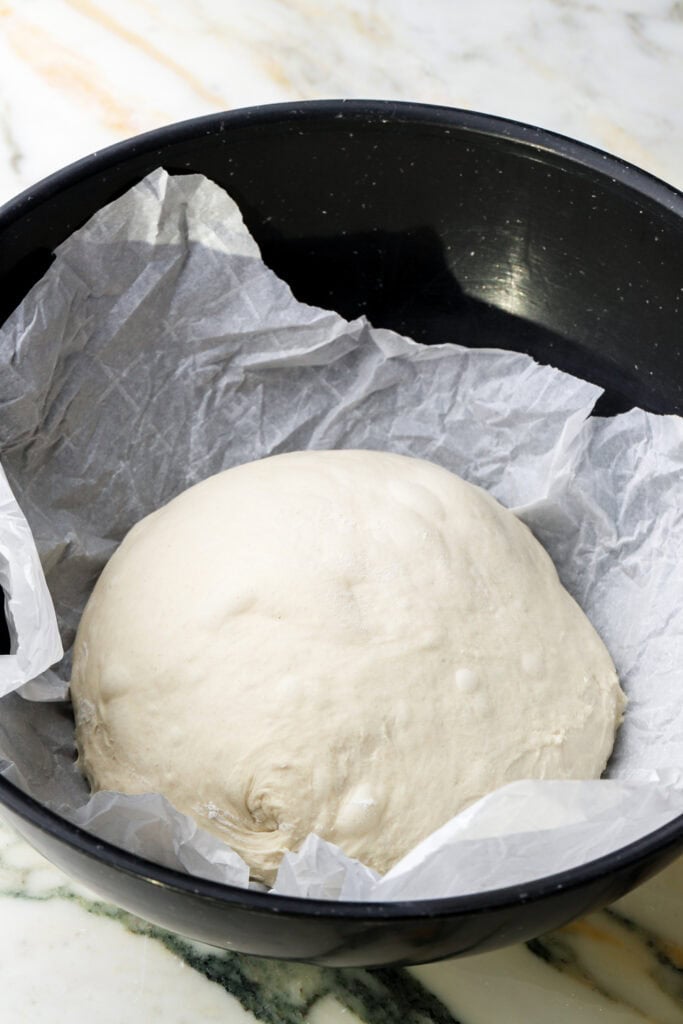
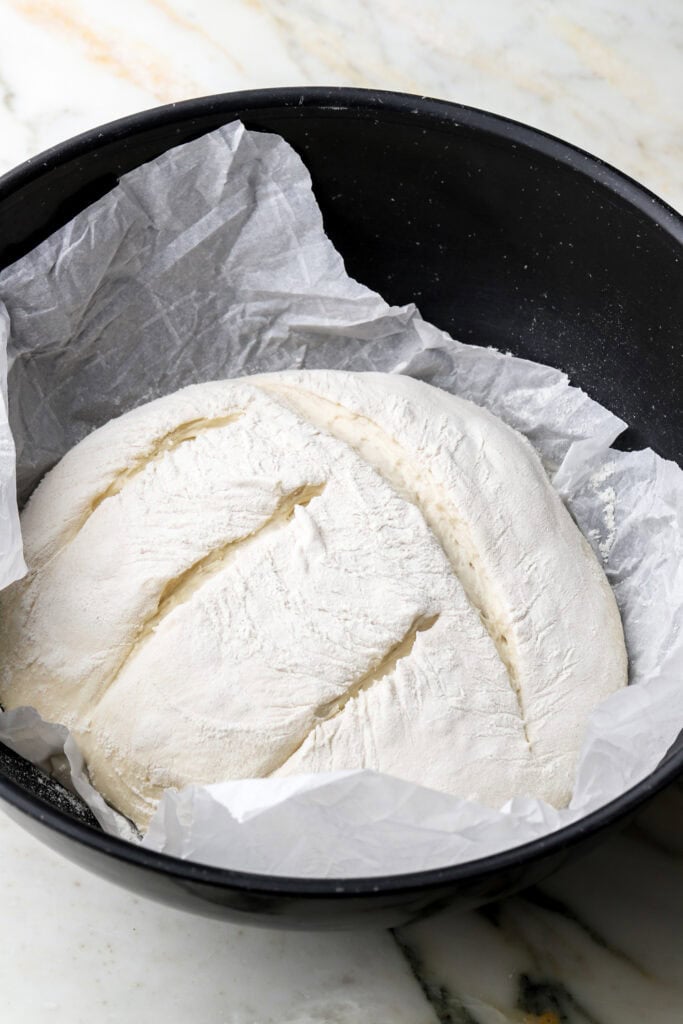
- Place your dough into a bowl lined with parchment paper. I crumble the parchment paper to make it more flexible.
- Cover the dough and allow it to proof in the bowl until it’s doubled in size, about another hour or so in a warm environment.
- Once it’s proofed, carefully score the dough.
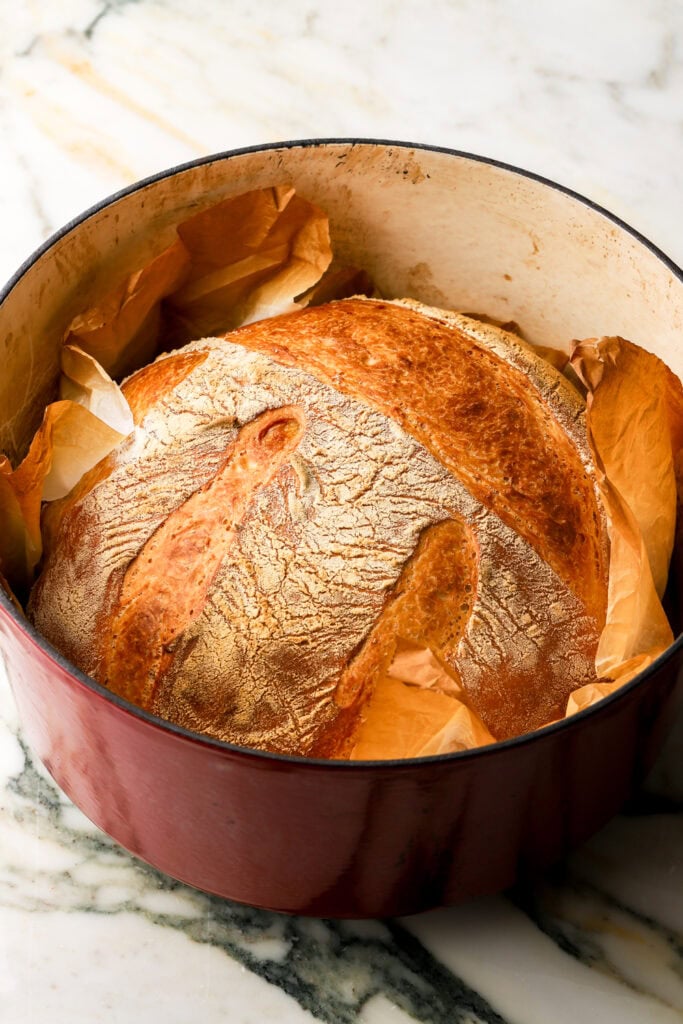
- Preheat the oven WITH the dutch oven in it (or a bread pan). Once it’s preheated, CAREFULLY pick up the parchment paper with the dough and place it into the hot dutch oven.
- Place a few ice cubes around the dough, underneath the parchment paper and bake with the lid on for half the time and the lid off for the second half of the time.

Stretch and Folds vs. Kneading
If you’re at all familiar with sourdough, you’ll likely know what this is lol. But basically instead of kneading, we will stretch the dough out and fold it over itself to develop the gluten a little.
The stretching will help the gluten build strength to give it structure so you get a nice big oven spring.
It’s just a lot less time consuming than kneading and I feel like it gives it such a nice structure without over-developing the gluten. So it’s sturdy enough to trap the gas, giving it that nice big oven spring but not too strong that it’ll give your jaw an exercise.
You’ll start by just grabbing one side of the dough, stretch it out as far as it goes without tearing and then fold it over top of the rest of the dough. Do that four times, turning the bowl 90 degrees each time so every side of the dough is stretched. See the video above for a better reference.
Let it rest for 30ish minutes and then repeat this again.
Since the dough is quite sticky at this point, run your hands under cold water between every stretch. This will prevent the dough from sticking to your hand as much.
What Temperature To Proof Dough At?
You want to make sure your dough is proofing at a comfortable temperature. I prefer room temperature because it’s been rising for so long, so try to keep it somewhere around 75F (24C).
The dough can also be proofed in the refrigerator. This is called a retarding proof because it really slows down the process. The benefit of this is that you can just pop the dough in the fridge for a longer period of time and the dough will develop a stronger flavor if it rises for longer. I would do at least 18 hours, and up to 72 hours, if you’re going to refrigerate it overnight though.
You can refrigerate the dough overnight for the first proof but then shape it and bring it back to room temperature before baking.
Rising and Proofing The Dough
Rising and proofing are typically used interchangeably but the initial ‘resting time’ is actually the ‘rising’ and the second ‘resting time’ is the ‘proofing’. The time needed for rising/proofing is dependent on the recipe and the environment.
Typically with instant yeast, a lot of recipes allow you to skip the first rise and just let the dough relax for just 10-30 minutes instead, before shaping the dough. For this bread, you will need to let it rise and proof fully. The initial overnight rise is what builds structure and flavor so don’t skip it.
A general guideline for proofing and rising is that the dough should double in size each time. It should also slowly spring back when you press on it, but also leave a small indent. This is not the case here. The initial overnight rise will cause the dough to get really loose and bubbly and jiggly, there’s no poking and springing back happening here lol.
But for the second proof, that is kind of what you’re looking for, however it won’t exactly double in size.
Before going into the oven, the dough should be tight enough to slowly spring back when you press on it. If it springs back quickly, then it needs more time to rise. If it doesn’t spring back at all and is quite flimsy, it is likely over-proofed and may result in a flat, deflated bread that’s a little more dense.
Shaping The Loaf
Again, she’s a sticky dough so when handling, you’ll want to use flour on the work surface and your hands.
After it rises overnight, the dough will still be loose, however the gluten will have developed enough to hold itself together. You may get a little sticking to your fingers so flour your hands as well but overall, it should be able to be handled if you work quickly.
Dump the dough onto a floured surface. Flour your hands and dust some more flour onto the dough. Lightly stretch it out into a rectangle. No need to roll it out thin or stretch it far, just try to get a rectangle going like in the photos. Then fold the top ⅓ down and then the bottom ⅓ on top of the top ⅓, like a letter that goes into an envelope.
Then start at a short end and roll it up. You’ll have the layers on the side exposed so you’ll try to roll the ball of dough back and forth a little to close up the exposed layers. Watch the video above because it’s hard to explain lol.
How To Bake
My oven runs super hot on the bottom so besides pie, I pretty much bake everything on convection (which means the fan is circulating the heat around). I bake this bread at 450F (232C) in a dutch oven, for about 15 minutes with the lid on and then another 20ish minutes with the lid off.
Most home ovens will adjust your temperature to 425F if you preheat it to 450F convection but my oven thermometer is reading 450F when I set it to 450F convection so make sure to get an oven thermometer for best results. Either way, 425f-450f should work fine, feel free to just test it out in your oven both ways.
The internal temperature of the bread should be at least 195F (90C) but mine is usually around 200F (93C).
Don’t go based on the color on the top because it can be done quicker before it darkens in color. I like the darker color so sometimes I leave it in there just a smidge longer or take the lid off sooner. Also don’t bother sticking a knife in there cuz that won’t do anything with dough.
If it’s fully baked, the bread should feel light when you pick it up though – kind of hollow.
My Favorite Ways To Serve
Italian Bread
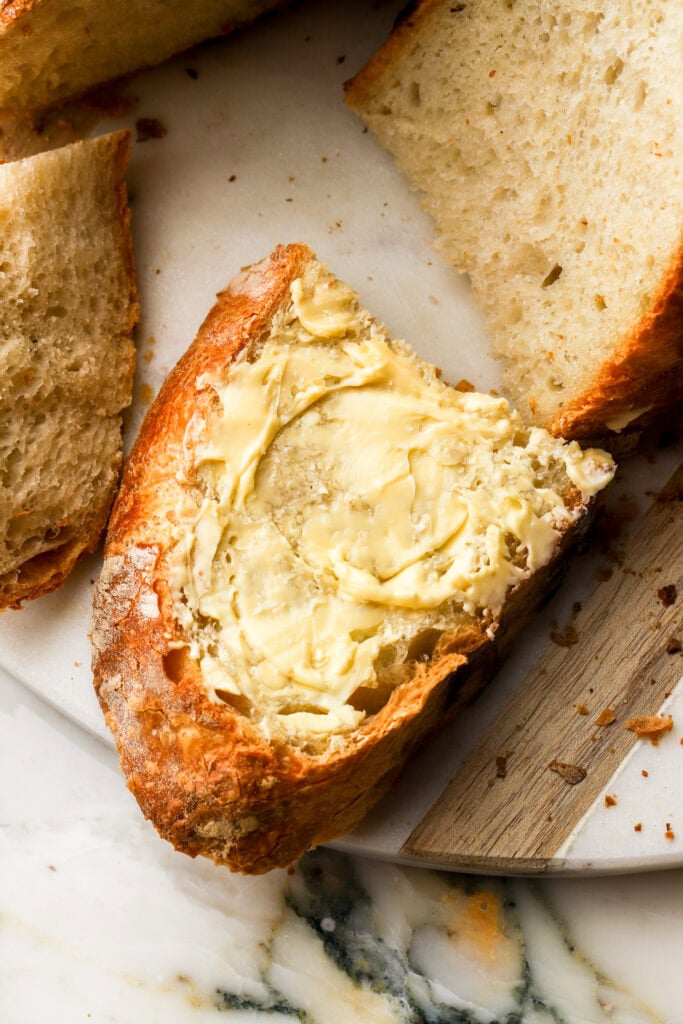
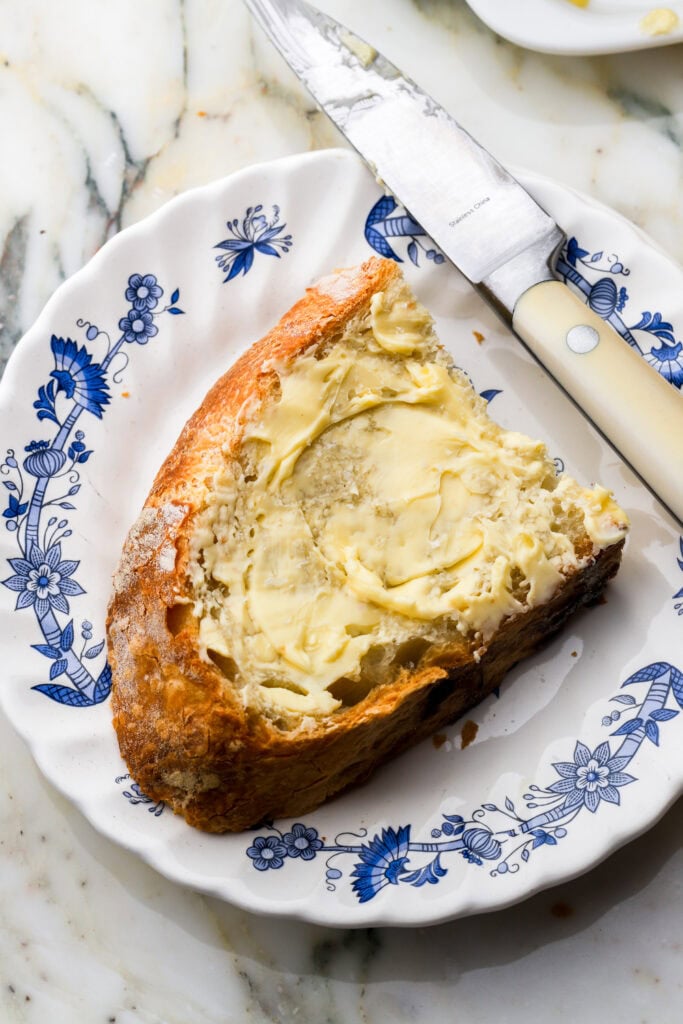
- My personal favorite way to eat any bread is warm with European butter and flakey sea salt. I could literally live off that alone.
- I’ve also used this bread to make the absolute best sandwiches and I love it for avocado toast! It’s slightly softer than your average loaf of sourdough so I do toast it for sandwiches.
- It’s lovely as a side to almost any dish because it’s great for soaking up things like dips, egg yolks or soups/stews. My favorite is to scoop up my Tocanita with it and use it to wipe all the sauce off the edge of the bowl.
How To Slice So It Doesn’t Squish
Although warm bread is sooooo delicious, it’s important to let your bread cool at least 75% before slicing. Letting it cool all the way will make the bread the fluffiest it can be.
If you slice it while it’s hot, it can become a little gummy.
I didn’t know this for a long time so I assume a lot of people don’t but there is a way to slice bread so it doesn’t squish down.
Once it’s cooled, slice the bread in half using a serrated knife. Then place the open side face down on the board and slice through the crust. Doing it this way doesn’t smush the crumb together.
Storing
Any bread is always best fresh because there’s nothing like a warm slice of bread with butter. However, this bread does keep really well!
I leave it on the counter in a ziplock bag for 4ish days (it never lasts that long though) or refrigerate it for up to a week or freeze it for longer.
If it’s from the fridge I usually microwave it for 10 seconds for the kids or toast it for myself.
If it dries out at all, just toast it and spread some butter or avocados on top and it’s good to go.
If you’ve made it this far, I apologize for the length but I hope this post is helpful to make the best crusty Italian bread at home!
If you love this bread as much as we do, I would appreciate it if you left me a review or a 5-star rating or a review below.
As always, have a blessed day and happy baking!
Love, B


Thank you for sharing this recipe! I made it yesterday but messed something up and my bread turned out flat, light, and gluey. My fault, I think the water was too cold and initial rise not enough before the fridge. Today I am trying again. Dough looks and feels more like it should and every step I feel like I am better at it the second time lol. I did the initial 2 rises for about an hour each, then overnight in the fridge for about 20 hours. I just took it out and let it rest at room temp a bit before shaping and am now waiting on the last rise to bake it. I noticed in your instructions with the pictures you say 450 degrees- the recipe card says 425. I did 425 yesterday and will try 450 today! Hoping for a better result.
Hi Hilary! Thank you for trying my recipe, I hope it turned out better this time!
I bake it on convection and a traditional oven, when set to convection, reduces the heat automatically by 25 degrees. However my oven doesn’t so I set mine directly at 425f.
So if you have a traditional oven, it should work well when set to 450 convection but if you have an internal oven thermometer, it should read 425f. Lol it’s confusing but either temp should work fine anyway 🤣
Thank you so much! I just took the lid off and it already looks soo much better than yesterday! I am new to bread baking but have tried a bunch of failed recipes over the years. I am planning on trying yours everyday this week to see if I can get more consistent!
Aww hahah well you’ll get there!! Lmk if you have anymore questions 🙂
At first I was concerned about only using a half a teaspoon of yeast, but the loaf is delicious and just about perfect. I think the issue is on my end, the crumb is a little moist. Should I let it proof a little longer? Or do I need to bake it a little longer?
Hi Gina, if it’s a really tight crumb, then probably yeah let it proof longer but if it’s just a little gummy/wet then just bake it longer.
Thank you. I’m new to bread baking. Sounds like I need to do both! 🙂
What size dutch oven do you use? I have 3.5 quarts or 2 quarts. .
Hi Tanya, a standard is 4.5qt, that’s what I have. I’m not sure if it’ll fit in the 3.5 but you could use both and separate the dough lol
I’m excited to try! How would you recommend baking if I don’t have a dutch oven? I do have a pizza stone and a pizza steel.
You can just bake it on the pizza stone but it will probably just bake a little flatter and wider
I made this full for the first time today I’m a beginner bread baker and found this recipe easy and the bread is delicious. The crust is perfect. I’m wondering if I could cut the dough in half and bake as long rolls. Like long sub rolls
Hi! So glad you liked the bread. I haven’t tried it but I don’t see why it wouldn’t work. My only concern would be that it may be a little sticky/messy to shape
Anxious to try making this bread thank you for the recipe
I just made it last night! 🙌🏼
How could I turn this into sandwich rolls?
Hi Jan, I haven’t tried that with this type of bread but if you do, let us know!
I’ve been making lean, no-knead bread and the bottom crust could chip a tooth. I’m hoping that adding some fat from your recipe will soften it. I just started the overnight rise, so I’ll know in a few hours. But, it looks promising so far.
This is bizarre! My comment dated Aug 2, 2025 was actually my first comment made on Jun 10, but disappeared when I submitted. It reappeared. I have no explanation. In any case, the recipe is flawless. I’ve made it into boules and French loaves. Shared with friends and family. Everyone loves it!
Hi Michael, I’ve been getting my website redone this summer so maybe there was some issue with the actual site and staging site when it came to the comments! Glad you like the recipe though, thank you for the review!
I love this bread it’s my favorite! I was wondering if after the final rise in the morning if you could cut it into smaller balls to make rolls and how long it’d bake for.
Hi Jessica, thank you so much I’m so glad you like the recipe!
I haven’t tried that but there’s no reason it wouldn’t work. If you’re referring to dinner rolls, they usually have a little added fat to them to make them softer.
Thank you for sharing this recipe! I baked my first italian bread, and came out so good!
OMG! That pretty much says it all. I’ll be doing this again tomorrow…because the first loaf will be gone in about 10 more minutes. So easy! So good!
Oh thank you so much, so happy you like it!:)
Can I use a cast iron pot that is 10 inches in diameter and 3 inches high
not including the lid
You could, if the lid doesn’t fit, you could just bake it without a lid and if it gets too brown, cover with foil for part of the time
There will be less steam so you may end up with a slightly wider and shorter loaf
Hi Jessica, try just 3-4 ice cubes and remove the lid sooner and that should give it more time to brown.
My dough wasn’t sticky like in your video. Will it still work?
Hi Crystal, I can’t really say without seeing it but I would still try baking it and see how it turns out! I would assume it would be a little more dry but still good to eat.
You let room temp rise for 8 hours then overnight in fridge.? (Another 8 hours in fridge?). Sounds good to me- just making sure I’m following- thanks!
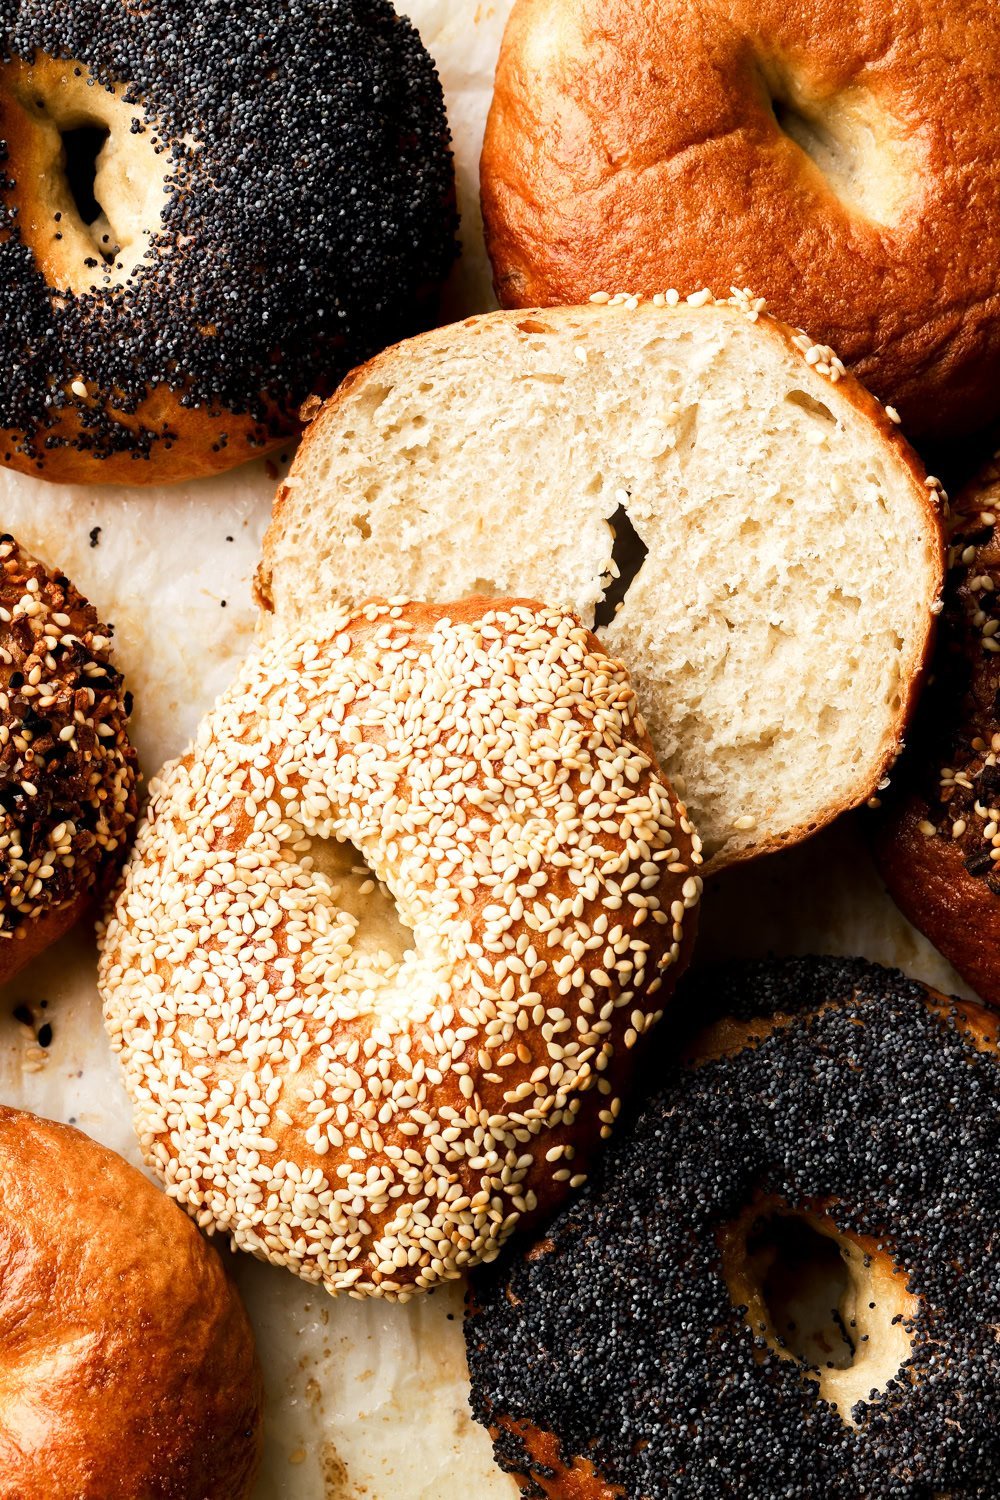
Followed directions to the letter – perfection! Used a mixture of bread flour and all-purpose flour. Was thinking of making again with an egg wash and sesame seeds – what do you think?
Many thanks for this – I am a fan!
It should work just fine! Glad you liked the recipe 🙂
Best recipe!! I have tried many ?
Fabulous. So much better than the un-enriched doughs I’ve been making in a similar way. I used olive oil and let it rise room temp for about 8 hours then put it in the refrigerator. I let it rest for 30 minutes in the morning then shaped and baked. Thank you thank you!
You let room temp rise for 8 hours then overnight in fridge.? (Another 8 hours in fridge?). Sounds good to me- just making sure I’m following- thanks!
Wait, is that correct? 8 hours at room temperature then overnight in refrigerator? I thought I read it as overnight at room temperature. I’m new at this and just doing my first 60 minute rest now. Thanks
Don’t you need to dissolve the active dry yeast in
warm water before it gets mixed into dough? Or is that initial step not needed in this recipe?
That is only necessary to “prove” your yeast is still active. If you know your yeast is good, that step is completely unnecessary. People only do it because it would be a shame to put in all that time and effort, only to discover their yeast is dead.
Hello. Trying to find the video for the bread recipe. Where is it? Thank you. B.
Hi, the video is towards the top of the post, slightly under the table of contents
This is a beautiful recipe. I followed it exactly, appreciating the weight measurements as the way to go, which are more exact, and it turned out a light, airy, crispy, chewy loaf. Just exceptional.
Thank you Robert, I’m so glad you liked it! 🙂