Skip to content
  • Recipes
    • Bread
    • Brownies & Bars
    • Baking Basics
    • Cheesecake
    • Cookies
    • Cupcakes
    • Donuts
    • Drinks
    • Frosting
    • Layer Cakes
    • Muffins
    • No-Bake
    • Pies & Tarts
    • Savory
    • Sheet Cakes
    • Small Batch
    • Snacks
  • Cookbook
  • About
    • Meet Bernice
  • Contact
  • Ingredient Guide
  • Recipes
    • Bread
    • Brownies & Bars
    • Baking Basics
    • Cheesecake
    • Cookies
    • Cupcakes
    • Donuts
    • Drinks
    • Frosting
    • Layer Cakes
    • Muffins
    • No-Bake
    • Pies & Tarts
    • Savory
    • Sheet Cakes
    • Small Batch
    • Snacks
  • Cookbook
  • About
    • Meet Bernice
  • Contact
  • Ingredient Guide
slider buns topped with sesame seeds finished baking in baking pan

Recipes

,

Yeasted & Artisan Breads

Homemade Slider Buns (Soft Pull-Apart Rolls)

prep 20 minutes mins
cook 20 minutes mins
4 hours hrs

Homemade slider buns that bake into 12 soft and fluffy pull-apart rolls that are sturdy enough for generous fillings without getting soggy.

Jump to Recipe
rate recipe
Pin Recipe

Homemade Slider Buns (Soft Pull-Apart Rolls)

August 7, 2026

These homemade slider buns are soft and fluffy with just enough structure to hold plenty of filling without turning into a soggy sandwich. 

The recipe makes 12 generously sized pull-apart buns in a 9×13-inch pan, or it can be doubled to make 24 generously sized buns or 36 smaller party buns in an 18×13-inch half-sheet pan.

When I was pregnant with my third baby, I filled our freezer with postpartum meals—including several pans of slider sandwiches for my sandwich-obsessed husband. I used store-bought rolls and made different versions with chicken cutlets, pesto and mozzarella; buffalo chicken; and pizza-style meat sauce. They froze surprisingly well: I thawed each pan, reheated it in the oven, and the sliders tasted freshly made.

We still love all those fillings, but as I’ve started making more of our everyday staples from scratch, the store-bought rolls have been replaced with these homemade slider buns. They bake closely together, so the entire slab can be sliced horizontally and filled without ingredients falling through large gaps between the buns.
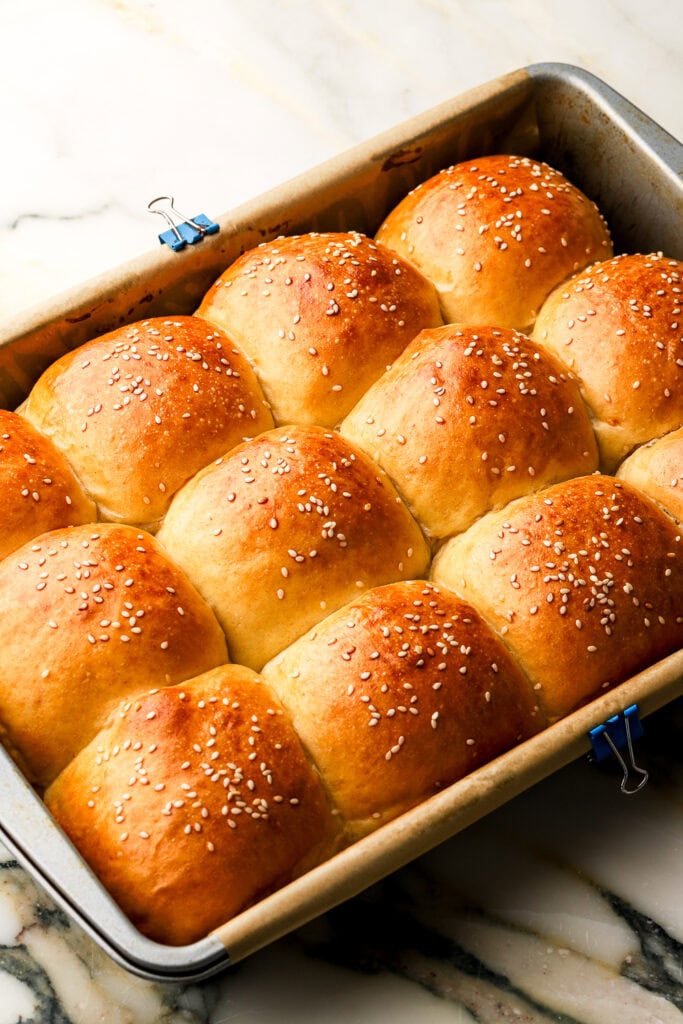
Table of Contents
  • Ingredient Notes & Substitutions
  • Let's Make 'Em
  • How to Serve Them
  • Storing
  • Slider Buns
slider buns topped with sesame seeds finished baking in baking pan

Ingredient Notes & Substitutions

*The full recipe is in the recipe box at the bottom! 

  • Bread flour: Bread flour gives the buns a little more structure because of its higher protein content, but this recipe also works well with all-purpose flour.
  • Water: Use lukewarm water. It should feel slightly warm, not hot.
  • Yeast: I use instant yeast when I have it because it can be mixed directly into the dough. The same amount of active dry yeast also works; dissolve it in the lukewarm water first and let it sit for 5–10 minutes before mixing it with the remaining ingredients.
  • Egg: I use a large egg; room temperature or cold is fine for the dough.
  • Honey: Adds a subtle sweetness and helps the buns stay soft without making them taste noticeably sweet.
  • Butter: I prefer salted, but unsalted butter also works if that’s what you have. Soften the butter to room temperature so it incorporates evenly into the dough.
  • Salt: I prefer sea salt, but any salt is fine.

Let’s Make ‘Em

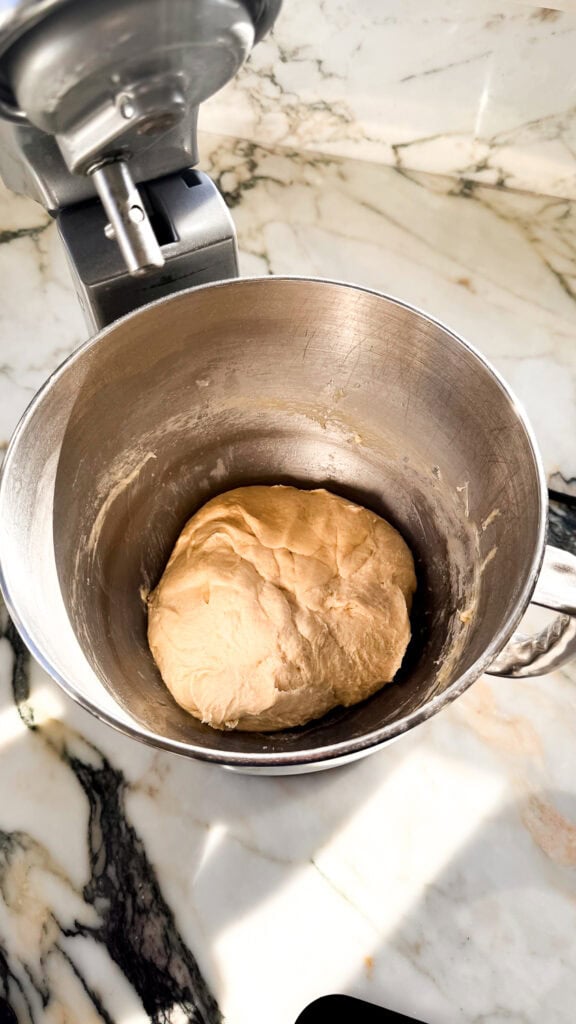
  1. Make the dough: Combine the dry ingredients, then add the water, honey and egg. Mix until mostly combined before adding the softened butter and kneading until the dough is smooth and elastic.
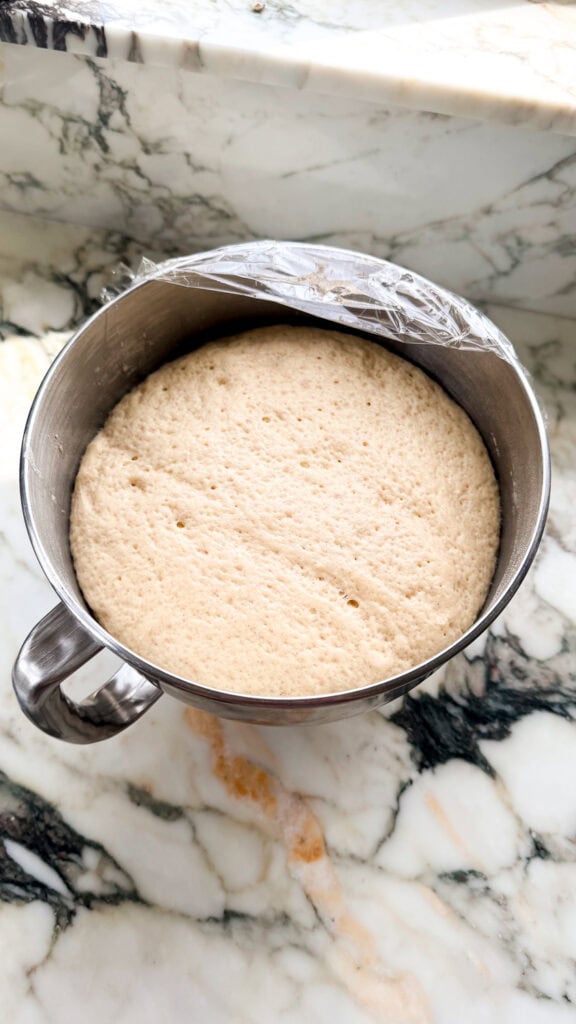
  2. Let it rise: Cover the dough and let it rise until doubled in size.
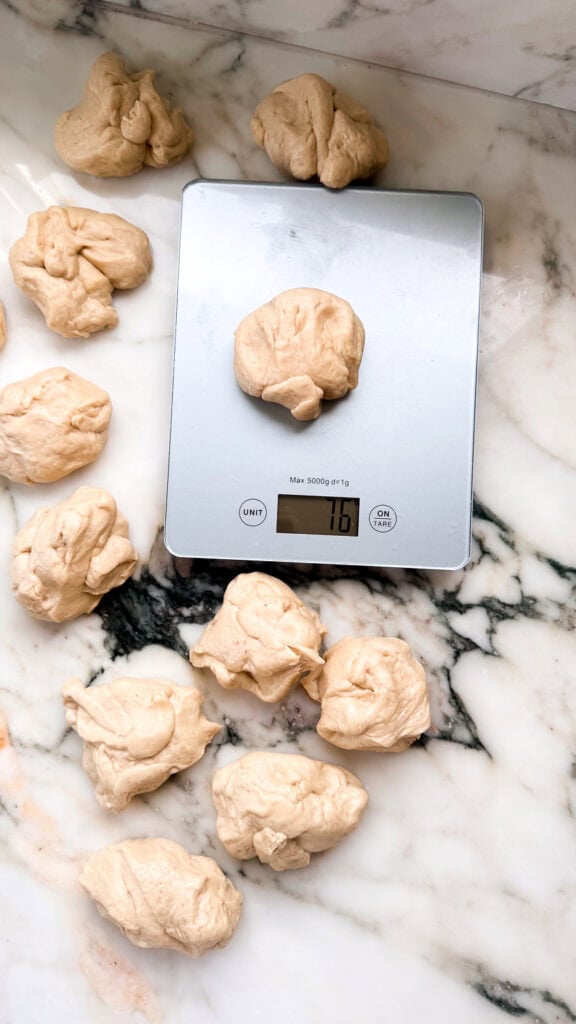
  3. Shape the buns: Divide the dough into 12 equal pieces, about 72 grams each. Shape each piece into a tight ball by cupping your hand around it and dragging it in circles against the counter.
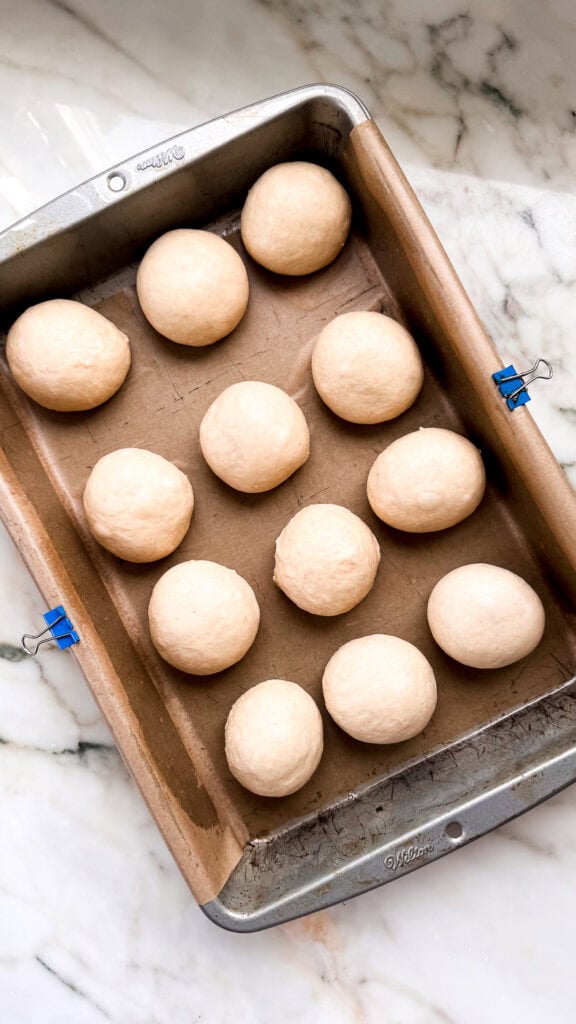
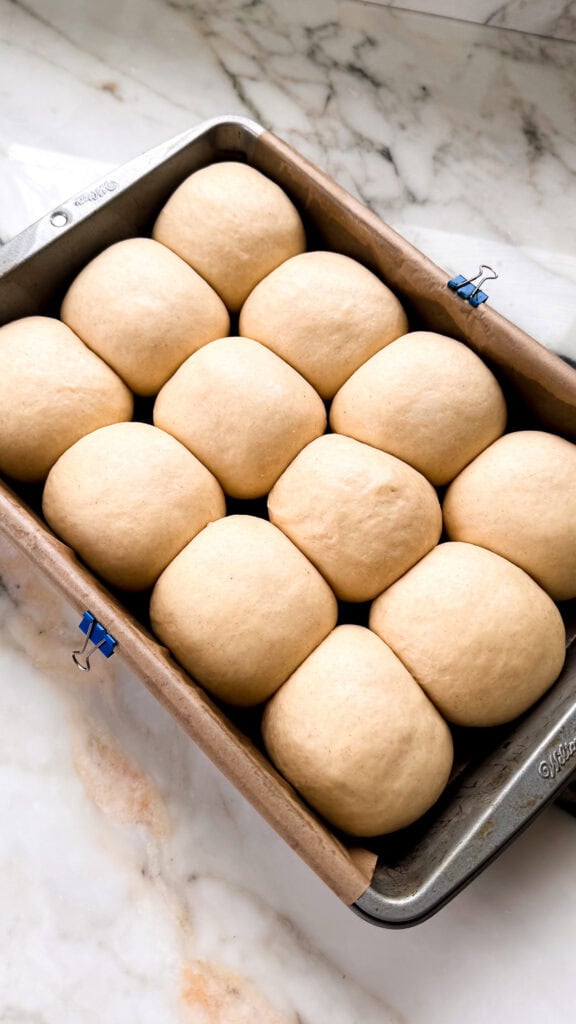
  4. Proof again: Arrange the buns in a 9×13-inch pan with a little space between them. Cover and let them rise until doubled and touching.
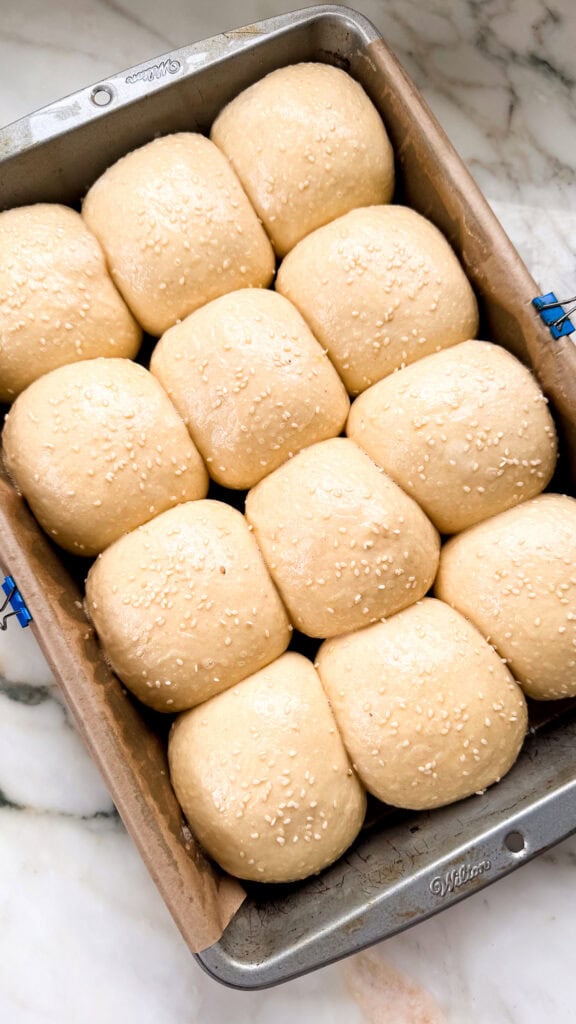
  5. Bake: Brush the buns with egg wash, sprinkle with sesame seeds and bake until golden brown.
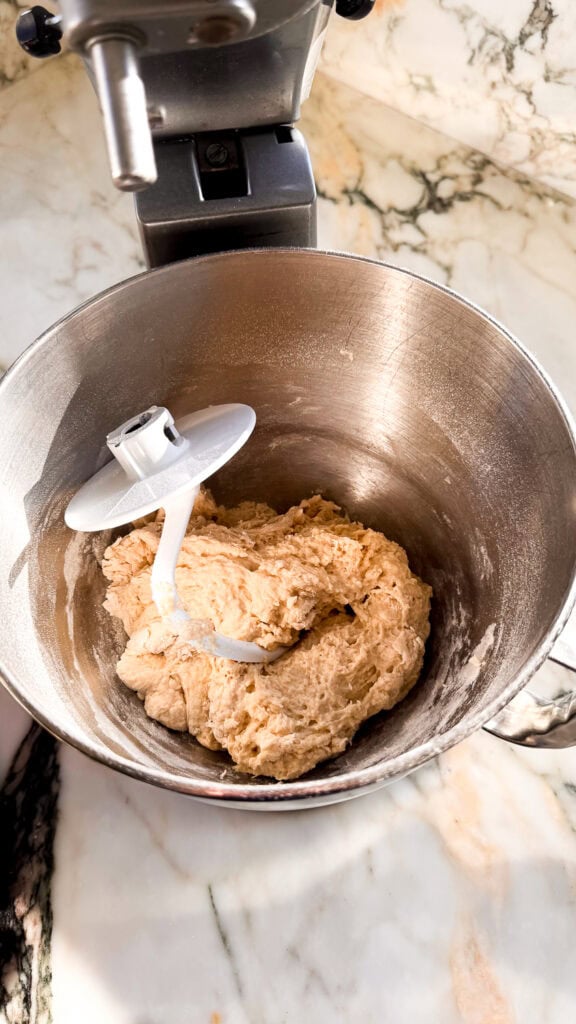
dough before butter is added in a stand mixer bowl with the hook attachment
dough before butter is mixed in
dough after butter is added and done in a stand mixer bowl with the hook attachment
finished dough before first proof
dough after first rise, doubled in size in a stand mixer bowl
dough after first proof
balls of dough getting weighed on a kitchen scale for even sizing
measure out even sized dough balls
rolled dough balls in prepared pan before second proof
roll dough into balls – before second proof, lots of space between them
dough after second proof in prepared pan
dough ball are touching besides the corners after second proof
proofed dough balls brushed with egg wash and topped with sesame seeds before baking
egg wash and sesame seeds before baking
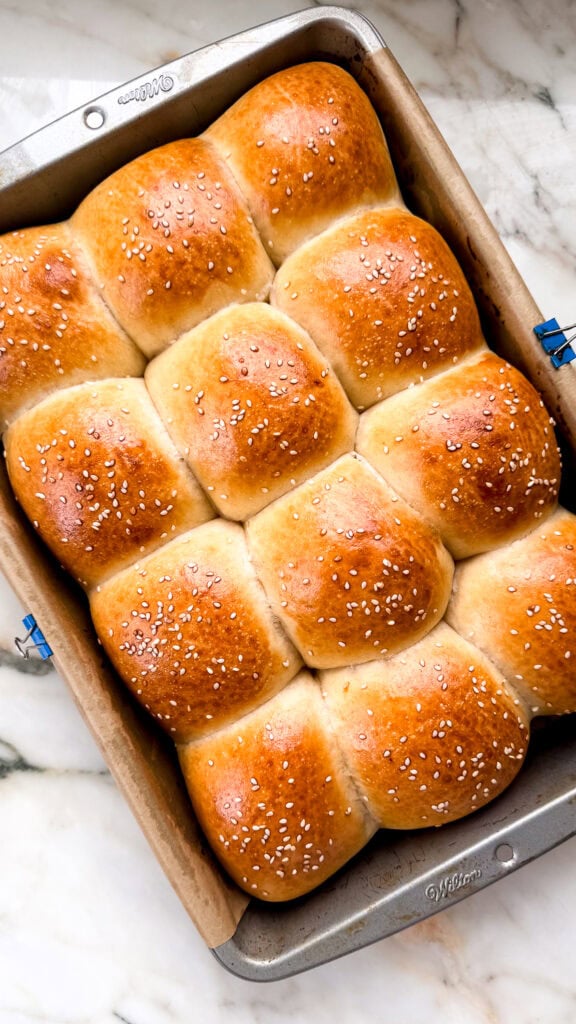
slider buns are finished baking and golden brown in baking pan
slider buns finished baking

How to Serve Them

These buns can be brushed with melted butter after baking and served as dinner rolls or even stuffed with cheese like I did these cheesy garlic dinner rolls (I developed this new version specifically so the buns expand into one connected slab for sandwiches, without gaps between them).

However, our favorite way to use them is for pull-apart slider sandwiches.

Once the buns have cooled, use a long serrated knife to slice the entire slab horizontally without separating the individual rolls. Remove the top slab, layer on the filling and cover the pan with foil. Bake until everything is hot and melted, then replace the top slab during the last few minutes so it warms and lightly toasts without over-browning.

Some of the fillings I’ve made include:

  • Chicken pesto – Breaded chicken cutlets with pesto and fresh mozzarella.
  • Buffalo chicken – Buffalo chicken with plenty of melted cheese.
  • Pizza sliders – Meat sauce, shredded mozzarella and your favorite pizza toppings.
  • Braised beef – Layer my braised beef with Swiss cheese, just like I do with ciabatta bread, then bake until the beef is hot and the cheese has melted.

All of these can be assembled ahead, frozen and reheated for an easy meal (make sure all the meats are fully cooked). 

I simply thaw them in the fridge overnight and then at room temperature for a couple of hours before baking (it may take a little longer than this depending on the fillings). 
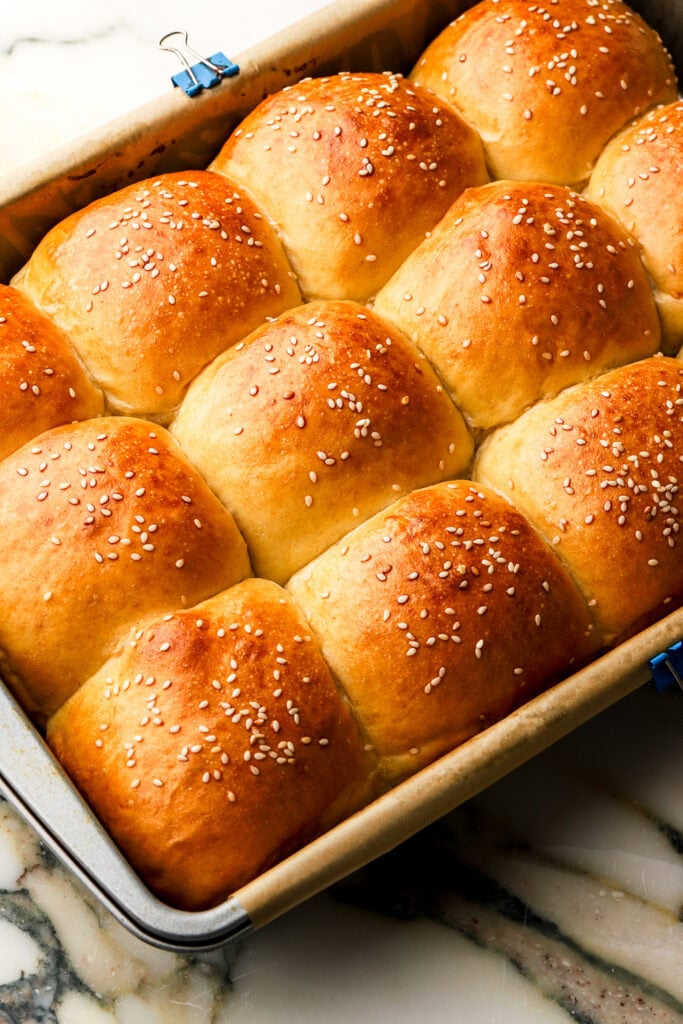
close up of slider buns in pan after baking

Storing

Store leftover buns in an airtight container at room temperature for 2–3 days. You can refrigerate them for longer, but bread does dry out in the fridge.

For longer storage, wrap the cooled buns tightly and freeze them for up to three months. Let them thaw at room temperature before serving or assembling the sliders. 

Thanks so much for reading! If you make these slider buns, I’d love to know what you fill them with. Leave a comment and rating below or tag me @baranbakery on Instagram so I can see them.

As always, have a blessed day and happy baking!

Love, B
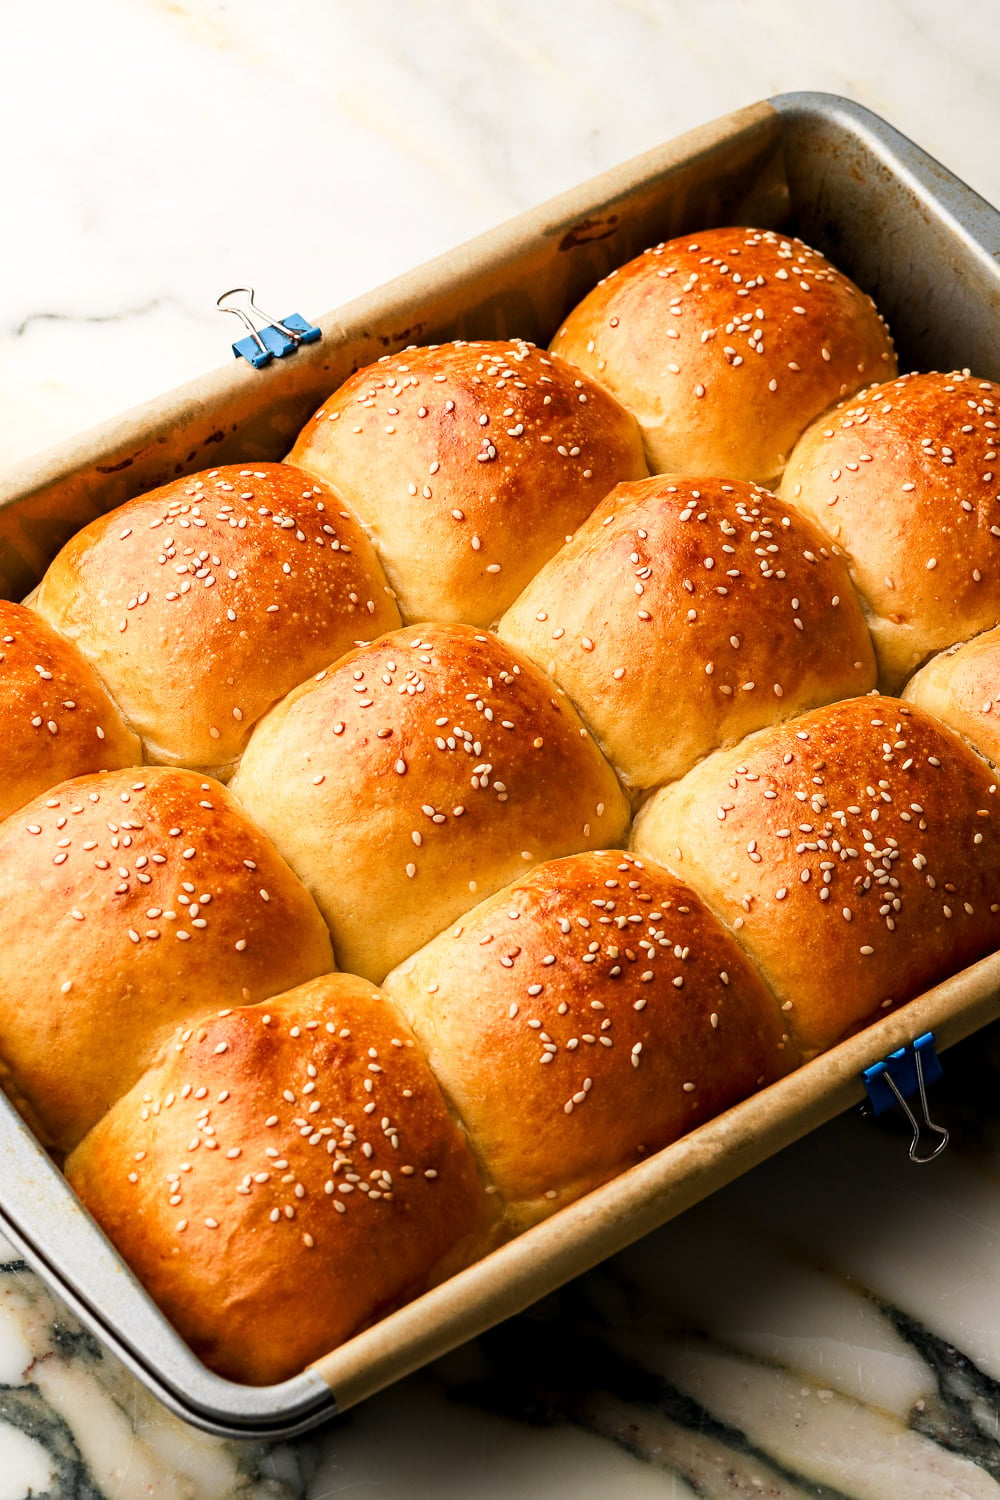
slider buns topped with sesame seeds finished baking in baking pan
Recipes
Yeasted & Artisan Breads

Slider Buns

prep 20 minutes mins
cook 20 minutes mins
4 hours hrs
total 4 hours hrs 40 minutes mins
Serves 12 buns
These homemade slider buns bake into 12 soft, fluffy pull-apart rolls in a 9×13 pan, sturdy enough for generous fillings without getting soggy.
Print Recipe Pin Recipe email recipe
Servings 12 buns
Prevent your screen from going dark

Equipment

  • 1 stand mixer with hook attachment
  • 1 9×13" pan

Ingredients

  • 480 grams bread flour
  • 7 grams yeast
  • 10 grams fine sea salt
  • 240 grams water
  • 20 grams honey
  • 1 large egg
  • 56 grams salted butter, softened
  • 1 egg for egg wash
  • sesame seeds or flakey sea salt for topping

Method

  1. Add the bread flour, instant yeast and salt to the bowl of a stand mixer fitted with the dough hook. Mix briefly to combine. If using active dry yeast, dissolve it in the lukewarm water first and let it rest for 5–10 minutes.
    480 grams bread flour, 7 grams yeast, 10 grams fine sea salt
  2. Add the lukewarm water, honey and egg. Mix on low speed for 1–2 minutes, until the ingredients come together into a rough dough.
    240 grams water, 20 grams honey, 1 large egg
  3. Add the softened butter and continue kneading on medium-low speed for about 10 minutes. The dough may look slippery or separated at first, but the butter will gradually incorporate. Continue kneading until the dough is smooth, elastic and slightly tacky, and pulls away from the sides of the bowl.
    56 grams salted butter softened
  4. Cover the bowl and let the dough rise in a warm place until doubled in size, about 60–90 minutes, depending on the temperature of your kitchen.
  5. Grease or line a 9×13-inch pan. Turn the dough out onto a clean work surface and divide it into 12 equal pieces, about 72 grams each.
    Shape each piece into a tight ball by cupping your hand around it and dragging it in small circles against an unfloured work surface. The friction against the counter will create tension and smooth the surface of the dough.
  6. Arrange the buns in the prepared pan in four rows of three, leaving a little space between them. Cover the pan and let the buns rise again until doubled in size. They should be touching one another, although there may still be a little open space in the corners between each ball of though.
  7. Meanwhile, preheat the oven to 375°F (190°C) and vigorously whisk an egg until it's loose for the egg wash.
    Gently brush the risen buns with egg wash and sprinkle with sesame seeds, if desired.
    1 egg for egg wash , sesame seeds or flakey sea salt for topping
  8. Bake for about 18–22 minutes, until the buns are deeply golden brown. The center buns should register approximately 190°F (88°C) on an instant-read thermometer.
  9. Let the buns cool in the pan for 10–15 minutes before removing them. Serve warm as dinner rolls or allow them to cool completely before slicing the slab horizontally for slider sandwiches.

Notes

This recipe can be doubled to make 24-36 buns in a 13×18″ pan however, the dough will be a bit much for a 5qt. kitchen aid stand mixer so you may have to help knead it by hand a little after it comes together. 

Nutrition

Calories: 195kcalCarbohydrates: 31gProtein: 6gFat: 5gSaturated Fat: 3gPolyunsaturated Fat: 1gMonounsaturated Fat: 1gTrans Fat: 0.2gCholesterol: 37mgSodium: 366mgPotassium: 58mgFiber: 1gSugar: 2gVitamin A: 157IUVitamin C: 0.01mgCalcium: 12mgIron: 1mg
Course: Breads
Cuisine: American
Keyword: brioche buns, slider buns

Hey I’m

Bernice Baran

Welcome to my little corner of the internet where I share with you the sweetest parts of life.

more about me

Let’s Connect

Newest Recipe

  • Homemade Slider Buns (Soft Pull-Apart Rolls)
    Homemade Slider Buns (Soft Pull-Apart Rolls)

Latest on Socials

I just turned around and walked my wet behind back I just turned around and walked my wet behind back to my car and pretended that never happened.
@andreea817 your umbrella has been in my car for a year… idk if you want it back now 👀
.
#dinnerprep #storytime #chickencaesarwrap

Got a Craving?

I Wrote A Cookbook!

learn more

Never Miss A Thing

Loading

You May Also

Love

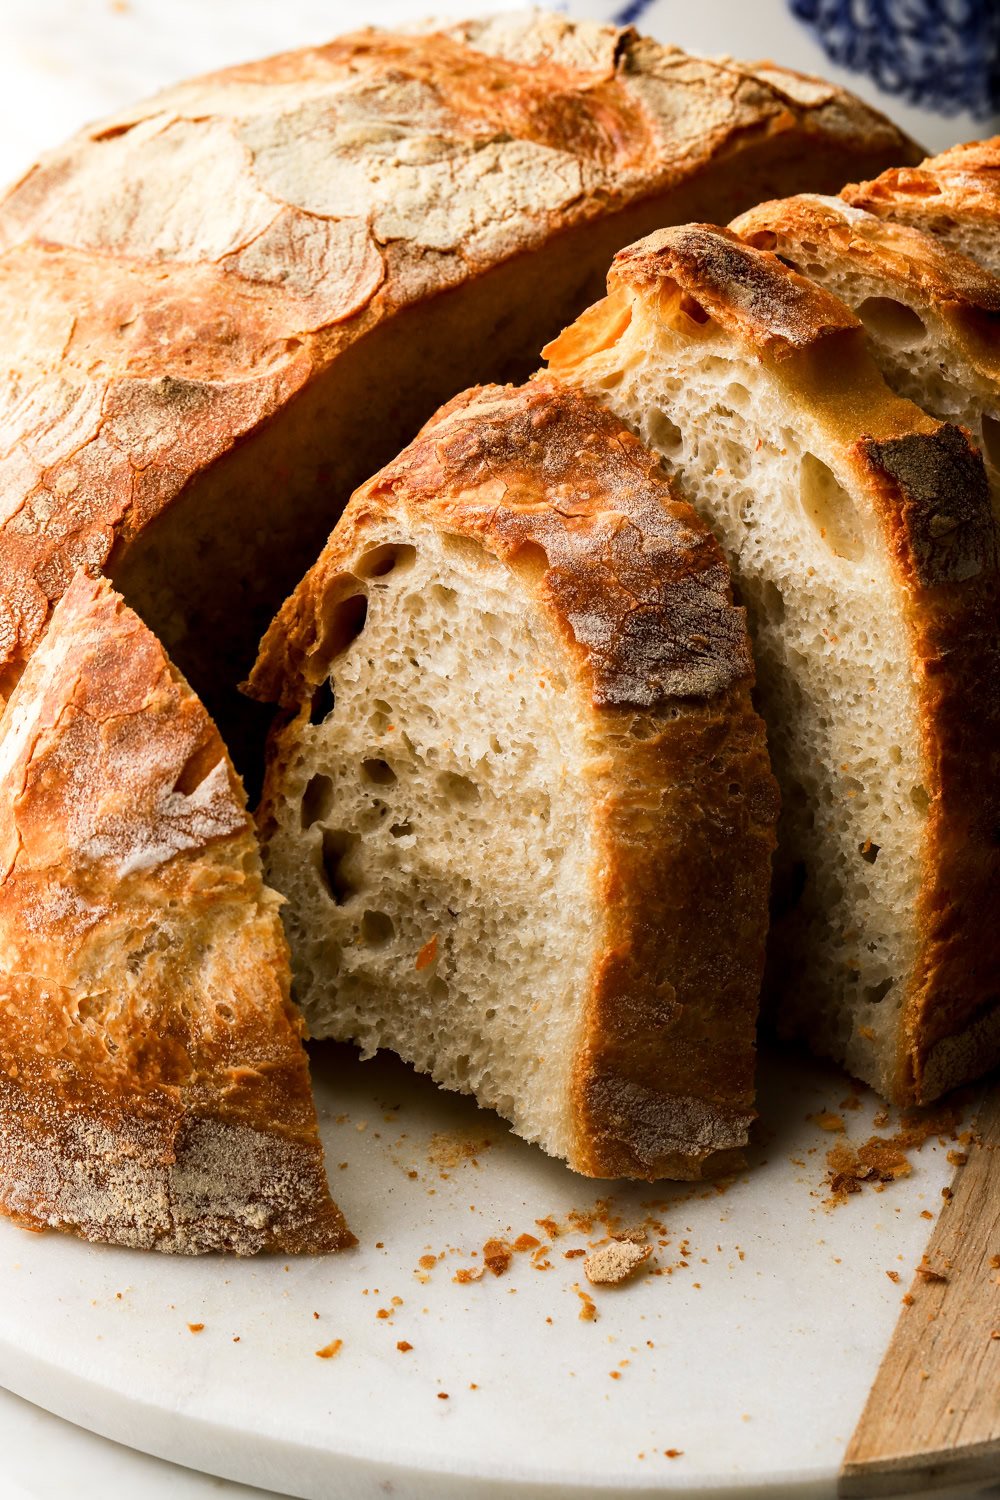
Italian bread sliced on a marble board
Yeasted & Artisan Breads

Easy Overnight Italian Bread

Bread

Homemade Bagels

Yeasted & Artisan Breads

Garlic Butter Dinner Rolls Stuffed With Cheese

gorgeous fluffy ciabatta rolls on a baking sheet - baran bakery
Bread

Quick & Easy Ciabatta Bread

Rate & Review
Cancel reply

Your email address will not be published. Required fields are marked *

What did you think?


Follow Along

@baranbakery
I just turned around and walked my wet behind back I just turned around and walked my wet behind back to my car and pretended that never happened.
@andreea817 your umbrella has been in my car for a year… idk if you want it back now 👀
.
#dinnerprep #storytime #chickencaesarwrap
Not telling you what to do or anything, but my Fre Not telling you what to do or anything, but my French Silk Pie recipe just went up 👀😍

And can someone please tell me how people get perfect bite shots because this pie was fighting me.

Recipe is on BB — link in bio or comment “French silk” and I’ll send it to you :)

Also, I finally linked a bunch of my kitchen/styling things on ShopMy last week, including these plates!
Sure there’s incredible bakery style cookies, but Sure there’s incredible bakery style cookies, but a cookie that comes together in 20 minutes is just as impressive! 🤣
At least V thinks so hahah I dropped a chocolate chip on the floor and she found it 👀
Recipe is on bb, 🔗 is in my bio or comment “easy cookies” and I’ll send it :)
I’m not crying, you’re crying 🥹 Honestly though, w I’m not crying, you’re crying 🥹
Honestly though, where does the time go?! (This is not a rhetorical question, someone tell me lol).

Also both cakes are on my site, 🔗 are in bio or comment “birthday cake” and/or “mini cake” & I’ll send you the links :)
So many of you already love my moms tocăniță recip So many of you already love my moms tocăniță recipe so I posted to my website as well 🫶🏼
🔗 is in my bio or comment “tocanita recipe” to make the easiest dinner 🤍

Want more deliciousness?

Loading
  • Recipes
  • Cookbook
  • About
  • Contact
  • Privacy Policy
  • YouTube
  • Instagram
  • Facebook
  • Pinterest

After something specific?

©Baran Bakery2026 | All Rights Reserved.

website by saevil row + made to thrive