Easy Croissant Recipe
There is quite literally nothing as satisfying as making homemade croissants.
They’re crispy and golden brown around the edges while being light and airy in the center. They’re so beautiful with all the layers when you slice them open and can be served alone or in so many different ways.
Croissants may be intimidating but I promise it’s so doable. It takes some time but if you follow the step-by-step instructions, it will be well worth it.
If you love croissants, I also have a chocolate version and a croissant french toast casserole… but I wouldn’t DARE use my precious homemade croissants in a casserole lol. I would eat them as is.

Ingredients & Substitutions
*full recipe is in the recipe card at the bottom!
- Flour: I use bread flour for croissants. I haven’t tested this with all-purpose flour but to be honest, I’ve never had any bread recipes give me major problems when I subbed in all-purpose flour so it should be fine.
- Bread Flour has more gluten so it will give it a better structure and more of a chewy texture.
- Sugar: I used granulated sugar in the dough. The sugar lightly sweetens the dough and makes it a little more tender. It also helps with browning. I don’t recommend swapping it, but the recipe does work well if you want to reduce it a little.
- Yeast: Instant yeast or active dry yeast works fine. Just sub for equal amounts.
- Salt: I like fine sea salt.
- Water: I like using cool water, it makes the dough a little less sticky.
- Butter: I recommend a good, high quality butter with high fat content like Kerry Gold, Danish Creamery European Butter, Plugra. The highest butterfat you can find would be best. I prefer to use salted butter for croissants since it gives more flavor.
- I have not tested this with dairy free butter but if the butterfat content is over 80% then you should be good.
TIP: I HIGHLY recommend using a digital scale, as dry ingredients are almost always over measured.

How To Make Croissants
Croissants are known to be a labor of love but they’re so worth it. We have several parts here:
- The Croissant dough – it’s a lean bread dough, literally the easiest dough to make. It’s just a simple bread dough that’s not too sticky.
- The Butter – this makes it no longer lean but it’s not mixed into the dough, it gets shaped into a rectangle and then folded into the dough.
- The Lamination – this is where it can get a little confusing but we’re essentially just layering the dough and the butter. This is what gives the croissants that gorgeous honeycomb texture.
So although the ingredients are simple, there’s technique involved and I’ll walk you through it!
Croissant dough
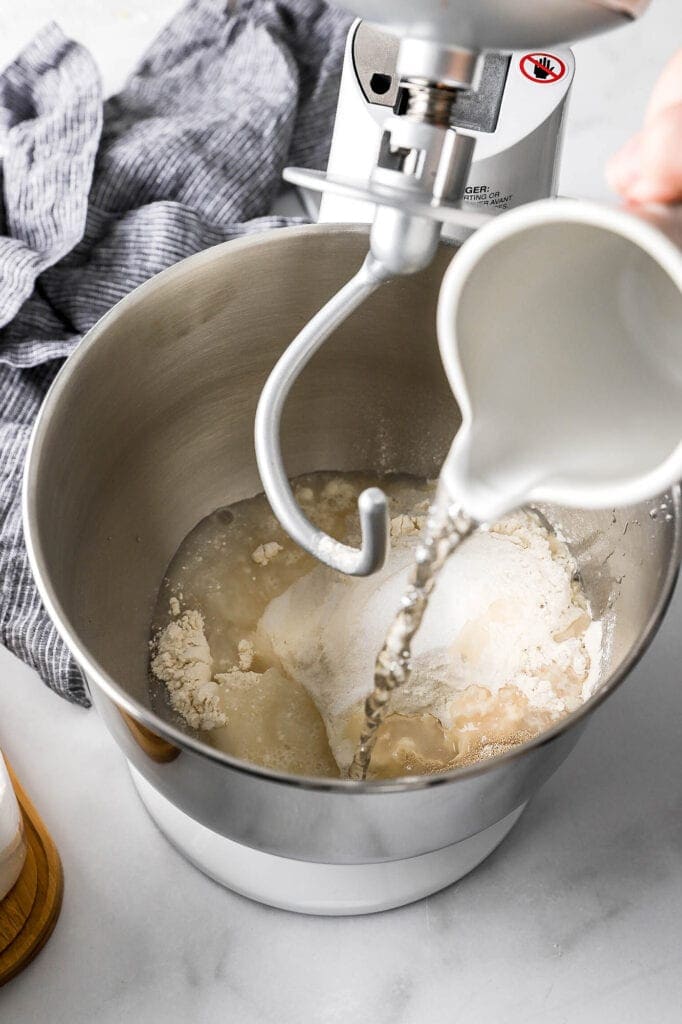
- Combine the dry ingredients – flour, yeast, salt and a tiny bit of sugar – in the bowl of a stand mixer. You can also put in a bowl if you want to mix it by hand.
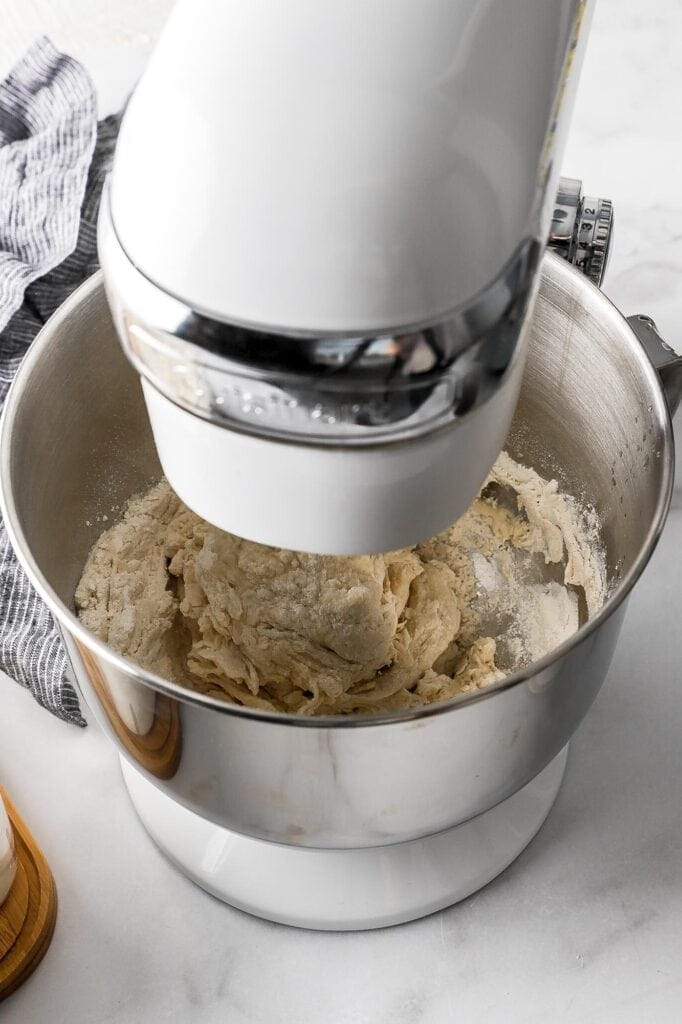
- Add the water and mix on low speed until the dough comes together.
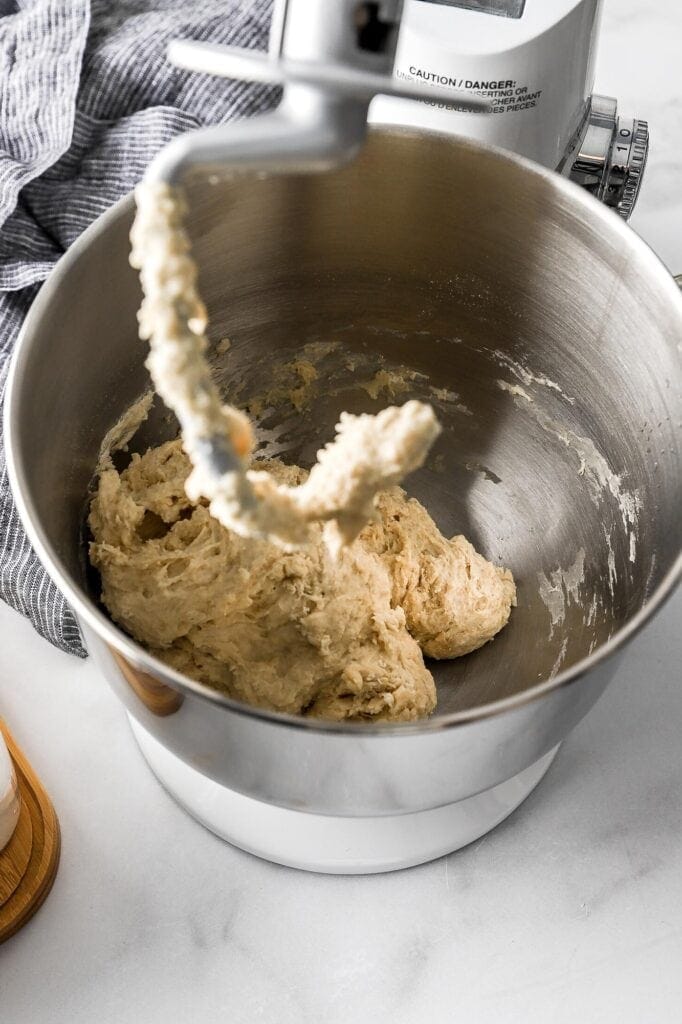
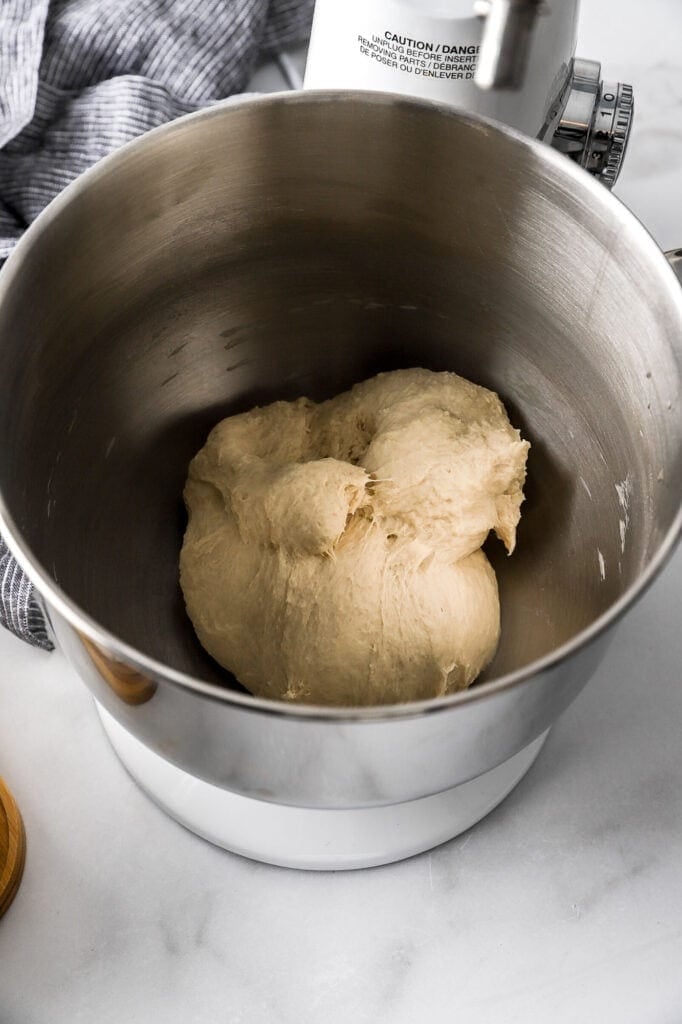
- Allow the mixer to knead for at least 5-7 minutes, until the dough peels itself away from the edge of the bowl. At this point, the dough will feel a little tacky but should not be too sticky to work with.
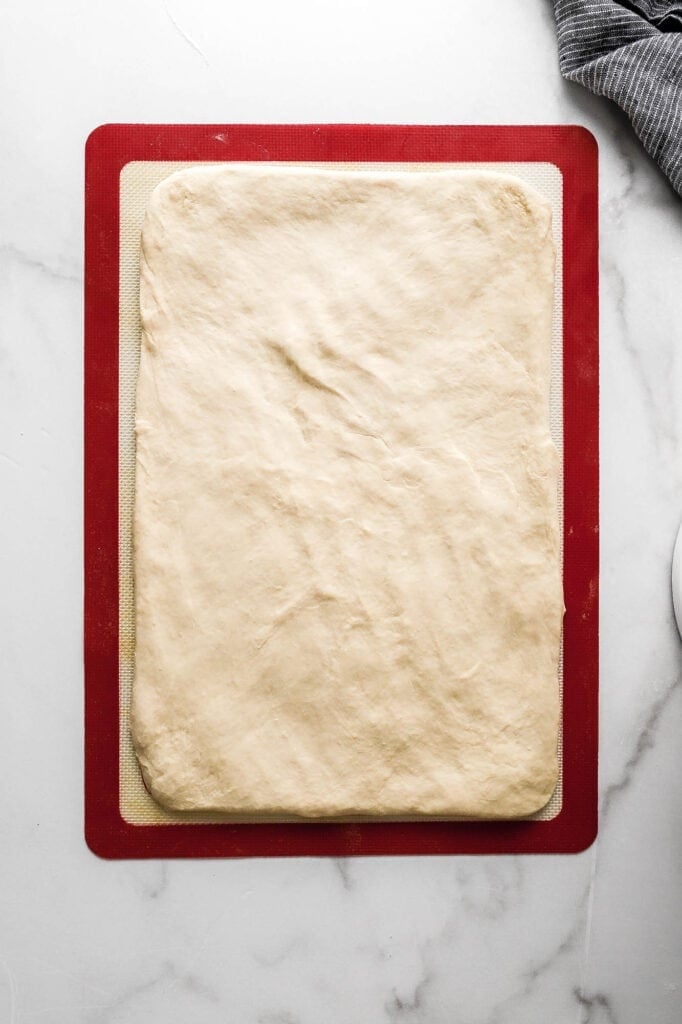
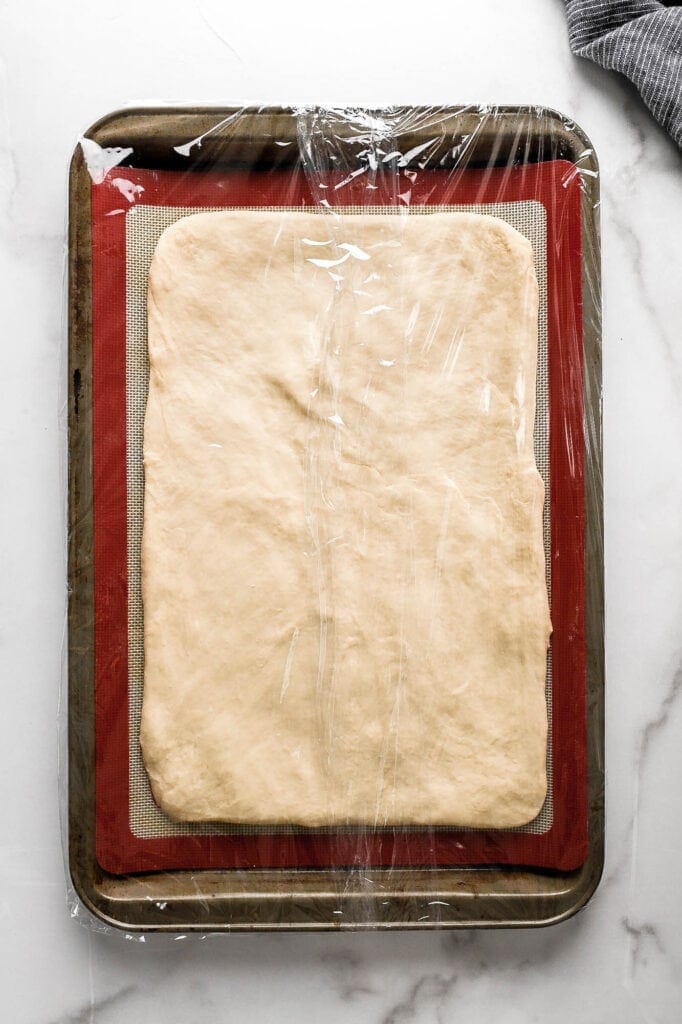
- Roll it out into a rectangle – the gluten might not let it stretch far so it doesn’t matter if it’s quite 10×16 yet.
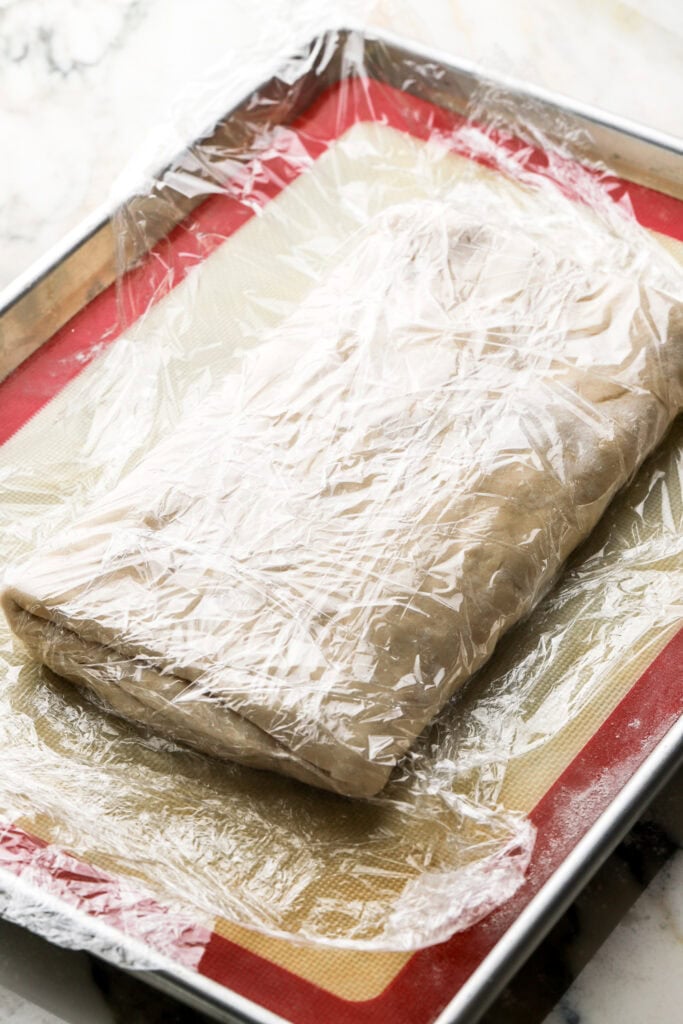
- Wrap the whole pan in plastic wrap so no air can get in and then refrigerate it for at least 4 hours, but preferably overnight.
Shape the butter for laminating
There are so many ways to shape butter for laminating and this was just my preferred method. It really doesn’t matter how you choose to shape it as long as the butter is the right shape and temperature when you begin laminating.
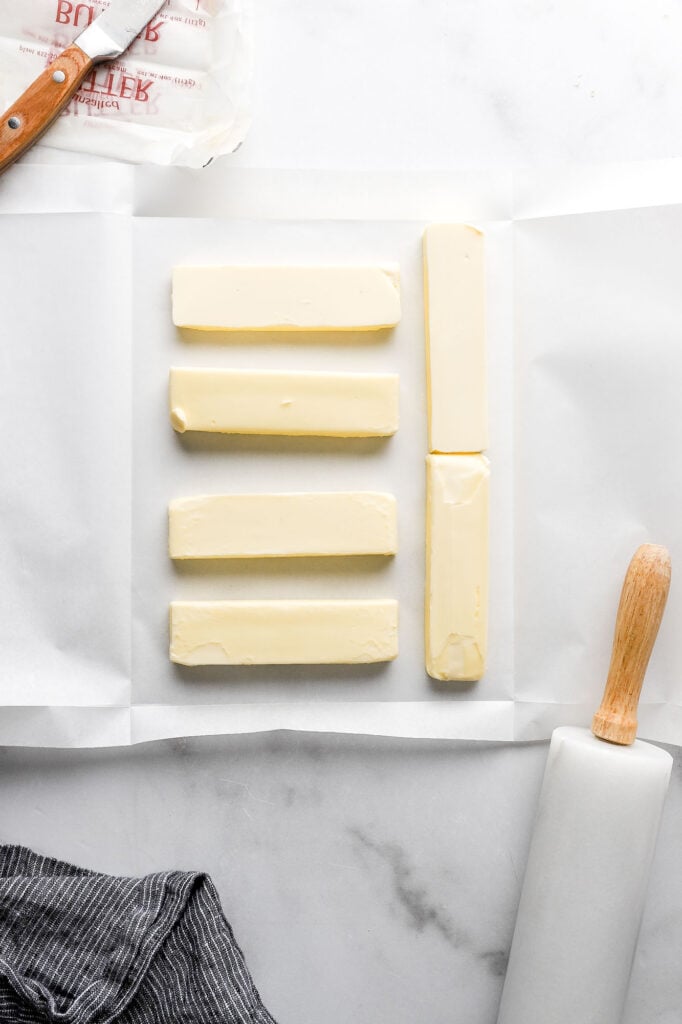
- Fold a large piece of parchment paper into an 8×10” rectangle by folding each end in until one side measures 8″ and one side measures 10″.
- Slice the sticks of butter in half so that they’re easier to spread out.
- Place the slightly chilled butter (not fresh out of the fridge but not too soft either, just room temperature/maleable) in the parchment paper and cover it back up with the folded edges of the parchment.
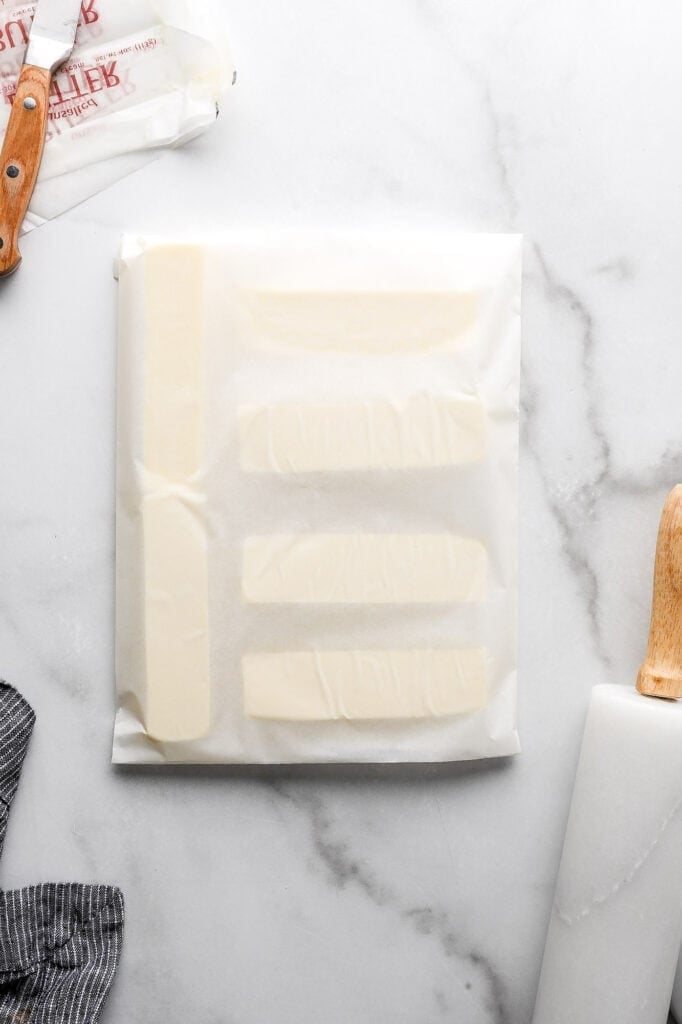
- I like to flip the whole thing upside down so when you go to roll it out with the rolling pin, it doesn’t interfere with the parchment openings.
- Use a rolling pin to smush it into the size of the rectangle.
- Then refrigerate the butter for 10-20 minutes, or longer, but make sure to bring it back to a malleable temperature before laminating.
TIP: You could also let the butter soften to room temperature and just spread it out, using an offset spatula or a spoon, into that size on a parchment paper and then chill it again but make sure to give it more time to chill in the fridge then and bring it to the right consistency before laminating. It has to be malleable but not too soft or greasy.


Laminate the dough with the butter
This is the hard part, knowing when the butter is the perfect temperature for laminating.
The butter has to be firm enough to bend – not spreadable, not greasy but also not too hard that if you press on it or bend it, it cracks. You want the butter to be able to be malleable.
- Now that the dough has relaxed, roll it out into a 10×16” rectangle, onto a floured surface. Try to get it nice and even around the edge – you can slightly trim it if it’s not straight but it’s not a big deal.
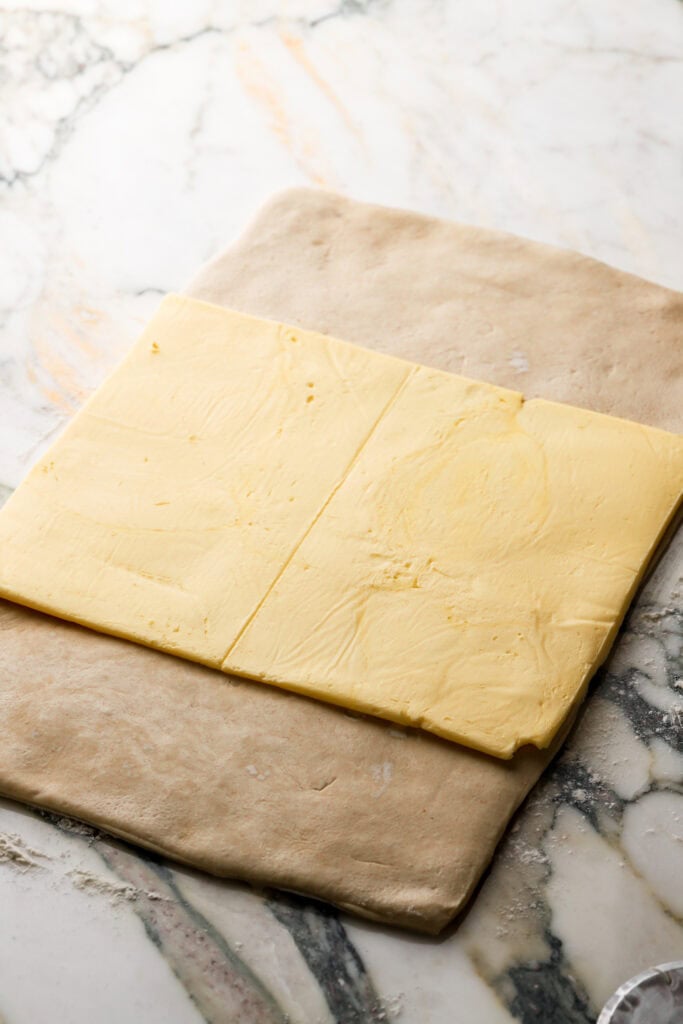
- Place the butter on top of the dough, in the center, lining up the edges so you’ll have the 10” side of the dough parallel with the 10” side of the butter.
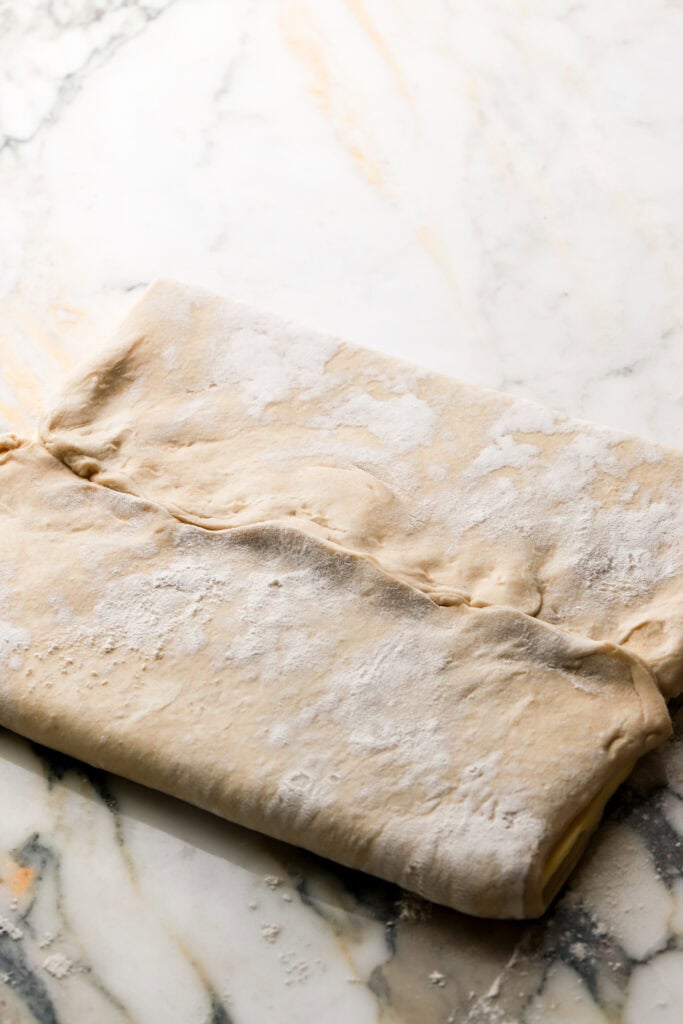
- Fold the top ⅓ of the dough down over the butter and then fold the bottom ⅓ of the dough up on top of itself, so the two edges of dough meet in the middle of the butter. Seal the edges by pinching them together a little.
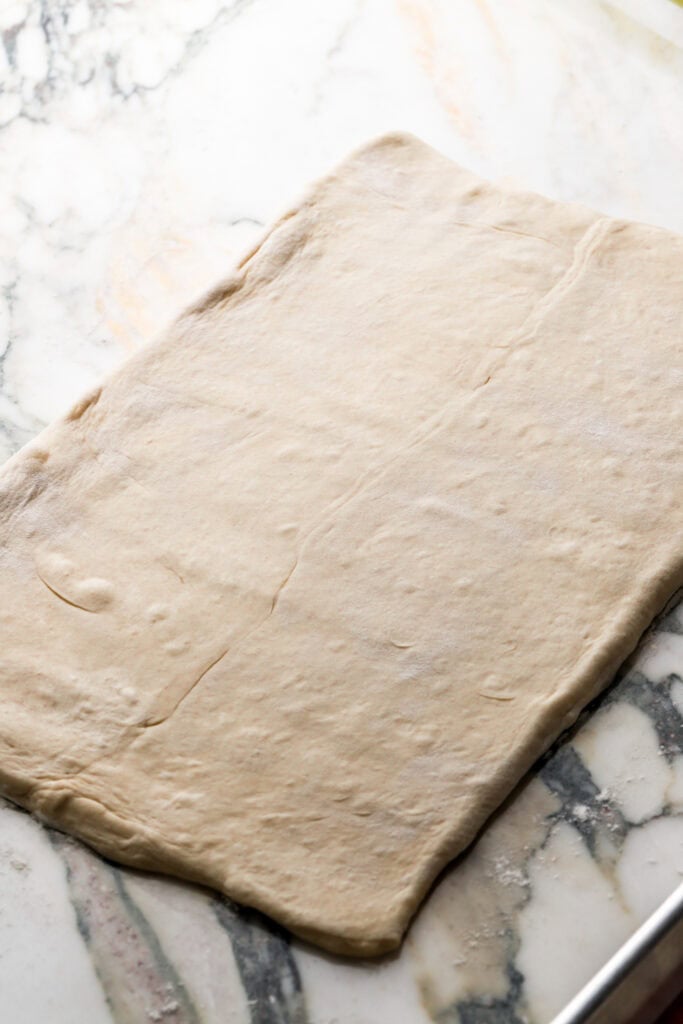
- Then turn the dough 90 degrees and GENTLY roll it back out into 10×16”. I like to press the rolling pin into the dough a little, roll it 1/2 an inch or so and press down again (watch the video).
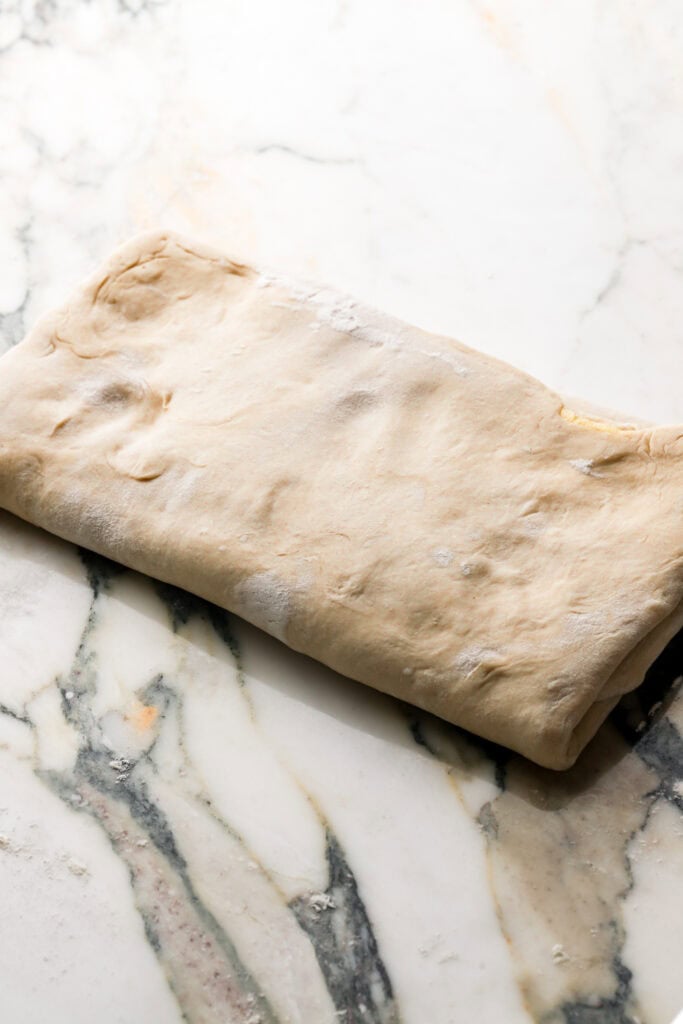
- Fold it again into thirds, like an envelope this time so the bottom 1/3 overlaps the top 1/3 of the dough .
- Cover the dough with the plastic wrap again and refrigerate it for 10-20 minutes.
- Roll the dough back out into a 10×16” rectangle, fold it into thirds again, cover and refrigerate for another 10-20 minutes and repeat one more time after this.
- So after the butter is wrapped into the dough, you’re doing three more rounds of folds. Refrigerate the dough for at least 2 hours now after all the folds.
Shaping Croissants
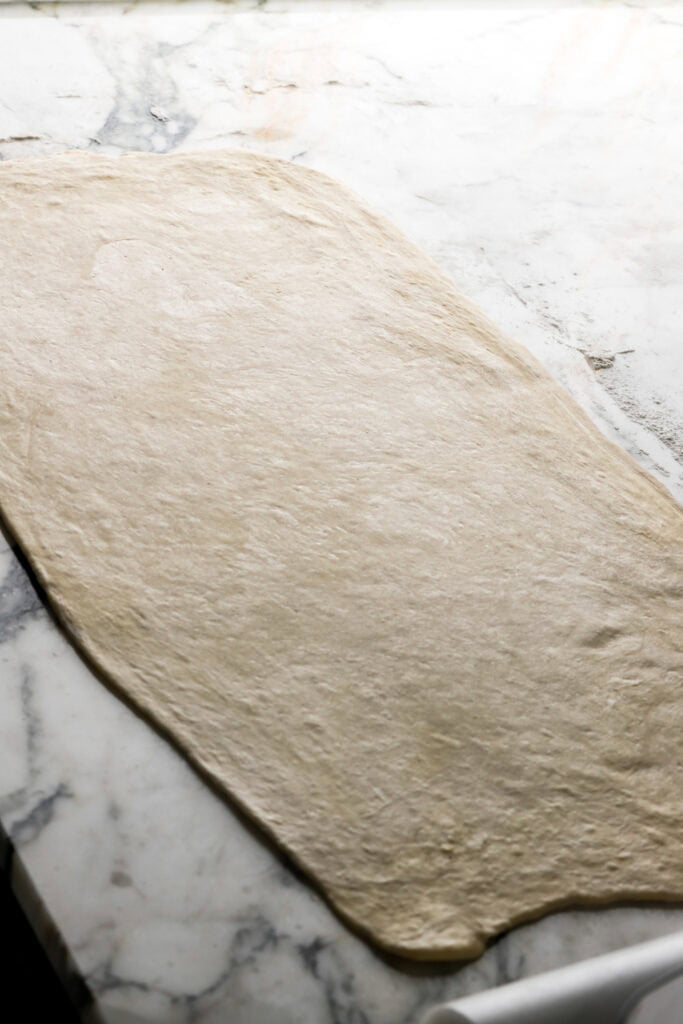
- Remove the dough from the fridge for about 15 minutes before rolling it out again into a 12×24” rectangle.
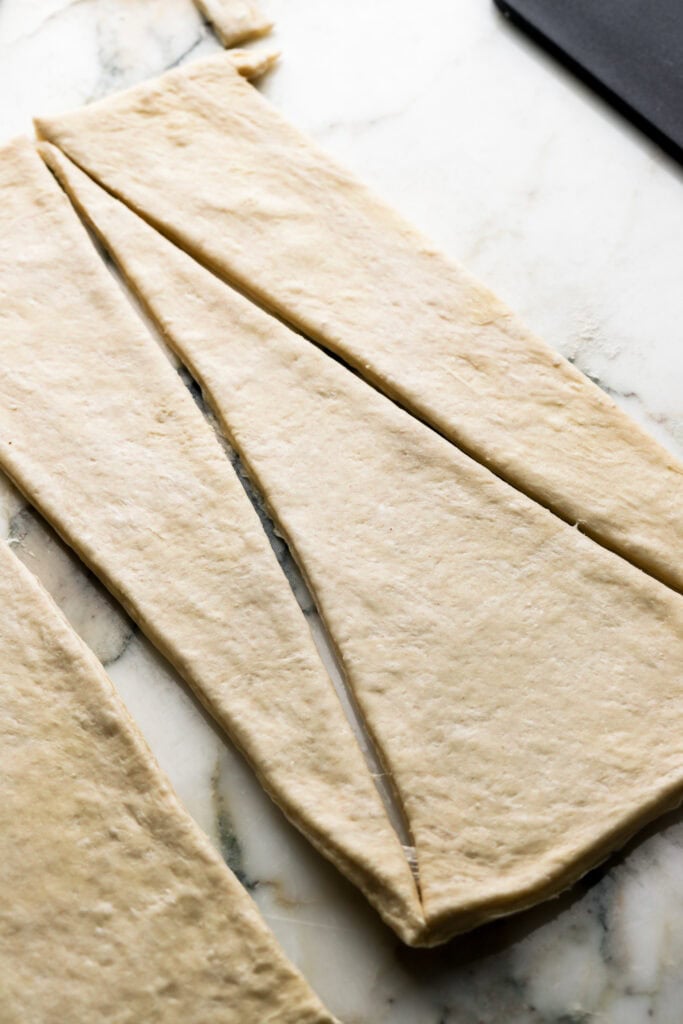
- Slice the dough into triangles from long end to long end. I like to use a pizza cutter for this but a knife also works. Obviously just press lightly so you don’t scratch your counters!
- Roll each croissant up starting with the fat end of the triangle. Press down on the tip a little so that they stay flat.
- Place on a baking sheet, cover with plastic wrap and let them rise for 2-3 hours at room temperature.

Baking Croissants
- Beat an egg with a fork until it’s loose and runny, not goopy.
- Brush each croissant with the egg wash. I like to do this twice just so it gets nice coverage.
- Bake until they’re just a little darker than golden brown.
- Allow them to cool before serving.


Steps in Spark Notes:
- Make Dough: combine all the ingredienst
- Knead for 5-7 minutes until it doesn’t stick to the bowl.
- Roll out into a rectangle
- Refrigerate Dough for at least 4 hours
- Shape Butter to 8″x10″
- Refrigerate Butter for 10-20 minutes
- Laminate:
- Roll Dough to 16″x10″ & fold butter into dough, seal in the center.
- Fold 1:
- Turn Dough 90 degrees
- Roll to about 16″x10″ again
- Fold into thirds (like an envelope)
- Refrigerate dough for 10-20 minutes.
- Fold 2:
- Roll dough to about 16″x10″ again
- Fold into thirds (like an envelope)
- Refrigerate dough for 10-20 minutes.
- Fold 3:
- Roll dough to about 16″x10″ again
- Fold into thirds (like an envelope)
- Refrigerate Dough for at at least 2 hours (preferably 4 or more).
- Shape:
- Rest dough out of fridge for 15 minutes
- Roll dough to 24×12 and slice triangles
- Roll into triangles into croissant
- Proof:
- Place on cookie sheet & cover gently
- Rest for about 2 hours until they wiggle
- Bake:
- Egg wash proofed croissants
- Bake until golden brown
Why do I have to refrigerate and rest the dough
Before laminating, the dough needs to rest in the fridge for at least 4 hours or up to overnight. Refrigerating is important for two reasons. One being that we want the dough cold so that the butter laminates in layers and doesn’t melt into the dough.
The other reason is because after developing the gluten, it becomes too tough to roll out to the desired shape and letting it rest for a while will allow the gluten to relax. Resting happens twice, the first time after the dough is made and then again before shaping.
You’ll really notice this when you’re shaping the croissant dough. If you try to roll the dough out to 12×24” without resting it, the dough will just spring back to the shape/size it wants to stay at if the gluten hasn’t had enough time to rest.

Proofing croissants
Proofing the croissants is important because if they’re not proofed enough, the butter can leak out. This hasn’t been a huge deal for me, they still taste great even if the butter leaks a little but if they’re severely under-proofed and all the butter leaks out then they risk the croissants not rising and not having any flakey layers.
To know when they’re done proofing, gently press your finger into the dough and if it leaves an indent, it should be done.
Fully proofed croissants will also wobble if you gently shake the pan.
I like to proof my croissants at room temperature (NOT in a warm environment) so that the laminated butter doesn’t melt. My room temperature is usually about 70F.
Make sure to fully cover the dough with plastic wrap so that the dough doesn’t dry out but don’t make the plastic wrap tight on top of them, leave room for them to proof.
Egg wash the croissants when they’re done proofing, while the oven is preheating.
Frequently Asked Questions
Two main reasons: under proofing after shaping the croissants or your room was too warm while the croissants were proofing.
It is also possible that the oven was just not hot enough so I always recommend getting an oven thermometer to be safe!
Yes and no.
After making the dough, you can refrigerate it for over 4 hours, up to overnight, get to it when you want.
After laminating it with the butter, don’t surpass that 10-20 minute window because you don’t want the butter to harden completely in the dough.
When you rest the dough again after you’re done with all three laminations, you can refrigerate it for longer than 2 hours if you need to.
Don’t proof it longer than 2-3 hours before baking though.
I recommend a butter with a slightly higher butterfat if you can find that. Look for European butters like Kerrygold, Danish creamery, etc. but even Costco butter is great.
The better quality butter, the better the croissants will taste.
I have not tried this with dairy free butter but if it has a butterfat content of at least 80% I don’t see why it wouldn’t work.
How to store croissants
Croissants are best served after they’ve cooled, the same day they were made. The outside is crispy and they’re soft and airy inside.
Store them at room temperature in an airtight container or bag for 2-3 days or refrigerate for up to a week.
To freeze them, place them in an airtight freezer bag and defrost them on the counter overnight.
To reheat them, I prefer to bake them at 350F in the oven or toaster oven for a few minutes until they’re warm.

Classic croissants usually take at least two days to make but I have made these croissants in about 12 hours, so you are welcome to start early in the day and finish late!
Feel free to spread it out over two days if you want to though. I hope you guys have success with these and let me know if you have any questions!
If you love them, I would love it if you left me a 5-star rating or review below.
As always, have a blessed and happy baking!
Love, B





I appreciate the very detailed directions. I have baked for many years and am attempting the croissant for the first time. What a work of art these are!
hello baran, i just wanted to ask a question how long would these croissants last? and how do i perserve these croissants the longest?
A few days at room temperature but I usually just freeze them in a freezer bag to keep them fresh
These were the first croissants I have ever endeavoured to make, and I’m pleased to say that they came out wonderfully! Very easy-to-follow recipe, which I am very grateful for. Surprisingly easy pastries to make, just time consuming, but they are definitely worth the time and energy 🙂 Thank you for posting this recipe
Are these the type of croissants I could fill with a custard or chocolate like pain au chocolat?
Yup!
oh my goodness! Thank you for replying so fast! i really appreciat it… But I just wanted to ask one last thing if its in the fridge from 9pm – 4pm is that still ok?
Hi bernice, I just wanted to ask is it okay if I leave my dough filled with butter for around 10 hours? Pls i need a fast response
If it’s in the fridge it should be fine!
oh my goodness! Thank you for replying so fast! i really appreciat it… But I just wanted to ask one last thing if its in the fridge from 9pm – 4pm is that still ok?
For which step?
for the laminating the dough with the butter, Im on the last step and I cant do it until 4pm from 9pm
Yeah if you finished laminating the dough, a long rest is perfect. I put MINIMUM 2 hours but a longer rest is preferred!
Thank you SO MUCH bernice 💖💖 you have no idea how much this means to me, Im using this recipe for my personal project at Grade 10 which is required to make something you love and I chose croissants with this specific recipe, Thank you so much bernice please keep doing what you are doing and keep up the fast replies 😁😁😁
Ah well I hope it turns out perfectly!
Bernice, just one last quetion, while my dough with the butter is in the fridge resting for hours, there were some holes in my dough that exposed some butter, but i quickly covered it with some flour, will that effect me when im rolling out the dough to shape the croissants? because my butter was really thin and would melt easily if i left it outside when i was going to put the butter in the dough.
It might but there’s really nothing you can do about it now so it’s worth following through and seeing how they turn out!
I followed the directions to a tee. The croissants never rose and they were like rocks. the outsides looked good but the inside wasn’t cooked well enough. I decided to make them with a recipe that actually has you proof and the dough increases in size and I got beautiful croissants. I do not recommend this recipe.
Hi Jodi, thank you for taking the time to leave a review. I’m sorry to hear that this recipe did not work out for you. I’m curious what you mean by “a recipe that actually has you proof”, as this recipe does have you proof the dough as well. The first proof is in the fridge and it needs several hours, preferably overnight. The second proof is about 2 hours after shaping the croissants. Did you maybe miss one of these? If that step was skipped then yes I would expect to get rock like croissants as well.
Either way, I’m glad you were able to still get lovely croissants 🙂
It was my first time making croissants in a long time after I was left traumatised from another recipe but let me tell you now this recipe is fool proof and the croissants are just exceptional. It’s my birthday today and I will spend the whole day eating the croissants or baking more lol
Matthew, this makes me sooo happy!! Thank you so much for the review & happy birthday 🙂
This was a super easy recipe that turned out amazing! Loved the picture step by steps!
If I don’t have a stand mixer what are alternatives? Can I use a hand beater?
I would just knead it by hand
they turned out so amazing thank you for sharing this recipe, I will definitely be using it again! I was wondering though, if I wanted more layers/flakier croissant could I repeat the lamination process more times? Or will that just overwork the dough… any tips if this wouldn’t work would be amazing!! Thank you!
So glad it turned out well. I’m not sure exactly about laminating more, I don’t see it being a problem but I can’t say for sure.
I’ve made this recipe multiple times with great results, but noticed it was rising far too fast and accumulating too many air pockets during rest times. That’s when I realized the yeast in the imperial instructions is incorrectly listed in Tbsp instead of tsp. Other than that I loved the recipe! Should definitely be noted though.
Hi Ali, thank you so much for letting me know!! Will update immediately!