
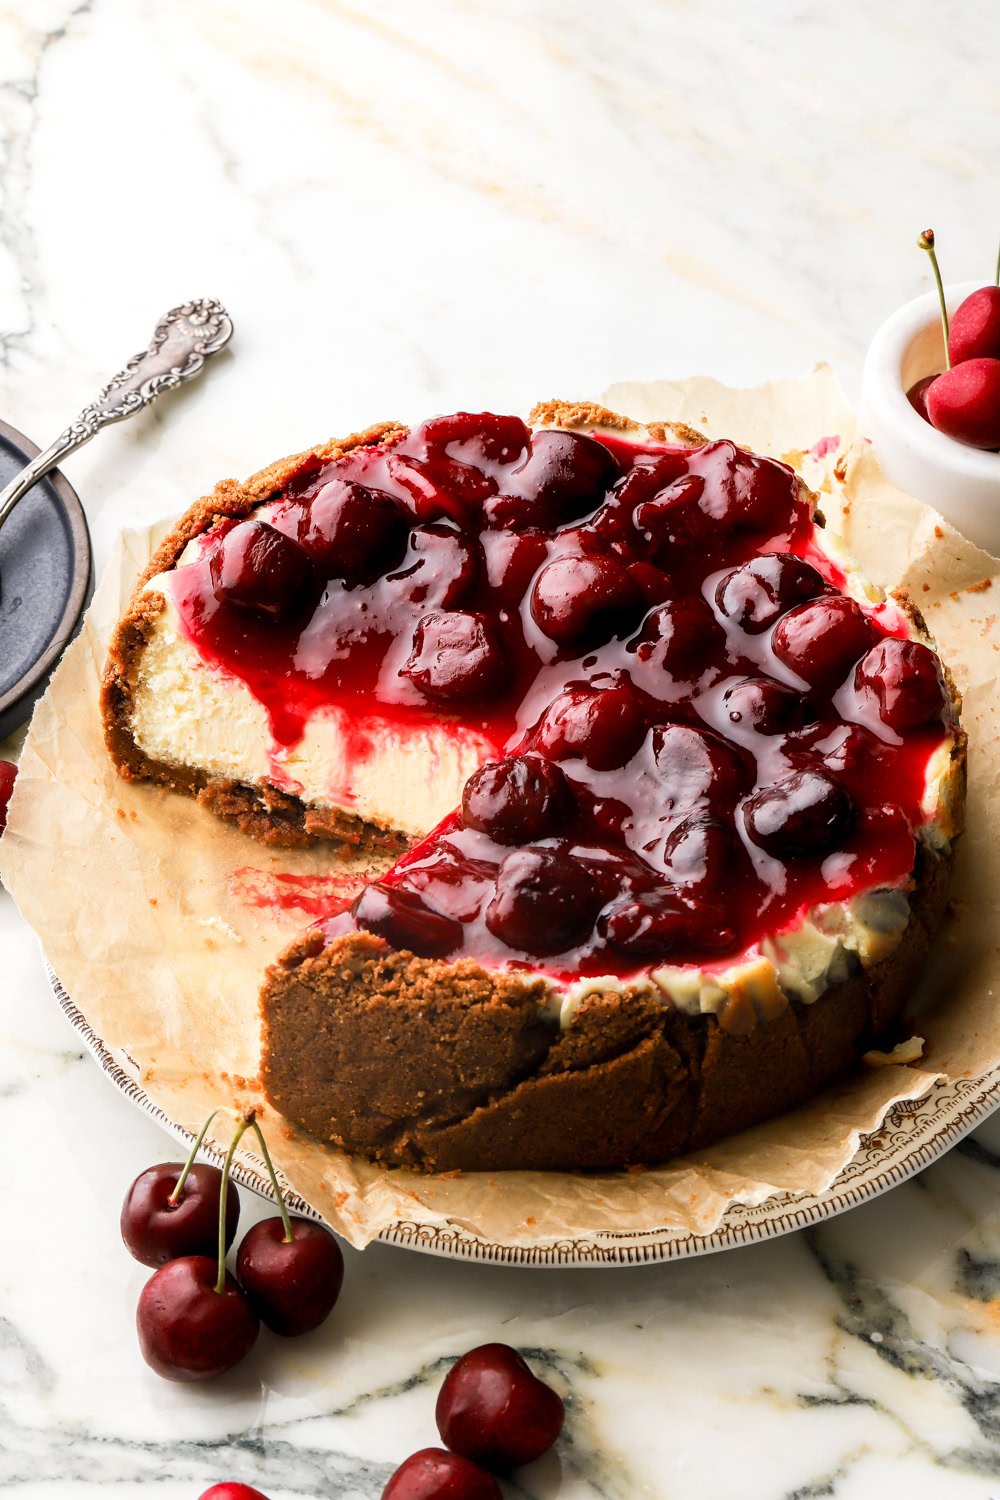
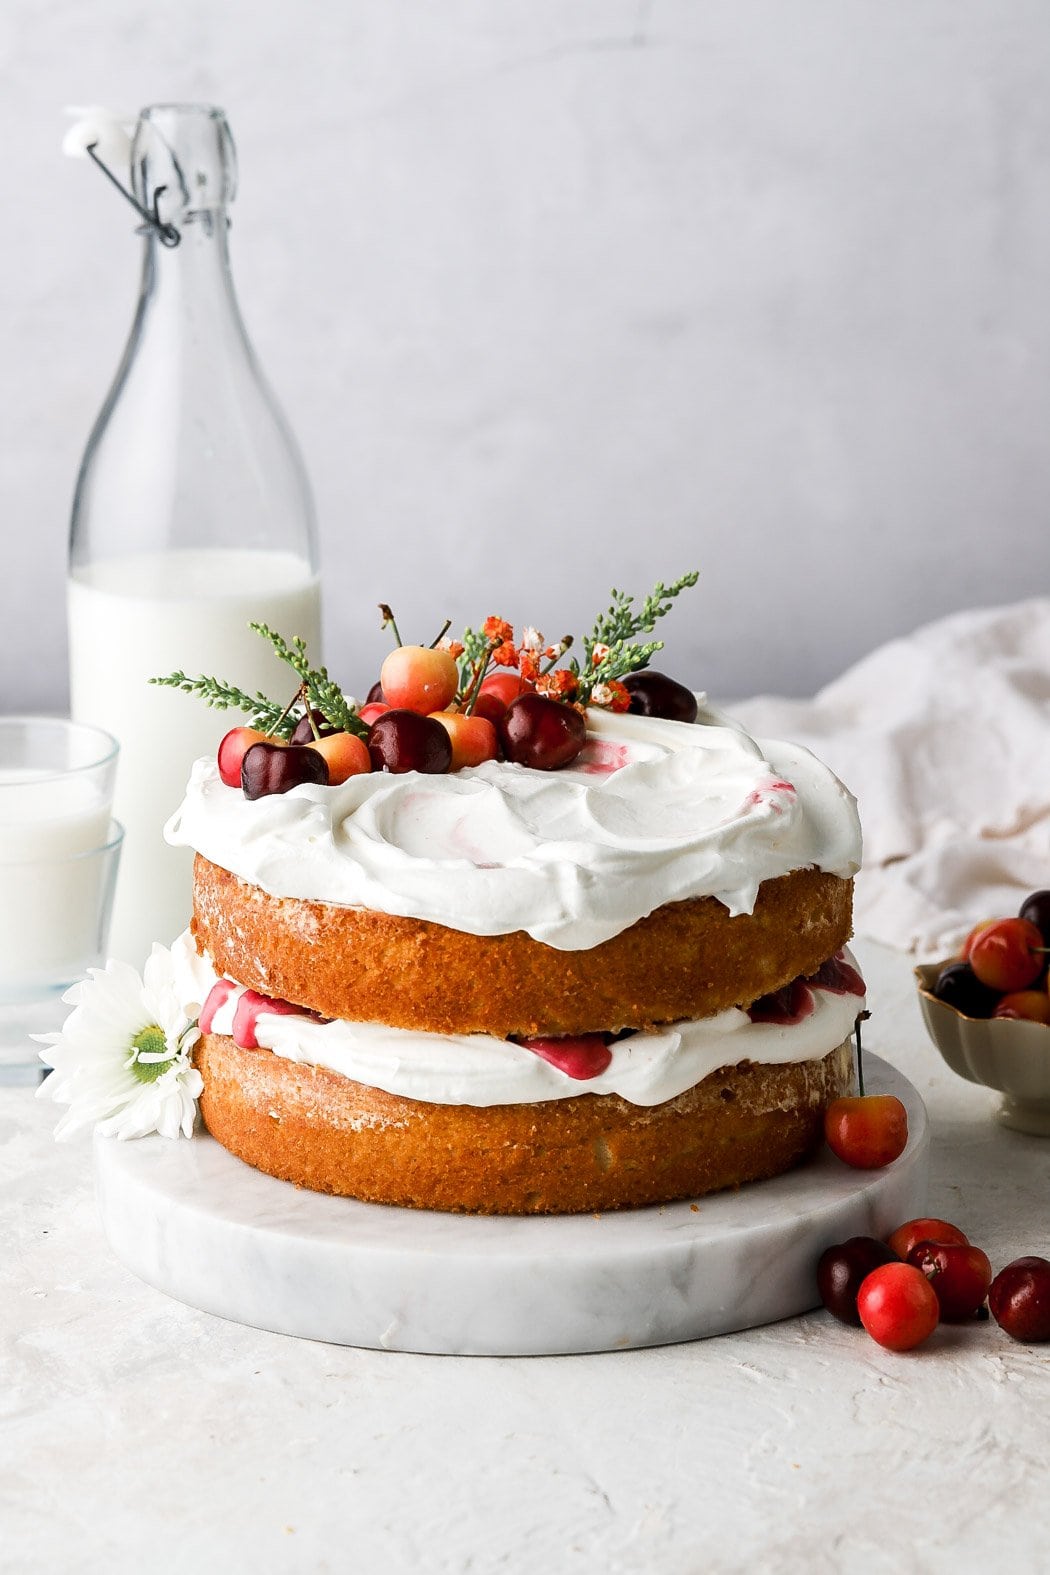
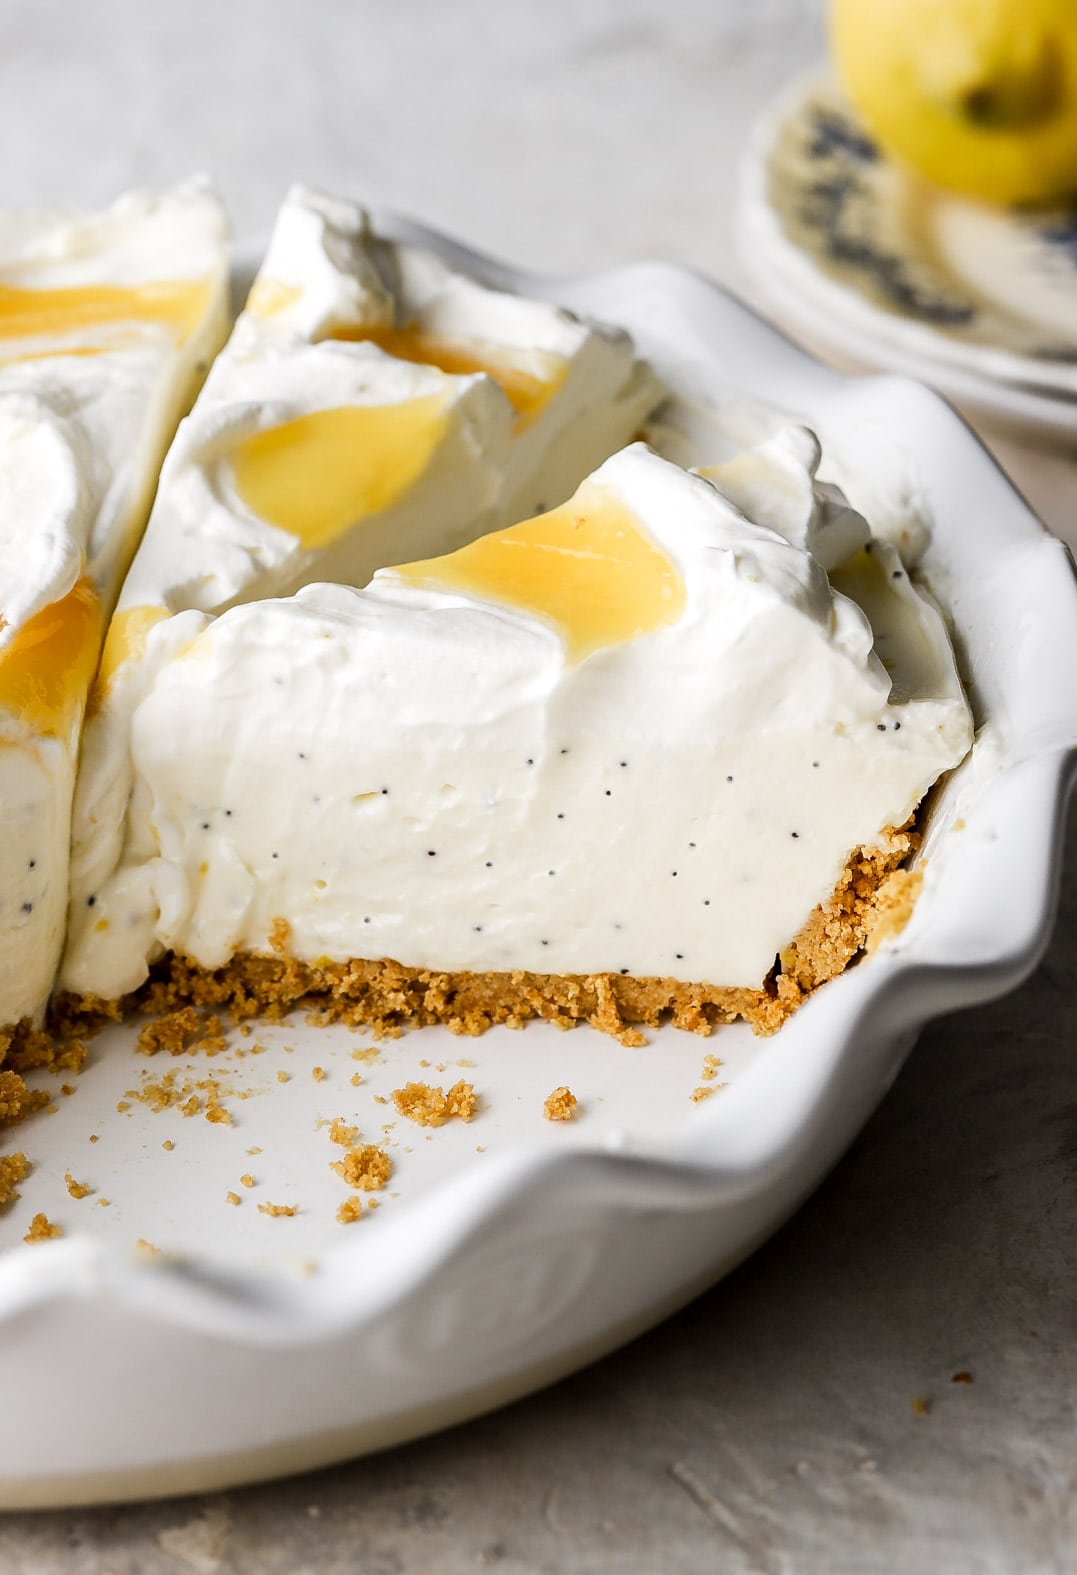
Cherry Cheesecake
I have this perfect, easy, no-water-bath cheesecake recipe that can be adjusted into any size spring form pan. I took her and baked her on a biscoff crust and topped it with the best, easy homemade cherry topping.
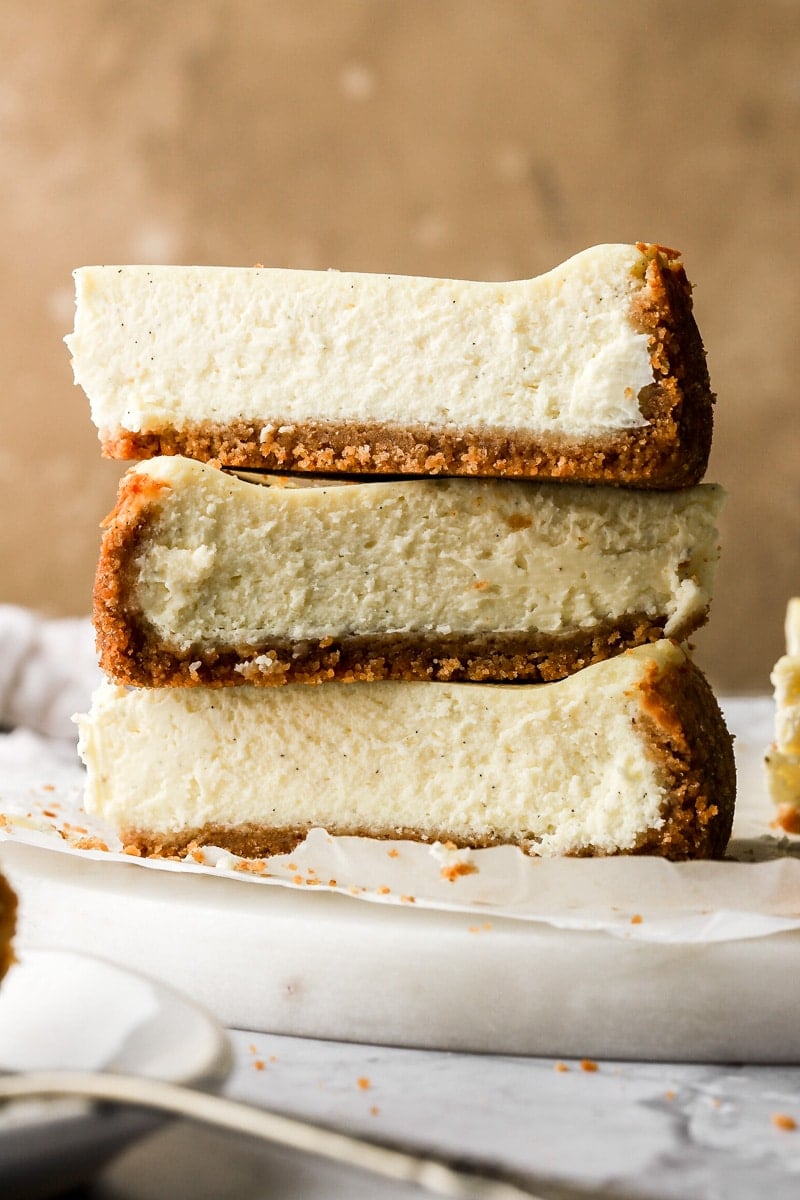
This cheesecake is so smooth and creamy but dense and rich, just like a classic cheesecake.
& the cinnamon and ginger from the biscoff cookies pairs SO WELL with the cherry topping!
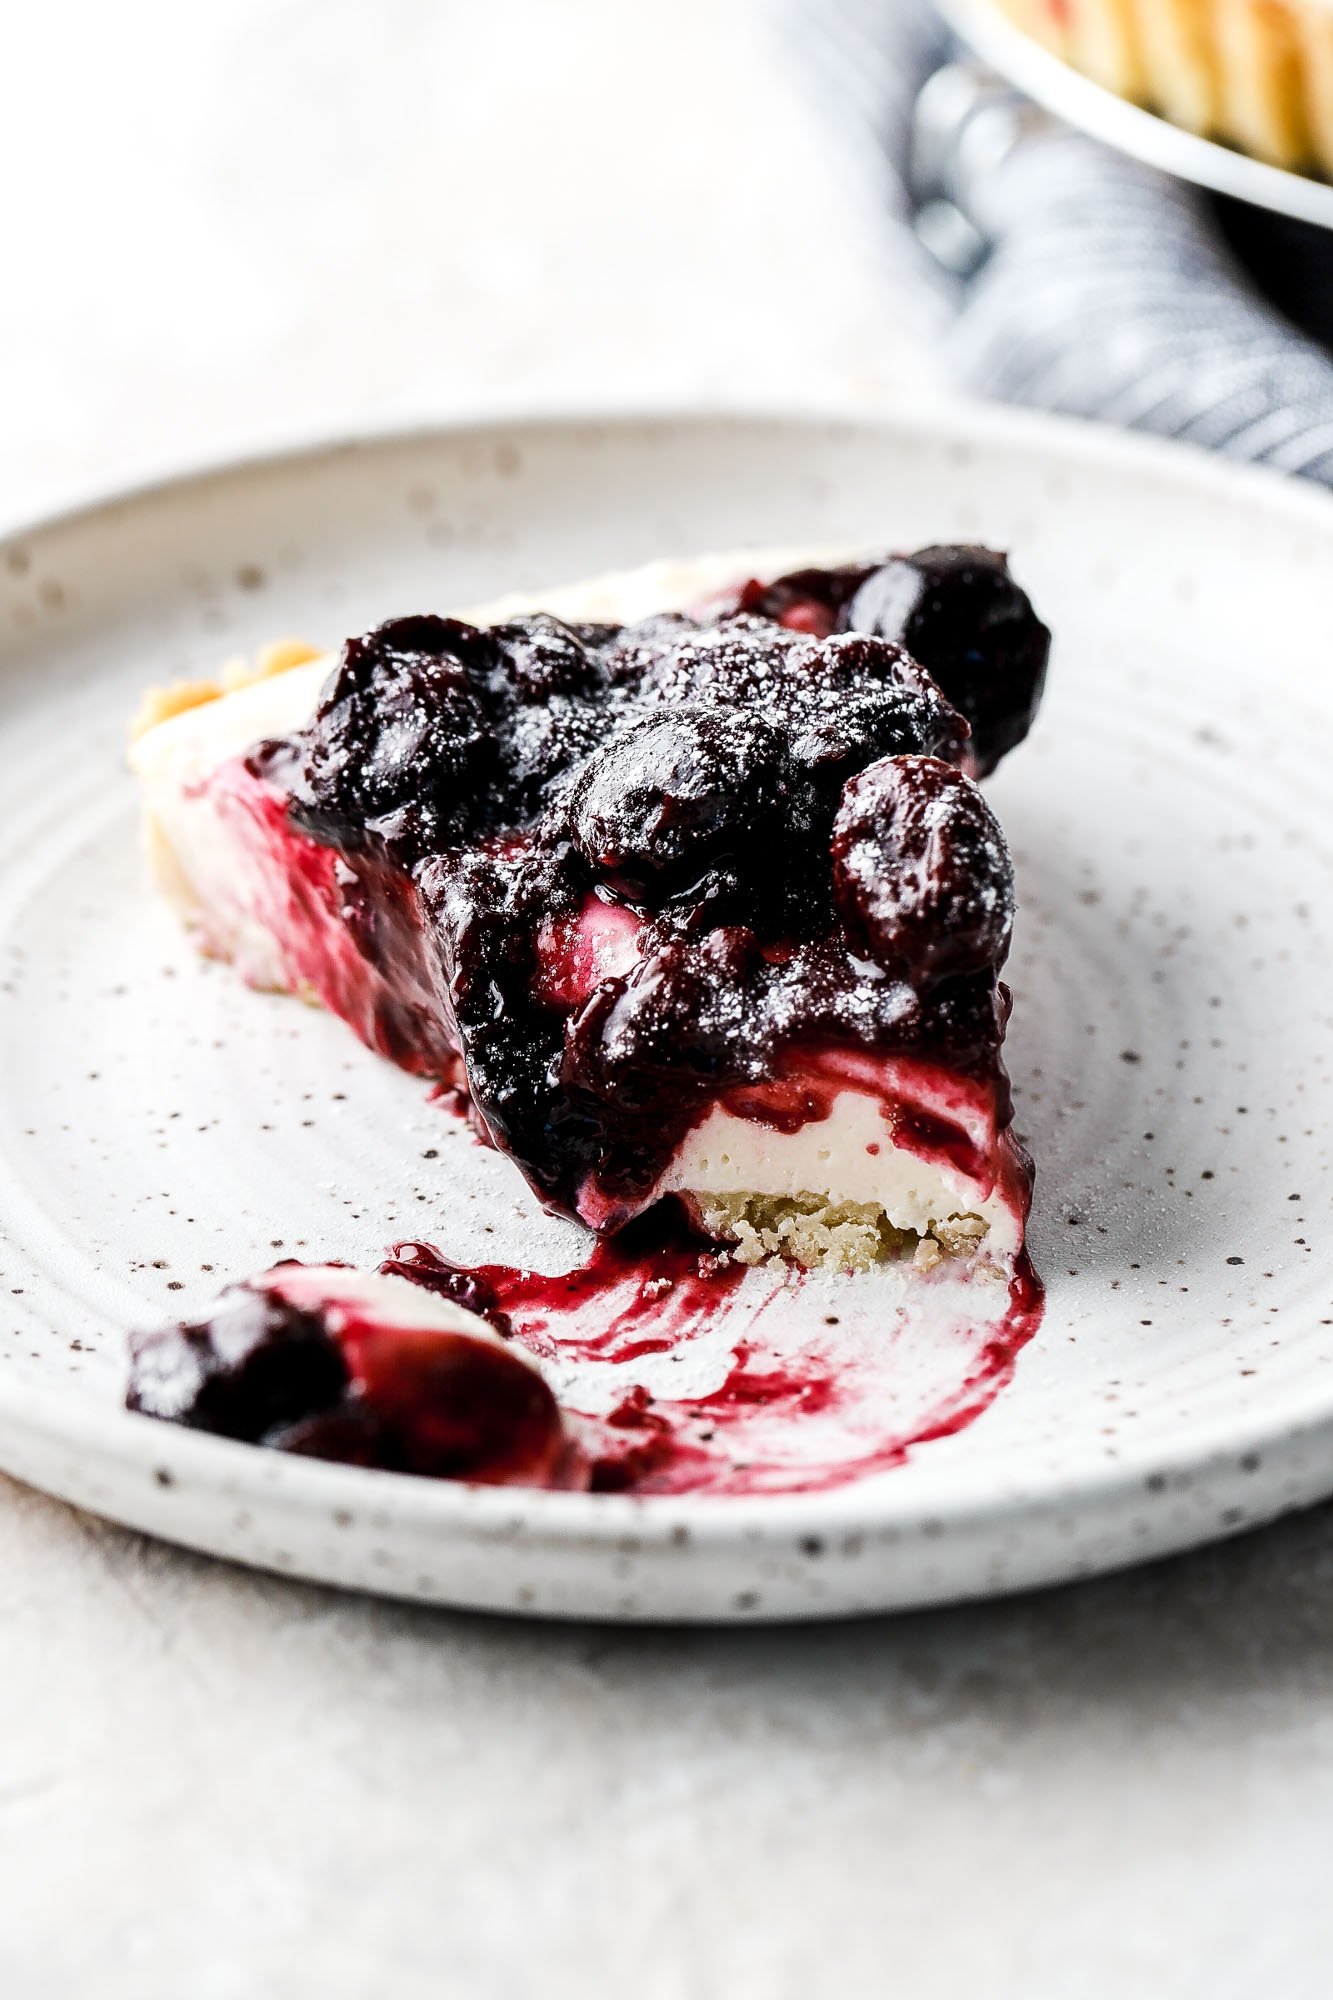
The cherry topping can be made using fresh cherries or frozen cherries, whatever floats your boat.
Frozen cherries don’t have to be pitted so that’s convenient but for fresh cherries, I use this handy dandy cherry pitter.
To get more use out of your fancy new cherry pitter, I have the BEST cherry pie recipe and a cherry cobbler!.
If you’re also a cheesecake lover make sure to check out some of my favorites. I have a biscoff one, pistachio one and triple chocolate.

Ingredients & substitutions
*full recipe is in the recipe card at the bottom!
- Cream Cheese: make sure to use the full-fat brick cream cheese. I prefer the Philadelphia brand.
- Sugar: I used granulated sugar and I don’t recommend swapping it. If you prefer a tangier cheesecake, you could reduce the amount slightly but I don’t recommend reducing it in the topping – it makes it nice and jammy.
- Sour Cream: I’ve tested this recipe with equal amounts of sour cream and greek yogurt several times and have never noticed a difference.
- Plain yogurt should also work fine, just make sure it’s unsweetened.
- Eggs: Use large, room temperature eggs.
- If you’re in a pinch, place them in hot water for 5-10 minutes.
- Vanilla: I recommend vanilla bean paste or actual vanilla beans. If you’re in a pinch, pure vanilla extract works well too.
- Crust: I’ve used graham crackers and biscoff cookies (speculoos cookies) interchangeably in this recipe. Graham crackers are more classic but that biscoff flavor goes sooooo well with the cherry topping. Makes it a little more unique.
- Cherries: I used fresh black (sweet) cherries to make the topping. Frozen cherries are also fine. I don’t recommend sour cherries unless you’re looking for a sour flavor lol.
- Lemon: I like to add a little lemon juice to the cherry topping – for more flavor, feel free to zest that lemon first and rub it in with the granulated sugar in the cheesecake batter before beginning.
- Cornstarch: this thickens the sauce for cherry topping – I don’t recommend swapping it.

Step-by-Step Instructions
There’s three parts to this cheesecake.
- A simple biscoff crust (can be subbed for graham cracker crust too!).
- Creamy vanilla cheesecake batter.
- Easy, homemade cherry topping using fresh or frozen cherries.
Biscoff Crust
- Prepare your pan by removing the edge of the springform pan. Place a sheet of parchment paper onto the bottom of the pan so that it hangs off the edge.
- Then attach the side of the springform pan back to the bottom, so the parchment paper should be secure between the two pieces.
- Lightly spray the sides of the pan with baking spray.
- Make the crust by placing the biscoff cookies in a food processor and pulsing until you have fine crumbs.
- Add the melted butter and pulse until it’s evenly distributed.
- Spread the crust into the prepared pan, coming all the way up the sides.
- Use a ½ cup measuring cup to make the bottom smooth and the corners sharp.


Cheesecake
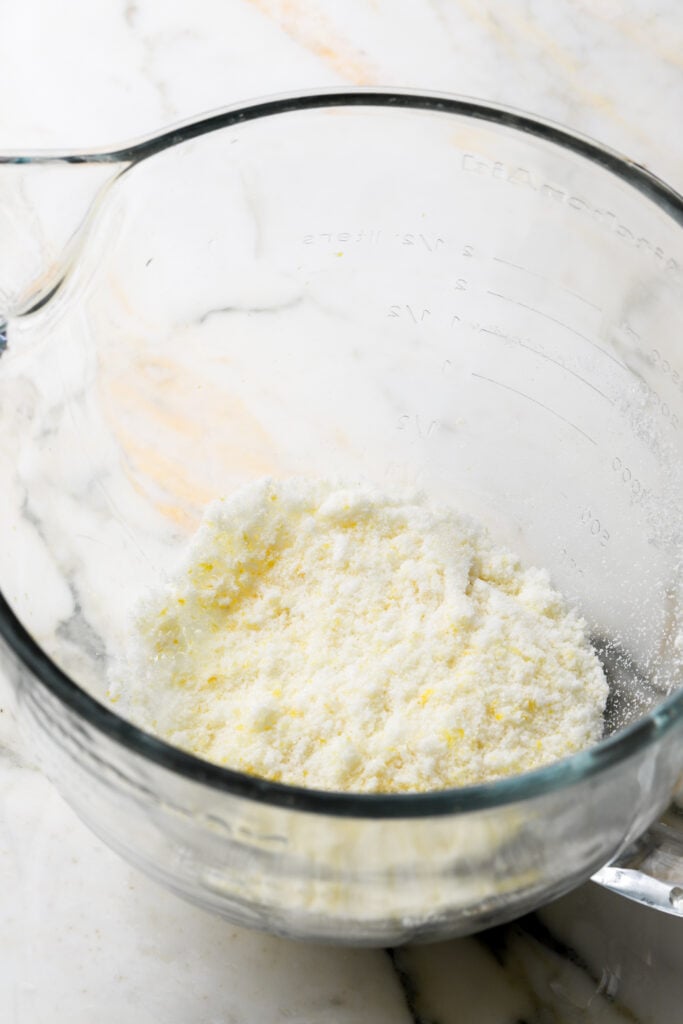
- *optional: I forgot to do this for myself but wish I would’ve. You could zest the lemon (from the cherry topping) and rub the lemon zest with the sugar before mixing it with the cream cheese. This will give the cheesecake base a slight lemon-y flavor.
- Make the filling by creaming the room temperature cream cheese with the sugar, until it’s smooth, creamy and glossy. Make sure there are no chunks of cream cheese left.
- Add the sour cream and vanilla and cream until it’s completely smooth. Then add the eggs, one at a time, mixing on low speed, just until each one is combined.
- Pour into the prepared pan and bake at 300F (148C) for about 60 minutes. Then turn the oven off and use a knife to release the cheesecake from the edge of the pan. Let the cheesecake rest for 15 minutes in the oven with the door halfway open.
- Cheesecake should still have jiggle in the center, let it cool on the counter for a few hours before transferring to the fridge for at least 6 hours or overnight.


Cherry Topping
- Pit all the cherries – I like to leave them whole so they look for lushes but you can also cut them in half if you don’t have a cherry pitter.
- Cook cherries with the sugar and lemon juice for about 5 minutes on medium heat, until the cherries are a little softer.
- Mix the cornstarch with a tiny bit of water to create a slurry and then add it to the cherries. Cook just another couple of minutes, until the juice has thickened, stirring constantly.
- Pour into a jar or a bowl and allow to cool completely. Can refrigerate if made ahead.
- Spread the cherry topping on top of the cheesecake once the cheesecake and the cherry topping have completely cooled.
- Serve immediately or refrigerate until ready to serve.


Expert tips to get the perfect bake and prevent cracking
- Weighing your ingredients with a digital scale is always recommended.
- Bake the cheesecake at a lower temperature than normal for a longer period of time. Bake until the edges are set and the center is still jiggly.
- Allow it to rest in the oven for another 15 minutes so that it can cool slowly to prevent cracking.
- Allow the cheesecake to chill in the refrigerator for at least 6 hours (preferably overnight) so that it sets fully.
I always recommend an oven thermometer just because oven’s can vary.

How to bake this cheesecake in different size pans
I tested my base cheesecake recipe iin 4 different sizes. It’s pretty straightforward to adjust to whatever pan size you need.
My traditional vanilla cheesecake uses 2 bricks of cream cheese and is baked in an 8 inch pan but the featured photos for this cherry cheesecake use 3 bricks of cream cheese and is also baked in an 8 inch pan so it’s taller.
You can adjust the quantity needed by what size pan you have and how tall you want your cheesecake.
I’ll list out the amount of cream cheese needed and you can just adjust the rest of the ingredients accordingly.
The amount of cheesecake batter you’ll need for each size pan:
- 10 inch pan: 4 bricks of cream cheese – bake for 65 minutes, rest in the oven for 25 minutes.
- 9 inch pan: 3 bricks of cream cheese for shorter cheesecake or 4 bricks for a taller cheesecake – bake for 55-70 minutes, rest in the oven for 20 minutes.
- 8 inch pan: 2 bricks of cheesecake for a shorter cheesecake or 3 bricks for a taller cheesecake – bake for 45-60 minutes, rest in the oven for 15 minutes.
- 6 inch pan: 1 brick of cream cheese – bake for 30 minutes, rest in the oven for 15 minutes.
If you have any questions, just comment down below and I can help you figure out how much you need!

Frequently Asked Questions
If you don’t have a springform pan, you can use a regular cake pan. If you want this size and height, use a round 8 inch cake pan that’s 3 inches tall. I also recommend spraying it with baking spray and lining it with these precut parchment liners.
I like to use the 10 inch round liners in a greased 8 inch pan so that it comes up a little higher and you can remove it from the cheesecake from the pan easier.
Sometimes biscoff cookies can be hard to come by. If you find any speculoos cookies, those will be the most similar. If you can’t find speculoos cookies, gingersnaps are probably your next best and then cinnamon graham crackers but honey graham crackers will also work just fine.
If you’re in a rush and don’t have time to let your ingredients come to room temperature (aka me everyday), place the cream cheese (with the packaging) and the eggs in a large bowl of hot water for 10-20 minutes.
You can also microwave the sour cream for 10-15 seconds.
If your cheesecake does crack, it’s usually for 1 of 3 reasons.
– It’s over-baked, which means it dried out a little bit.
– It cooled too quickly which means it didn’t have time to set properly.
– It stuck to the sides of the pan and pulled on the center of the cheesecake.
Make sure to check out my pro tips on baking without a water bath above.
Yes, you can sub the cherries out for strawberries, raspberries, etc. Frozen fruit also works fine.

How to store these cheesecake
To refrigerate, cover the cheesecake with foil or plastic wrap and refrigerate it for up to a week. Serve cold or bring to room temperature 1-2 hours before serving.
I noticed if the longer the cherry topping sits on the cheesecake in the fridge, they get more and more wrinkly.
If you’re making this a few days in advance, you can save the cherry topping in a container and then just give it a good mix and spread on top of the cheesecake fresh so it looks nicer.
To freeze the whole cheesecake, wrap it in plastic wrap and then wrap it twice in aluminum foil (or place it in an airtight container big enough).
To freeze slices, place them tightly in an airtight container and then place the container in a freezer bag, squeezing out all the excess air.
Bring them back to room temperature by thawing at room temperature for a few hours before serving.

Thanks so much for reading today’s post, if you have any questions just comment down below, questions often get lost through email or through social media.
If you make this cherry cheesecake recipe, I’d love it if you left a review or a 5-star rating or a review for me.
As always, have a blessed day and happy baking!
Love, B

This came out great but I wish there had been a bit more specific direction about the cornstarch and how you need to use water and make it a slurry because now I have chewy pieces of cornstarch all in my cherries and it’s impossible to get out
Hi Zsavoir, I’m sorry that happened, that’s so annoying! I would definitely make a slurry if that happened but I’ve made it in many recipes and have never experienced that. However, to be safe, I’ll update the recipe to make a slurry first. Thank you!
One of the best tasting cheesecakes that I have make. I am fortunate to have a steam oven which takes it up a notch.
Can I Make it in mini bite size ? Please tips of so
I have not tried it but I don’t see why not! I would just try baking them for about 10ish minutes at 300F and still put the extra pan of water in the oven with it.
How many grams of cookie base we should use for different pan sizes?
I would use half in a 6inch, the same amount in a 9 inch and 25% more in a 10″. You could also do the same amount in a 10″ if you don’t want it as thick and coming all the way up the edge 🙂
Tried the cherry cheese cake. Turned out beautifully.
I am making this tonight for a friend’s birthday, amd I was wondering if I can layer the cherries in the middle and on top?
I haven’t tested it but I see other people do it all the time so I think it would be fine!
I made this for our annual Christmas party. I had multiple comments that it was the best cheesecake they have ever had. Thank you!!
Love it
Thank you for this recipe! The cake was so deliciously creamy but not too heavy and the cherries really crowned the cake. Made this for friends and they loved it! I accidentally bought an extra cream cheese block but it gave me perfect reason to make this again.
Hello, for how many minutes do I have to bake the cheesecake? It says 45 mins on top and 60 mins in the recipe card. I have a habit of reading it all. Please advise have to make it tonight
So sorry it is closer to 60 minutes for this cheesecake
Thank you so much for the prompt reply
Can I put some fresh blueberries inside the cheesecake and use yiur blueberry jam recipe for the top? Let me know if uts ok to out wome blueberries inside the cheesecake
I haven’t tried it. I would assume you could and maybe bake it a little longer?
Thank you! I have tried your recipes they all turned out amazing. I would love to try this cheesecake too, but with bl it blueberries and for that, I should follow the recipe jam recipe you shared and pour it over the cheesecake. am I right?
Yes
Hi I am still waiting for your response
Hi, I haven’t made a blueberry cheesecake but I’m sure it would work fine with any topping. I have a blueberry jam I made in this cake if you’d like the recipe. Biscoff cookies, graham crackers or any digestive cookie should be fine.
https://baranbakery.com/blueberry-chocolate-cake/
It looks so delicious. I love old like to use blueberries instead. Suggest me what crust would be perfectly paired with it? Also, do I have to follow the same method you used for cherry topping?
Absolutely loved this recipe!! The cherry topping is delicious and compliments the flavor of the crust well. Thank you for the detailed instructions!