

Hello Fall
Hi, there lovelies! Autumn is my absolute favorite time of the year. I love the cool weather, the beautiful colors of the trees, the oversized sweaters, and of course the anticipation of the holidays! Unfortunately, since I’m an adult now, with an adult job, I have to work both Thanksgiving and Christmas this year. I was super bummed at first but now I’m telling myself that I can still enjoy the whole season and make the best of what I have. A group of us who all work Thanksgiving Day decided we would throw a ‘Friendsgiving’ on our day off, so stay tuned for that! 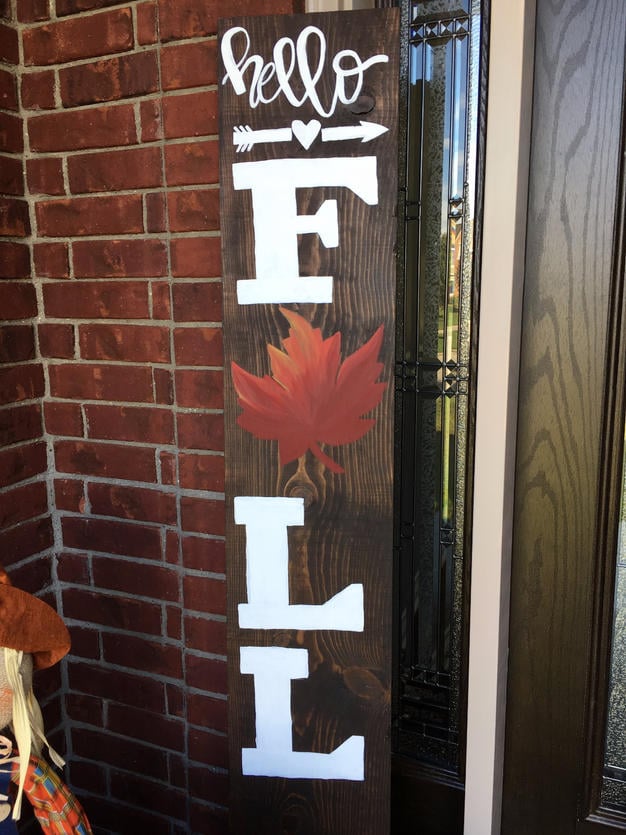 To start off this beautiful season I have a DIY fall sign that I made last fall. I found a ton of these at Joann Fabrics a few weeks ago and I believe I saw a couple at Homegoods this year as well. I made this with about $8 and I found one at Joann’s for $80 (it’s 50% off right now) but mine is also slightly taller.
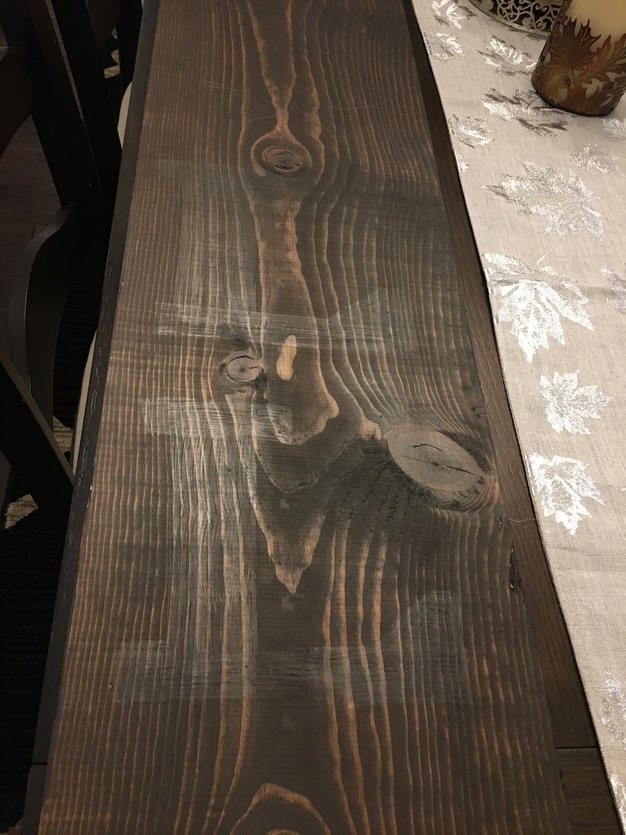
I already had wood stain, paint, and brushes at home so obviously, that made it a lot cheaper but I’m sure some of you DIYers have some things at home already as well. I did pick up the wood board from Home Depot and honestly, I just went in and picked a flat piece of wood for a decent price. I love Home Depot because they cut it into any size you want, free of charge.
What You’ll Need: – Wood– Wood Stain – Custom color by Sherwin Williams–
Paint – I used acrylic paint: red, yellow, black, and white–
Brush – Acrylic/watercolor brushes–
Pencil
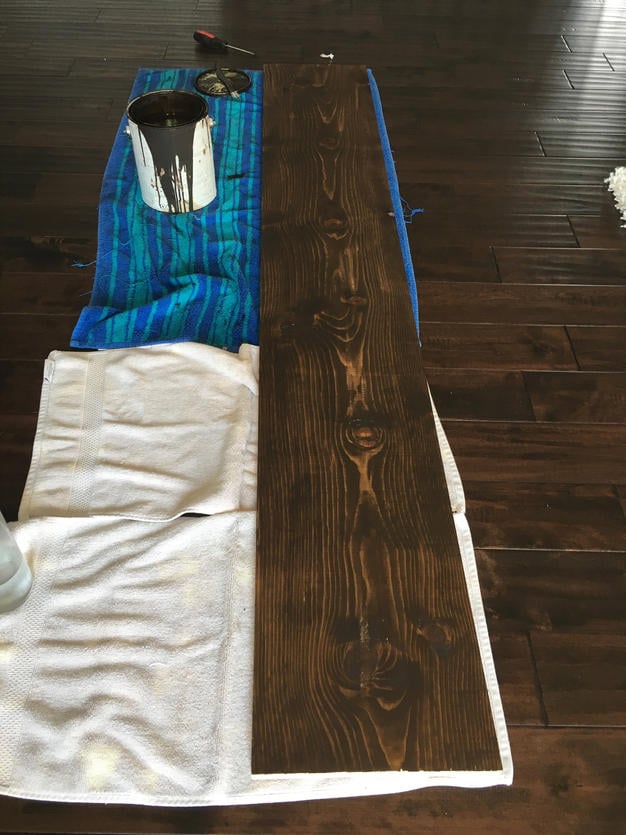
So I started off with Pinterest as usual and found a few inspirations before starting. I went and picked up the wood, left it pretty rough around the edges, I didn’t sand it or anything. I had this wood stain from when we built our house so I knew it would match my house well. If you like this color, it’s very similar to espresso but it’s a custom color by Sherwin Williams. I’ve used this stain for quite a few DIYs in the past and I just put some disposable plastic gloves on and I apply it with an old rag. I literally just dip the rag in the stain, after I’ve mixed it well, and apply it to my wood. Let the first coat dry and then apply a second coat.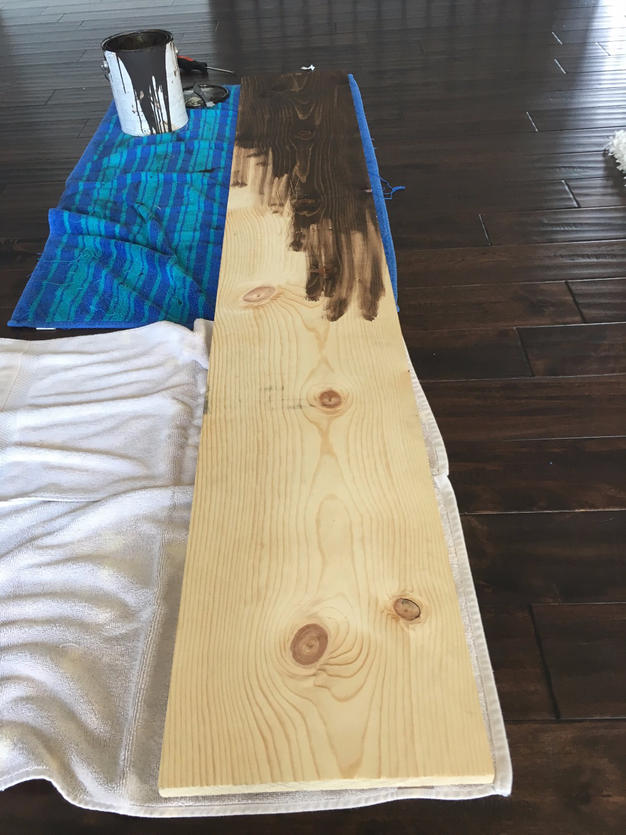
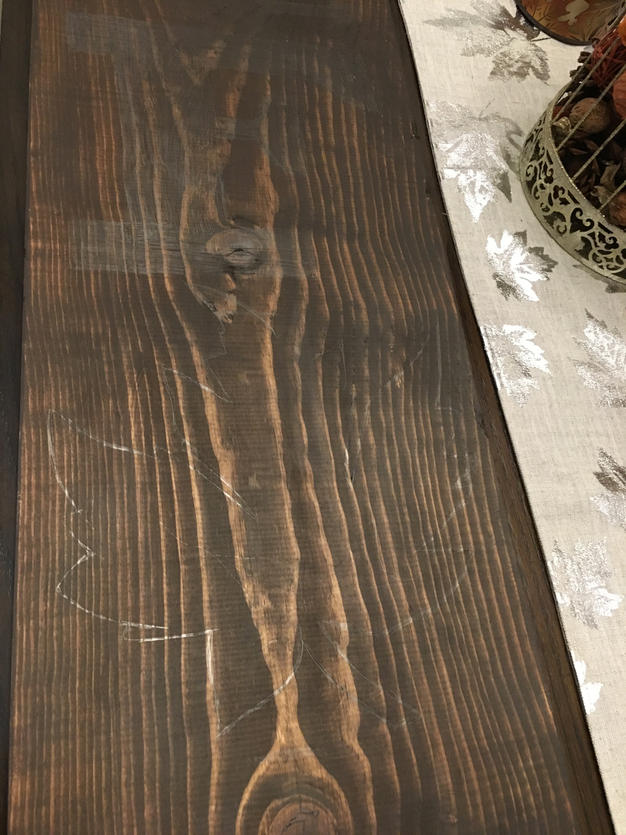
 I let the stain dry for a least a night before continuing and then I transfer it to my dining room table so I can sit more comfortably while painting. I used a pencil to outline where I wanted my letters and then just paint.
 There are different size brushes to help with the sharper edges and using a larger brush for the center of the letters makes it go by a little quicker.
 You can see how uneven they are up close but it doesn’t really matter, no one notices once it’s all finished.
 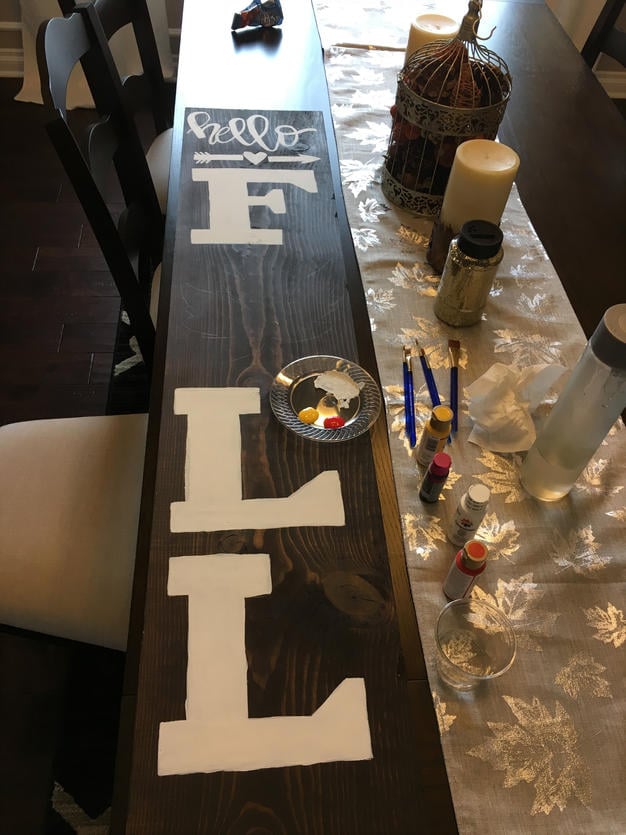 As for the leaf, I am somewhat artistic but I have never drawn or painted a leaf so I just googled a photo of a fall leaf and hoped it would come decently. I used plain white paint for the letters and for the leaf I used just red, yellow, and black (black to make the red darker). I was aiming for more of a yellow/orange/red leaf but somehow when I mixed yellow and red, I got some pink there, which I obviously don’t mind because pink is always fabulous!
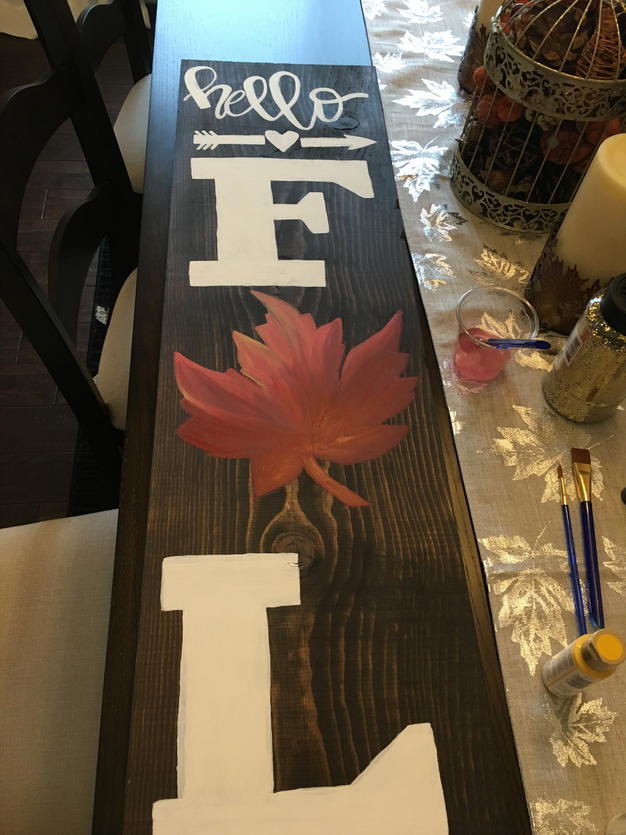
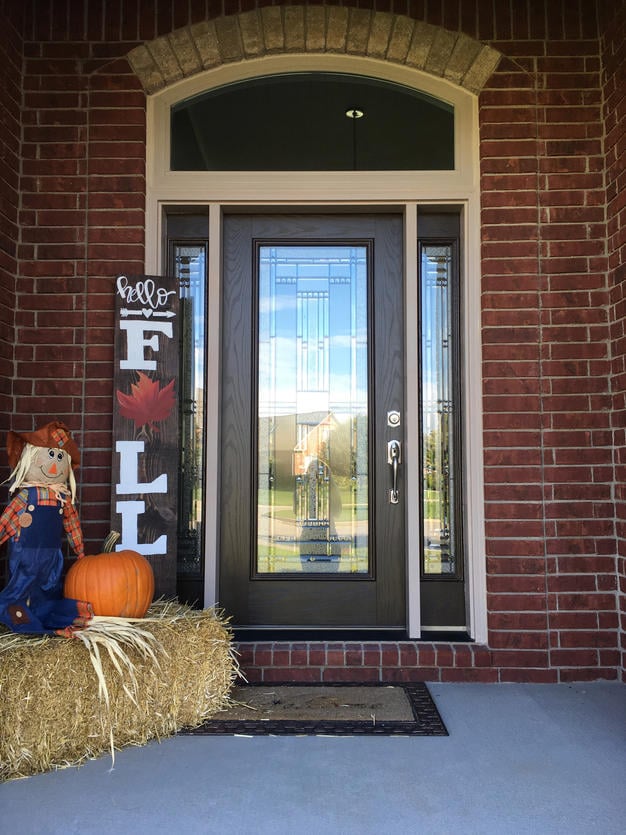 Here’s how I decorated last year, I’ll make sure to keep you posted on what we do with the fall sign this year!
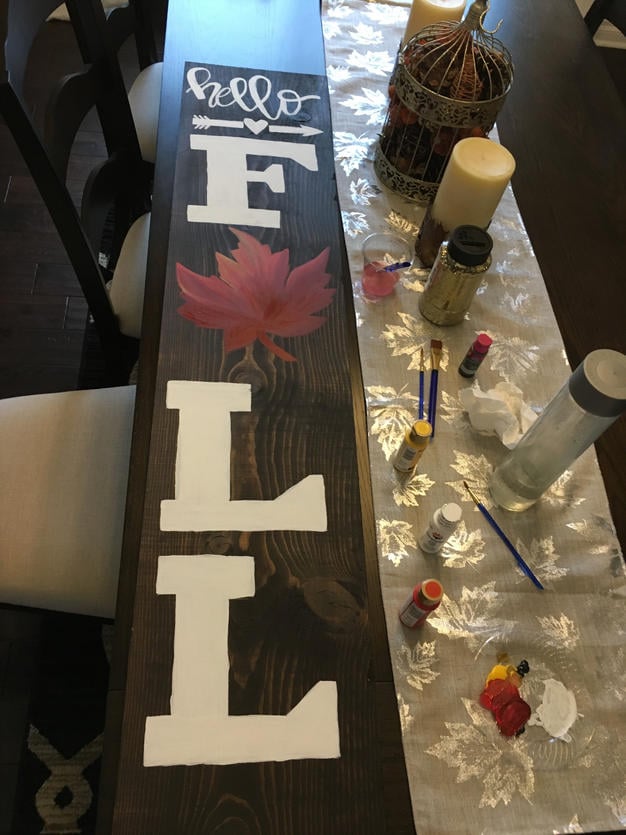
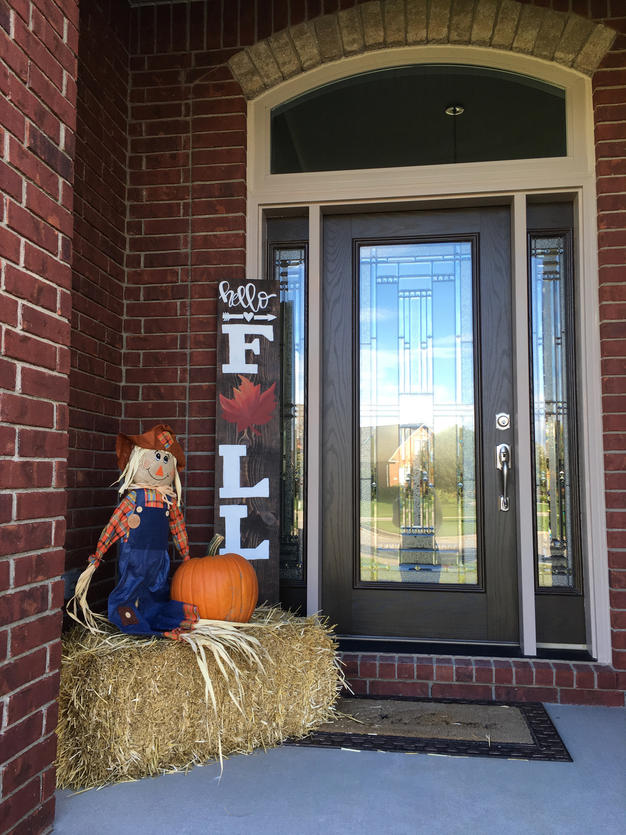 One tip I do have for painting this sign is that less is more. When I mess up a little I just add more paint to cover it up and then my letters keep getting fatter and fatter. I would’ve made the arrow going through the heart a lot thinner but obviously, I messed up a lot there and kept painting over it to fix it. I think it still looks pretty good but just don’t over do it! If you have any questions I’d be more than happy to help and let me know if you have any suggestion for future DIYs!
Love, B