
Chocolate Hazelnut Tart with Hazelnut Crust

It’s Thanksgiving week and what better way to start than with some sort of pie?! Better yet, a chocolate hazelnut tart made with Pan Di Stelle’s luxurious cream hazelnut spread.
Literally friends, I can eat this stuff by the spoonful because it is SO GOOD! It’s also only available in the United States during the holiday season so make sure to snag a jar on amazon before it’s too late!
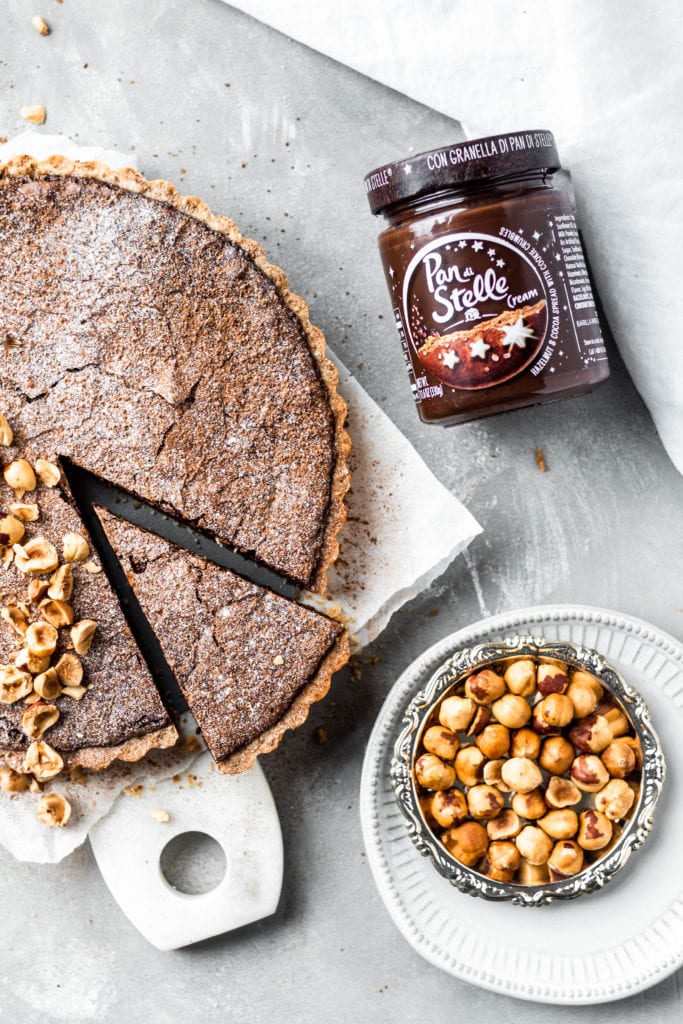
Truth: this was my first time making a tart in an actual tart pan with a removable bottom and I am obsessed. I always thought they looked so much prettier than regular pies but you can absolutely make turn this into a chocolate hazelnut pie using a shallow pie pan. A springform pan would also work or even a cake pan if you line the bottom with parchment paper.
What’s in this chocolate hazelnut tart?
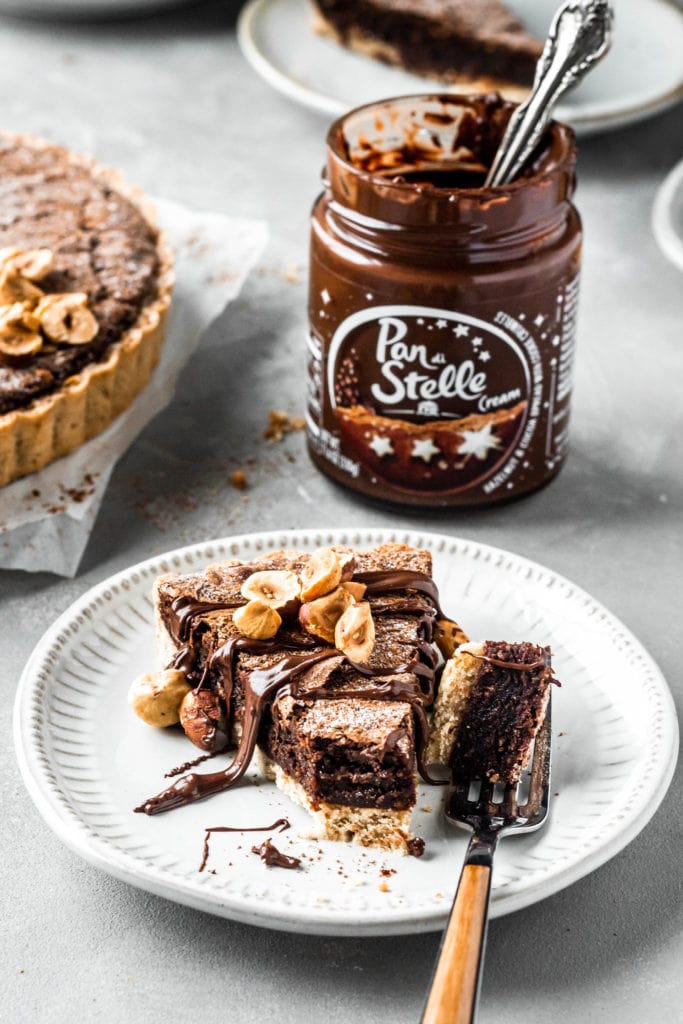
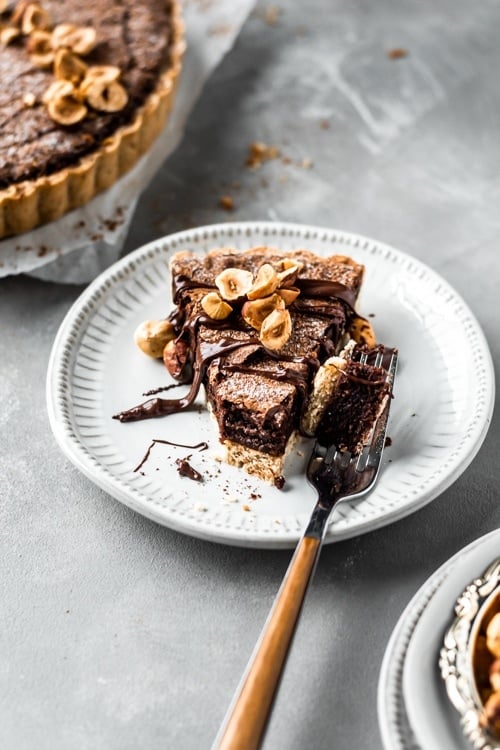
This tart filling is super simple! It doesn’t consist of any cocoa powder, chocolate chips, heavy cream or corn syrup like most other tarts; it just has toasted hazelnuts, eggs, sugar, Pan Di Stella chocolate hazelnut crema, ground hazelnuts, butter, and vanilla.
To make up for the simplicity of the chocolate hazelnut tart filling, I made a pie crust that was a bit more unique. I went with a twist on Pierre Herme’s pate sablee recipe. I replaced the almond flour with hazelnut meal and played with the ratio a bit. Turns out, it’s amazing and you need to try it!

How to make hazelnut crust:
Most pie crusts require cold cubed butter and cold water or ice. I like crusts that aren’t so particular so when I came across Pierre Herme’s pate sablee crust (sablee meaning sandy), I knew I had to try it.
This crust requires room temperature butter to be creamed with icing sugar, after which an egg and hazelnut meal is added and beat until fully combined. Next add the flour and salt and mix just until combined and no more. Refrigerating at this stage will make working with the dough easier.
However, it is a very forgiving dough so you don’t even need to roll it out, I just pressed it straight onto the bottom of a greased tart shell. Now you will want to either freeze the crust until solid or use pie weights (or do both) to avoid losing it’s shape.
How to make chocolate hazelnut tart filling:
The filling is sooo quick to make. You can start making this while the crust in baking in the oven for 15 minutes. Begin with melting the butter and chocolate hazelnut spread, mixing until they’re homogenous. Beat the eggs and sugar for a couple minutes and then add the chocolate butter mixture and vanilla. Last, add in the ground hazelnuts and pour over a partially blind baked crust.


Pro Tips:
- Toast all the hazelnuts beforehand and peal the skins off. Save some for the topping and use a food processor to make ground hazelnuts/hazelnut meal for the crust and filling.
- To avoid losing the form of the crust, freeze for a longer period of time and/or use pie weights (I was too lazy for pie weights so I froze the crust in the pan for at least 30 minutes before baking).
- For a crispier crust, bake the tart crust in the tart shell before adding the filling.
- To avoid spilling, once you pour the filling into the tart crust place it on top of a baking sheet to bake.
- For clean slices, allow to cool completely and use a hot knife and clean it between every slice.
You know this chocolate hazelnut tart looks amazing…so go ahead, get to work! If you make it, make sure to tag me @baranbakery on instagram so we can all join in on the fun and for a chance to be a featured baker! As always, have a blessed day and happy baking!
Love, B
Chocolate Hazelnut Tart Recipe
Thank you for supporting all things Baran Bakery & the brands that make it all possible. This post was sponsored by Pan Di Stelle. All opinions are 100% my own.


Nice recipe, but unfortunately without metric weights and measurements.
This tart is DIVINE! I made it for my birthday and it was very simple, and tasted so rich and not too sweet. I can’t wait to make it again!
This tart is DIVINE! I made it for my birthday and it was very simple, and tasted so rich and not too sweet. I can’t wait to make it again!
So glad you liked it!
Hi. What size of pie tin did you use?
Hi Ophelie, I used a 9 inch tart pan 🙂