
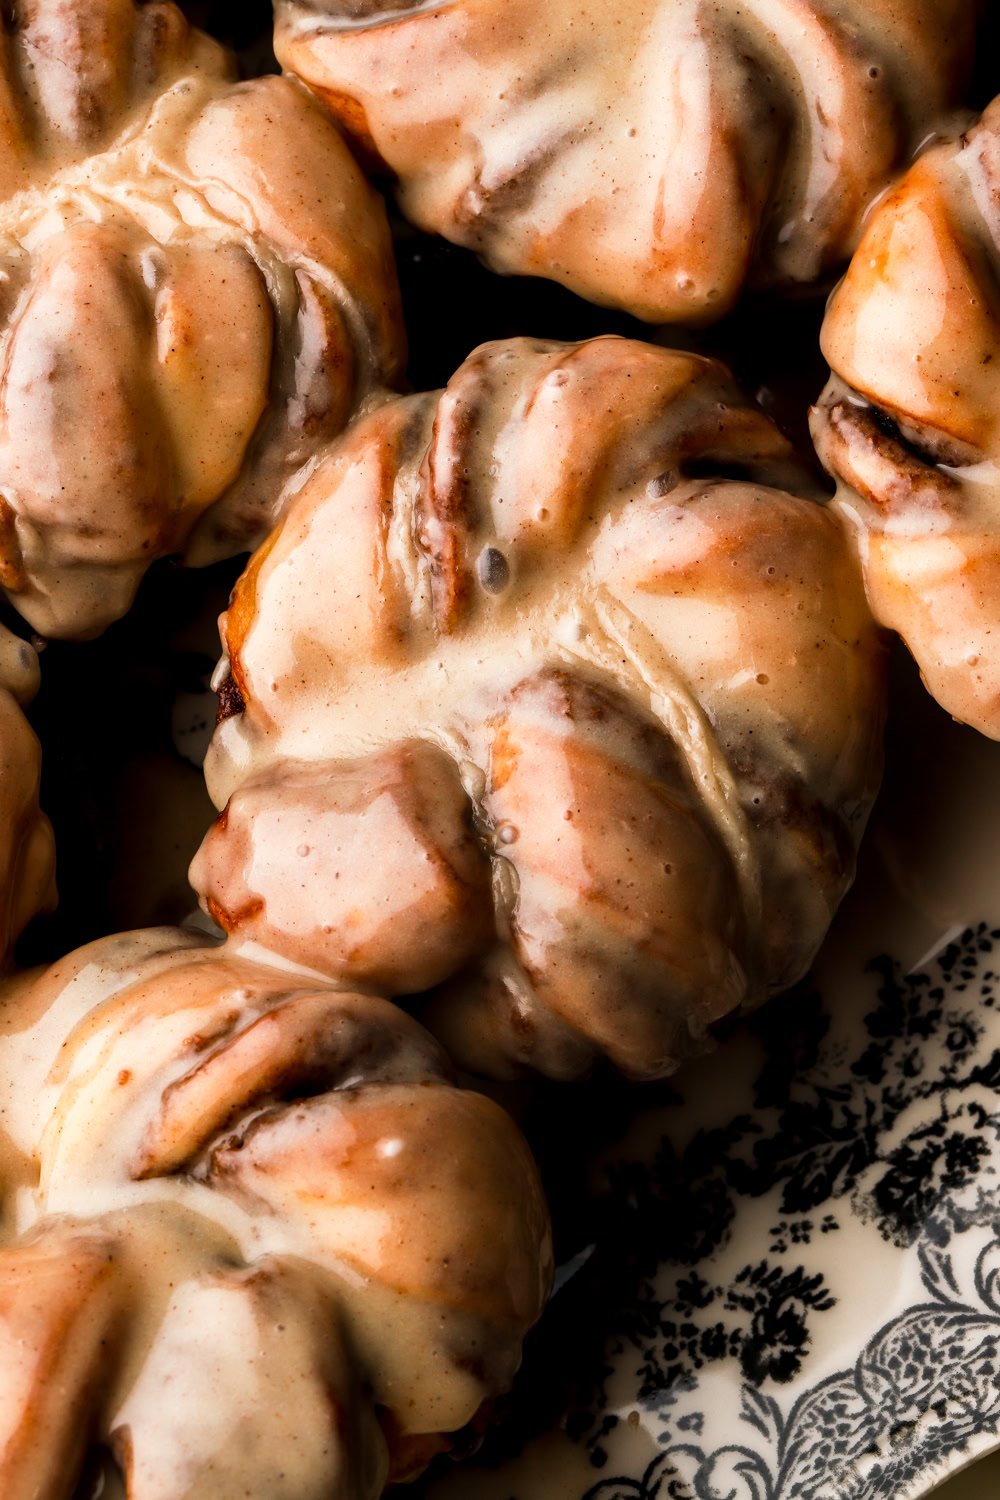
The BEST Cinnamon Knots with Honey Glaze
I didn’t think I could love cinnamon rolls more but for some reason, these cinnamon knots covered in a honey cinnamon glaze take it to the next level.
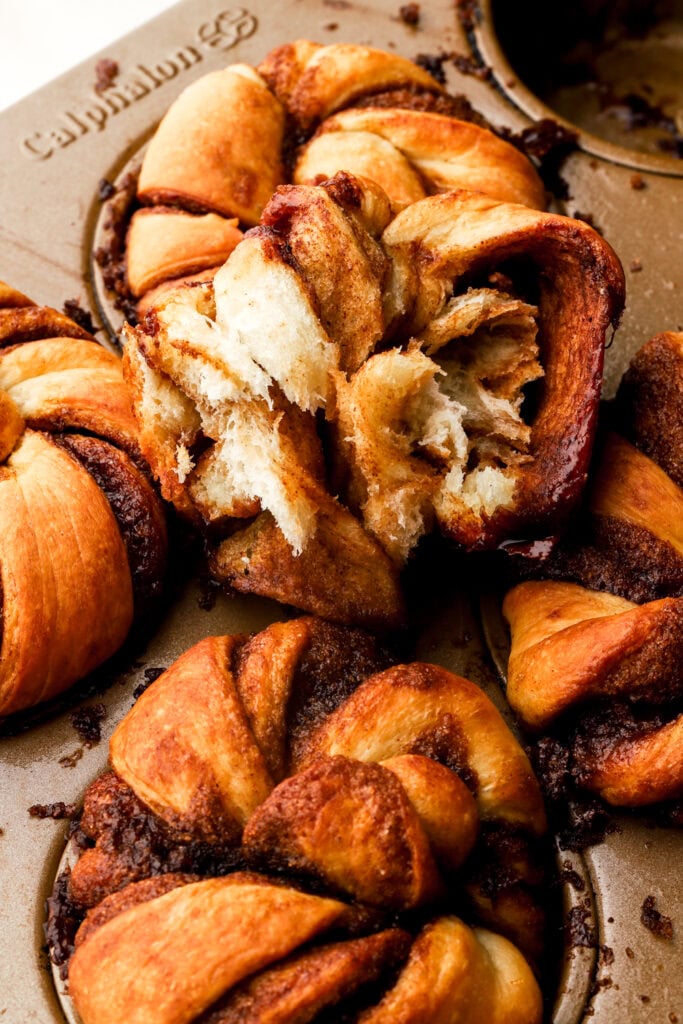
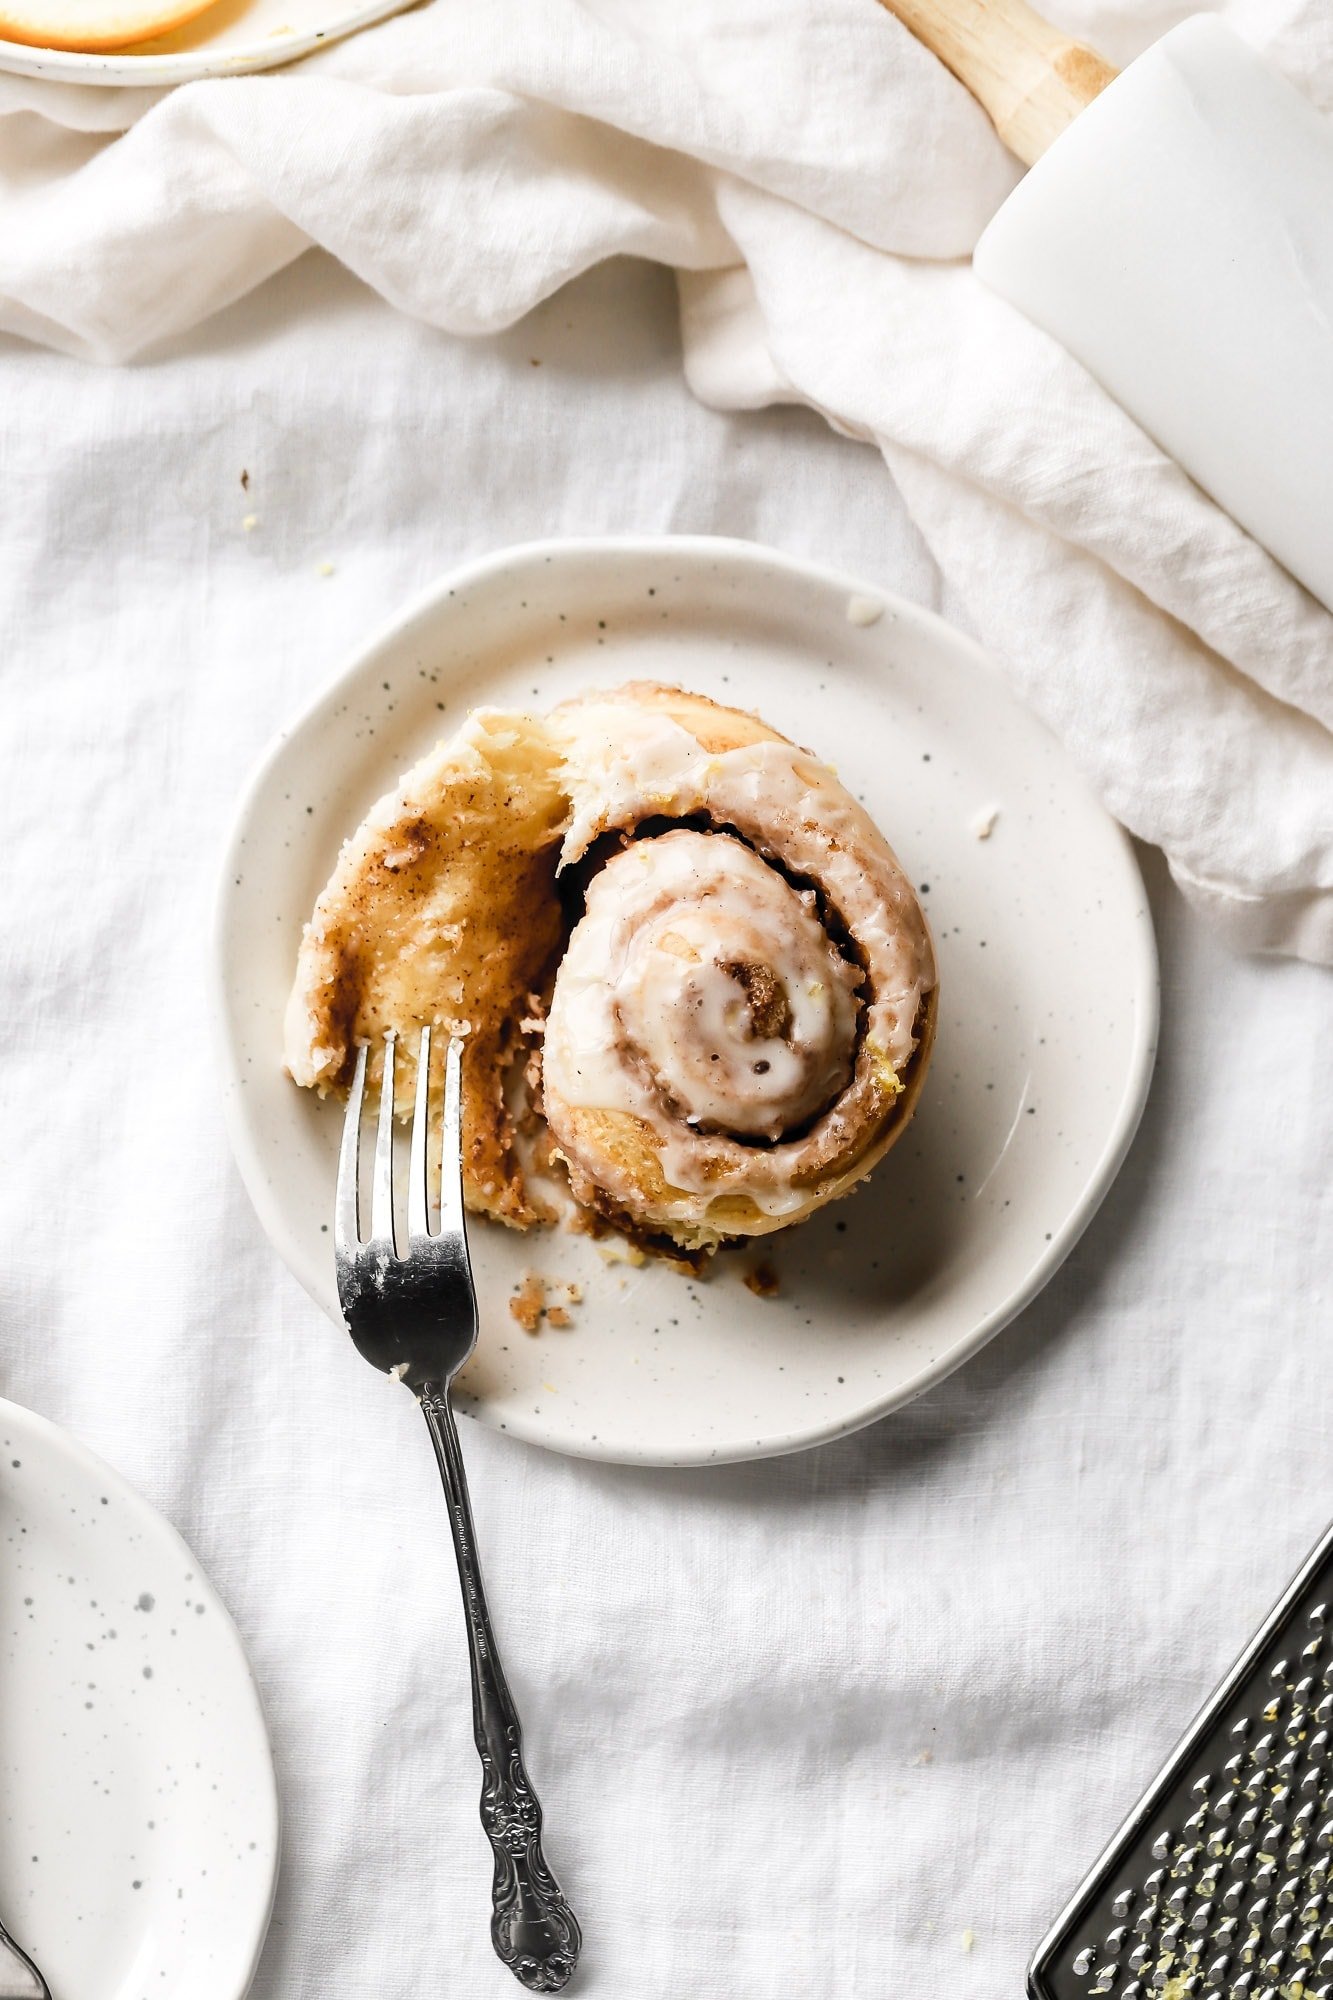
These are made using my favorite fluffy brioche dough rolled around brown sugar and cinnamon, of course.
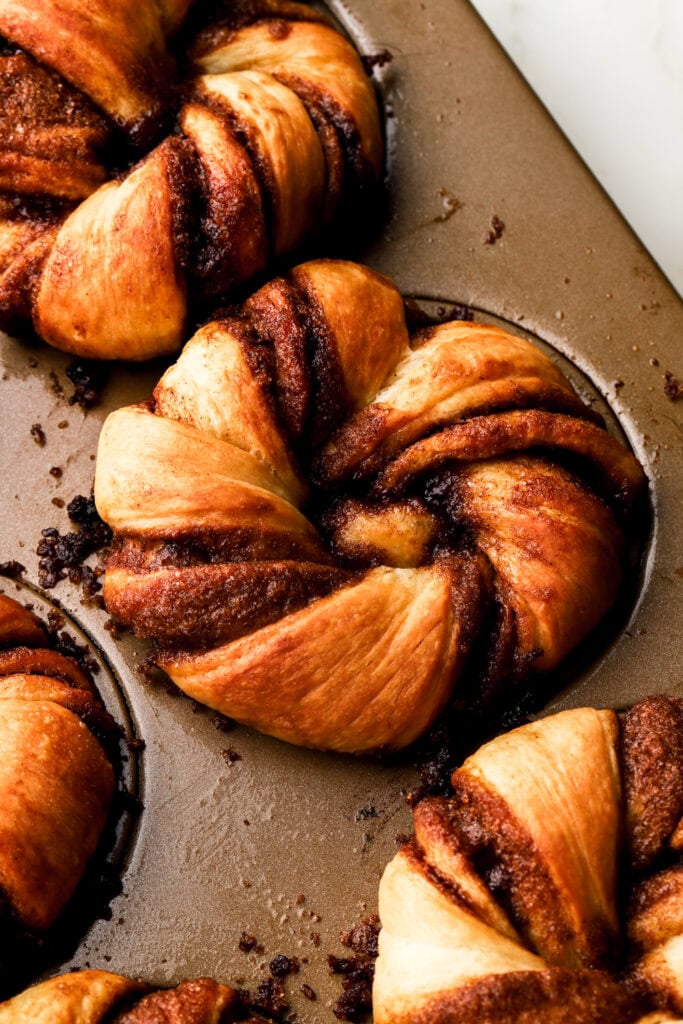
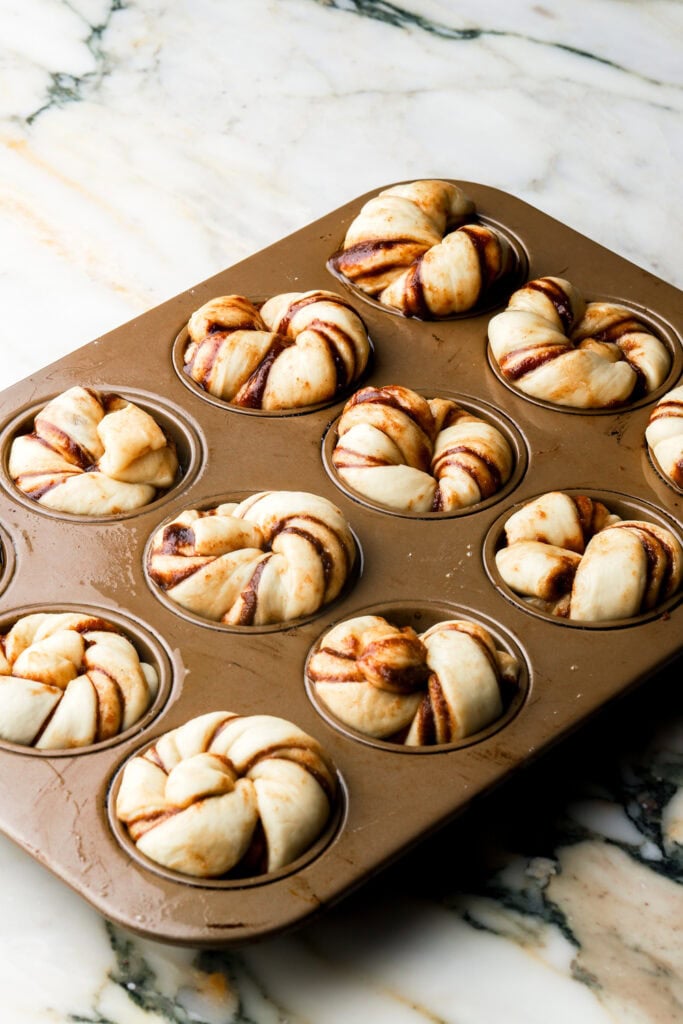
But instead of rolling into a log, I folded the dough into three layers and then sliced them into strips, twisted them and tied them in a knot and baked them in a muffin pan.
Make sure to watch the video below for a tutorial on how to shape them!
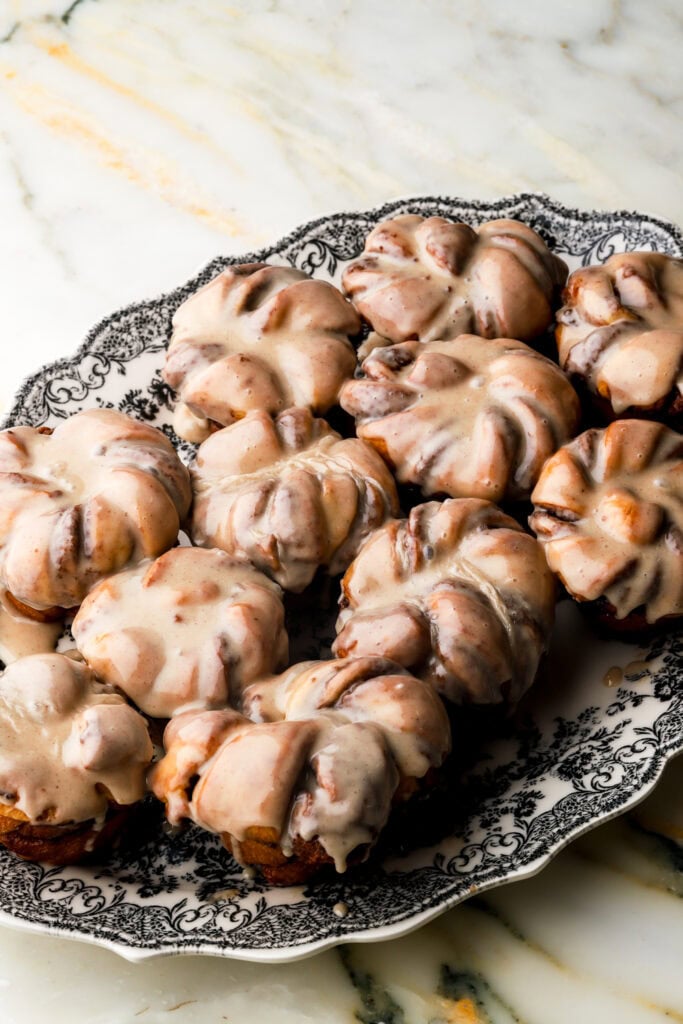
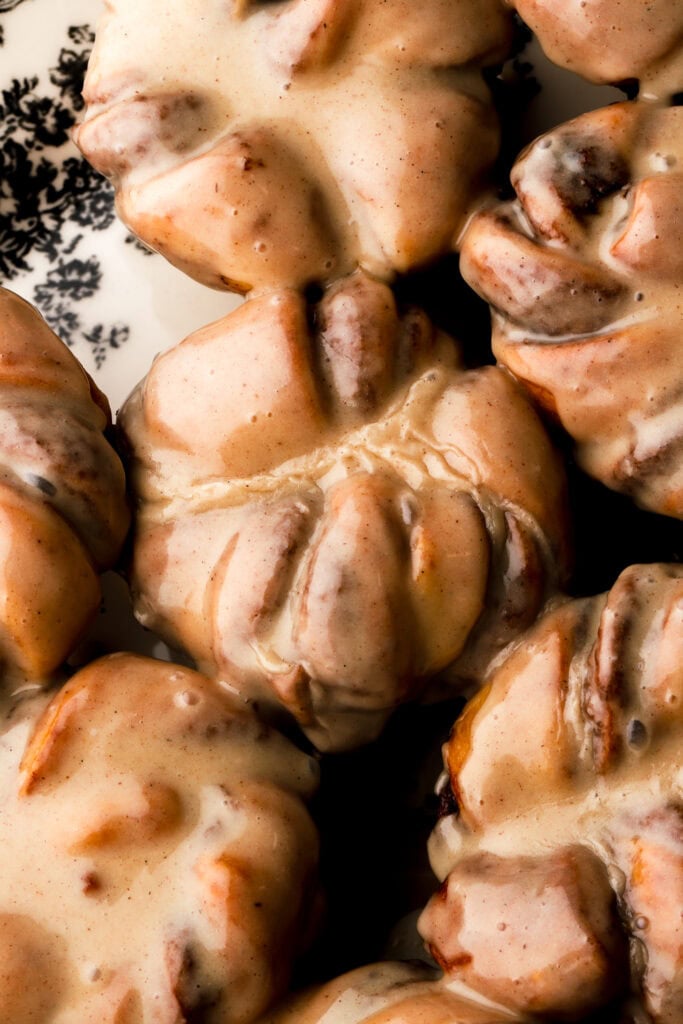
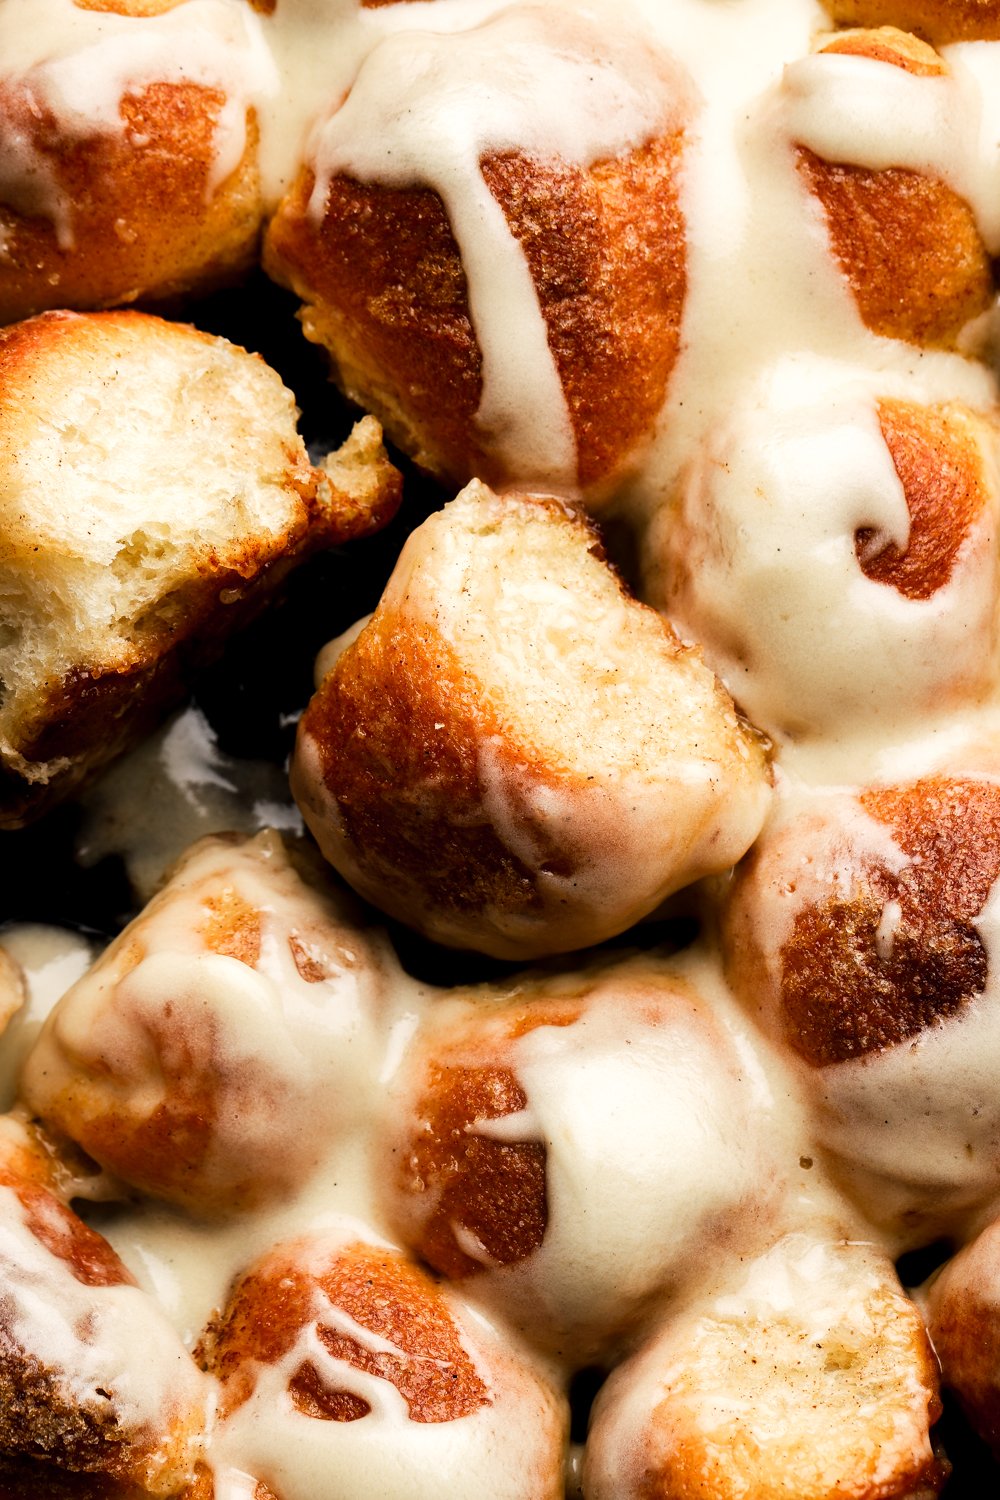
The best part? They get topped with this gorgeous honey cinnamon glaze, similar to a nostalgic honey bun but SO MUCH BETTER!
Side Note: I started a book club a few months back and we have a lovely dinner once a month where I cook and bake things inspired by the book. This recipe was inspired by Lauren Roberts’ book Powerless. She constantly references a honey bun throughout the book so this was my take on it.
These would definitely replace all your cinnamon roll needs. The recipe is pretty much the same as my traditional cinnamon rolls so if you wanted to flavor these more unique, you could follow any of my cinnamon roll recipes and just use this ‘knot’ technique!
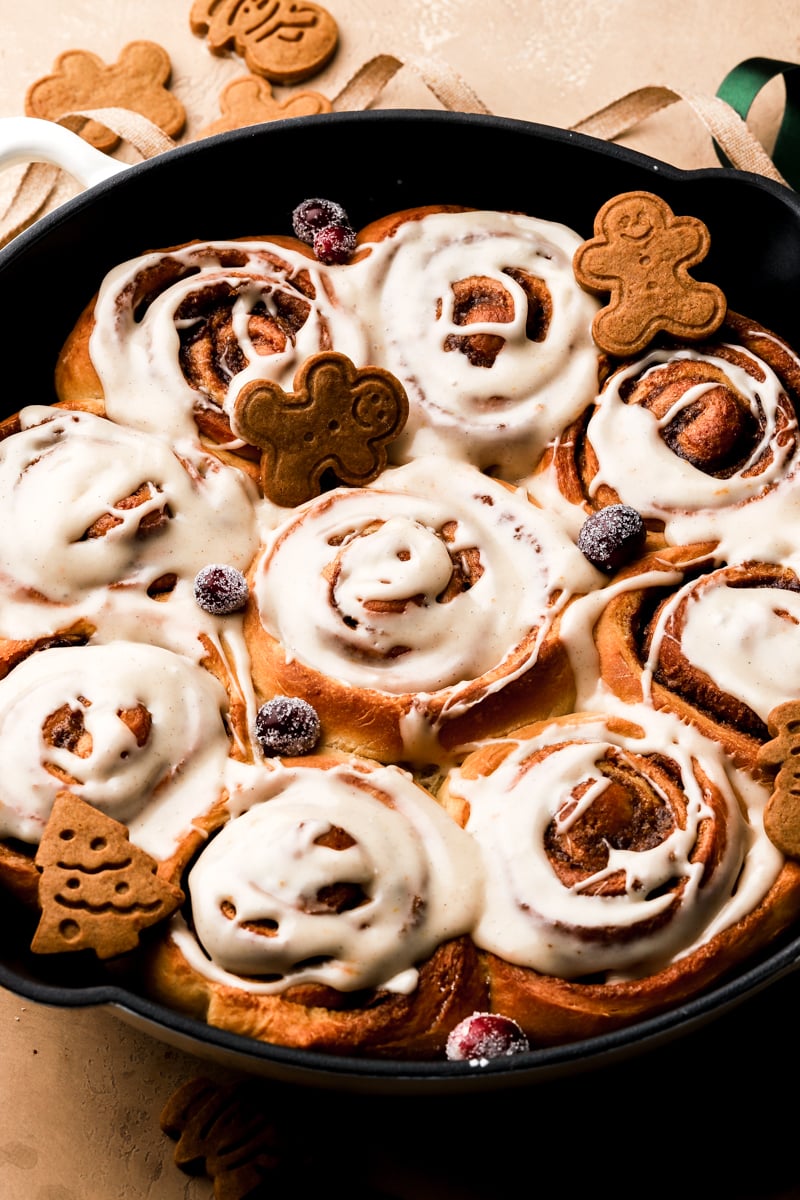
Gingerbread Cinnamon Rolls are soooo good & can be made into knots. I also love my Cranberry Orange Cinny’s and omg my Brown Butter Lemon ones too.
Ingredients & Substitutions
*full recipe is in the recipe card at the bottom!
- Flour – I usually use bread flour but all purpose flour also works just fine.
- Yeast – active dry yeast or instant yeast works fine. Recipe is written using active dry yeast but if you use instant yeast, you can just skip the activation and mix it in directly with the flour.
- Water – I use water in my brioche as opposed to milk, after a lot of testing, I just found that it makes a lighter, fluffier dough.
- Egg – one large egg, make sure it’s at room temperature. If it’s not, then just place it in hot water for a few minutes.
- Butter – I love salted butter, I think it gives more flavor. Unsalted butter also works fine.
- Salt – I use and recommend fine sea salt for baking. Other salts work fine as well but I recommend using about half the amount if it’s table salt.
- Sugar – I use granulated sugar in the dough, brown sugar in the filling, honey and powdered sugar in the icing. I know that’s annoying lol you can sub the granulated sugar in the dough for brown sugar too so you’re not using so many different kinds.
- Vanilla – I like to use vanilla extract in my dough and vanilla bean paste in my icing but either works fine for both
- Cinnamon – this is an obvious one…
Step-By-Step Instructions
Dough
- Place the yeast with half of the sugar and the warm water in the bowl of a stand mixer. Mix and allow it to rest for 5-10 minutes, until the yeast starts to foam (can skip this step if using instant yeast and just mix yeast with flour and spices).
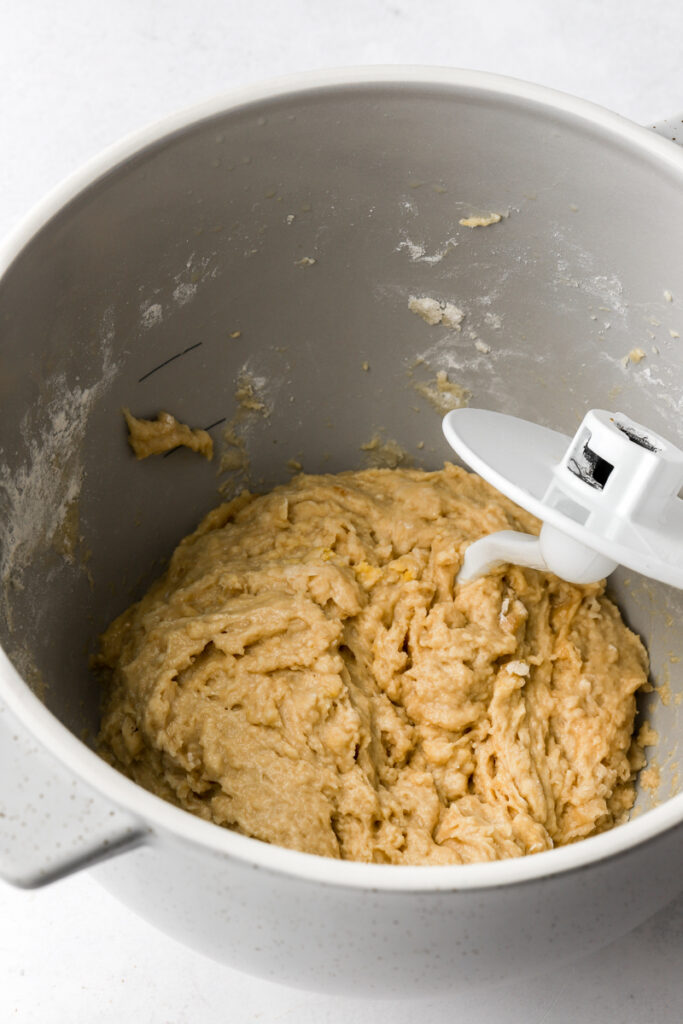
- Add the rest of the sugar, melted butter, and egg mixing until combined.
- Add the flour and salt and and mix until it comes together.
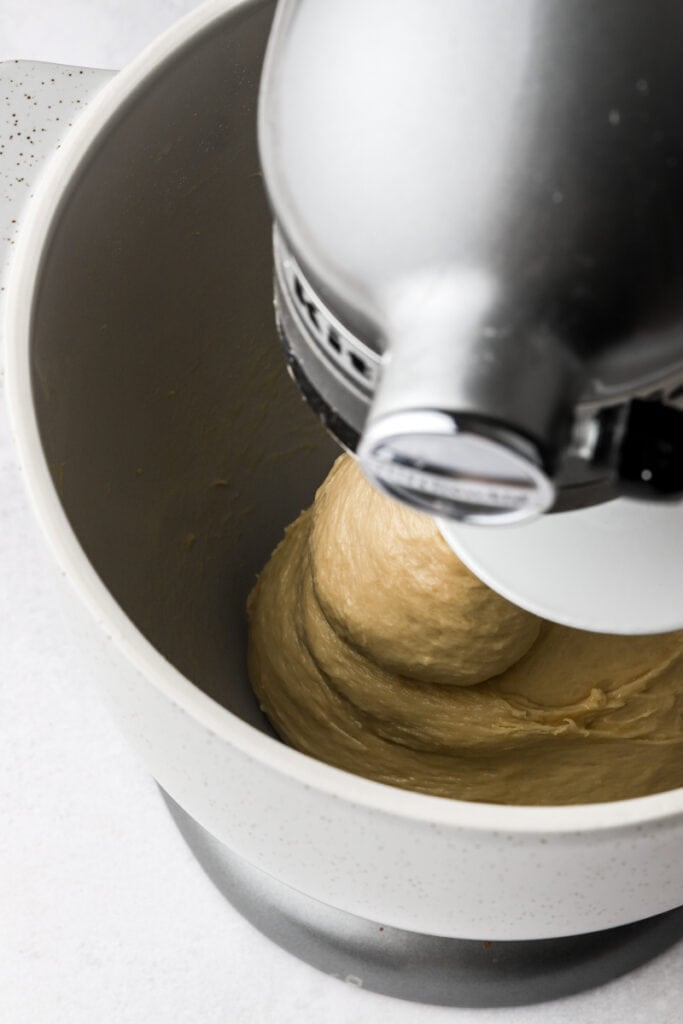
- Use the hook attachment to knead the dough for about 5-10 minutes. The dough should be soft but strong enough to stick to itself, not the bowl or your hand.
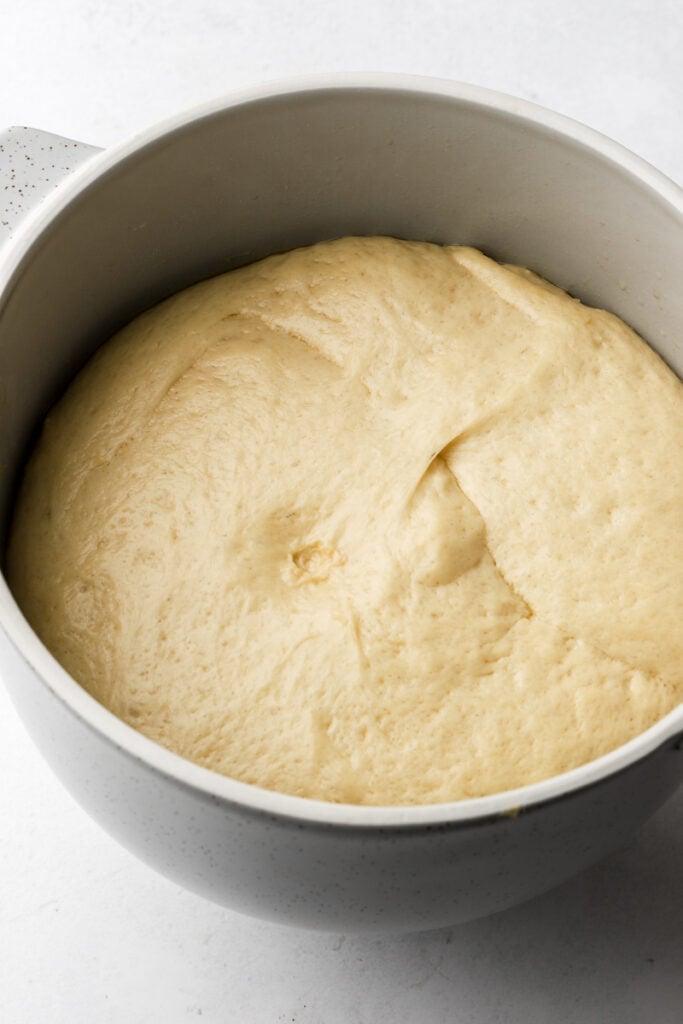
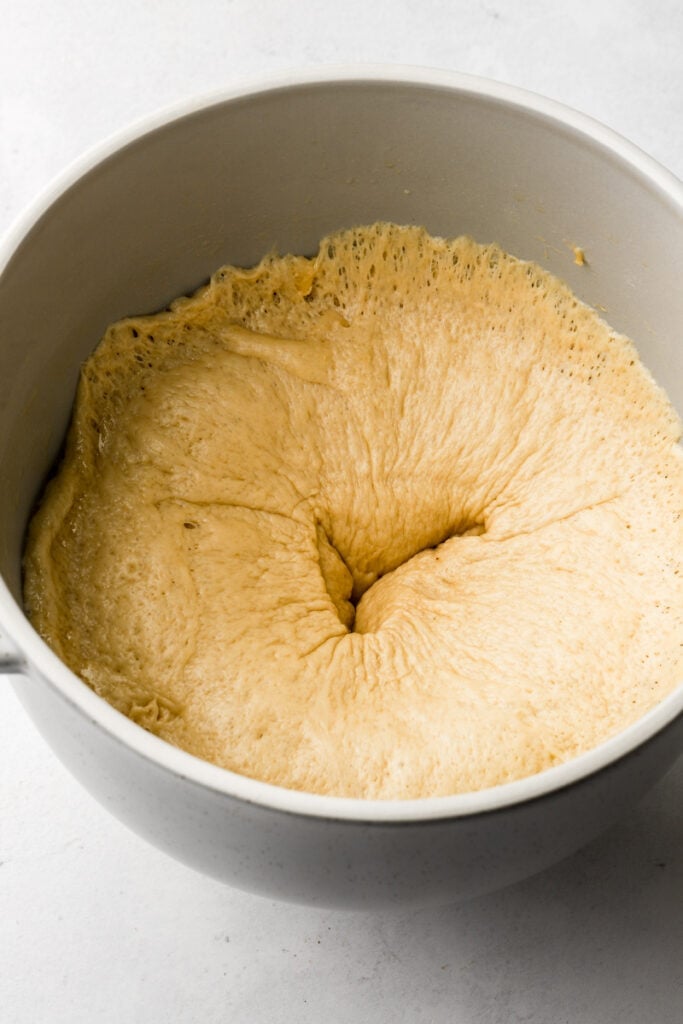
- Cover and let it proof for about 90 minutes in a warm environment (could be half this time with instant yeast or depending on room temperature).
- Dough should be doubled in size and puffy.


Shape
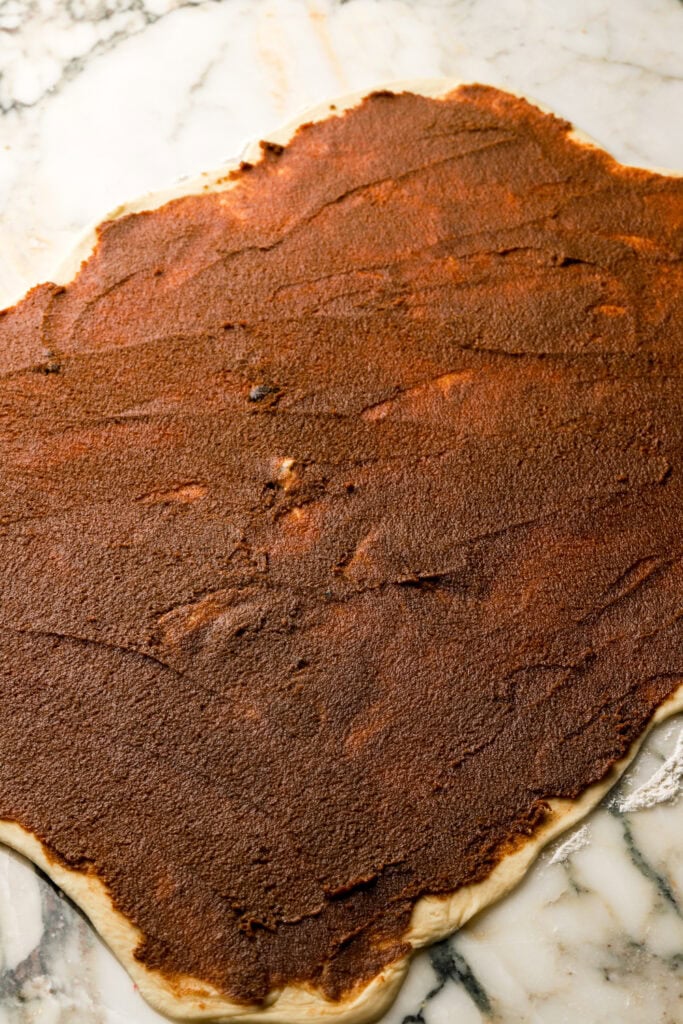
- Make the filling by combining the butter with the sugar and cinnamon.
- Place the dough onto a floured surface. Gently stretch it out into a rectangle with your hands then use a rolling pin to roll it into a 12×16 inch rectangle (doesn’t have to be perfect or exact).
- Spread the filling evenly on top of the dough.
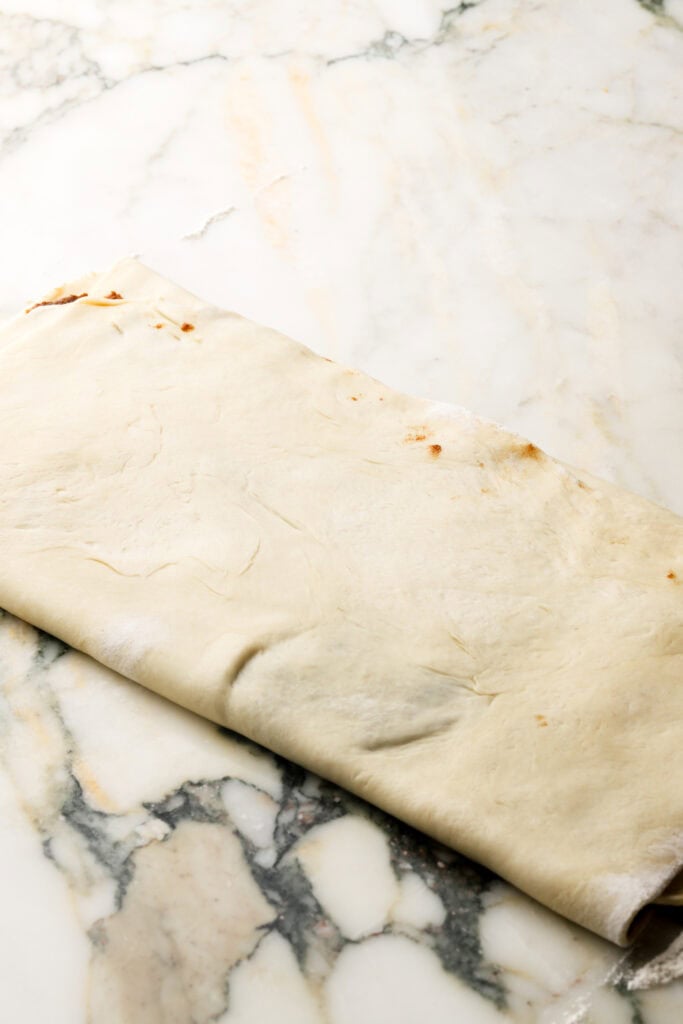
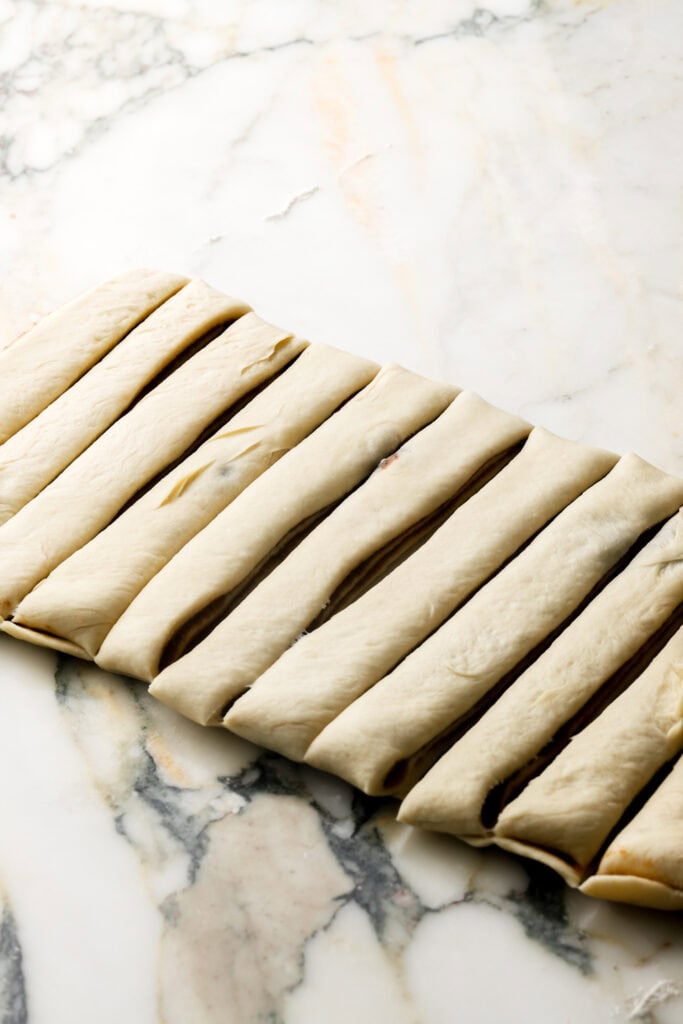
- Starting at a short end, fold 1/3 of the dough over the middle. Then repeat with the other side so the dough is folded the into thirds, like a letter going into an envelope.
- Slice the rectangle into 12 skinny, long strips. I use a pizza cutter but knife works fine too just make sure not to scratch your counter.
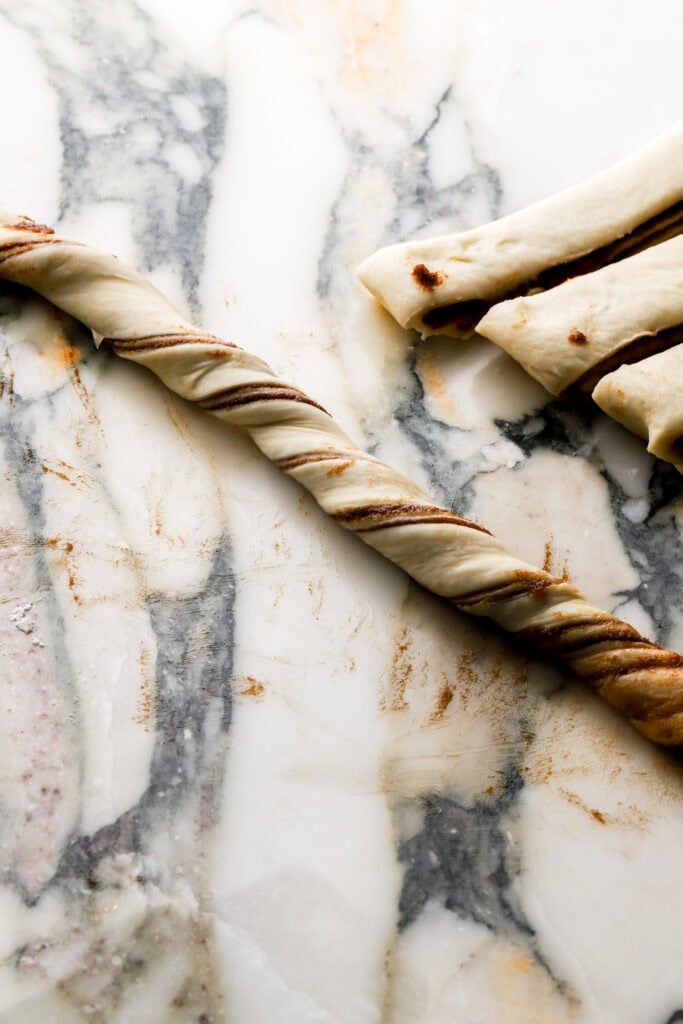
- Hold each end of a strip with your fingers and twist in opposite directions so the strip curls.
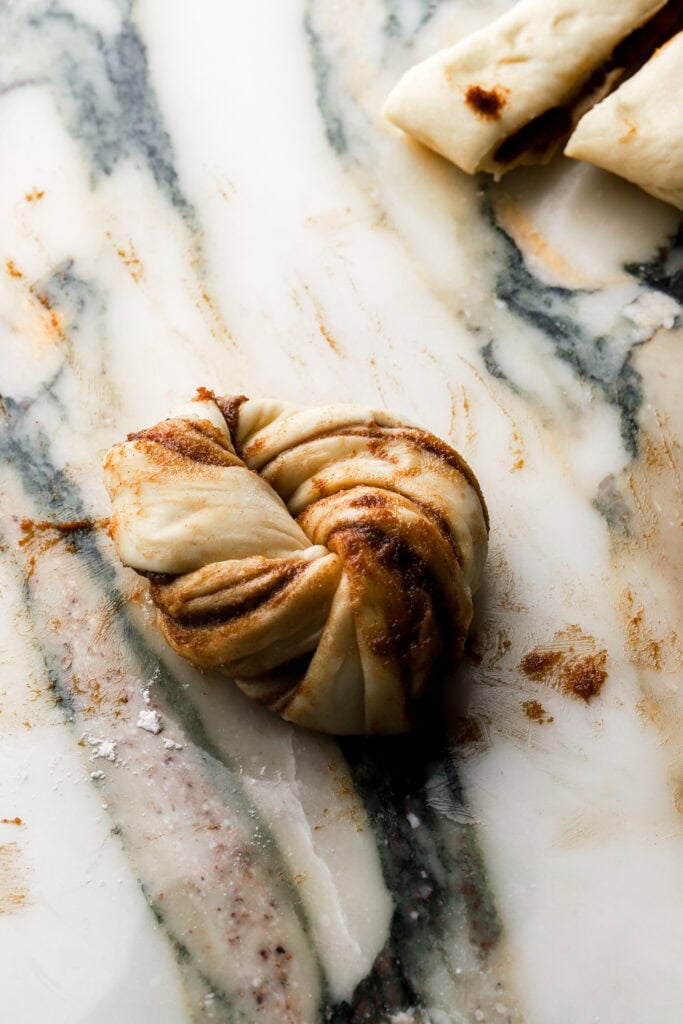
- Tie the curled strip into a knot (see images and video).
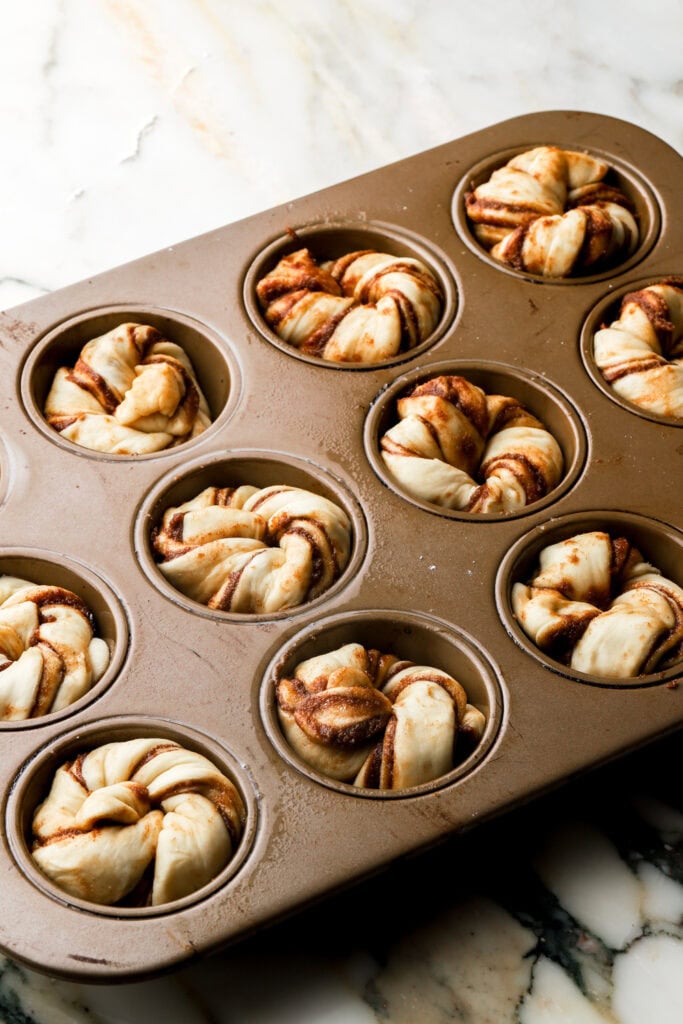
- Place each knot into a greased pan muffin tin and then cover and allow to proof another 45-60 minutes.
- The knots will almost double in size/grow past the brim. Drizzle a little heavy whipping cream on top of the knots before baking.
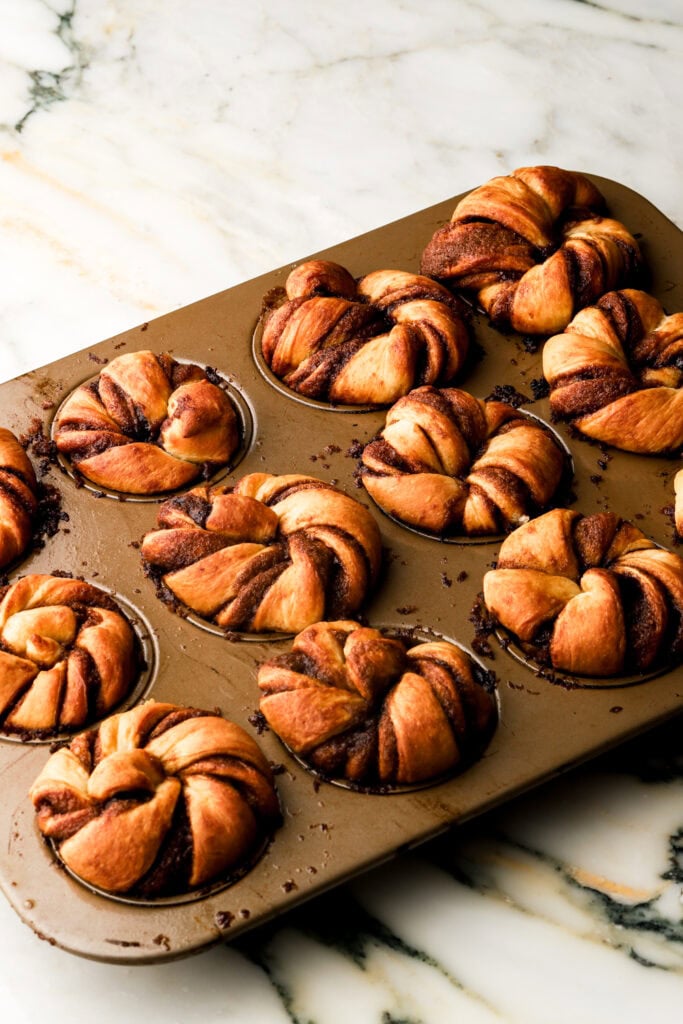
- Bake for 20(ish) minutes at 350F/177C. The knots should be browned and the dough should no longer look wet.
- Allow them to cool for about 15 minutes before removing and glazing.
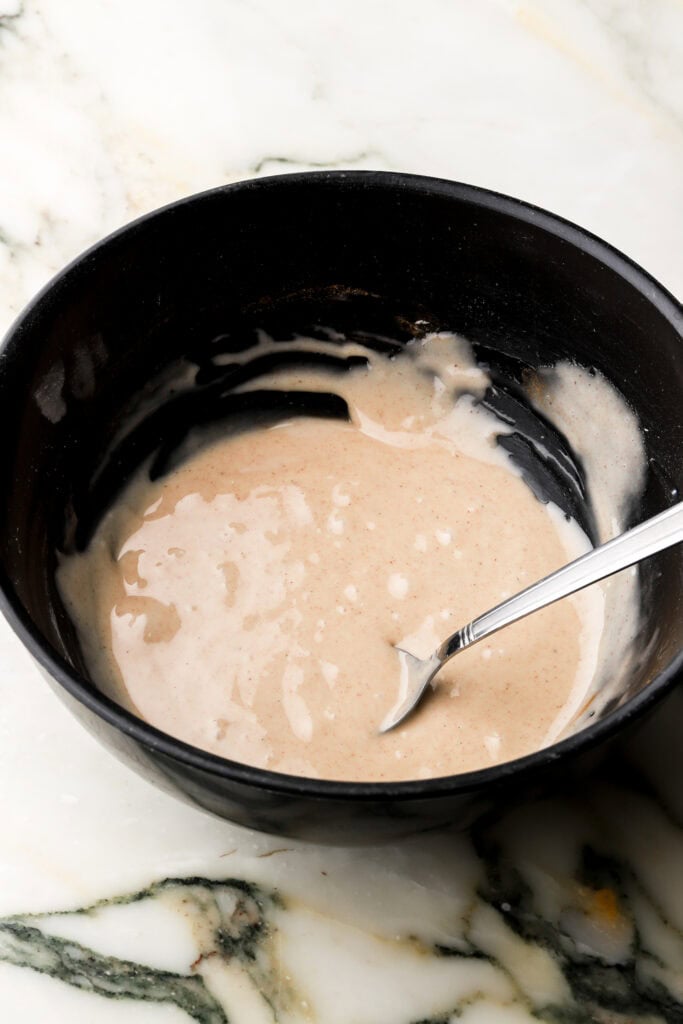
Honey Glaze
- Combine the milk with the powdered sugar, cinnamon, honey, salt and vanilla and mix until they’re well combined.
- Dip each knot in the glaze or drizzle it on top. Serve and enjoy warm rolls!
How To Make Them Overnight
These can easily be prepped the night before and baked in the morning.
After the dough is rolled and sliced and placed in the prepared pan, cover it tightly with plastic wrap and place it in the fridge or freezer. Refrigerate overnight and then bring to room temperature before baking.
From the fridge, it may take 1-2 hours to bring to room temperature (again, don’t want to overproof so don’t leave it out too long).
Proceed with normal baking instructions (heavy cream goes on right before baking).
How To Store Knots
All cinnamon rolls or anything like them are best served fresh and warm.
If they’re not served immediately, it’s best to keep them airtight at room temperature for a couple of days or refrigerated for up to a week.
When serving later, reheat them in the microwave for a few seconds.
I dream about these knots – I want to make more variations lol but trust me when I say the honey and cinnamon combination is superior!
If you have any questions, please comment down below – those will get answered much quicker than email or through social media.
If you’ve tried this, I would very much appreciate a 5-star rating or review as well.
As always, have a blessed day and happy baking!
Love, B


Can this recipe be prepped and stored overnight and baked the next day?
Yes, I would just covered them completely after shaping in the muffin tin and refrigerate.
The next day bring it to room temperature like 30-60 minutes before baking (depending on how warm/humid it is in your house). In the winter I give it more time but in the summer it comes to room temp quicker.
What did I just make?!?! These were beyond delicious and a hit for the holidays this year! I feel like my dough wasn’t rising so I had to proof for longer, but everything worked out in the end. Adding to my make again list! Yum…
So glad you liked them! I find my dough taking much longer to rise in the winter as well!
Jut wondering if these could be made smaller, say baked in mini pan with smaller strips
Technically I’m sure they could lol but it would just be quite difficult to make them so tiny
I made these early this morning and they were delicious! My family loved them! I did add a little cream cheese to the glaze(my mom’s request) but it was like eating the center of a cinnamon roll…YUM! I was wondering how would you package these to ship to someone?